In 2013, Martyn Culpitt explained the work of Image Engine on WHITE HOUSE DOWN. He then worked on many films such as THE WOLVERINE, JURASSIC WORLD, FANTASTIC BEASTS AND WHERE TO FIND THEM, LOGAN and THE MEG.
What was your feeling to be back in the Harry Potter universe?
It was very exciting for me to be working on another part of the series in FANTASTIC BEASTS. It’s a very artistic and beautiful universe. I love the creatures and environments and it’s a fantastic challenge to figure out how we get to bring the work to life.
How was this new collaboration with director David Yates and with VFX Supervisors Christian Manz and Tim Burke?
We worked solely with Christian Manz on CRIMES OF GRINDELWALD. Tim and Christian split the VFX supervision role 50/50. Christian is a great supervisor to work with, and I was very excited to have the opportunity to work with him again. We had formed a strong relationship and understanding from the first Fantastic Beasts movie, and so it’s awesome to build on that trust and relationship.
David Yates was very receptive to everything we showed him and was open to Christian and me driving a lot of the heavy VFX side of things. It was great to be able to push our work to the level we did and hit all his creative marks and more. He was over the moon with the look of our sequences and was very appreciative to all the work we have done. We had a lot of temps to deliver very early on to sell the sequences and understand all the challenges, and he was blown away by how we managed to get it to such a high level for his reviews. It really helped to build on the trust we had developed from the first movie with him.
How did you use your experience of the first Fantastic Beasts for this new episode?
Coming from the first FANTASTIC BEASTS movie to this second in the series was really exciting. We know the characters and the universe they all live in. It’s definitely a smoother start to a project when you understand the background of where it all comes from.

What was the sequences made by Image Engine?
Image Engine was mainly responsible for the first 7 minutes of the film, including the title.
There are three main sequences that we did.
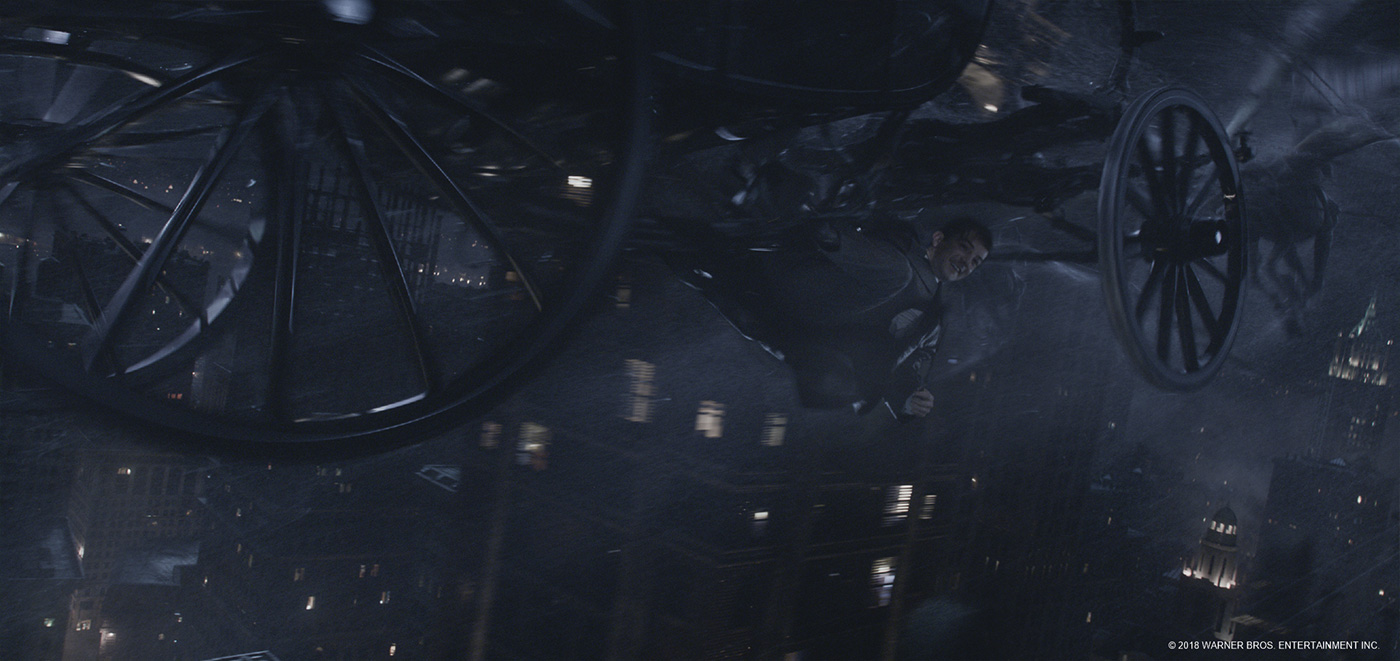
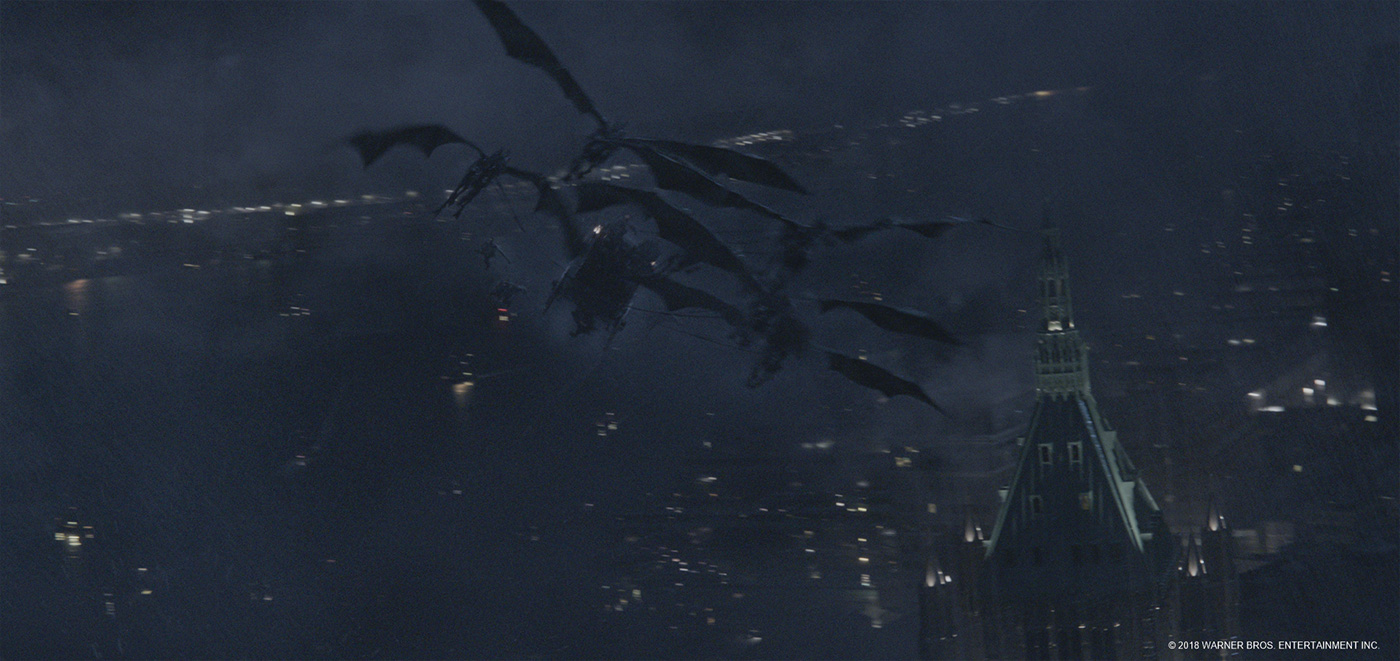
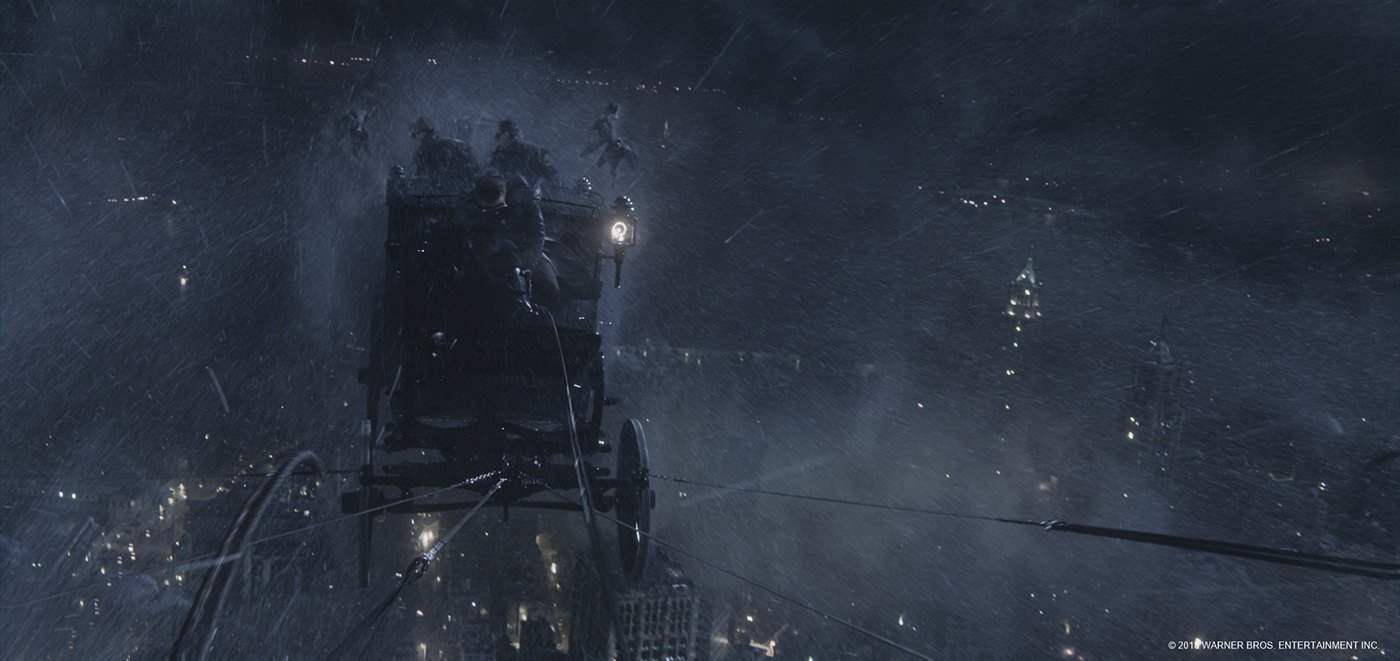
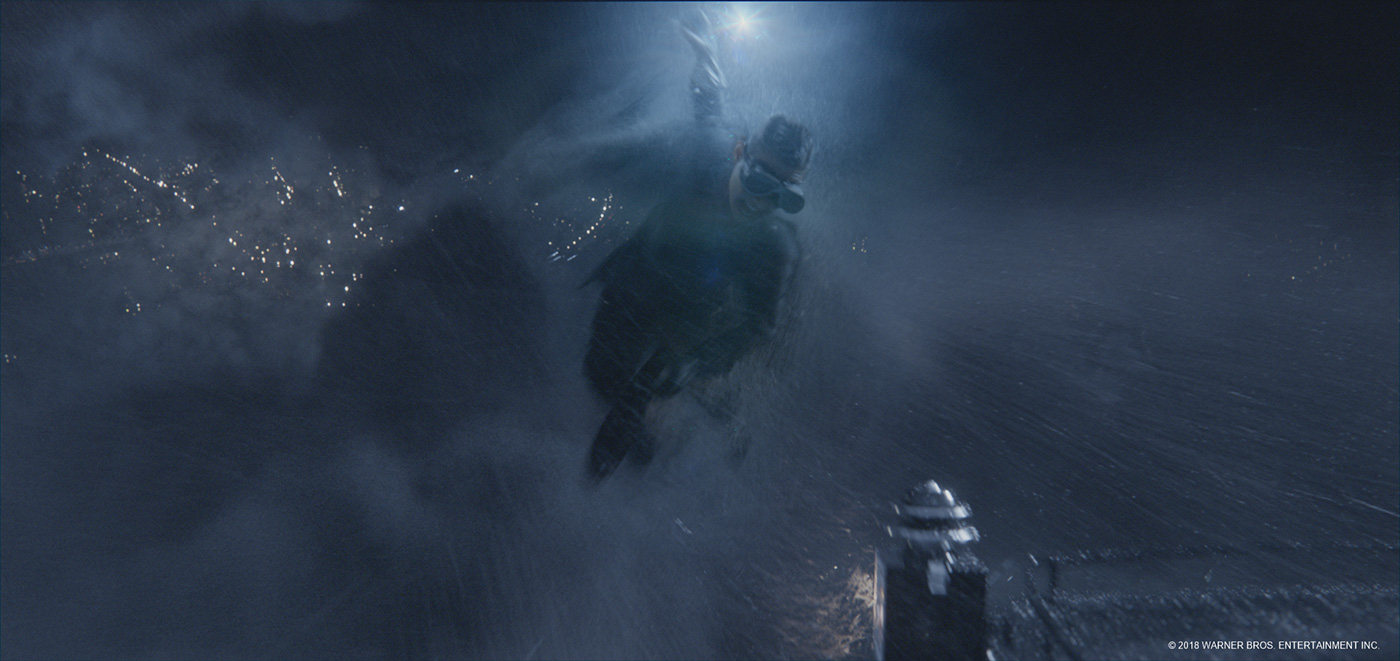
1. The flying of the Thestrals through period New York at night time. We travel through rain, fog, lightning, and even over the surface of the river.
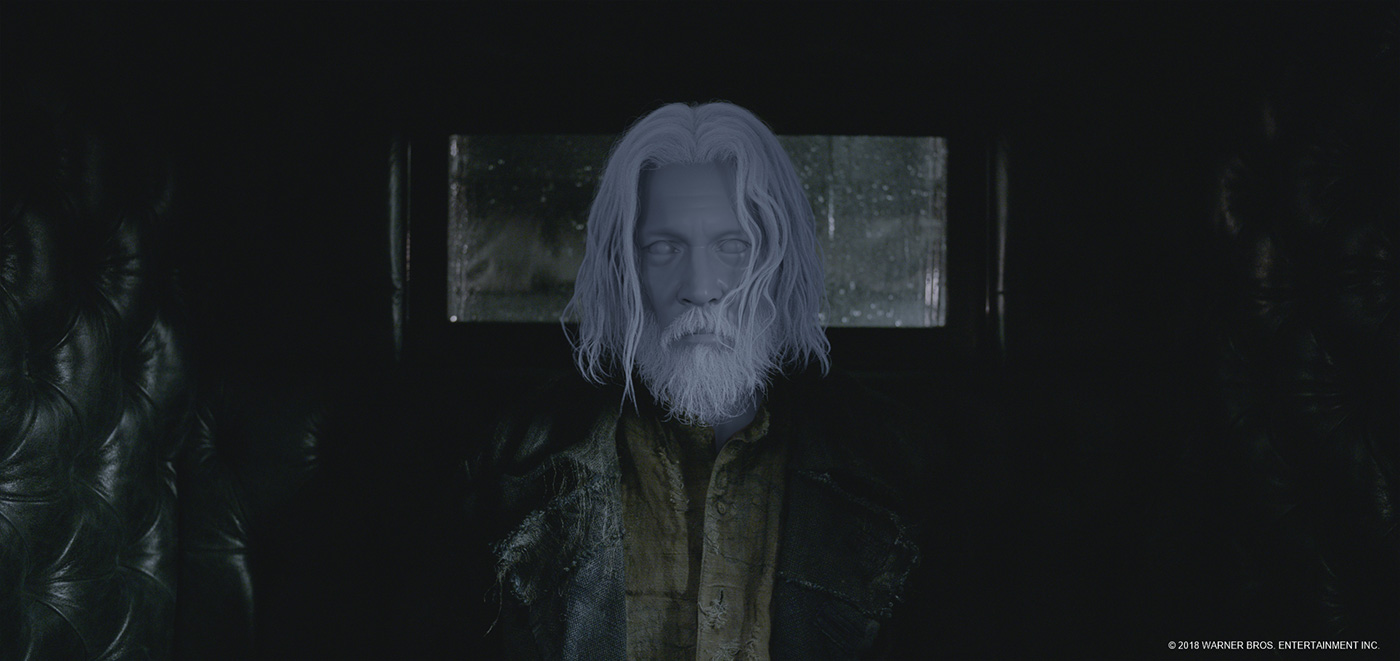
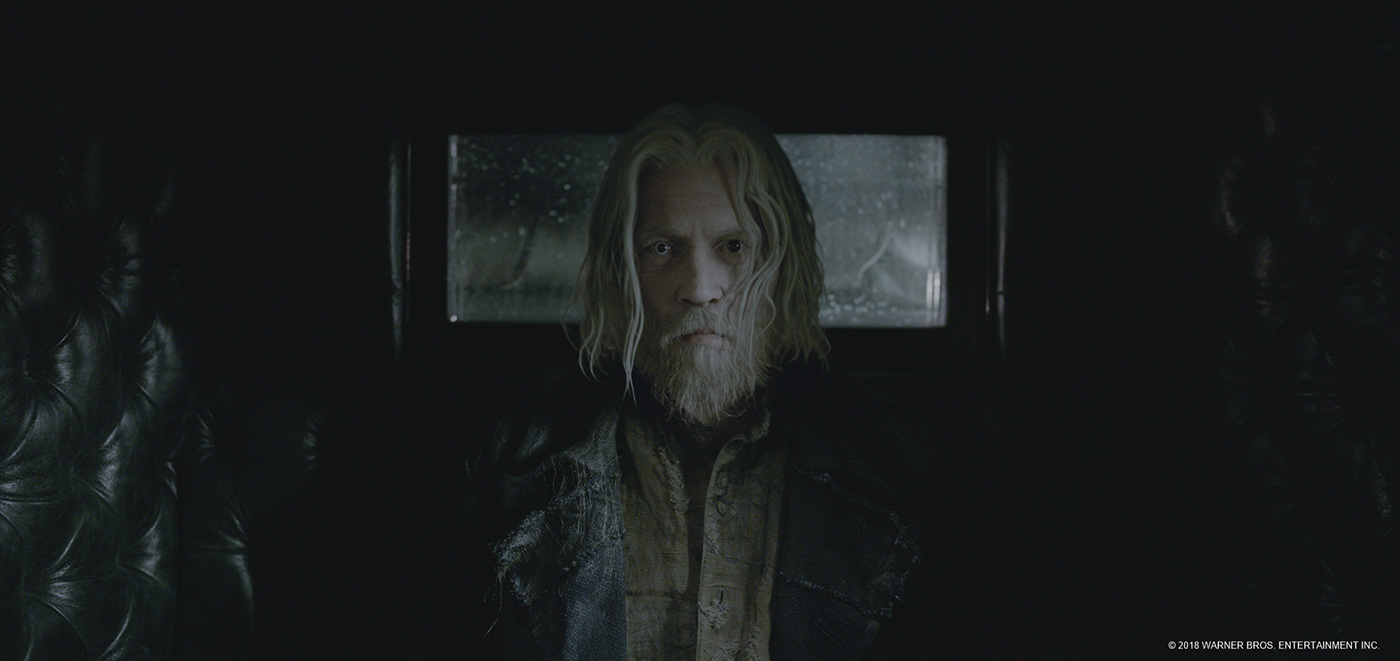
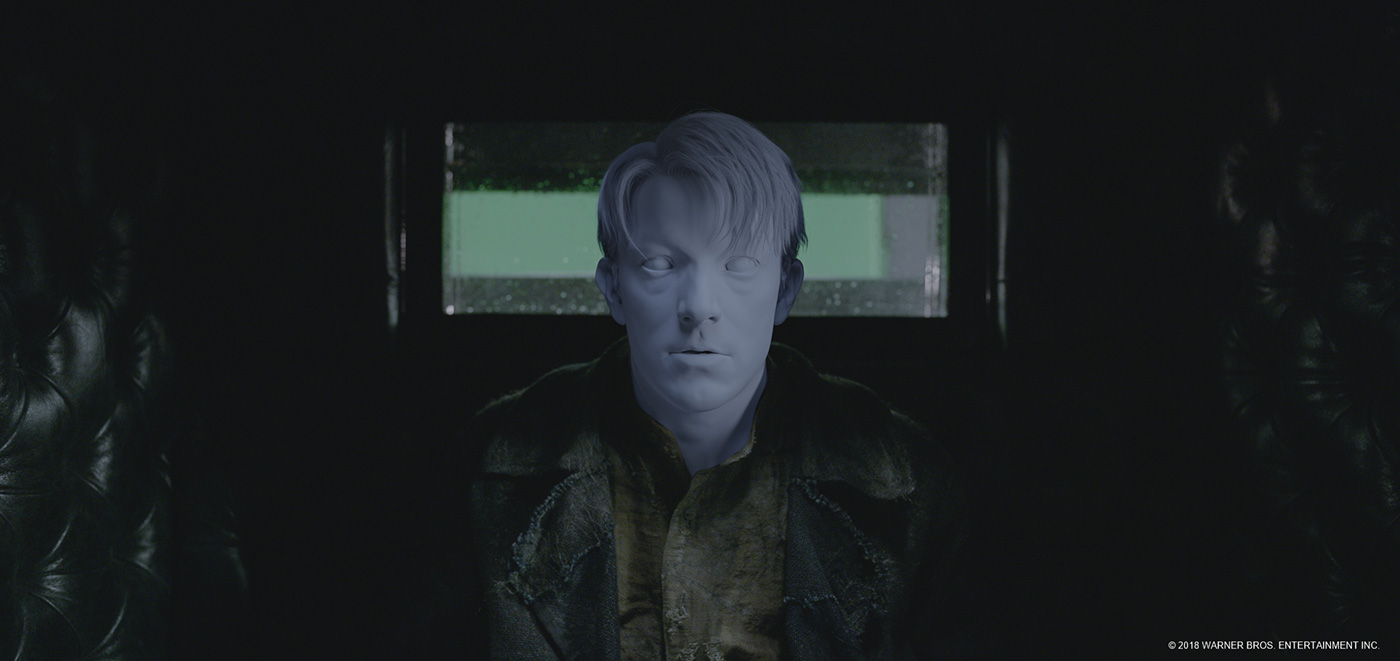
a. Within the flying NY sequence we end up doing a full CG transition between Grindelwald and Abernathy. We created a full CG version of each.
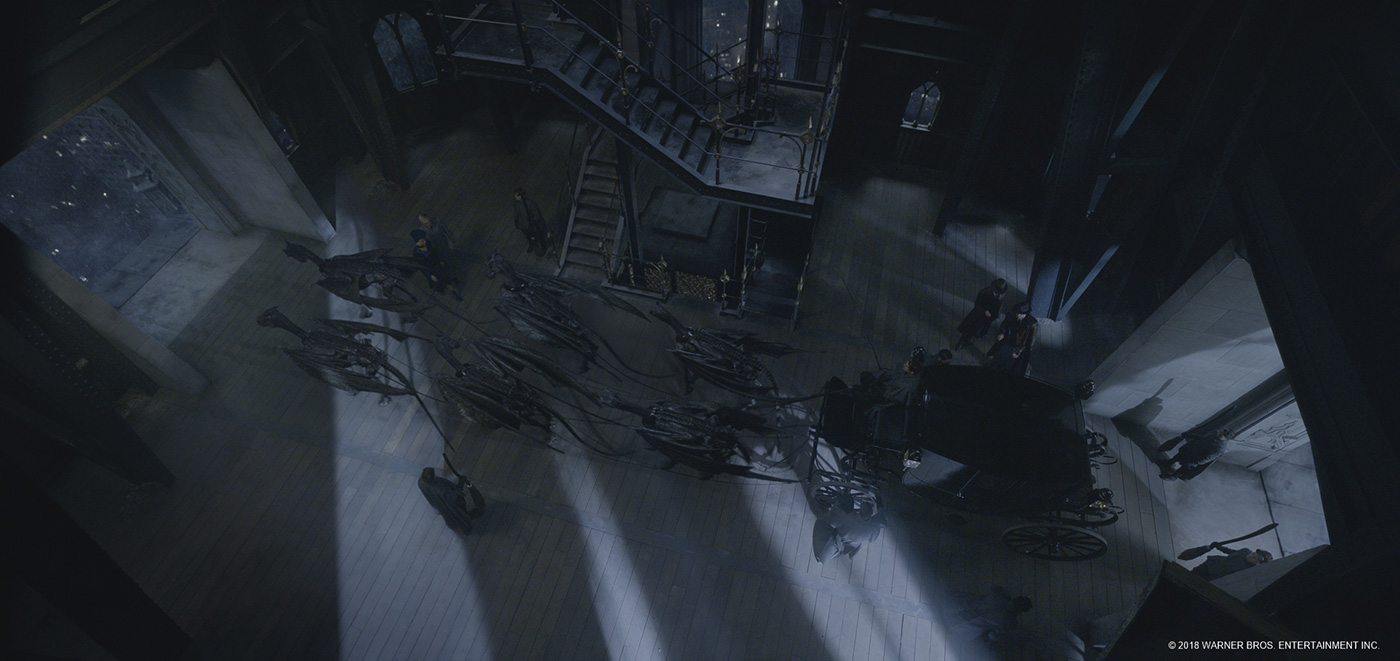
2. The Macusa Cells where Grindelwald is being held. He is then transported to the waiting carriage at the top of the Macusa building.
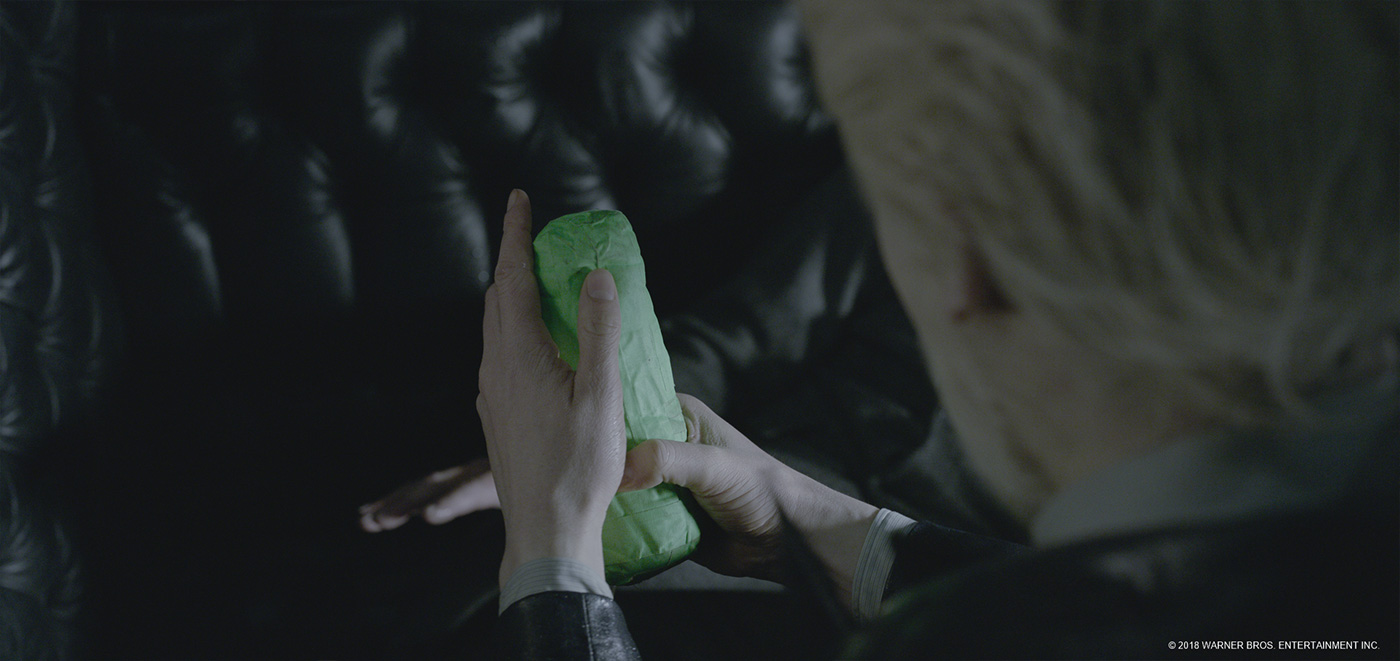
3. The London street environment where Queenie and Jacob talk and interact with each other before Queenie disapparates.
4. We also did some one off shots in Paris at night.
a. We are floating down the Seine looking at Notre Dame.
b. We are craning up looking towards the Eiffel tower over Paris.


What was your approach to create New York and Paris?
For any Environment work there are various paths that can be taken. We combined both a full CG workflow as well as incorporating DMP where needed. It’s really about sitting down and figuring out the paths cameras will take and how much we see of various areas and making sure we don’t over build using assets while having the detail where needed. We did build nearly 200 cg assets including buildings, props, vehicles, trees etc.

Can you explain in detail about the creation of New York and Paris?
We wanted both New York and Paris to be believable and realistic to the period in which the movie is set, around 1927. So there was a lot of time spent researching how they both looked back then from old photos and any data we could find. Then the real process started.
NEW YORK
Because any city environment you build can be built and populated in various ways we took the time to really figure out what exactly was needed for each area within the city.
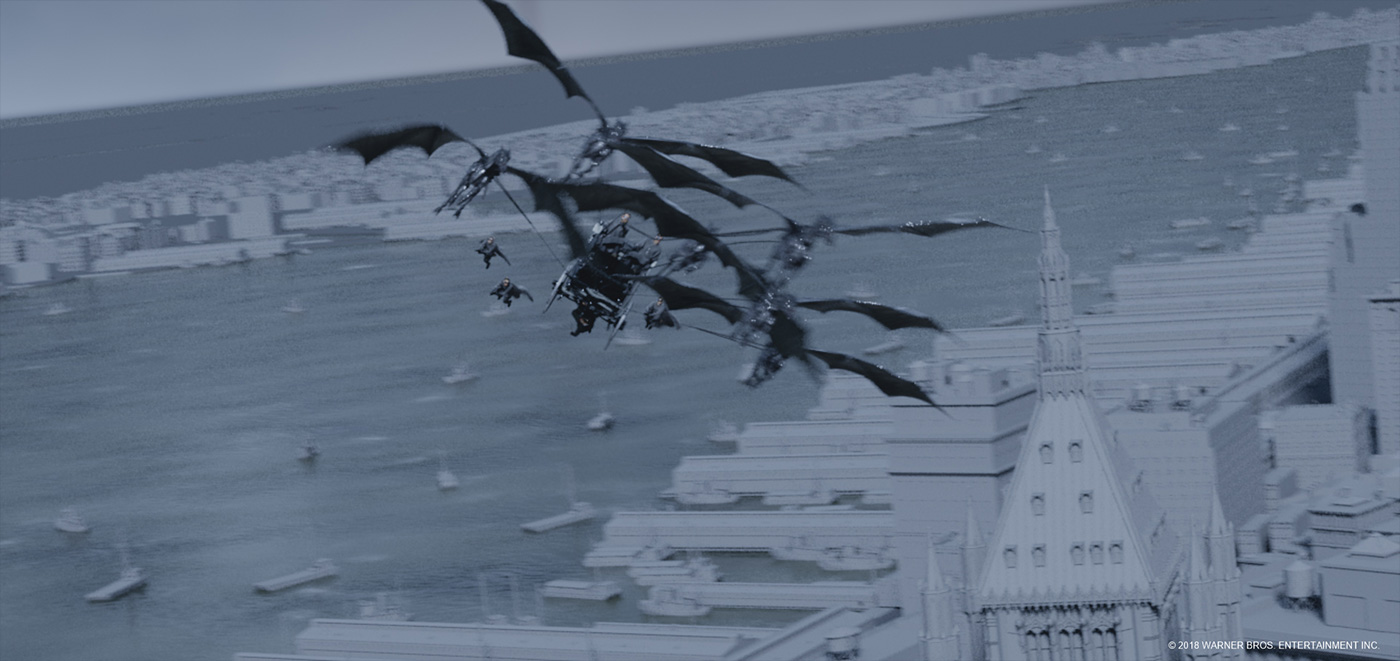
Very early on Christian and his in-house team started to do post-vis on the main flying sequence over NY to help David see and sign off on how the feeling of the sequence would work. We gave them our first build of the carriage and Thestrals to also use and fly around the city. This enabled us to get the cameras and rough geo from these post-vis scenes and see where they were flying around in NY and make a decision on the process to best fit how we would see the buildings etc through these cameras. We ended up changing a lot of the cameras for final but they really did stay close to where we had figured out we would be flying. It was a very collaborative process in which we would send back our NY city build layout when updated and new cameras per shot and they would update the scenes on their end and keep working and finesse for some first temps for David and the studio. It really helped us push the sequence forward relatively quickly and be able to focus on the animation and polishing of the shots.
For the city builds themselves we created many CG buildings to an extraordinary level of detail as we end up flying right past the windows on some.
We broke the city up into various areas through an overhead map layout system. This was mainly based on historical information (archival photo reference and old maps); we defined areas where we would want to see more buildings of certain types (townhouses vs larger mid-rise apartment blocks). We broke these areas up even further to be both a procedural layout out as well as manual. This overhead map gave us the ability to visually split the city into areas easily. We then fed that map into our workflow to create the city.
The main areas that needed manual layout were the areas that we fly through and would visually see the silhouette of the city and need to be accurate to the period of the city. Manhattan was the main area as well as coastlines and the Brooklyn bridge area. Anything outside that was mostly procedural. Sometime after the procedural layout of the city we would go and edit or add some hero buildings if needed.
The procedural layout was created using our library of assets. We obtained a large section of NYC from open street maps as an OSM file. A custom python script was created for turning the OSM data into categorized geometry and curves. We isolated the building footprints in Houdini from the map and compared the building footprints to our pre-existing library of generic buildings we had built. The final positions are outputted to our internal format for representing points; on those we store position, orientation, scale, and building asset name for point instancing. Each building was then snapped to the points at render time. Road curves from the original data set served as the building blocks for road geo, particle based traffic systems, street lamp instancing and other geometric detail that can be added to the street.
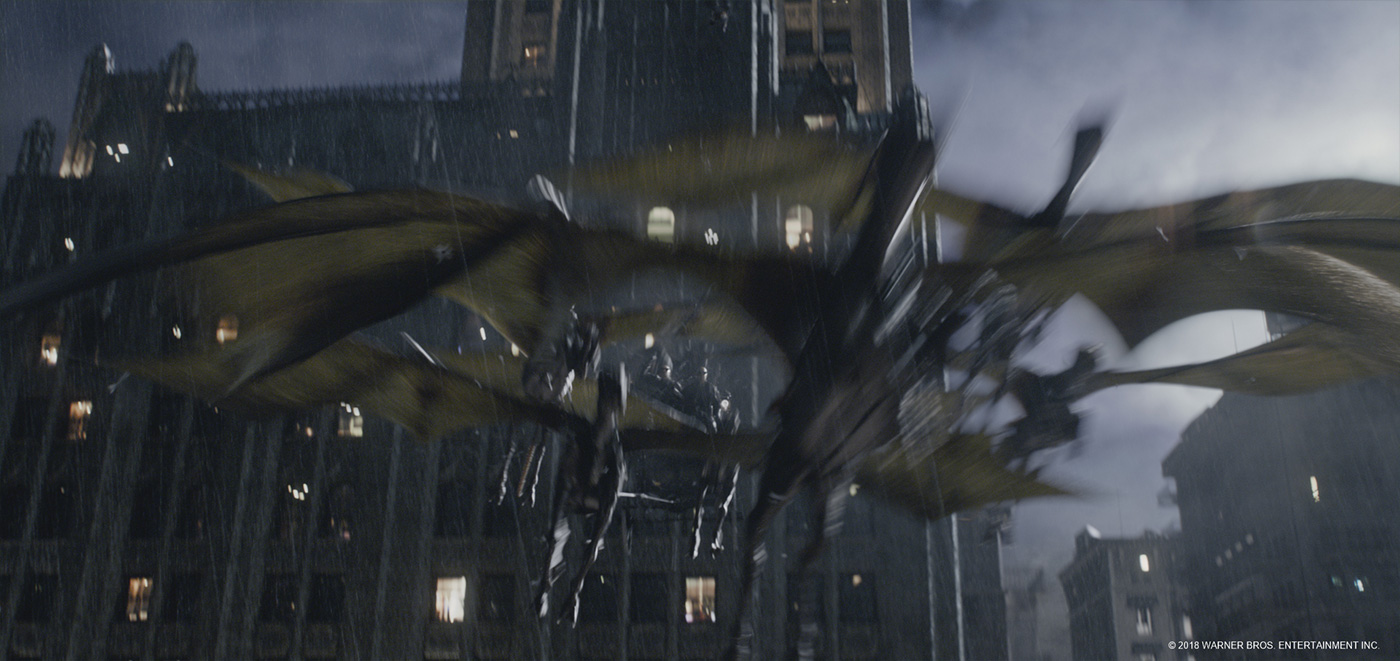
The Whole sequence was set at night within a storm. This posed a very big challenge and one that pushed us to figure out how best to configure and setup the shots and sequence to be efficient and flow together. We had to create a cloud and lightning system that we could add to all shots and be visible even at the head of the pipeline. Animation needed to see the clouds so we could fly through and around them and also have control over an animated lightning system so we could have the characters interact with it and drive the art direction/timing per shot.
Initially we created a library of clouds for populating our world around NYC. Each cloud VDB came with an additional geo representation so that Maya artists could quickly place and duplicate many clouds. Using our internal Gaffer system, a link was made to Maya to show the VBD version of the cloud geo layout live in an Arnold interactive render as the layout artist would manipulate cloud type, transform the density with the final LookDev and lighting. Once the cloud layouts were complete, they were published using an internal format which our FX automation tool would pick up and convert to a point based format so that future edits would be easier to make in Houdini without pushing back to the front of the pipeline for Maya Artists. A hero lightning rig would be instanced into a shot and in Maya the animators could animate this wiggling curve. Just like the clouds, the FX automation tool would pick up this lightning asset from the bundle and then generate the proper looking detailed lightning geo for lighting to pick up and render for comp.
For every animated character, carriage, or prop that moved within our NYC scene, all of them would need to interact with the environment. We had to create a whole FX system to be able to handle all the individual passes needed to give the realism needed to sell the shots. Hero rain/secondary rain, running surface water, drips, atmos, fog, mist, all were created per shot, per character. The FX system we created meant that once a shot’s animation was complete it would then trigger the FX sims to be run and then all joined into one scene and passed off to lighting. It was a very complex system but very efficient and saved a lot of time once set up.
Hero rain represented rain which hit the fast moving action items like the broom riders, carriage drivers, Thestrals, and carriage as well as water dripping down the carriage. Secondary rain (environmental rain) is anything 10m-1000m from camera. Secondary rain was fully automated and tuned to the camera frustum for performance reasons.
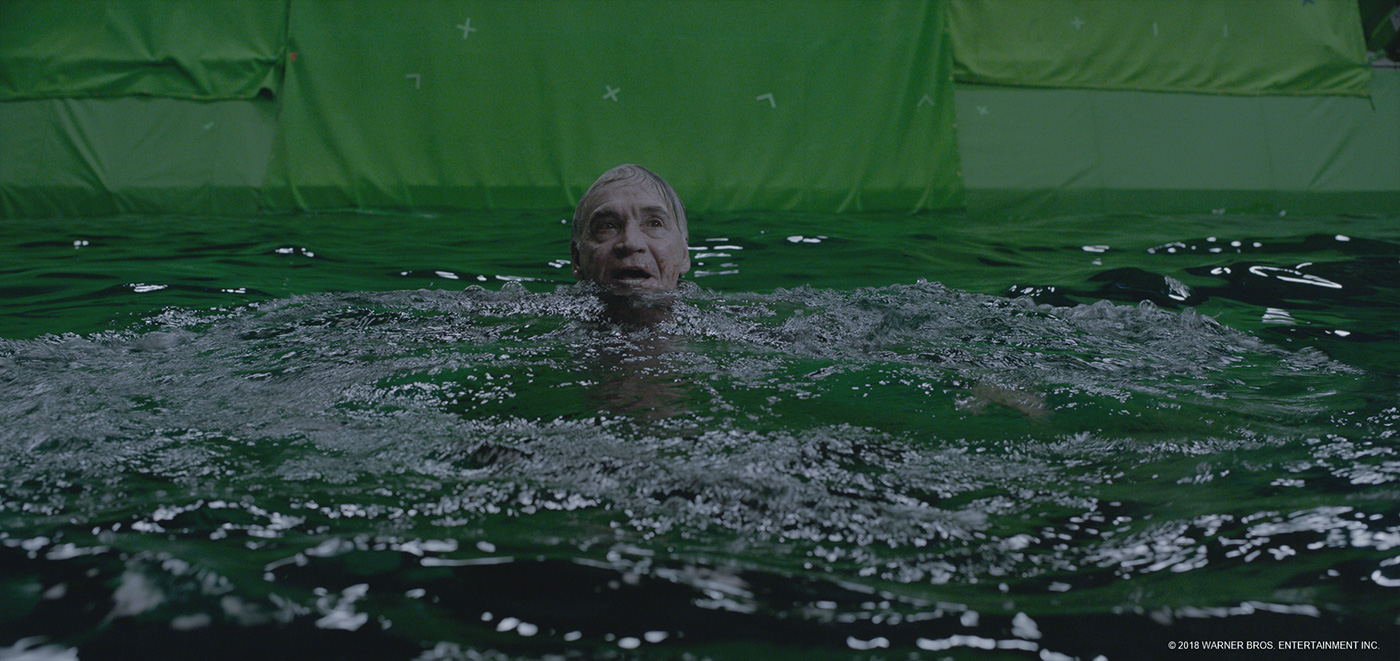
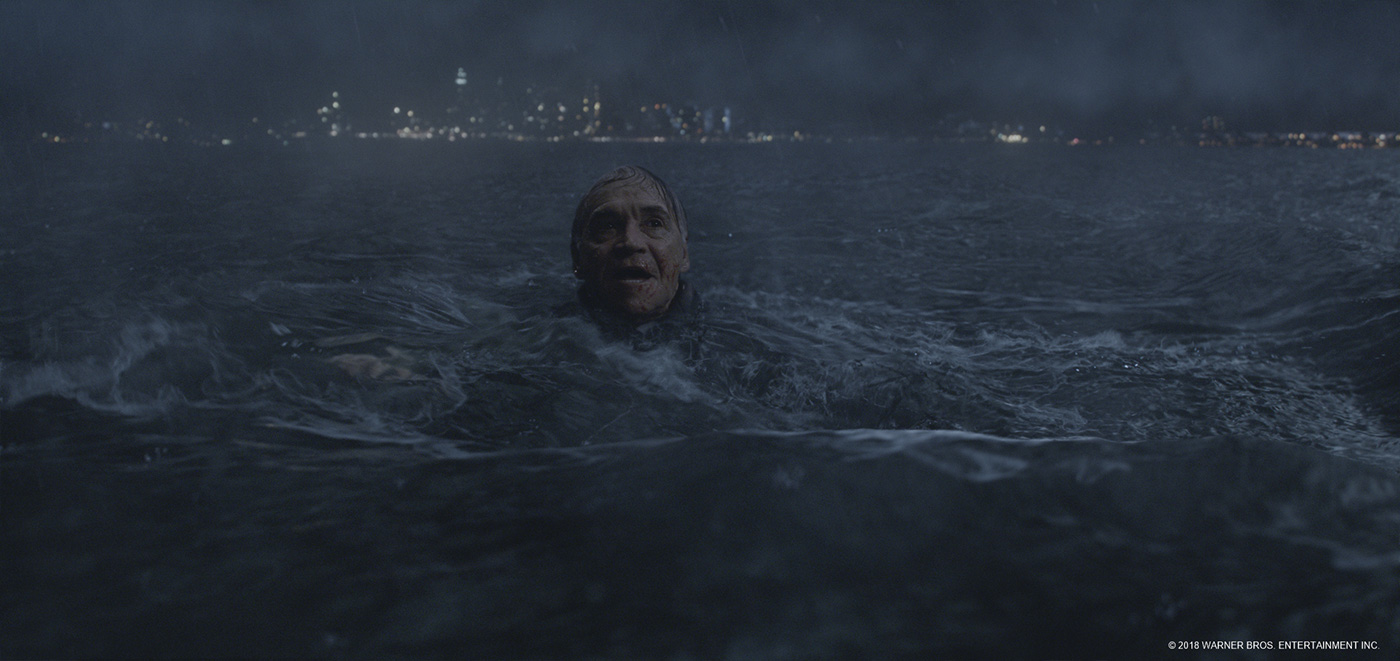
Lastly we had to create a full water system. We flying over and interact with the river surface. Speilman falls into the water near the end so we had to create a full river with hi-res simulations, all through Houdini. We had to simulate the water surfaces, producing a detailed surface, foam, bubbles, and hero splashes. A full underwater world was also created for inside the carriage when we see the Chupacabra floating around.
Overall the sequence is incredibly complex and took a lot of time and effort to get right. The client was blown away by the realism of what we created and was so happy with the final result.

PARIS
For the Paris Environment we took a slightly different approach. We were asked to do these shots very late in the schedule and had to adjust our workflow to suit the schedule. We had to build two big shots, set at night. Each was unique and had to be photoreal. In one we are floating down the Seine looking at Notre Dame. In the second, we are craning up looking towards the Eiffel tower over Paris.
The first shot was a big challenge for many reasons. We had to create a very hi-res river surface, as we are right on the river floating on it. We see hero Paris buildings, bridges, traffic and environment which meant we had to do both an asset build and also DMP. Luckily Christian had shot some plates in Paris near Notre Dame for us to use with DMP to help give the detail in the areas needed. Overall the shot is very realistic and looks awesome.
The second shot is a big establishing shot showing Paris. As said before, we start near the ground and crane up to reveal the Eiffel Tower and surrounding Paris environment. It was a big challenge to figure out the layout. We ended up using OSM (Open Street Map) data, which was fantastic as we could see the placement of buildings, rivers, trees etc and use it as a base map for building the area. We also used reference images to help finalize the placement and look. It needed to be a real place in Paris and so had to feel geographically correct. In fact both shots needed to. We built hero asset buildings, trees, lampposts, cars, the Eiffel tower and more.
People were added to both shots on cards using sprites from a green screen shoot that Christian did with various people in many different costumes. It worked great and really gave the final little bit of realism to the shots. Finally, we added birds flying around which also helped give movement and realism.
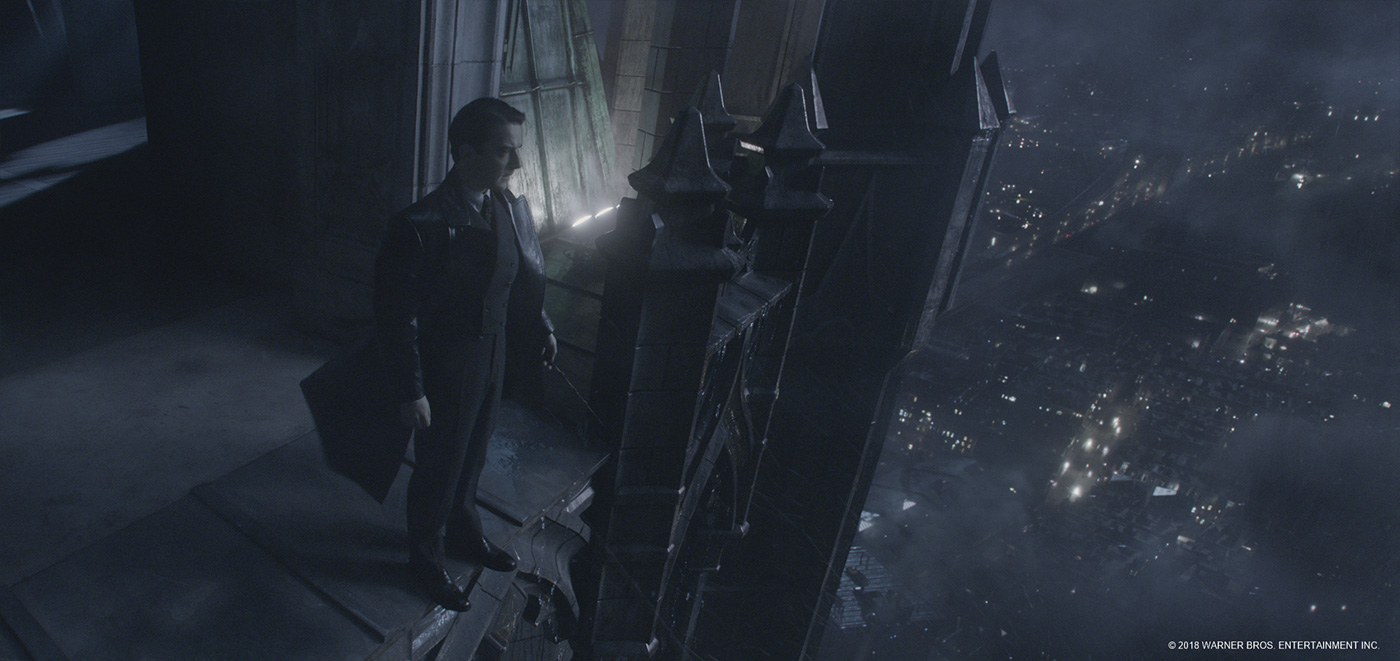
Can you explain in detail about the work on Grindelwald inside his cell?
The Grindelwald cells were fun to create, as this sequence also links to the Macusa NYC flying sequence. The client shot the plates on blue screen with a partial prison build with bars and stairways. We needed to create a much bigger environment with many levels of cells, stairways and add CG prisoners. There were also plate sprites that were shot for us to add where needed. We also added a CG fly, and the Chupacabra which is Grindelwald’s pet.
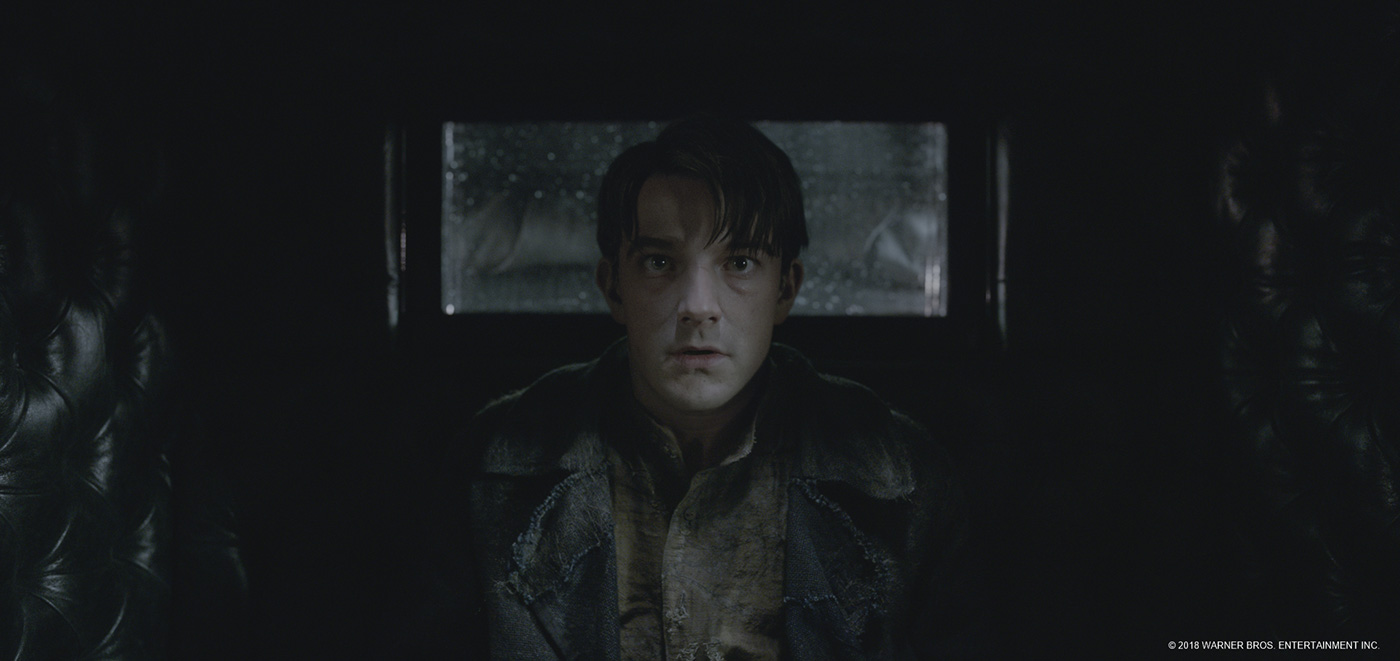
The sequence begins in Grindelwald’s holding cell and we see a fly buzzing around Grindelwald’s head before finally coming in contact with the force field that is holding him. The field activates and vaporizes the fly. We created this effect to feel like the force field was really encompassing him and that it was dangerous.
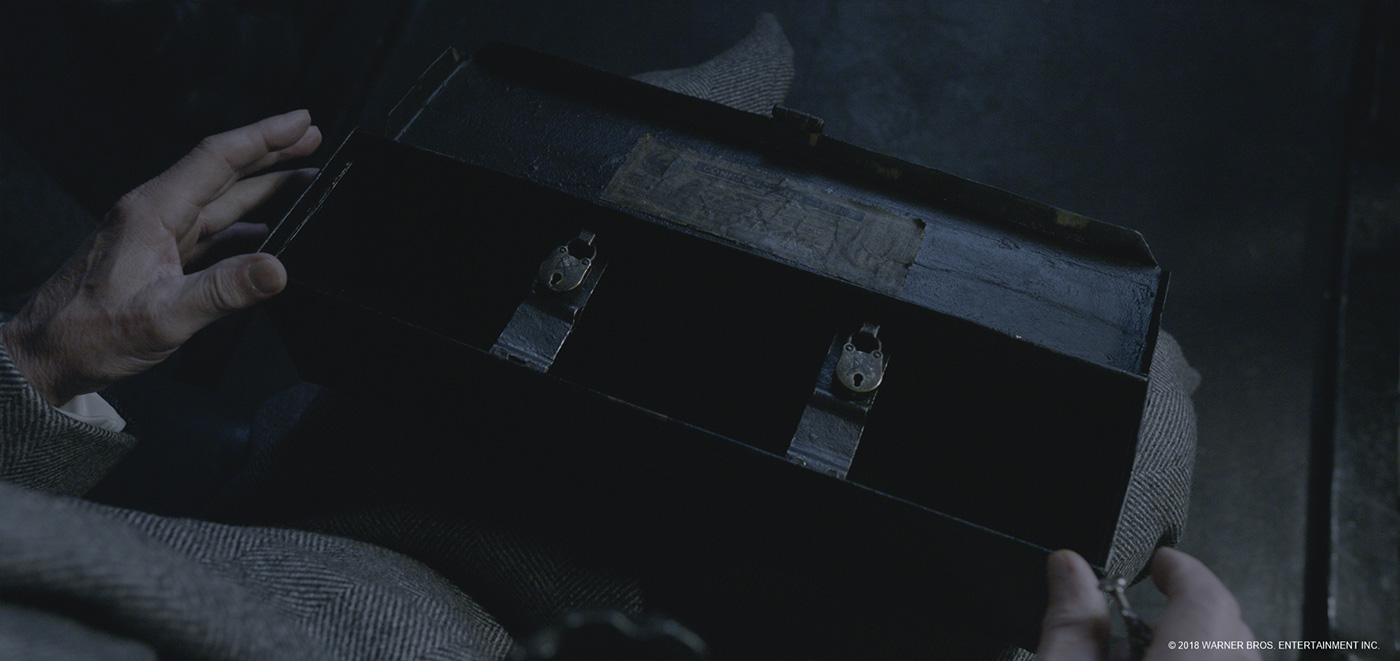
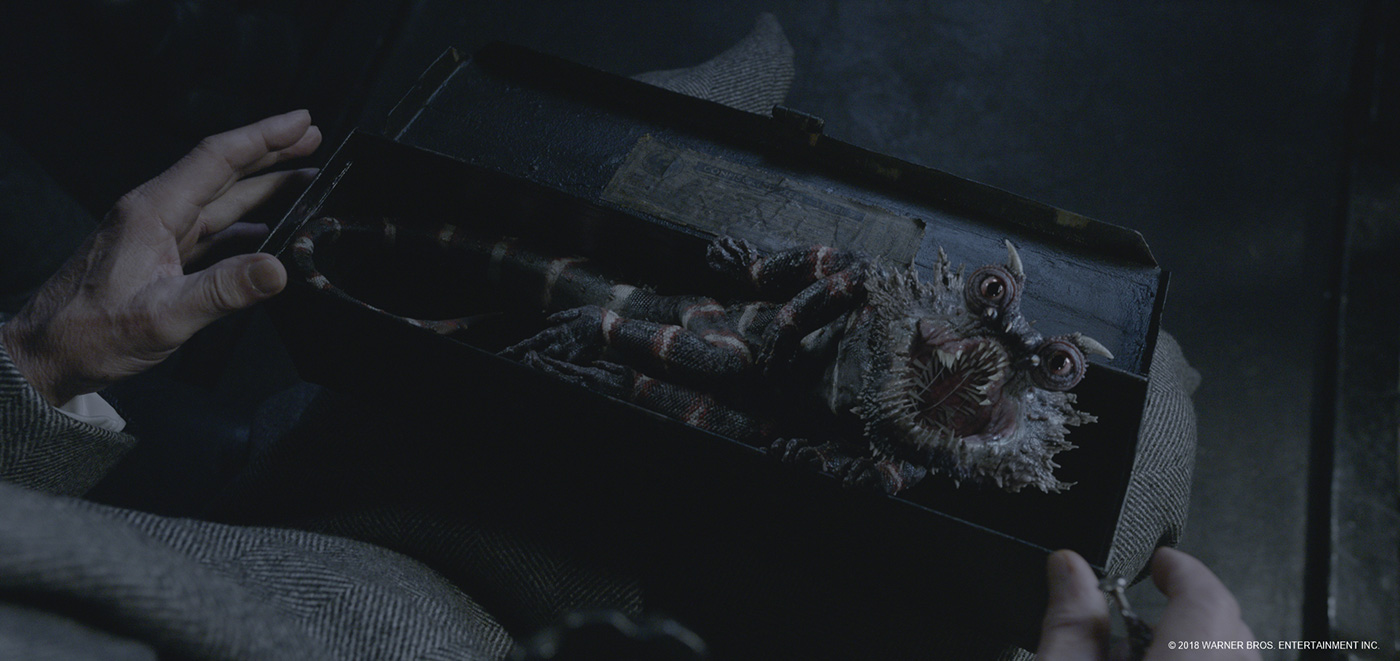
There are a couple of shots where we see Grindelwalds beloved pet Chupacabra. He is in the holding cell with him and is muzzled and chained. There is a fun shot where the Chupacabras tongue springs out of his mouth and through the bars on the muzzle and captures a fly wing; it’s pretty cool.

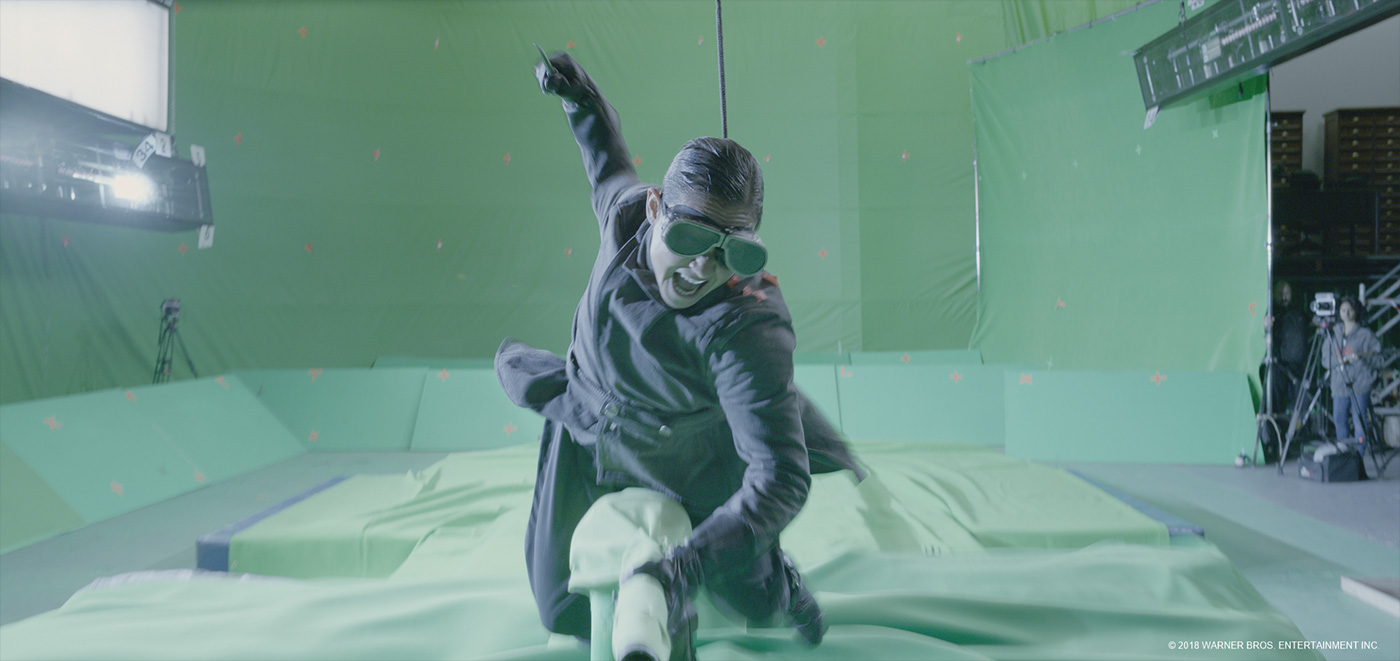
How was the Grindelwald escape sequence filmed?
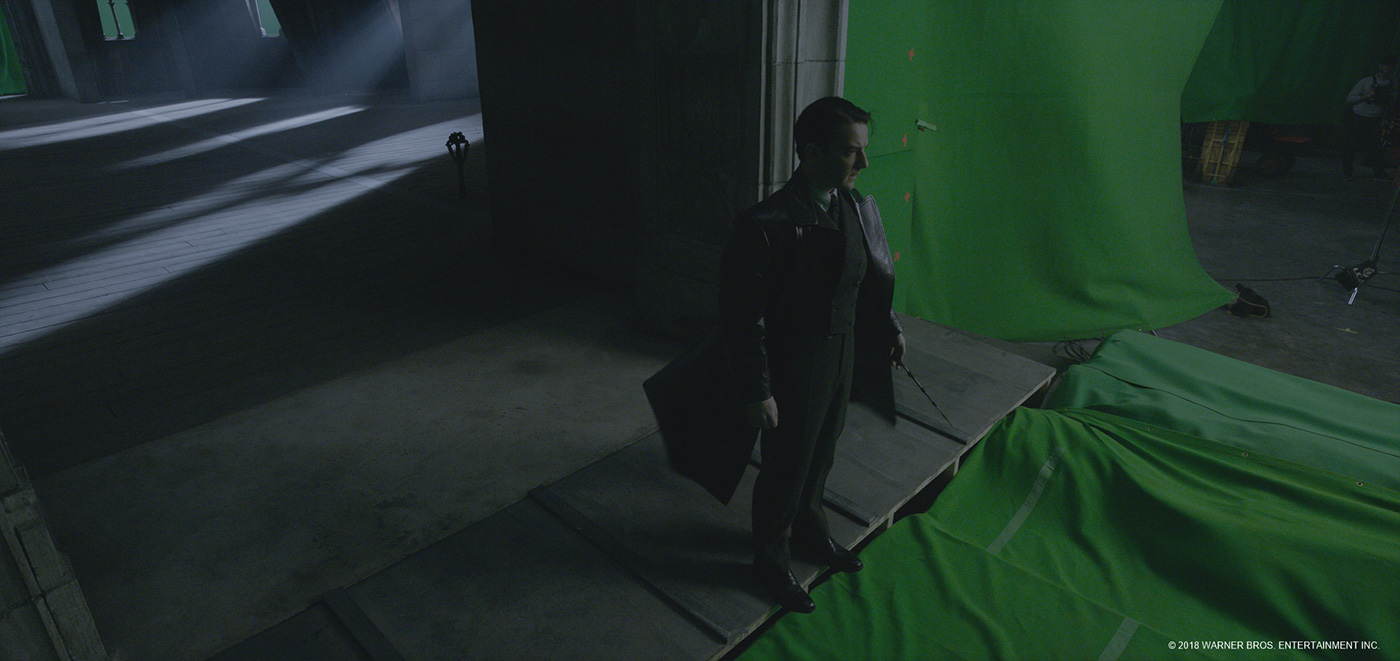
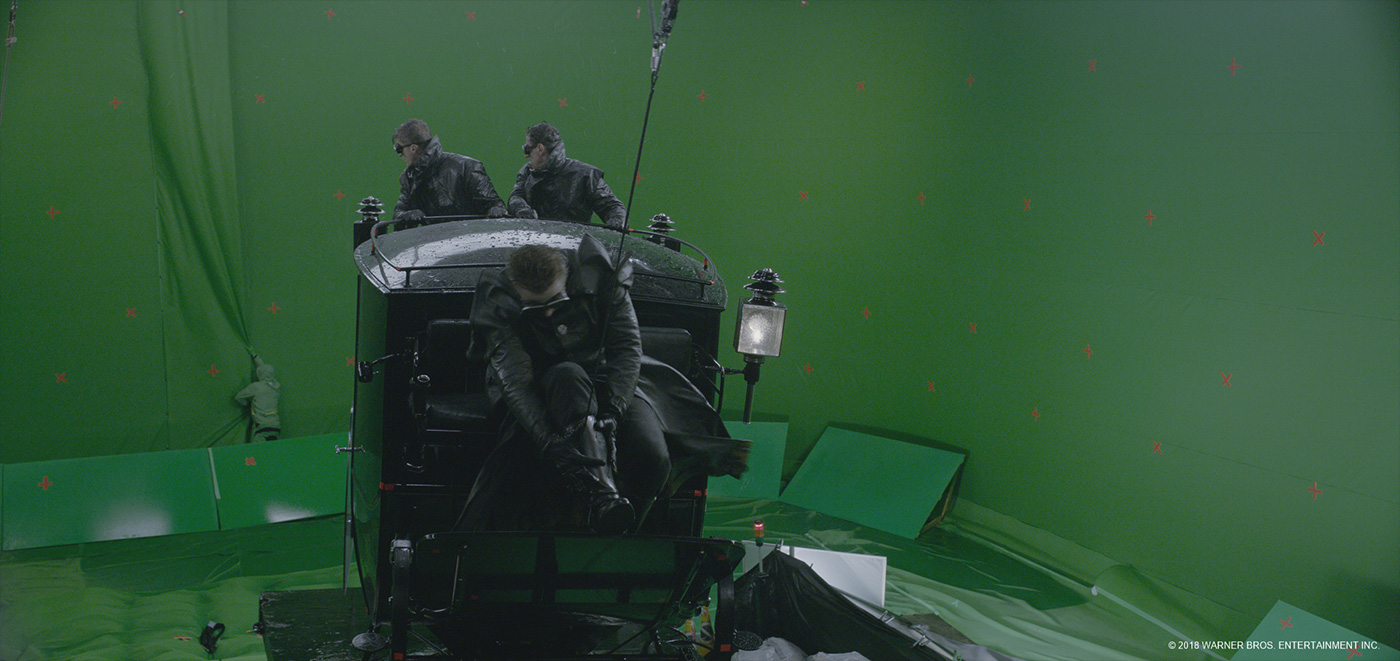
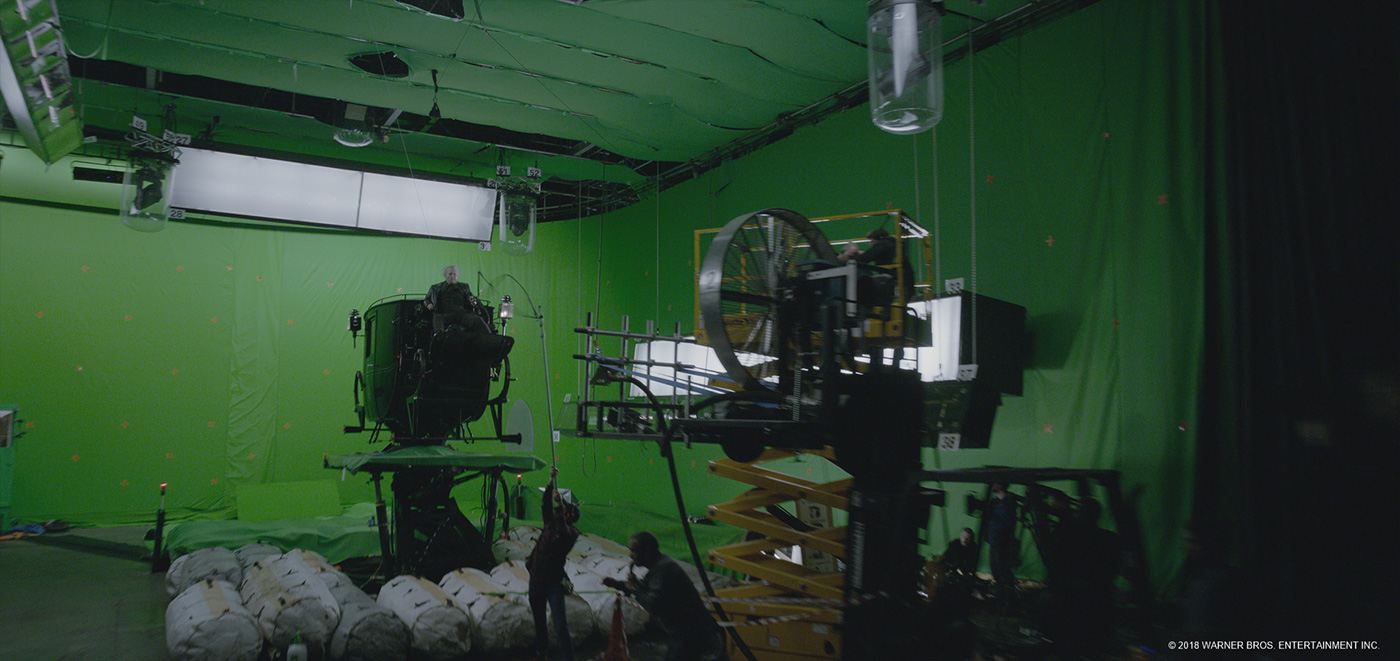
Pre-vis was done by The Third Floor and Christian’s in-house team. It was vital for executing such a complex sequence, to know what we needed to film. I went to part of the shoot, which was in London. We shot all the characters on green screen. There were 3 rigs for the carriage so we could get the movement and life into the plates that have Grindelwald, Abernathy and other characters either riding on the carriage or interacting with it. Initially we were going to try and keep some of the carriage from the plates but there needed to be so much rain, haze and interaction that we ended up replacing all of it with our CG version.
We had rain and wind on set so we could have the characters feel like they were really in the stormy environment.
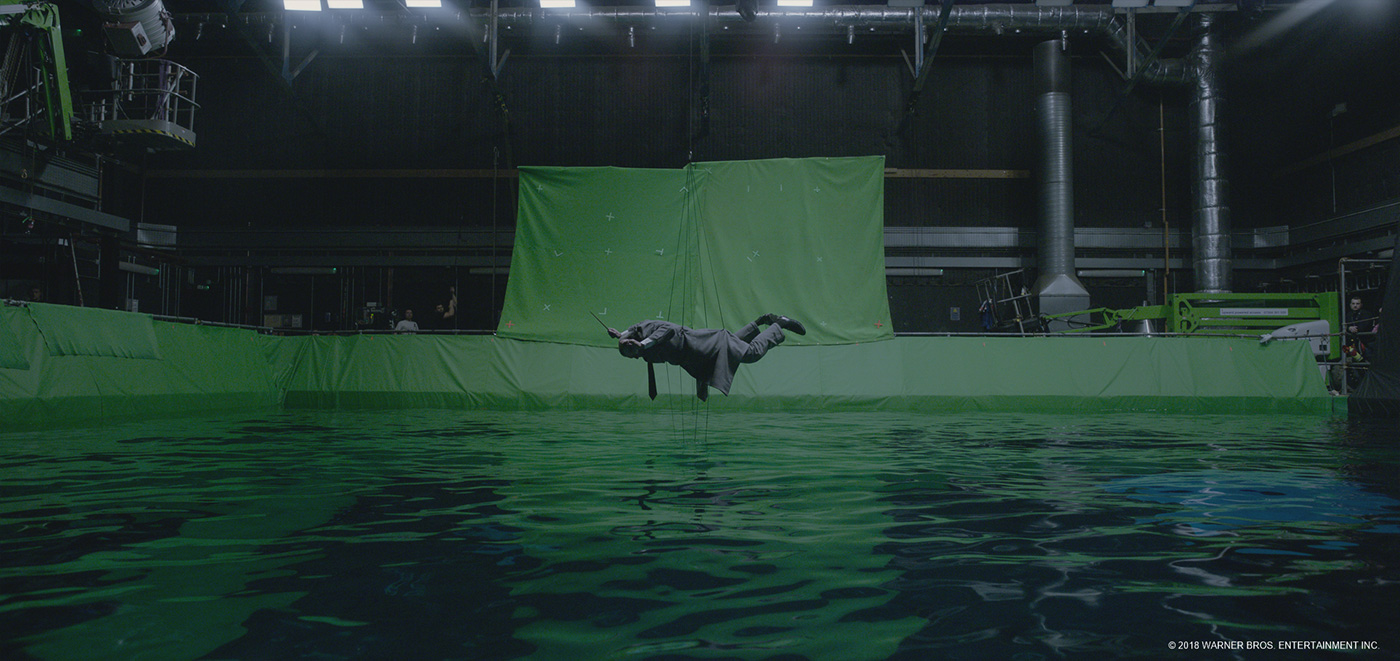
For the broom riders they had created a special rig called the Tuning fork. It was a rig that the actors could straddle like a broom stick and have their feet rest on. It was suspended on wires and was able to rotate and move around all over the set. There were six guys in full green suits helping guide and move it around to give it the realistic movements necessary for the shots. It really did look like a tuning fork. We used a few plates from this but ultimately we used it as reference; the shots became so dynamic we ended up replacing them with mostly CG characters.
Within the NYC flying sequence there were a few shots that were underwater as Grindelwald conjures up the river water into the carriage. These were shot polarized to remove highlights. A wind machine was used to have movement on clothing and hair. Caustics were also added to help sell it all. A light was shone through a slowly moving water tank, which projected the caustics into the carriage. The camera was also slowed to down to 48fps to help the underwater feeling. Over all it worked great when we added our CG water inside.
All the camera moves were matched close to the pre-vis so we could match the feeling that David wanted for the sequence. We did however change and enhance a bunch of these plates once we got into the final shot work, mainly to enhance the dynamic feeling of the sequence and have it be more action packed.

Can you explain in detail about your work on this exciting sequence?
We were very excited to be awarded this opening sequence to the movie. It’s pretty amazing to be entrusted with such an important part to the film.
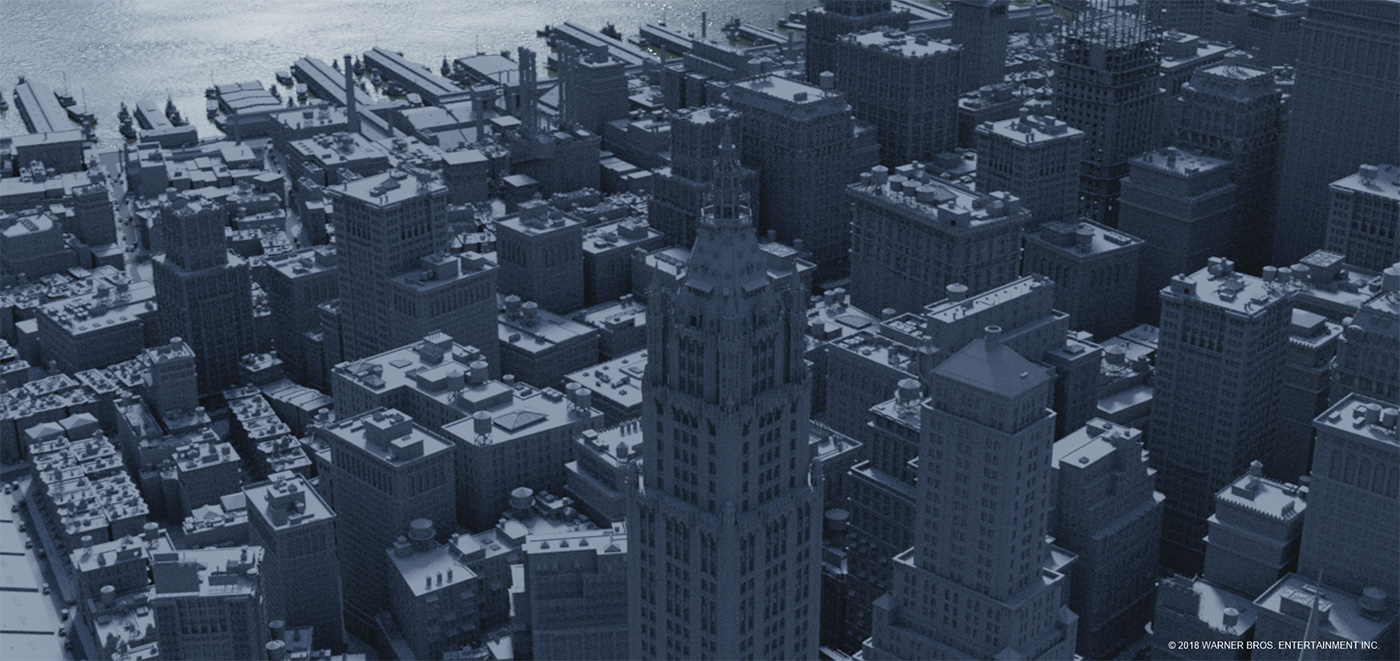
For this sequence we created a full CG 1927 period New York City from scratch. It was a huge task as you can’t just download the modern NYC city and use that, it really had to be based around 1927 archival photos and be believable. It is set at night within a rainy, stormy, environment. We had to be able to fly around the city and see it at various levels of detail from high above to flying right by a building. It took a lot of work to build and lay out the city, to know exactly where to add the detail. Cars, trams, trucks, boats and people were all added to give movement, help with the scale, and add city life. The city itself had water dripping over the surface of buildings and running off ledges, with puddles all over the place. It really felt wet and gave a great sense of detail.
We created an incredibly detailed carriage to hold up for all the shots. There were six Thestrals pulling the carriage with harnesses and reins. The CG carriage drivers, henchman and eventually Grindelwald all get to share a part on the carriage as it flies around. Throughout the sequence the carriage drivers and henchman are tossed from the carriage as Grindelwald takes control. It feels like you are on a fun roller coaster ride.
All the CG elements interacted with the environment, which is essential for it to really feel like they were flying in a stormy NYC. So many CG passes made up each shot, and it took a lot of work to have them all be consistent throughout the sequence.
While the carriage is on its journey across NYC, Grindelwald and Abernathy transform and switch places, which enables Grindelwald to take control of the carriage. We had to create full CG digi doubles for each character with hero face rigs and detail to hold up to any shot.
As the carriage nears the Brooklyn Bridge, it swoops down and skims the surface of the river. Grindelwald uses his powers to summon water into the carriage. We created a full underwater scene with bubbles and detailed sims from each person. The Chupacabra even makes an appearance as he’s floating around.
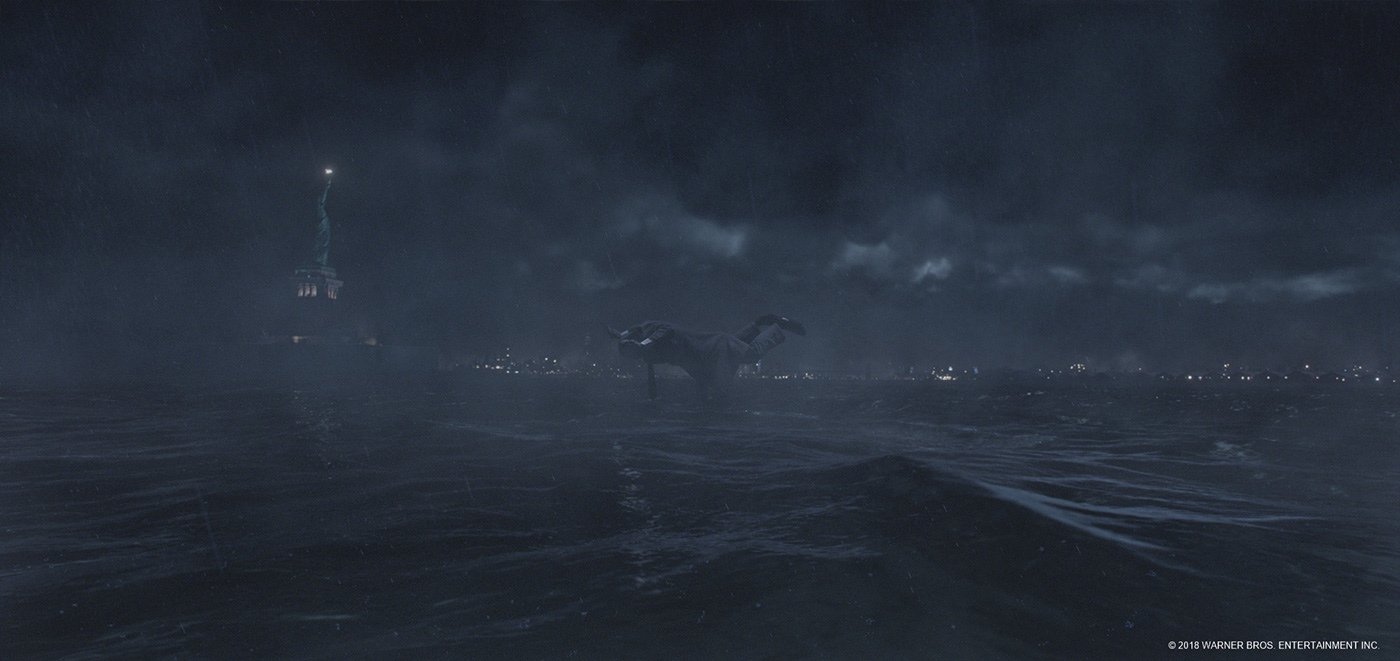
Once Grindelwald takes control of the carriage, he flies out past the Statue of Liberty towards the horizon as the title comes up. We created the title and all the clouds and interaction that happen as we transition to the Macusa Library, which was a shot that Rodeo created.
In the end, the opening sequence looked awesome! I’m very proud of what our team created, and so was the client.
The New York sequence is seen by night and inside a storm. How does that affect your lighting work?
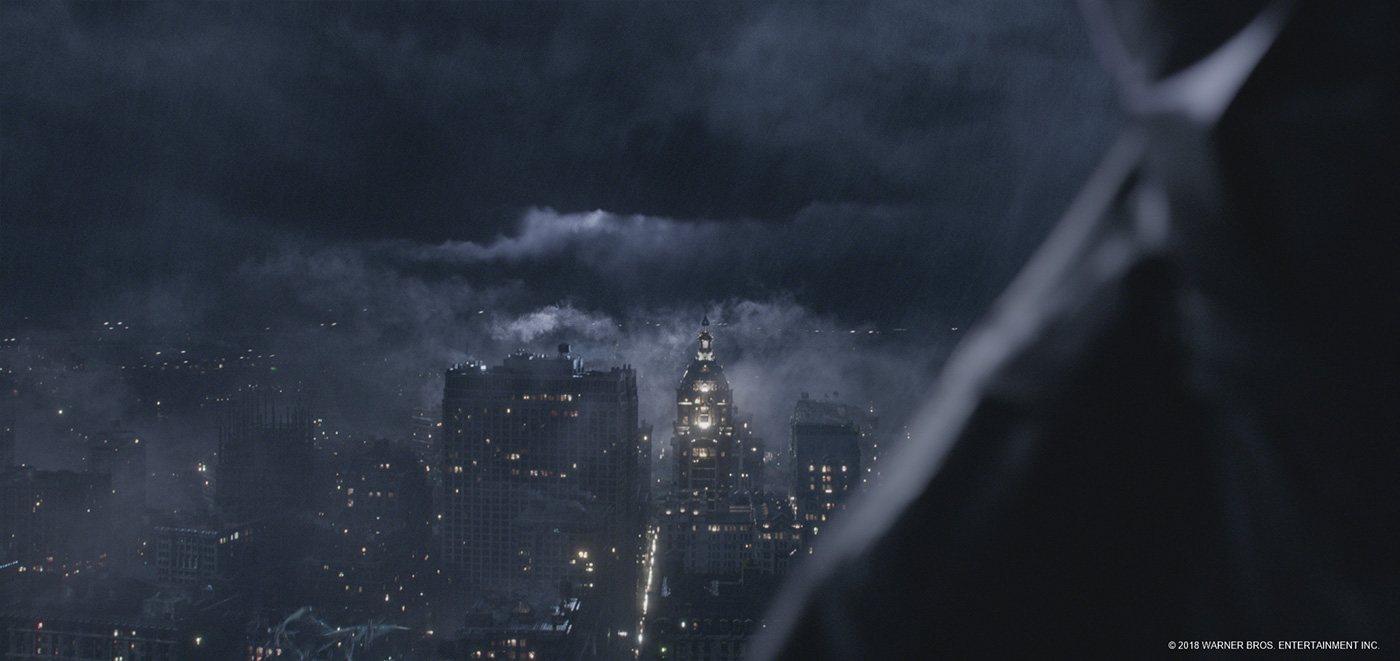
It was a big challenge to figure out the lighting and how it would work at night with lightning and a storm raging around us. We needed to match the lighting direction on the plates and create a sense of moodiness in the sequence. Christian wanted it to feel like photography and to not see everything all the time. We had some references he gave us of what he liked and we found quite a few ourselves.
It’s important to think about how a shot would actually expose if it was shot for real. The plates were shot brighter than what we really wanted in the end and we did grade them down a lot. We tried to keep the light direction true to a single source, like a moon behind filtered clouds. We played with light shaping from windows, vehicles, the carriage, lightning hits in clouds, etc. This had the environment glowing, feeling wet and believable. It did add a lot to our render times having to have FX volumes with light falling off and have light transmitting through them. You get some very very long renders to get it all clean with no noise. But it looked amazing!
The illumination in the clouds from the lightning hits was a lot of fun to art direct and we needed to be able to drive that right from the beginning of the pipeline. Animation controlled the timing and it really helped having the ability to do it right at the start to affect all downstream departments.
How did you create the various digital doubles?
The digi doubles were created from an initial scan we got from production. They used Clear Angle for all scanning. We got full body and head scan for each character. While I was on set in London I got to see their setup and it’s pretty impressive. They use a photogrammetry style rig with over 174 cameras to capture the scans. They also have higher level cameras for face capturing. This gave us a good level of detail to start the process. With each scan came a bunch of photographic textures and this really helped as a base for color texture reference, which we built upon.
For each character we built, we had to take the initial scan and then re-topologize the model and get them rigged to our generic in-house character rig. Once that was done, we started to up-res the model where needed and created the lookdev.
On this project we started to use a new system for clothes building called Marvelous Designer. Marvelous Designer has become a valuable tool in creating realistic looking and moving garments in the digital world. Approaching clothing from the standpoint of a real life tailor or fashion designer results in clothes that look and feel natural. We decided to go this route for our digital characters and clothing as they needed to blend seamlessly with ‘real’ shots, many of them close-ups. One of the first things we did was request the physical patterns used by the costume design team to make the costumes worn by the actors. Sean Frandsen, our Marvelous Design expert, took these patterns, photographed them, and recorded their real world measurements. We also had a number of photos of the clothing from all angles and the 3D digital scan of the actor in costume to measure against. This was really helpful in determining how folds should form later. It’s amazing how the program enables you to see the fabric draping over the cg characters and it really gives the right amount of detail.
All characters we created, broom riders, carriage drivers, henchman, Spielman, Abernathy, Grindelwald, all had simulations run on their hair, clothing and sometimes skin. It was a huge undertaking as all the characters were seen relatively close up and needed a high level of detail. This was especially true for our two hero characters, Grindelwald and Abernathy.
We had to create hero characters similar to the work we did on Logan for Grindelwald and Abernathy. There is a moment in the carriage where we have to transform from one to the other. We created a full-face rig using the FACS system so we were able to have them talk and animate any way we needed them to. The level of detail the LookDev department added to the skin, hair and clothing was just amazing. We had to be able to replace each character and not have the audience be taken out of the movie. It was a huge undertaking but in the end it worked amazingly well.
The hair was a big thing for us to figure out. We had to get two different grooms to blend between each other and feel right. We ended up using Houdini to do this through some really complex blending of the roots to the hair, the strands and the clumping. Each has to be shifted through the transition as well as two different simulations for each character groom. Each character also had different coloured hair so we had to blend between that too. In the end it looked awesome and more importantly, believable.
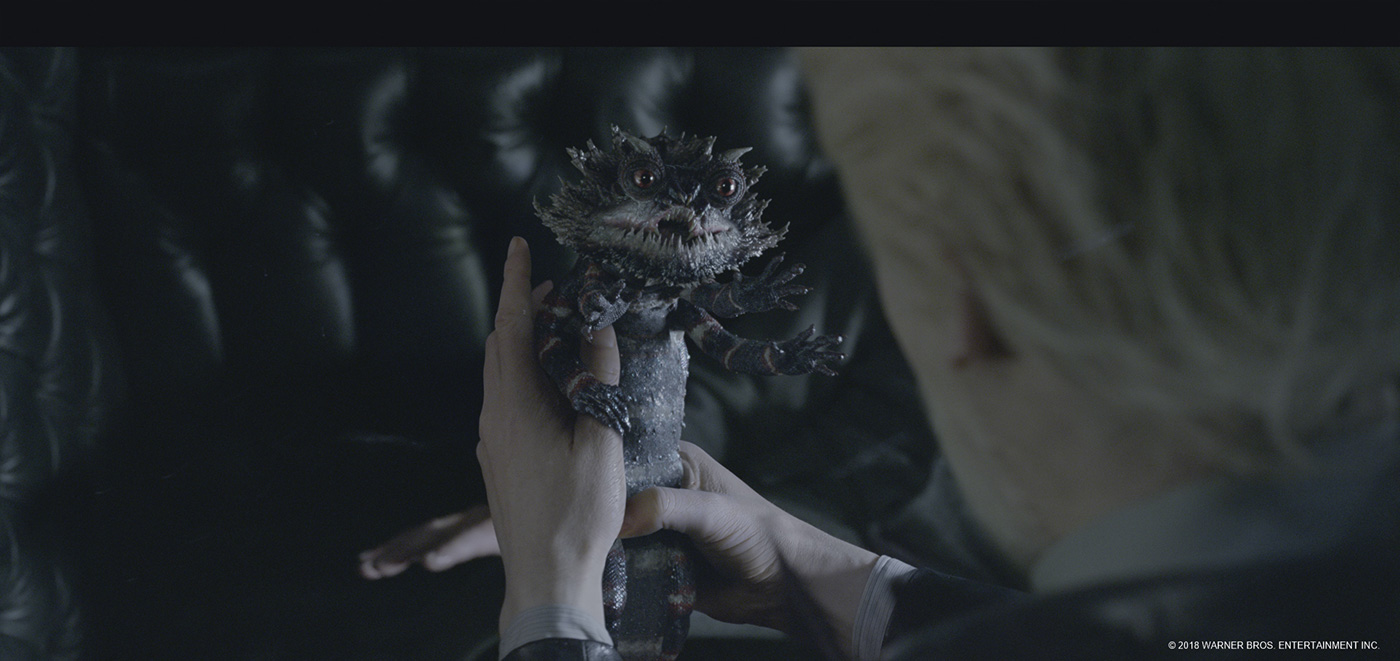
How did you design and animate the little creature of Grindelwald?
We had an initial concept from the client as a starting point, but in the end we changed it quite a bit. For example the Chupacabra was initially orange. Through the process of adding our own details and developing the overall look it changed to dark blue/purple with red/white stripes.
It was a fun challenge, as he needed to have spikes all over his body. When he got upset those spikes would come out from under the skin and so we had to figure out how to get them to do that and not intersect with everything.
The creature has six legs. We based the animation on a Kimono Dragon’s movement and then added our own take on how it would move with six legs to bring life to it.
He was an entertaining creature to animate and add life to because he has an attitude and personality to him. The client really liked him and how he brought life to the shots with Johnny Depp. It was a fun interaction between the both of them. The Chupacabra adores Grindelwald.
The client liked him so much that they ended up adding more shots to the movie so that they could have more of him. One of those shots was the shot in the cells where he is muzzled, which is a pretty cool detail.
What was the main challenge on the show and how did you achieve it?
The biggest challenge for us on the show was the creation of the flying scene over NYC. There were so many FX elements and passes needed to make it all work and feel believable. I think we managed to achieve this because we took the time at the beginning of the show to set up processes that we could run on multiple shots and all work together. So many of the shots needed the same elements and so there needed to be a consistency with them all. Prep on any show at the beginning is what will help it run smoothly.
Which sequence or shot was the most complicated to create and why?
The most complicated sequence for us was the night time sequence where we are flying over NYC in the thunderstorm. There isn’t really one shot that stands out as the most difficult. I think it’s the most complicated sequence because there were so many parts to it. It was incredibly complex involving so many CG passes. For lighting and comp to work with all these and have them all interact with each other took a lot of work and time to get the right. We comped in Nuke using Deep so we could control how the layers would blend in depth. This made everything more believable.
Is there something specific that gives you some really short nights?
I had a few late nights near the end of the project worrying about having to render so much and having to have it clean with no noise. It takes so much time to get the passes clean when you have lights and volumes and because we had so many passes it took a lot of resources. But we did it and it was worth the worry 🙂
Is there any other invisible effects you want to reveal to us?
I think the most invisible effects for me would be the sequence in London where Queenie and Jacob are talking and having a discussion before she disapparates. It’s seamless and I think you wouldn’t really know they were on green screen. The crew did a great job to make it feel photographic and real. David Yates was blown away by what we had done.

What is your favorite shot or sequence?
My favourite shot is in the main night time sequence as we leave the top of Macusa and fly out. There is a shot where we are looking out towards the river and the Thestrals and carriage come flying towards us and fly right by camera. My favourite sequence is obviously the night time NY sequence 🙂
What is your best memory on this show?
The best memory on the show for me is getting to create such a fun and dynamic opening sequence to the film and do this with the amazing team at Image Engine. It’s not everyday you get to own the first 7 minutes of a film and main title! It’s very exciting.
How long have you worked on this show?
Around 13 months.
What’s the VFX shots count?
147 shots.
What was the size of your team?
130.
What is your next project?
It’s going to be a fun one, but I can’t yet disclose the name of the title.
A big thanks for your time.
WANT TO KNOW MORE?
Image Engine: Official website of Image Engine.
© Vincent Frei – The Art of VFX – 2018
 and Rich Yeomans (Production VFX Producer)")
 and Michael Lum (Animation Supervisor) – ILM")
