Steve Moncur began his career in the visual effects in 2003 at MPC. He then worked at Baseblack and Cinesite before joining DNEG TV in 2016. He has worked on many films such as KINGDOM OF HEAVEN, POSEIDON, 10’000 BC, KINGSMAN: THE SECRET SERVICE and FANTASTIC BEASTS AND WHERE TO FIND THEM.
What is your background?
I studied Architecture and Design at Edinburgh College of Art, but when I finished the 7 year course there, architectural work was hard to find, so I took a job as a model maker and prop/set builder, which that started me on a path in the media industry.
How did you and DNEG TV get involved on this show?
I was invited to join DNEG TV by the Exec team, Jonathan Privet, Hayden Jones, Louise Hussey and Stef Dury, whom I have known for over 15 years. They thought I would be a great fit for this size and scale of show with my background covering film, TV and commercials. DNEG TV were invited to pitch for the project having built a relationship both with the TV and Film arms of Skydance, who produced the show for Netflix. Obviously it went well as we ended up doing the show!
How was the collaboration with the various directors and VFX Supervisor Everett Burrell?
Everett was an absolute joy to work with, both very focused on getting the best possible results for the visual effects, and also able have fun with it at the same time. He and his team were fantastically well organised and very collaborative. They were keen to have our input right from early pre-production meetings through to the end of the series. In fact the whole production team and key creatives, led by Laeta Kalogridis (Creator, Writer and Exec Producer) in conjunction with Steve Blackman (Writer and Exec producer), James Middleton (Exec Producer), Miguel Sapochnik (Director and Exec Producer) and Nick Hurran (Exec Producer) were all incredibly welcoming and keen to create a very collaborative atmosphere throughout the production.
What was their approach and expectations about the visual effects?
The expectations were very simple – it had to be cinematic. Everyone wanted to produce a series of the highest quality with effects that you would ordinarily only see in a Hollywood Blockbuster.
Can you tell us more about the previz and postviz work?
We set up a small previs team over with the production in Vancouver to help with visualising the first views of Bay City, and the Aerium – the world above the clouds.
As for postvis work some of this was handled by the client side editorial for some of the simpler shots and sequences, but for larger shots it was mainly a case of starting the shots and getting lots of grey scale blocking renders out to test in the edit.
Bay City is a massive environment. How did you work with the art department?
Carey Meyer, the production designer, provided us with lots of concepts and drawings, and I worked closely with him presenting him 3D models of his designs for his input.
What kind of references did you receive for Bay City?
Film Noir mainly. Much reference by both Laeta and Miguel was made to classic noir films such as THE THIRD MAN, TOUCH OF EVIL and THE LADY FROM SHANGHAI.
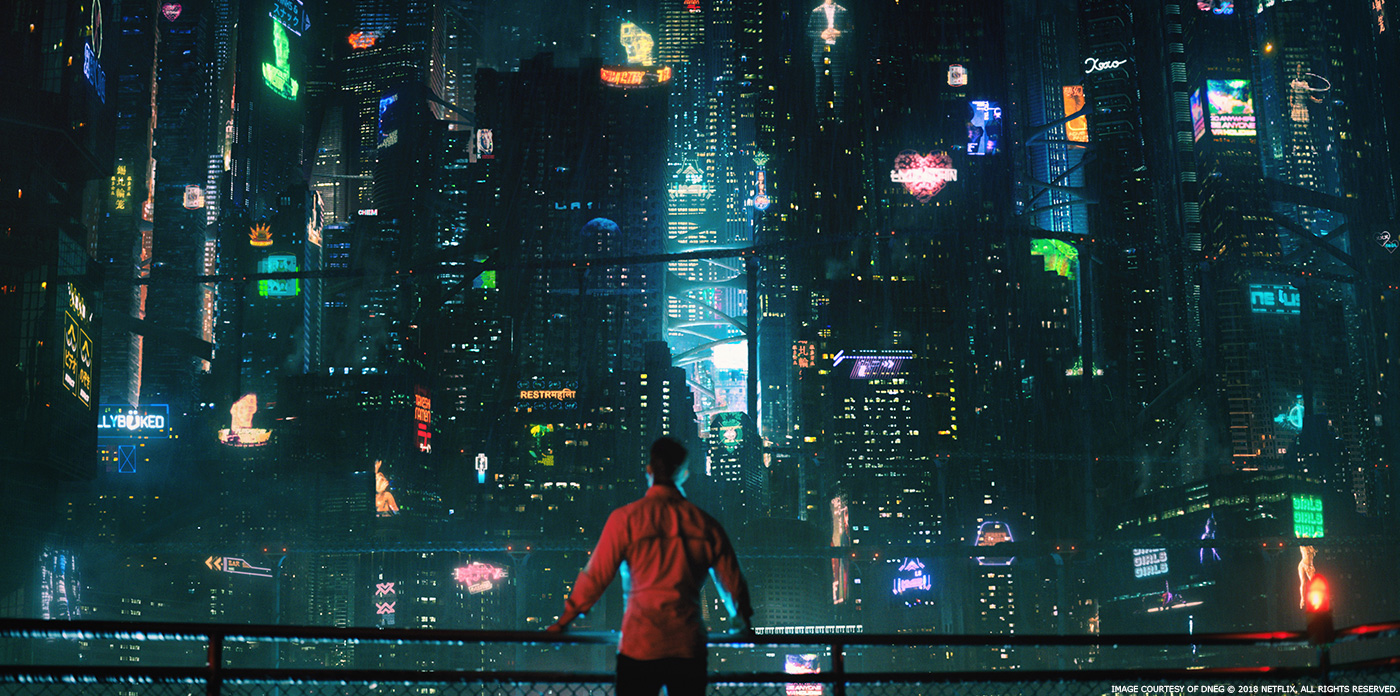
BLADE RUNNER featured as well – there is much in AC that pays great homage to the Ridley Scott 1982 classic. The film is beloved by Laeta, Everett Burrell the VFX supervisor, and Miguel the show’s Ep101 director.
In Miguels style guide book there were a number of key classic moments from the film, such as Deckard standing on his balcony overlooking future LA. AC paid homage to this in the shot of Miriam Bancroft standing on the penthouse balcony of the Raven hotel overlooking Bay City. The there were lots and lots of concept sketches and paintings.
Can you explain in detail about its design and its creation?
The San Francisco area was created using a procedural city generator, producing a city populated with over 23,000 buildings made up of over 100 custom made structures. A large majority of the buildings had interchangeable modular sections and roof dressing to help create the scale and magnitude required for this futuristic landscape, varying from 10 metres at their lowest along the trenches of Lick Town to way above the cloud line measuring at nearly 3 kilometres high to create the meth level scenes. Linking the two areas of interest across the bay was the famous Golden Gate Bridge, built to scale but populated with over 24,000 containers to set the scene of a network of slums for the less wealthy population of the city. To help sell the chaos and business of the city, generic car traffic from background to hero vehicles were created and animated flying through the city and alongside a network of pill lines and over 135 holograms.
As part of our Houdini layout tools we created a scatter system for the Golden Gate Bridge containers. It works by modelling the overall shape and adding a guide curve for the direction. A point cloud is created inside the general shape based off the guide curves. It is also easy to create some holes in the curves to create the gaps that we see in the final result. We could control the various sizes of containers and also have some rotated 90 degrees to the guide curve direction. The containers were then dressed with extra small object details such as supports, wall and roof dressing. The point cloud was then rendered with Clarisse and Mantra.
Can you tell us more about the lighting challenge?
The biggest challenge was creating interesting lighting in a city that is covered by a cloud blanket, so you can’t rely on a the sun to give you your shadows shape and form.
Which place was the most complicated to create and why?
All of it!
The City has many holograms and screens. How did you design and animate this content?
We brought in the graphic design team at Rushes, who have since joined us here at DNEG, to help design and animate this content. They provided us with lots of bespoke billboard adverts as well as a kit of parts that could be combined to create lots of variation. These were then dressed into the city.
How did you populate the city with vehicles and crowd?
The crowds were all live action so there was no crowd work. The city was never supposed to have lots of vehicles, so we only had to add a few that could be hand animated when seen close up, and any seen in the distance were part of a particle instancing system, where the vehicles could follow predefined paths through the city.
The Meths are living on top of luxurious towers. How did you create these places?
The key Meth structure that we had to create was Bancroft’s residence Suntouch. The design and realization of Suntouch was a big undertaking. The concept was for a huge building (900 meters tall) rising above the clouds.
A lot of time was spent in research and concept. Suntouch is a highly characterized building. Its aesthetics were required to embody two distinctive features of the uber rich Bancroft family: on the one hand elegance and magnificence, on the other the power and control exerted by its owner on the whole city. In order to represent the union of these two features we mainly took inspiration from the sinuous and elaborate architecture of Zaha Hadid, which is both elegant and structured.
So the whole building structure is constructed on three concentric shells, perfectly entangled within each other in a complex connections pattern. Inside is the nucleus of the building: the bright neural network that controls the whole city.
The existence of a strong class system in the society is another important concept underlying Suntouch’s aesthetics: it’s not by chance that the building base is dirty and battered, while its top is shining in a pristine and bright white.
The realization of Suntouch was a demanding task also from a technical point of view. Being able to model the building with such a complex curve shape without giving up on the structural consistency presented an interesting modelling challenge. We inserted supporting structures, pillars and buttresses that would justify its structural integrity without affecting the natural harmony of its forms.
A lot of effort has been put into details too: the entire surface of the building is covered with rectangular panels. It wasn’t easy to find a way to distribute these square shapes within curvilinear surfaces, so we had to conceive a specific design for this. Moreover, due to the tower’s considerable height and the varying camera distances, the building has been divided into five different areas and the panels have been made using two different techniques according to the needs: a displacement map for distant camera shots and modelling for close-ups.
In my opinion the design and creation of Suntouch was an intense and technically sophisticated challenge which ultimately graces the show with a most distinctive asset – the building becoming a character in its own right.
They are above a sea of clouds. How did you handle the clouds creation and animation?
The clouds were in a wide variety of aerial shots, so they needed to be easily manageable for quick layout and the possibility for artist-friendly customization.
The clouds have a special shading model, one that is quite different from normal smoke. Light scatters through it in a heavy anisotropic way, which means a special shading model is needed.
Luckily there is a lot of research that has been done on the subject, notably some very cool tests conducted by Matt Ebb. By plotting the data of Mie scattering on a texture, and interpolating that against the angle of view between light and camera direction, we could effectively recreate some optical effects such as fogbow or glory into a AOV (render pass).
Shaping the clouds was done by using the VDB volume shaping tools of Houdini.
Basic geometry, such as spheres, cubes and pyramids were merged together to form random shapes. Their features were then distorted by using different noises to stretch them out.
Once interesting shapes were created, they were converted into vdb volumes and shaped to give them more cloud like features. 3D noises of varying sizes were then introduced in their density fields to allow light to scatter through them in interesting ways. Certain regions of interest were chosen and distorted along custom created velocity fields to give the illusion of wind affecting their shapes.

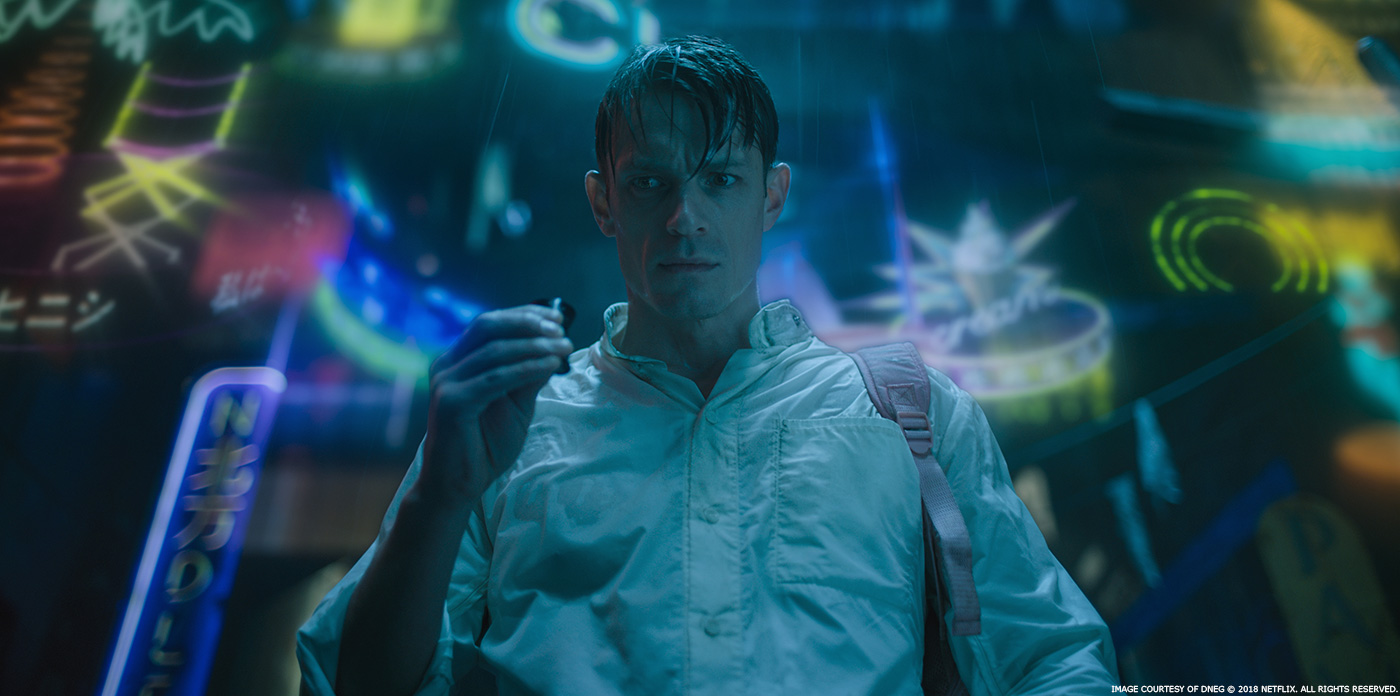
Sometimes the hero can see through the walls. How did you design and create this effect?
This effect is called Envoy Intuition. In Episode 1 there’s a scene in the a sleazy hotel on Harlan’s World where Kovacs first uses his Envoy Intuition to detect the protectorate soldiers creeping up outside of his room, ready to attack. High frame rate, slow-motion footage of the soldiers was processed with gaussian filters and a matrix to create a stylised, minimalist, line-based representation of the image. The finer details were then simplified and distorted to create an intricate looking webbing effect, which was used to add a further level of complexity to the more line based imagery, whilst still keeping the abstract feeling we’d created.
The build up of the image during Envoy Intuition is triggered by sound and vibration, so the footage was analysed for such moments and then using masks created in 3d space we’d recreate these travelling shock waves and use them to reveal and build up the image, spreading out from these trigger points. Every new trigger reveals more of the image, layering it up in increasing levels of detail, complexity and brightness.
Each element within a shot was rotoscoped and placed accurately into it’s correct position in world space within Nuke’s 3d environment, which allowed us to create a 3D particle system and integrate it around the action, bringing extra depth and life to the scene.
An overall treatment was given to the final image, giving it a rich golden hue with severe chromatic aberration and lens distortion to further push the idea of Envoy intuition being something slightly supernatural.
Many times during the show we go inside the Construct. Can you explain in detail about its design and creation?
This was created by stitching together a series of fish eye images and then overlaying with various graphical treatments, both in Nuke and the final DI.
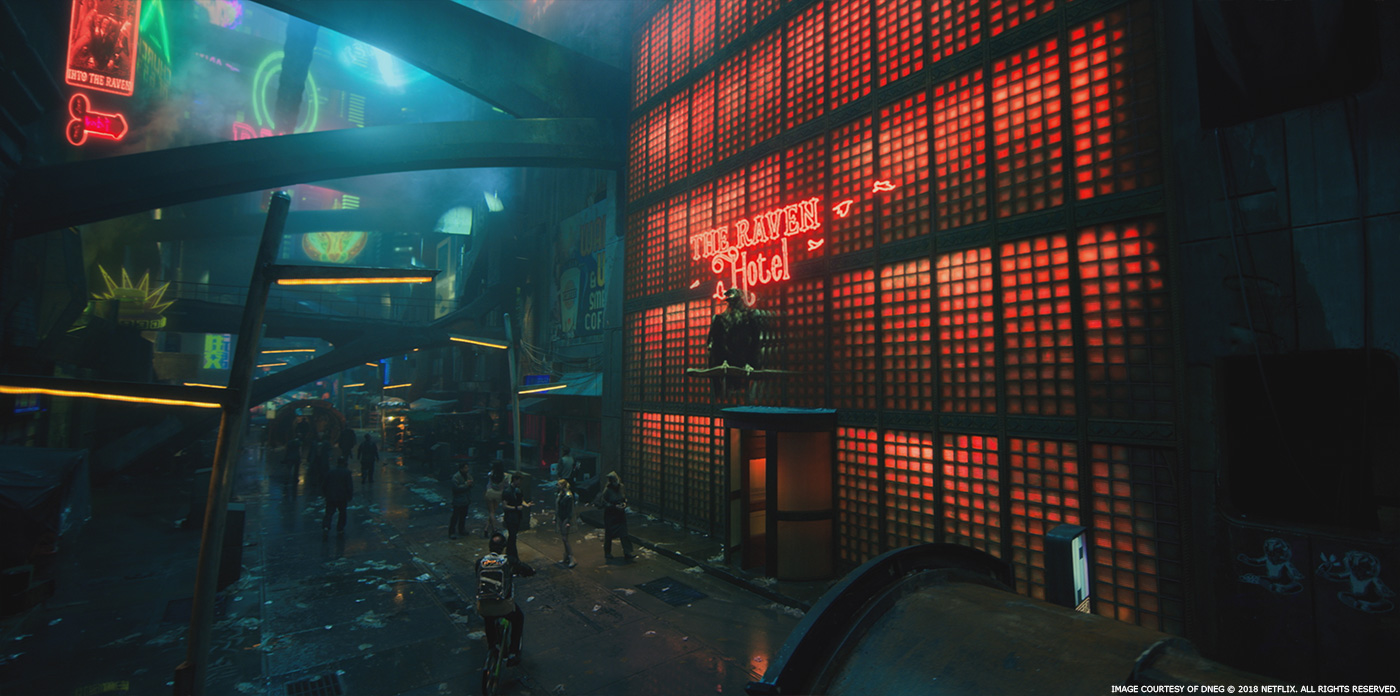
How did you design and create the character of Poe?
The apparition and death of Poe were enormous technical challenges.
Both Poe, the proprietor, and the Raven hotel are an Artificial intelligence construct based on the works of Edgar Allen Poe. Poe is a virtual representation in human form of the hotels personality. It is considered old technology in the world of AC – Kovach is Poe’s first guest in hundreds of years.
The brief/concept for Poe’s apparitions and ultimate deconstruction demise was heavily influenced by the client’s fascination with an effect called “Teslaphoresis” where a tesla coil’s electric field causes self-assembly in carbon nanotubes.
The brief for this effect was that Poe’s death should be influenced by this particular look and needs to work like an inverse Teslaphoresis, where structures breakdown rather then grow. We searched for ways to achieve this reverse “growth”-effect and after quite a bit of testing, we ended up using a infection based growth-algorithm as a solution to slowly erode Poe away.
The evolution of Poe’s disintegration took many iterations and different approaches were explored (sand simulation for erosion, pixelated cube-based looks, different variations for our internal elements etc.) until the actual look emerged.
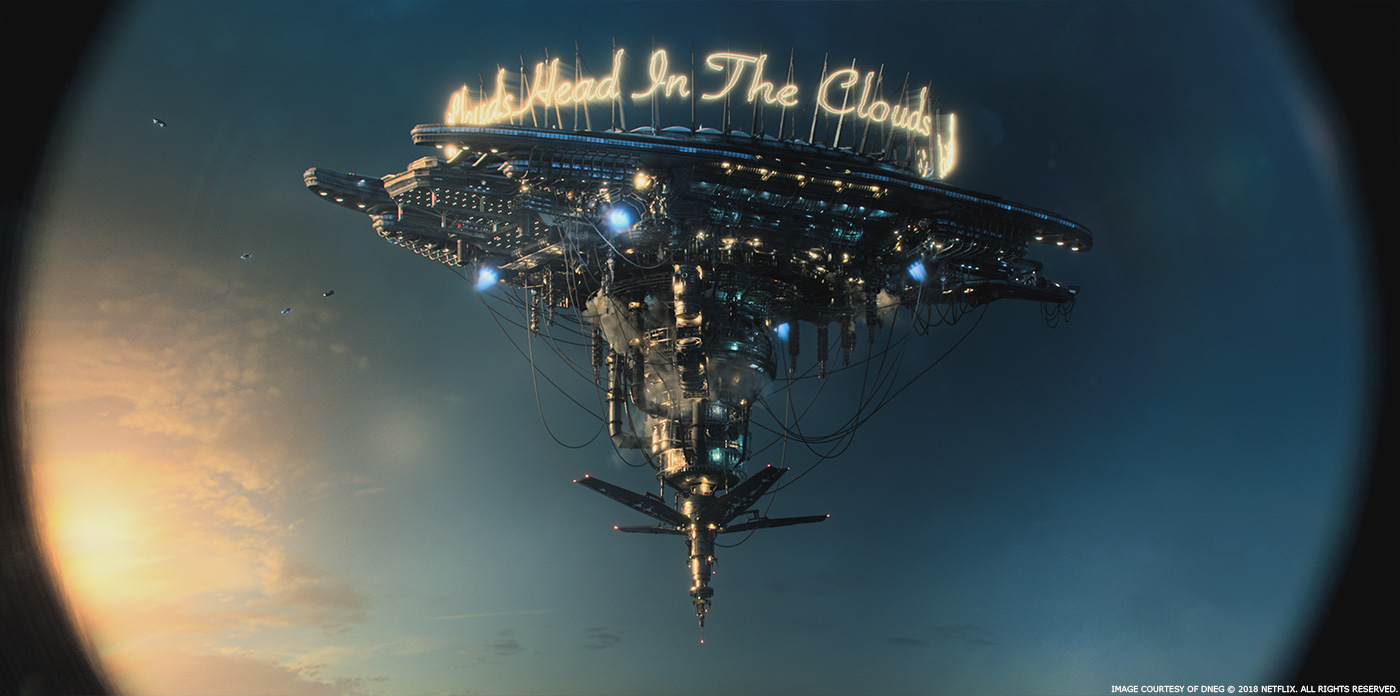
Can you tell us more about the huge final explosion of the sky palace?
Head in the Clouds is a giant brothel in the sky where, if you are rich enough, any and all your fantasies and desires can be catered for. This was a repurposed weather station – a mixture of both industrial design/function with a grande façade. In creating HITC, we started with the concept painting that had been provided to us by the client – this was great for starting to block out the overall look and silhouette.
This final shot of its destruction was a hero shot in every sense. Right from the briefing it clearly seemed like it’d take at lot of time to get this right
The premise of the final shot was as follows.
A 500m long orbital platform smashes into water at a -deeper than normal- SF bay, at high speed. Camera pulls out while a flying car escapes. The splash and structural destruction fills up the frame from corner to corner.
There were some very particular challenges for the 3D team on this shot:
The very large spatial scale implies certain constraints for simulations, if we wish to keep such perception of scale. We wanted to keep some parameters as they are in real world (i.e. gravity). That’d give us consistency over the different types of dynamic rigs. For that we had to change a few things over an standard workflow of water simulations. i.e. the fact that a splash of water travelling at high speed, in real world, vaporises over time due to friction against air. That’s something a CGI water simulation doesn’t handle right out of the box.
Huge water and white water simulation for +10 secs. That’s longer than average. We had to use the most powerful computers in our farm for this task. The turnaround time on near final versions was of around 50h for the water and 30 for white water (after setting up clustering for distribution across these powerful machines).
The destruction of a humongous spaceship. It was very large, mostly hollow, articulate and made of seemingly flexible materials. The final model consisted on 28 million polygons and over 200k objects. First runs with rigid body systems didn’t look totally convincing due to shock propagation at this scale so we had a try run with Houdini’s Finite Element solver. It handled this one better, deforming the model before breaking it up, so that’s the one that finally went into the shot. A typical turnaround was 16h with the full resolution model, and around 6h for the proxy.
It was for a 4k final rendering. The need for detail near and far from the camera while keeping continuity between terms was expensive in simulation runs, rendering time, hardware/farm. In order to render this within the memory limits of the main farm pool some elements, like particle count, had to be tightly adjusted. We made some fine-tuning and post processing on the white water, going from near 200m particles to around 100m without losing significant detail.
The compositing of the shot also came with its own particular set of challenges.
The shot was built with 3D elements from lighting and FX and 2D elements from DMP and Comp. There were no constraints on the shot apart from the need to feel like they are in the same world as similar shots in the other episodes. But episode 10 was the first time we were seeing the city in the early morning/dusk.
The main approach to compositing the shot, was to build the shot from the back forward. Setting the look of the sky and letting that affect everything else in the shot. For example the sky was blurred and mixed through everything in the shot to give a really nice depth haze.
Lighting used a lower resolution placeholder sky to light the scene in Houdini. The DMP department then produced a high-resolution version to be used in the final comp. While the DMP department were painting up the new sky, they added in lots of extra detail to emphasise the sun catching the bottom of the clouds, to give the shot more dynamic details. A slight grade was then added in comp to add more shape and we added photographic effects like blooming and light bleed.
Where the sky used was early morning/day break we made the choice to approach the shot as if the environment was exposed for the sun, which would naturally drop the shadow side of any object into darkness.
The main explosions were rendered without any holdouts. One of the main benefits of using deep renders in the shot meant we didn’t have to keep rendering everything in the shot if one asset changed. A prime example was the HITC – the ship was being updated almost till the end.
The water was made up of four different elements:
- The main water surface
- The crash wave water surface
- The white water
- Fine water mist
Another benefit of deep was the main water surface from the crash wave was poking through the white water and creating lots of hard shapes, which didn’t look good. We masked out the crash water surface in deep from the white water to remove the hard shapes. Having each part of the wave separate allowed us to tweak the wave transparency on the fly.
What was the main challenge on this show and how did you achieve it?
All of it was a huge challenge! It was the largest TV project ever undertaken by DNEG with 1,585 shots. The show was filmed predominantly in 5K with some key shots shot at 6K and then delivered back at 4K in HDR. All in the cinematic vision that was set out at the beginning.
We really achieved this by good old-fashioned teamwork, communication and collaboration between all aspects of the production.
What is your favourite shot or sequence?
My favourite character was Poe, but one of my favourite sequences is ironically his death, due to its huge technical challenge. My favourite shot I think has to be the shot of Miriam standing on the balcony of Kovach’s penthouse apartment in Ep02.
What is your best memory on this show?
All of it! It has been one of the best experiences of my many years working in the VFX industry. Especially working with Everett Burrell who was fantastic fun to work with along with being a huge inspiration and mentor.
How long have you worked on this show?
18 months.
What’s the VFX shot count?
1,585.
What was the size of your team?
180 artists plus our invaluable production staff, editorial team and all our background support in R&D, tech and our studio teams.
What is your next project?
Various projects that are still a bit top secret…! But I’m hoping that there will be ALTERED CARBON Season 2 – fingers crossed!
What are the four movies that gave you the passion for cinema?
STAR WARS – I think this features on every child of the 70’s list!
BLADE RUNNER – the production design blew me away when I first saw it.
DR. NO – all the Sean Connery bond movies in fact!
THE WIZARD OF OZ – I still love it to this day.
All these films inspired my love of film and cinema, but my love of VFX actually came from the classic TV series of the 60’s, 70’s and 80’s, like DR WHO, STAR TREK and BLAKES 7.
A big thanks for your time.
ALTERED CARBON – TRAILER
ALTERED CARBON is streaming now on Netflix.
// WANT TO KNOW MORE?
DNEG TV: Dedicated page about ALTERED CARBON on DNEG TV website.
© Vincent Frei – The Art of VFX – 2018


