Marcus Taormina, who previously discussed the visual effects of Army of the Dead in 2021, now shares his insights into his latest collaboration with Zack Snyder on Rebel Moon – Part One: A Child of Fire, shedding light on the various challenges and the visual effects work.
What was your feeling to enter into a brand new science fiction universe?
I recall reading the almost two-hundred some-odd pages of the script and being very excited but also feeling super overwhelmed just thinking about the sheer amount of characters, creatures and worlds we had to create. I was able to compartmentalize, then divide and conquer each and every one of those technological, design or creative challenges before we started shooting. I remember early into shooting I had an epiphany; we actually would have maximum creative freedom across both movies because we weren’t beholden to an established property or visual language, which was liberating. It has been a fun journey and a great exploration of a new property and the new visuals attached to it.
How was this new collaboration with director Zack Snyder?
This collaboration with Zack felt very familiar, but hit a bit different because we had so much creative to figure out in a relatively short amount of time before shooting. I was lucky enough to learn very early on about the project as we were finishing Army of the Dead and was able to carry over our established shorthand of aesthetics and shot design right away. This was helpful in translation of his storyboards, concept art, creature design, environment creation and creative ideas that popped up in post, and made it easier for me to shape the shots more quickly than would have taken with a new director. There was also an immense amount of trust between us that had developed from being in the trenches together, and that made it easier to execute certain ideas without needing to schedule creative downloads. It was also my second project with Zack acting as both the director and DP, which resulted in some efficiencies between us when we talked about camera dialogue, color palette and lighting of our fully digital shots. Creating worlds this dense with creatures, characters and lore takes a ton of energy, and I was glad to have the opportunity to work alongside such a visionary and energetic director like Zack once again.
How did you organize the work with VFX Supervisor John DesJardin and your VFX Producer?
During pre-production, production and front end of post-production, David Robinson took the role of VFX producer. He was integral on the distribution and decision making from not only a budgetary standpoint, but also a creative standpoint as we worked in lock-step through the process. You have to remember, this project started as one, long feature and blossomed into two separate parts, eventually splitting again into PG-13 and R-Rated versions of each part, resulting in four movies to break down, budget, and allot resources. David helped manage all of this along with a very robust office, set and post team while I was on-set for the 150 day shoot. When we got into post in January of 2022, it was apparent that we did not have enough hours in the day, or days in the week to turnover, discuss, and complete all of the material for each of the movies, so we proposed bringing on another team to help finish the remaining shots in progress for Part 1 while we moved onto focusing on the untouched Part 2 PG-13.
Once everyone finally agreed that another team was warranted, I had lunch with John “DJ” DesJardin to discuss his interest in finishing up and polishing the work we had been working on for the better part of the year. Because DJ had worked with Zack on many of his past projects, we knew it would be easier to get him up to speed because he knew Zack’s aesthetic already. Right around this time we also were starting work on the first major trailer that encompassed work from both parts, so it was a great opportunity to bring both DJ, VFX Producer Tamera Kent and their team up to speed on the lore, look and visual language for both movies. As the overall VFX Supervisor I knew my obligation was to deliver four amazing looking movies on-time, and with a compressed timeline for delivery, that meant in this instance, I needed to pass the baton to DJ for Part 1 while I moved on and focused all my efforts on Part 2. It has been a fantastic, collaborative partnership that has been really gratifying to watch flourish.
How did you choose and split the work amongst the vendors?
I tried to be very calculated in how I divided the work because there was so much of it to go around. I wanted to make sure each creature, character, vehicle and world was given enough time to grow and receive its own exploration, and I felt if we parked all the work at one facility we might not see the iterations we needed and wanted as we developed the visuals. I also took into consideration established relationships and trust I had with certain facilities, but also opened up and took the opportunity to collaborate with new ones, too. The trickiest thing was dividing the work amongst both movies, giving more time and energy to think about resources and delivery schedules more than I ever have before, years out from our delivery dates. When we started in pre-production we were still feeling the aftermath of covid and resource issues, so we were also deliberate in how much work we were going to give, and needed to commit to our eight facilities on both movies.
Where were the various sequences of the movie filmed?
We were extremely lucky to be able to film the entirety of both movies in Southern California which seems to be a rarity nowadays.
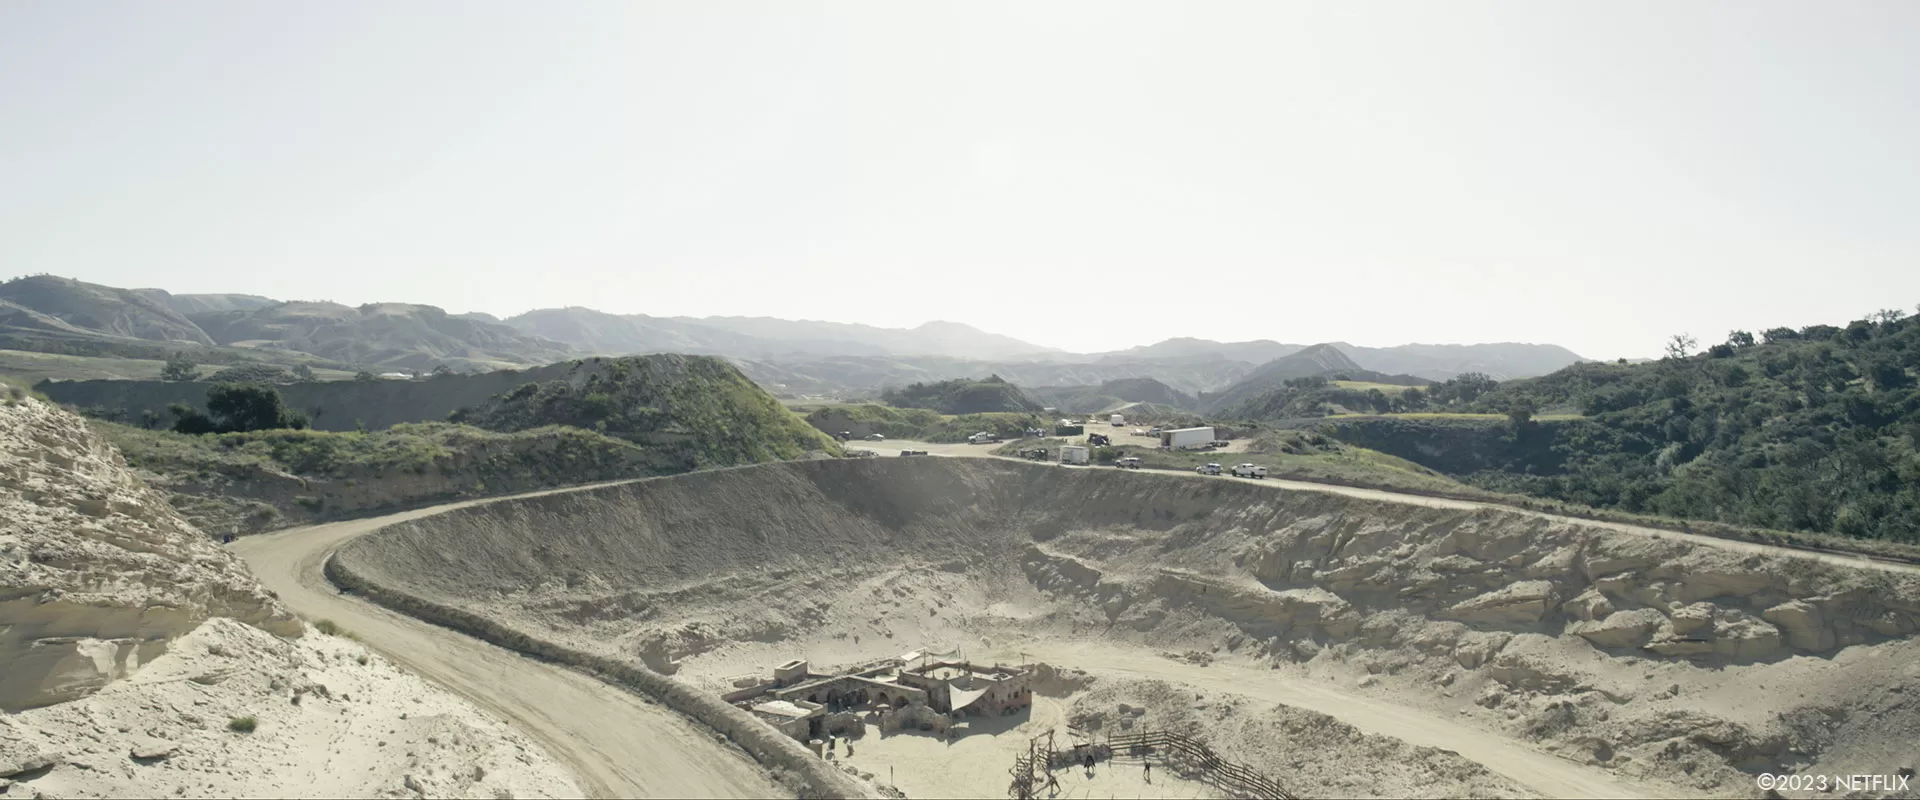
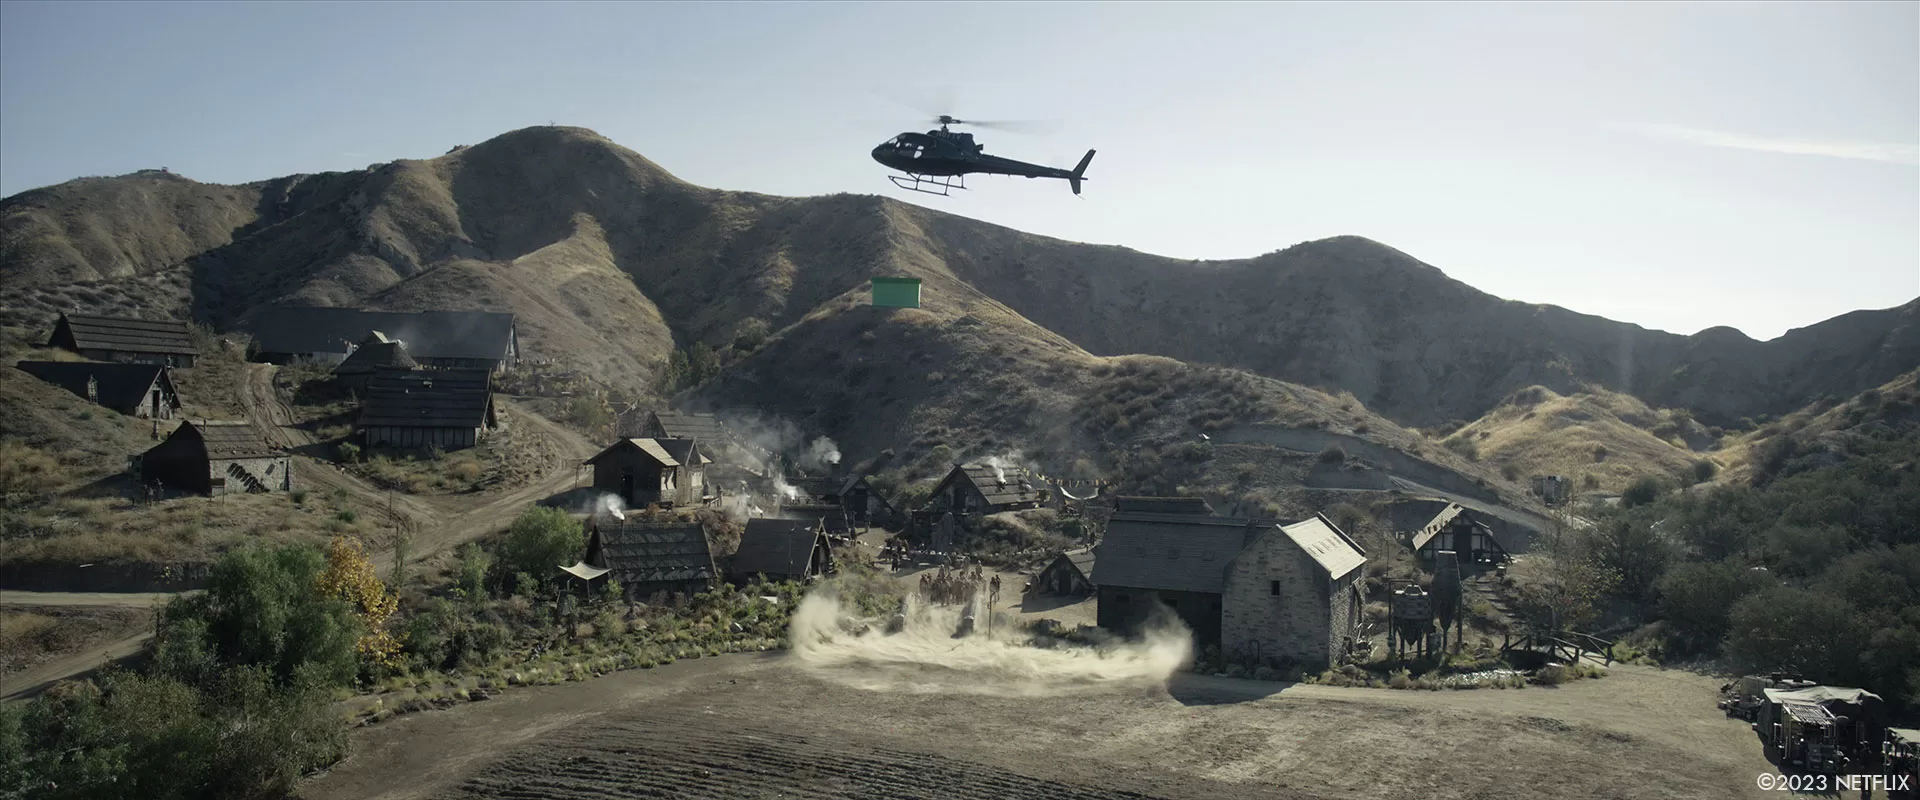
For Veldt, we scouted multiple locations, each presenting its own unique challenges. Each scout the department heads would imagine where each house was, where Kora’s waterfall was, where the Dropships would land, and of course where our practical field would end and all the digital extension would begin. When we finally nailed down our location for Veldt at Blue Cloud movie ranch in Santa Clarita, CA, we had a good idea of the layout because we had scouted four other locations beforehand, and knew what worked and what did not.
For Providence, Art Department and Construction built a small entrance gate and fence, street and fully detailed interior bar which we extended digitally in 3D for the exteriors, while the interiors were completely in camera. This was built on a smaller plot of land at Blue Cloud adjacent to the practical Veldt village. We maximized the remainder of the plot of land at Blue Cloud to film other sequences like the Journey to Providence shots, Kora and Gunnar campsite and the young Kora sequence meeting Balisarius, to name a few.
For Neu-Wodi, we found a great location at PW Gillibrand in Simi Valley, California where our Art Department built a small interior and exterior ranch and corral for Hickman and Beatice the Bennu, as well as a detailed interior of Kai’s Freighter’s cargo hold that was extended digitally on the exterior.
After we travel from Neu-Wodi to Daggus both in the movie and shoot timeline, we shifted the company to Sunset Gower Studios in Hollywood where we used the majority of the stages. The practical set builds, all of which included 2D or 3D extension work and/or full digital replicas in multiple states, included the environments of Daggus, Pollux, Sharaan, winter garden, great hall, dreadnought docking bay, bridge & cryochamber, muddy battlefield & pillbox, Kai’s Freighter bridge, Gondival docks, buoy and shore, Koi pond and the Motherworld palace and balcony.
Can you elaborates about the design and creation of the various spaceships, and the references and influences did you received for them?
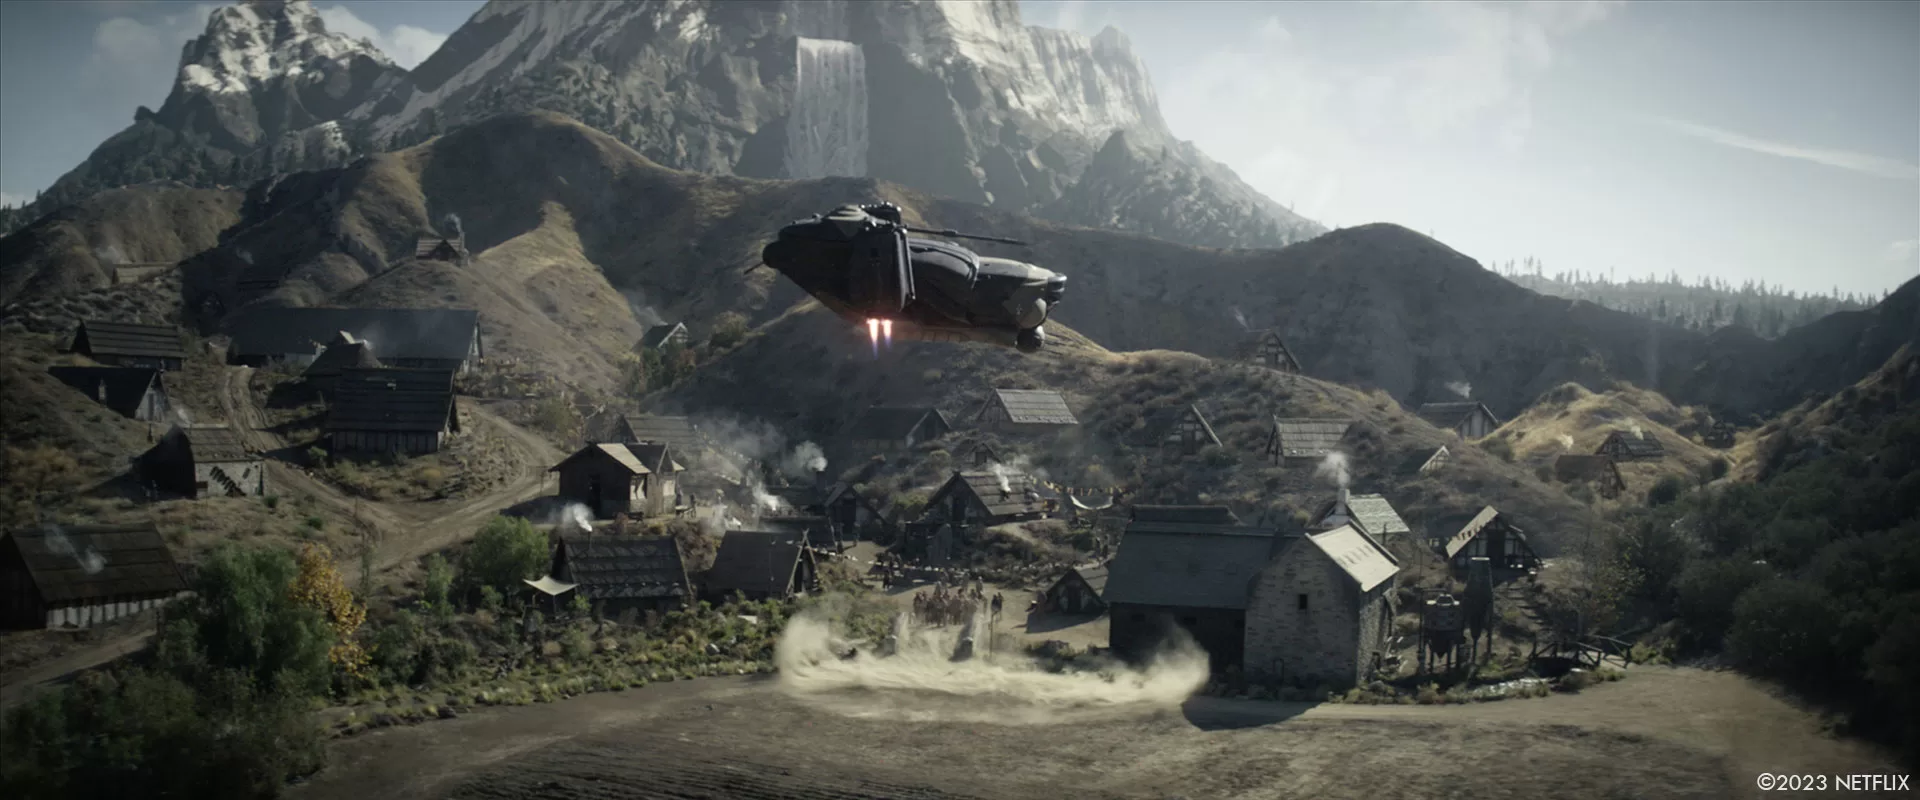
Spaceships seem to bring out the kid in all of us, and it was such an exciting opportunity to work on a film that included multiple ships of scale, look, and character. From a creative standpoint, the ship shots were some of the most enjoyable to work on. We tried as best we could with all of our ships to make sure they were animated with real world physics in mind. We made sure they had weight, but also had warble when they made their micro adjustments with the thrusters when landing or taking off. Our digital dust FX passes were driven by the rotor wash from the practical helicopter dust-off passes we shot on set, and all of our thruster FX designs were based on old footage of SR-71 engine tests. We really tried hard to have each of our ships become their own personalities on screen.
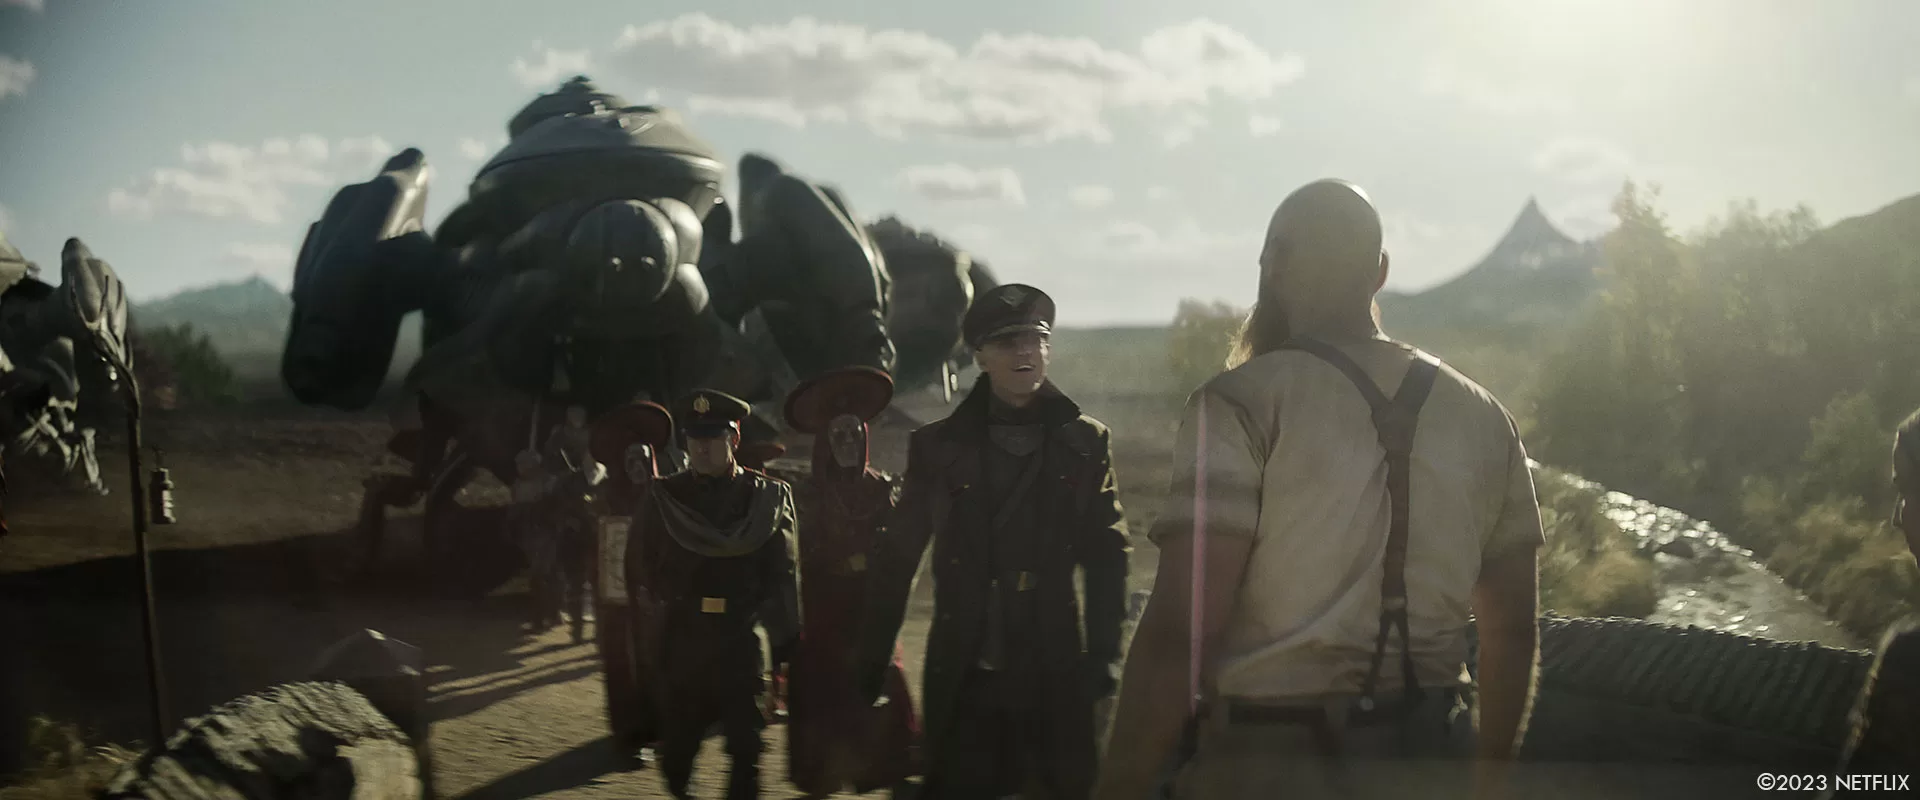
Imperium Dropships:
One of the first ships we designed were the Imperium Dropships because they were the ships we would be interacting with and seeing the most of throughout. As the Imperium wardrobe and lookbook became clearer, our Art Department started to sculpt some ships inspired by insect shapes. These shapes were eventually molded into the Dropships, with care taken to make sure there was enough artillery mounted on the craft to look and feel like a war machine. When we started to really break down the action in script that took place in or around the Dropships, we made a creative choice to build a practical, full size Dropship. We enlisted the Aria group, who are usually responsible for designing and building prototype vehicles, to build one Dropship that, with the help of our lighting and special effects teams, had working internal and exterior lights and an articulating ramp. To have a tangible object for the actors to see and touch was invaluable; it also made my job a bit easier as I was able to explain what part did what as we blocked out the landing and takeoff shots throughout the shoot. From a post perspective, it also gave 1:1 lighting reference when we had to add additional Dropships or CG extensions to the proxy pieces in certain scenes.
Kai’s Freighter:
This bad boy never really changed too much from the initial design. It was designed to be a rust bucket of sorts, a very unwieldy and temperamental ship. The base idea was that the Freighter was a cargo transport that took design cues from many of the modern container ships. We kept the color palate very neutral in earth tones and caked on multiple layers of scrapes, dirt and rust. Once we got into animating the ship, we added multiple degrees of axis and movement of the thrusters on the back and sides of the ship to use as stabilizers and side thrust when needed. The best in-shot example of this is the landing at Neu-Wodi when one of the engines putters out, you can see the ship start to sway off course, only to redirect when it fires back up. We found basic use for the stabilizer fins on the left and right of the ship, and tried to make sure our ramp articulation differed from the Dropship ramps, but also made sure it wasn’t too busy.

Dreadnought:
The Dreadnought had many exterior iterations we explored well into post. As some of the other 3D set designs like the docking bay, bridge and cryochamber came into shape, we started to plot out where each of these sets lived in the greater layout of the 1.2 mile long ship. In post-production we were handed a WIP 3D model of the Dreadnought that we continued to refine based on notes during shooting, and new creative briefs. Zack really wanted the shape to feel like a Russian Submarine with every angle covered by some sort of artillery. Because it was designed after the Dropships, we tried to bring some of the rounded edges and bulbous shapes back into the hull design, while leaving some of the flatter, harder angles towards the edges of the ship including the conning tower area.
The Dreadnought design also had to feel large and threatening while at the same time consider function, as it needed bays for the infantry and military vehicles to enter and exit, and a separate containment bay for the Attach Launch. While we explored a multitude of color palettes and pattern schemes, we landed right back where we started: the cold, uniform elephant gray color. While we liked the color, we felt it needed to break up so it wasn’t so uniform, so we gave each panel water stains, scratches and imperfections throughout. Near the main cannons, we added scorch marks and caked on layers of oil and gunk. We never liked clean or sterile in any vehicle, environment or shot, and kept to that philosophy throughout. The thruster FX was based on the SR-71 reference but at a much larger scale, and we used the thrusters on the side purposefully, firing them to counteract the massive cannon fire.
Attack Launch:
The Attack Launch was a unique design that, at first, was very hard to translate into a visually pleasing animation. The ship had a unique shape, and depending on the velocity and situation for travel, would fly horizontally or vertically. This was also another one of the ships that we needed to build to tie back into the small set pieces of the cockpit and exit ramp that we see throughout the Gondival sequence. We ended up changing some of the paint scheme during our lookdev to be more in line with some of the color palette of the old guard soldier uniforms to set it apart from the Dreadnought look. When it came to battle FX and animation, we wanted the cannon fire to feel similar to the Dreadnought’s, but with added ability to fire larger caliber tracer rounds as we knew it would be in an aerial battle with the Insurgent Fighter crafts in Gondival. We knew we had to rig the Attack Launch for the destruction component of the third act, so we made sure that we built the interior to result in cool visuals.
Insurgent Fighter Ships:
The Insurgent Fighters, first revealed on Sharaan, remained quite consistent in the design. We had a ton of 3D and 2D artwork that we received from Kevin Ishioka in the Art Department, and when it came to physical set pieces, we had proxy green screen bucks that matched the 3D design curves. We digitally extended many of the cockpits, adding the glass canopies and exterior shells in almost every shot. For the handful we did not reskin entirely, we had a smaller practical shell that surrounded our performer that we recomposed in shot to add scope and scale.
In post, we really didn’t have to do a whole lot of design changes, and used that to our advantage, focusing our efforts on figuring out rigging and animation for the operation of the left and right struts and thrusters attached to the main fuselage. We also knew these ships would need to be rigged for destruction and explosion simulations, so we took the time to figure out where exactly the best point of impact and explosion would be to maximize the carnage. Many of these simulations were also tied to practical interactive light on set, so we needed to take that into consideration, back timing our animation across the cut in continuity to match the correct placement at time of impact. In order to delineate the different fighter pilots and teams of fighters, we ended up adding red, blue and green hand painted graffiti to each of the six ships that was inspired by aircraft nose art.
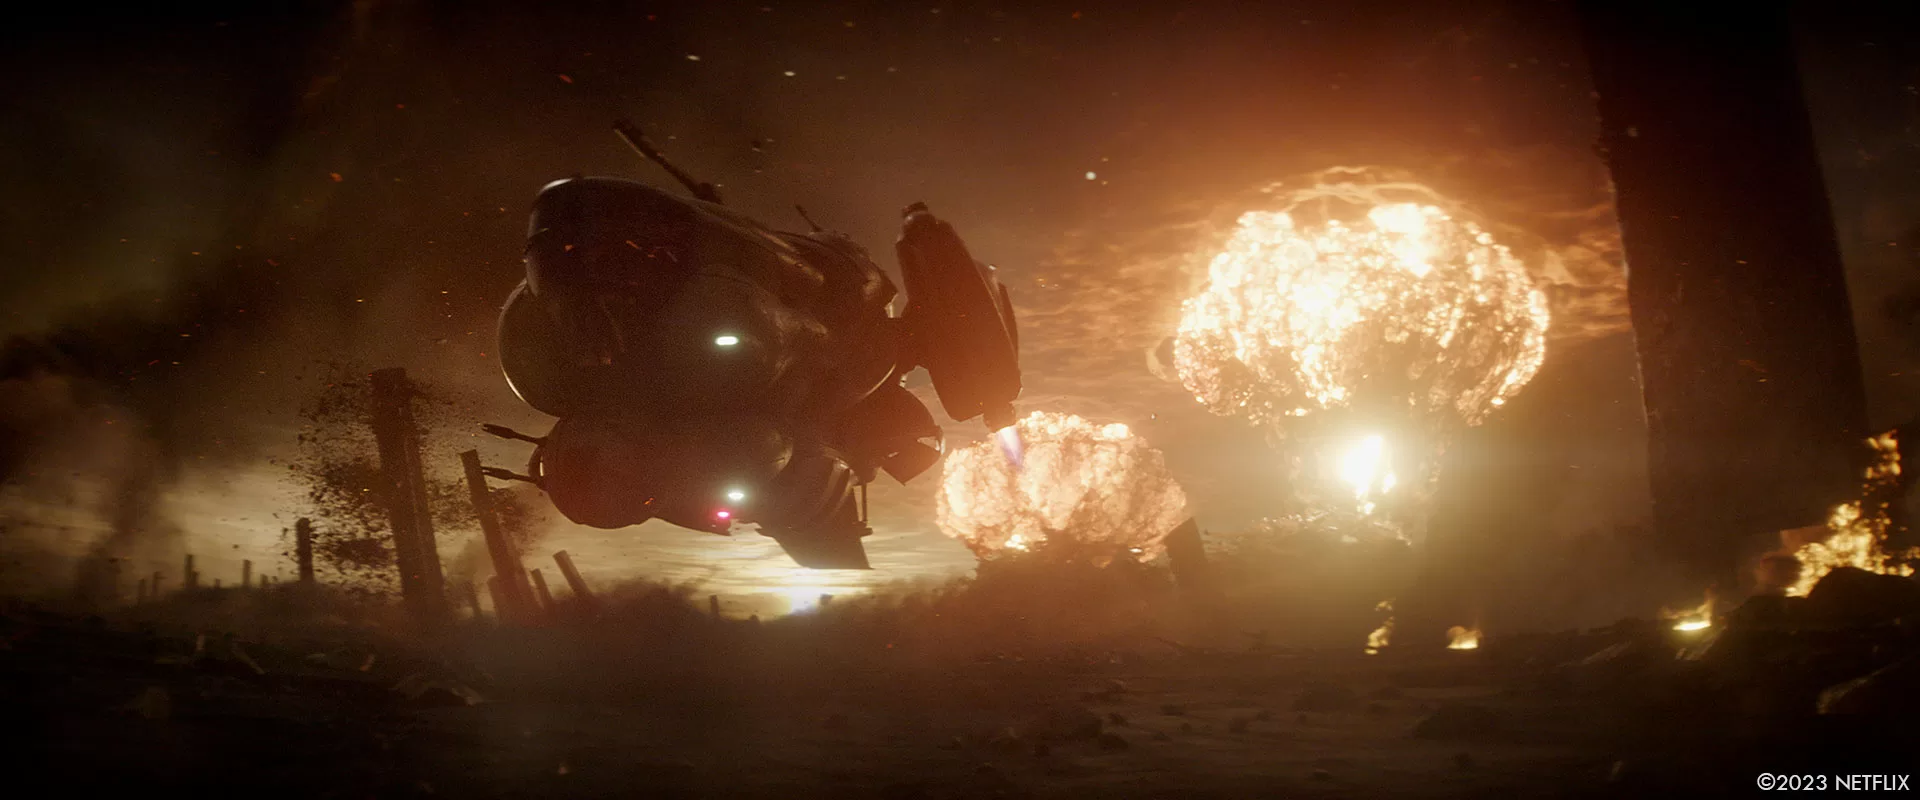
What did you enjoy the most by creating spaceships and also by destroying them?
Ha! I have to laugh at this one, and my crew can concur, but the most fun I had in post-production with the spaceship shots was vocalizing the landing and takeoff noises. I think the little kid in all of us loves to make pretend spaceship noises, and I just couldn’t help myself in dallies; Zack was the same way. From a destruction point, this one kind of speaks for itself. It’s pretty fun making objects explode. I always line up a bunch of references to review early on in pre-production with the facilities: videos of explosions from military tests or computer simulated explosions from iconic films and sequences. For Rebel, I was lucky to be able to shoot a week’s worth of elements including a ton of explosions at multiple framerates, up to 500fps, that we related back to and studied as our FX passes started to develop. Digital FX is a tricky discipline because, even with the correct parameters for the shot, the computer will do its own thing which, at times, doesn’t look right to the human eye, even though technically it’s sound. A great FX artist will notice those visual anomalies out of the gate, and also knows how to trick or manipulate the parameters to get it to behave wrong to look right. The destruction shots also tend to be the most exciting, occurring at pivotal points in the movie, and I always enjoy the audible gasps when the audience hears and sees a ship being blown out of the sky.
Did you use any miniatures?
Our Art Department built a handful of Veldt village houses for a show and tell that used to block out some potential shots before we got to location, but we never used any miniatures in any of the final composites. We did build and utilize a foam core model of Gondival for our day-to-day activities that was complemented by extensive blueprints of our layout of the Gondival docks because, in reality, we did the majority of the action of the main docks on one stage, on the same one-and-a-half physical docks everyday, even though in scene space, we were covering action from dock 1, 2, 3 or 4. The foam core model became very useful for our daily briefings to the cast and crew and gave tangible visuals to an otherwise greenscreen surround.
Can you elaborate about the environment work?
Creatively, we chose to infuse VFX elements within practical locations and set builds to complement one another. We worked closely with our two production designers to create the massive digital constructs of sequences, spanning thirty-eight environments of varying complexities. When possible, we tried to infuse organic qualities by covering these environments with dust, debris, and atmospherics to elicit feelings such as hope, despair and intrigue.
Veldt Village:
Once we found our location for Veldt, we scanned the entire lot ahead of construction and fed it back through to the Art Dept so we could have a near 1:1 match of the topography in the computer to lay out the buildings for physical and digital builds. That move also helped accelerate some of our early all-CG shots, and gave a great 3D representation of the village that we could tie into GPS data from Google Earth to be viewable at all of the facilities as we started our prelim discussions. The majority of the interiors and exteriors seen in the village of Veldt were built practically with rich details by our two amazing production designers Stephen Swain and Stefan Dechant. We build the same village digitally with details down to digital flora matching our physical flora established by our greens department. For shots looking towards the large green-screen wall, we extended digitally in 3D or a hybrid 2.5D approach was used. This view included day and night looks, with day needing multiple variations of CG wheat growth along the ground plane, and night needing our 3D giant gas planet Mara visible. For Mara lighting, our 728 team along with our talented team of rigging grips created a 120’ long by 6’ tall LED rig that cast the dirty orange light that mimicked our Urban Sodium gel that we liked from our camera tests. When the lighting rig wasn’t in use during the day, we could pull our green-screen rags across like curtains to pull clean chromakeys. The massive light source combined with our one-of-a-kind optics gave the compositing team at Weta FX a run for their money, but they did a fantastic job integrating all the unique characteristics of both the lenses and Mara’s gaseous surface back into the final versions of the shots.
Daggus:
We really wanted to feel the polluted, heavy industrial feel in the handful of shots we see out into the cobalt mining planet of Daggus. We kept warm source lights in our plates, but tried our best to bury the sun deep into the dense 3D atmospherics. Originally anticipated as a 2.5D build for a handful of shots, we ended up needing a more extensive 3D build due to last minute creative changes. We started with 3D smoke stacks and multiple tiers of tightly congested residential shacks. We introduced digital billboards and graphics to juxtapose the basic surrounds, and to add some more colors to break up the warm color palette throughout. When it came to animation, we tried our best to keep the backgrounds alive, adding one-off pedestrian ships, commercial flying trains, 2D crowd elements and hyperlifts throughout the frames.
Neu-Wodi:
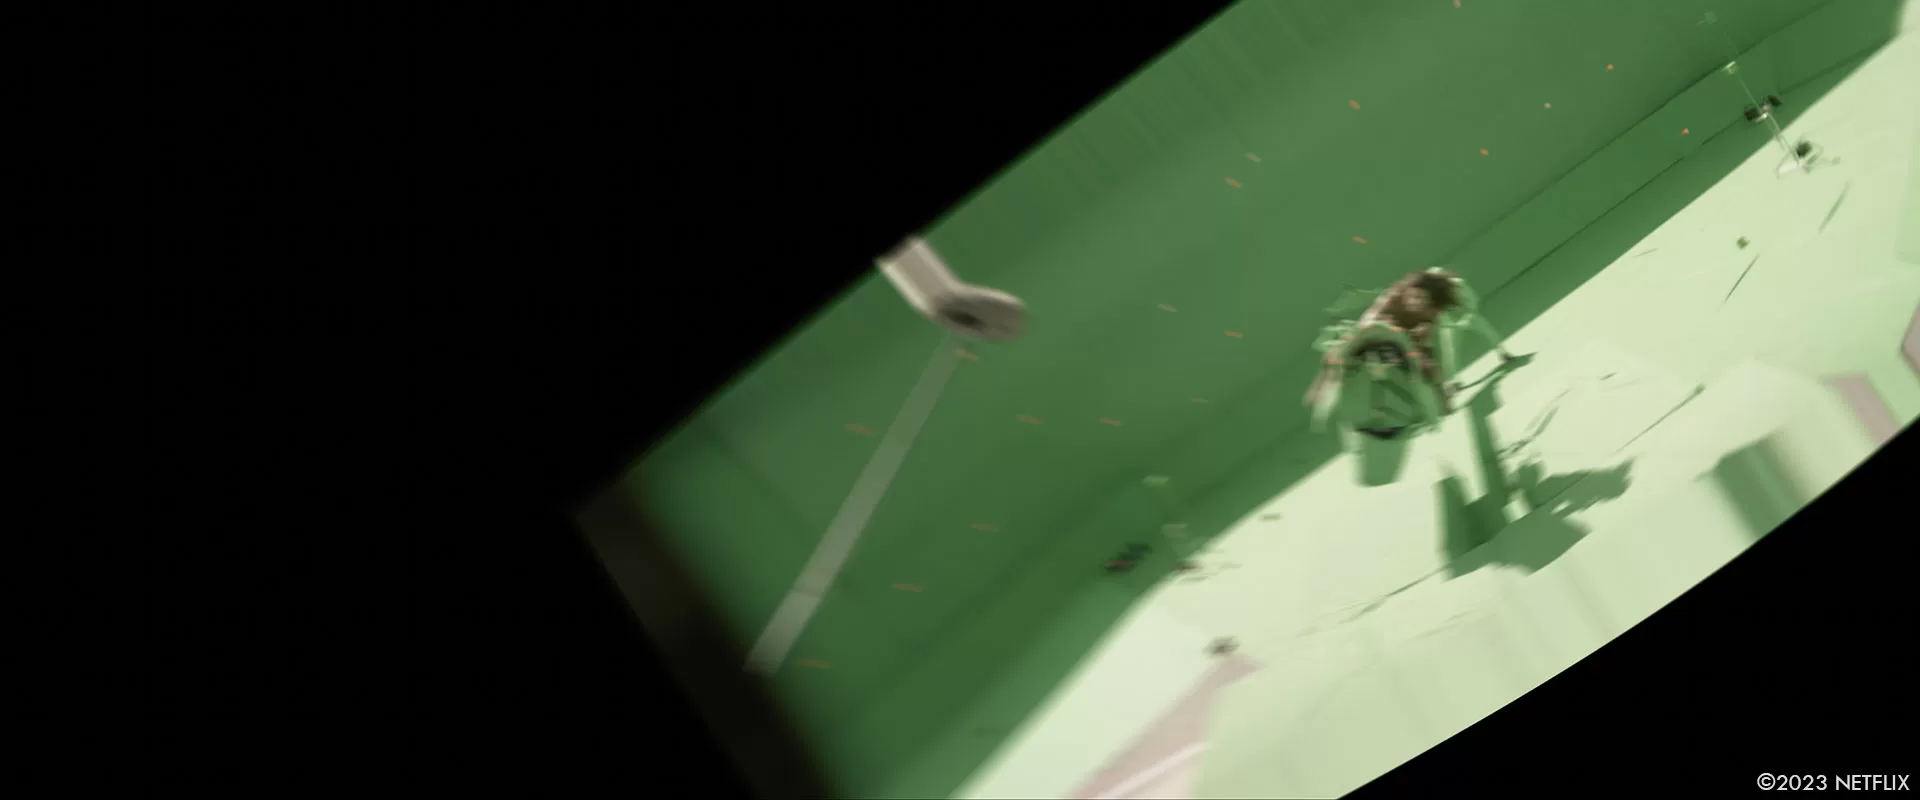
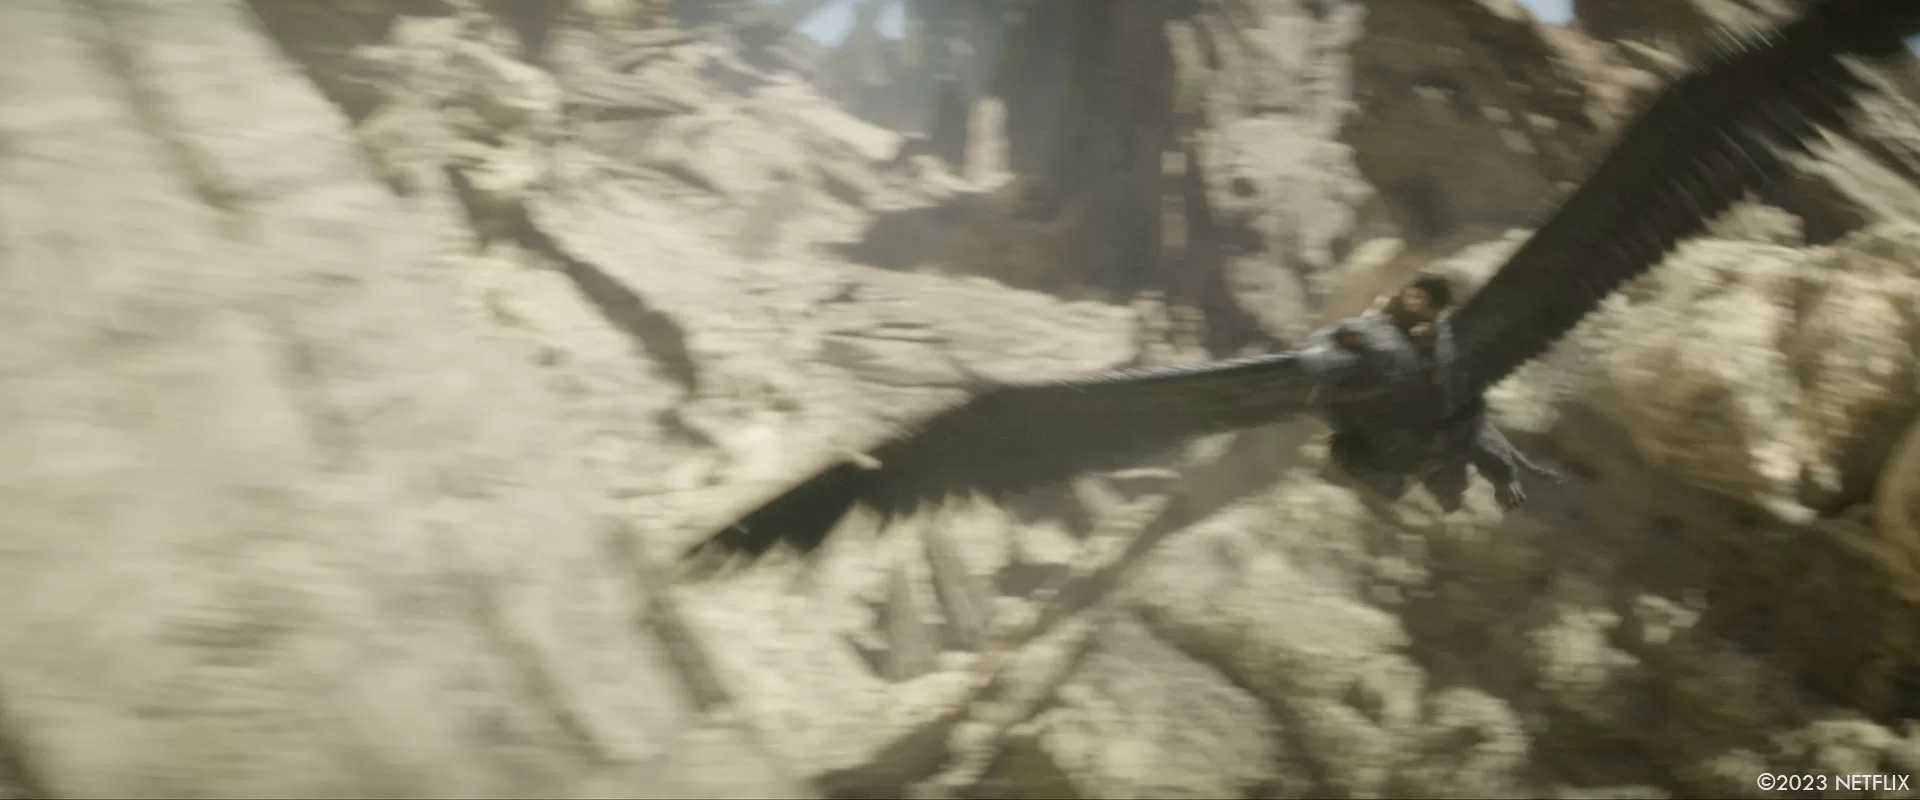
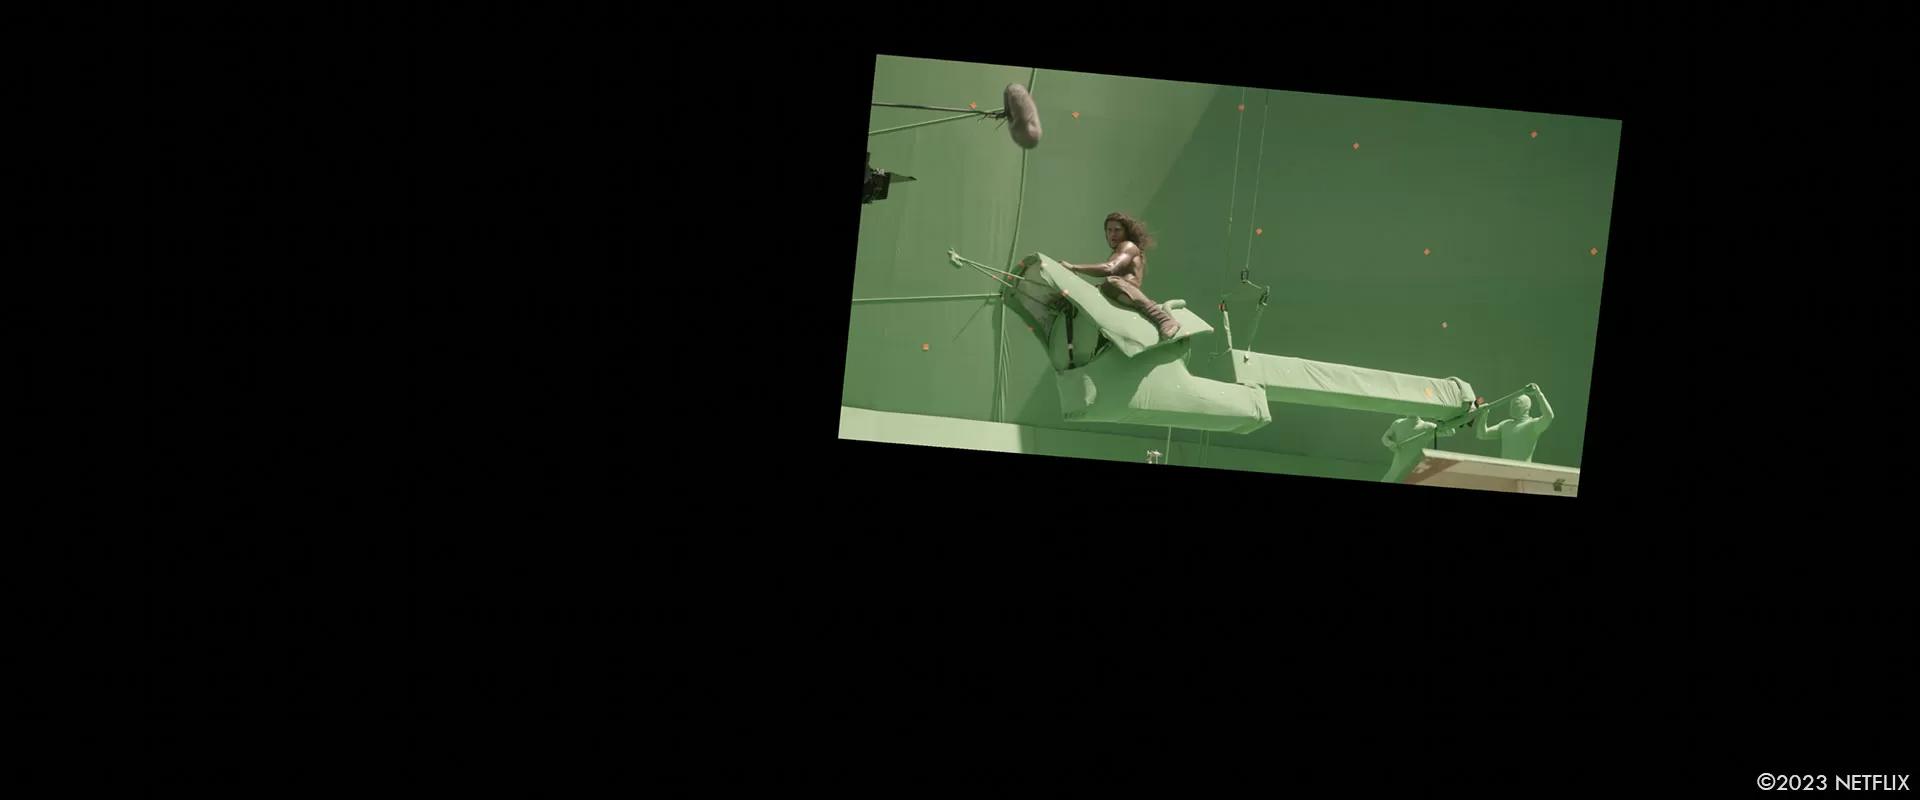
The majority of that sequence near or around the corral and ranch were in-camera with minor augmentation of the backgrounds. For Tarak’s flight, we sculpted an extensive 3D environment that mimicked the look and feel of our established ranch and surrounds. We shot elements of Tarak on an articulating suspended buck in a small parking lot at Sunset Gower studios for the majority of the flight shots, and used a hero digital double for some of the more extensive action in our all CG shots. A small frag set built in the back section of Blue Cloud was constructed for the bluff in which Tarak is thrown off of Beatrice, and the high-framerate shot of Tarak’s jump off of the bluffs edge back onto her back. Heavy CG debris and dust FX combined with harsh lens flares and seamless composites helped mesh the entire sequence together.
Muddy Battlefield:
In Kora’s flashbacks, we see her action throughout the muddy battlefield. This environment was inspired by the battle of Normandy, and it consisted of two very small set pieces we extended in 3D. We covered a lot of the ground action on our practical set piece with practical snow and explosion FX. This entire sequence was shot at a high framerate with dynamic ramps so our environment needed to hold up. We ended up shooting a wide master of the action that we postage-stamped back into our frame to really see the battle surrounding Kora. As we advance in the action, we jump to the pillbox set which is visible in the background of the battlefield shots. This was a small set piece on stage that we extended digitally with 2D matte paintings.
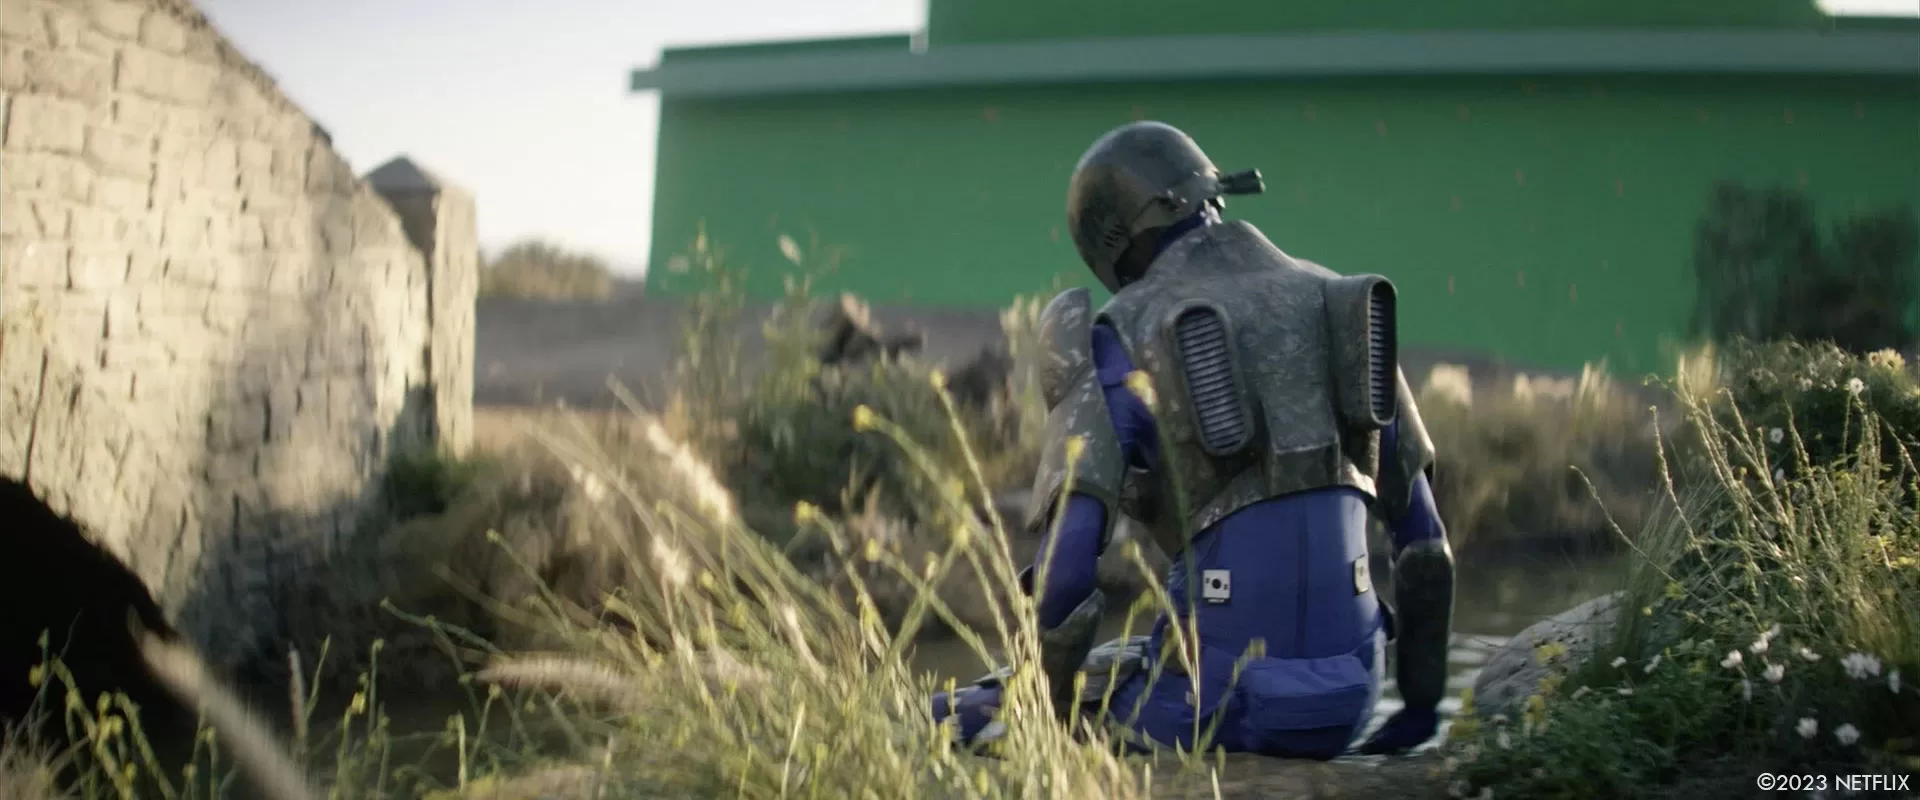
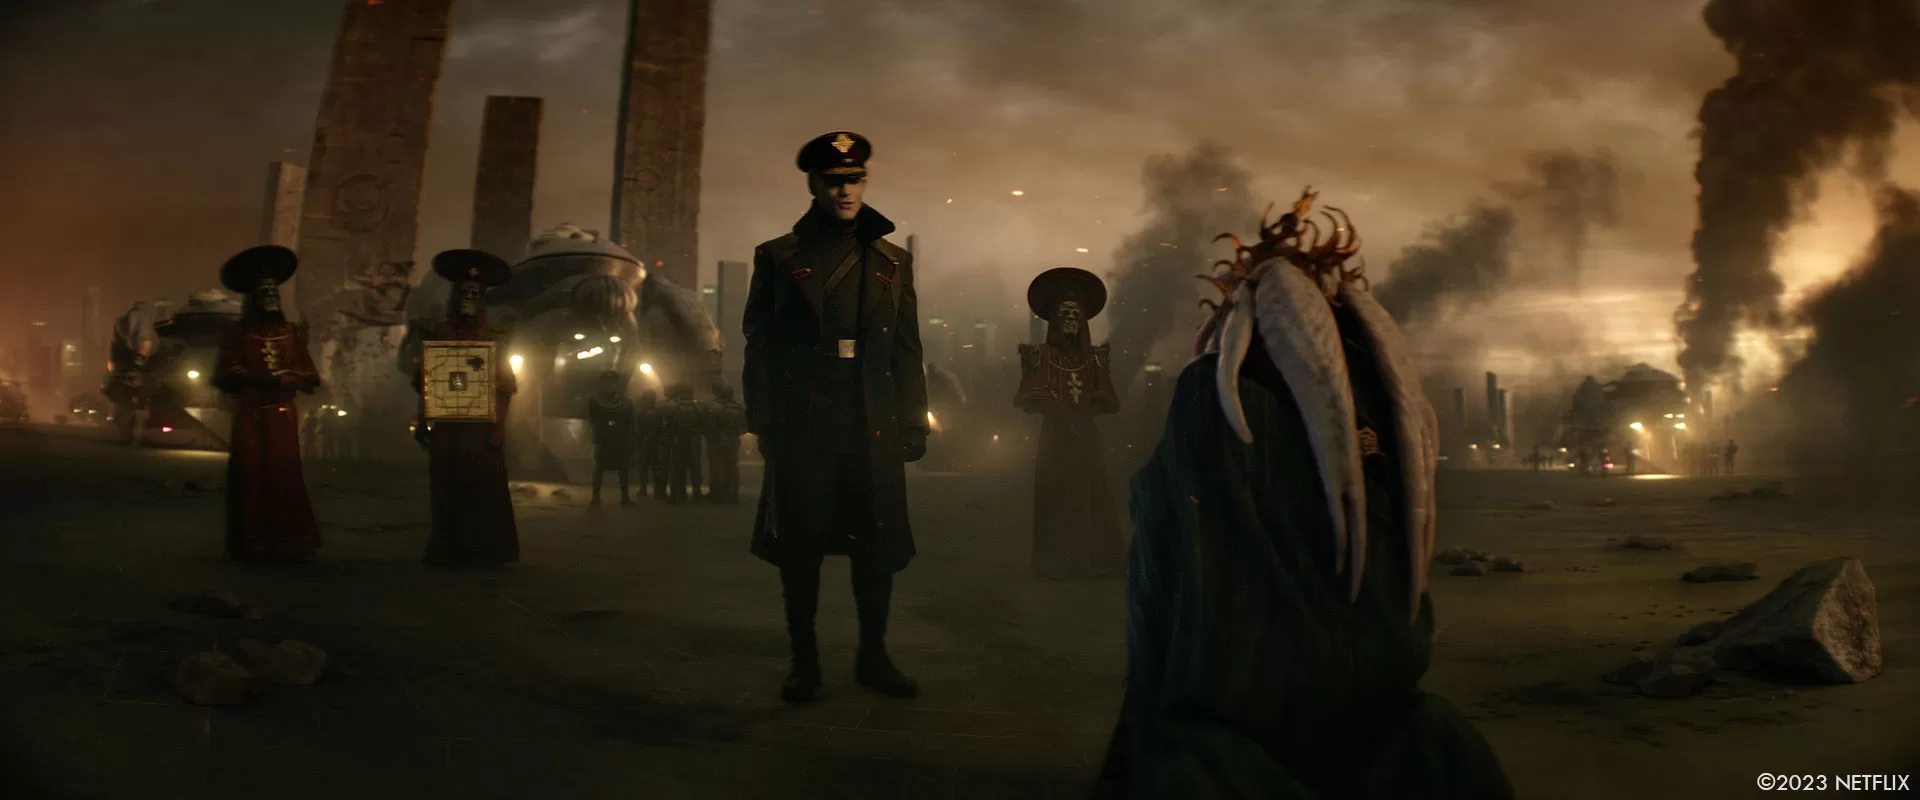
Sharaan:
We weren’t given much for the planet of Sharaan in terms of solidified artwork or set pieces. The set of Sharaan consisted of some granite floor tiles and the partial set build of Kai’s Freighter fuselage we used in Neu-Wodi, so it was basically a 360 cyc of green screen surround. Interestingly, with some of the earlier concepts of the world, we actually considered filming a printed background that had practical light sources adhered to the backing itself. In a way, we were coming up with our own analog, rear projection inspired by some of our early LED volume exploration. Once we reviewed the dailies we realized we would be dealing with the same issues we would have had as a volume show: focus could only be so deep and the highlight bloom and lens bokeh would be incorrect given the 3D distance we were suggesting with scale. We also quickly found out any atmospherics over the background caused overall flashing of the plates that didn’t preserve the mid tones and shadows like creatively intended.
In post, we went back to the drawing board multiple times, and actually went full circle on some of the initial designs after exploration. We had lots of conversations about the habitat and the individuals like Levitica that would populate the world for every environment: where did they live and why, did they have religion, who did they worship, etc. For Sharaan, we separated the 3D layout of the world to be more of an old-world and new-world, a ying and a yang. For the old world, Zack liked these ideas of floating monoliths covered with symbolism, which we tied back into Levitca’s face paint. The old world side was one of worship, with spiritual connections to other worlds, but had also degraded over time.We tried to represent this with the large chunks of anti-gravity rock spinning underneath the monoliths. We also kept the spiritual side backlit by the warm eclipse that fell in and out of totality throughout the two sequences.
When it came to the new world, we focused more on the colonization of the people of Sharaan via their dwellings and a general sense of a more populated, new world cityscape with the help of Weta FX. We ended up having two areas of interest in the new-world side – our underground dwellings that were partially visible on the horizon, and our more traditional skyscraper-like monoliths with a cleaner, more chiseled look. In between these two areas where Kora meets Levitica and the Insurgents in a secret meeting of sorts, we kept it rather barren, surrounded by 3D atmospherics. As we laid out our pristine Sharaan, we also made sure we created and preserved some negative space or added monoliths on the old world side that would help send Levitica off with a dynamite Dreadnought explosion later in the film.
Gondival:
Gondival was…well it was always something during shooting and in post. This environment was an extreme challenge to create and also compile the puzzle pieces to create a cohesive story. We started with a rather detailed 3D piece of concept art we leveraged for our build, but as the story developed, the action and budget caused some of the environment design to change. When it came to building physical sets, we tried to be smart about how much of the docks we built and really considered the shooting logistics. This meant we would build the docks on top of the stage floor, low to the ground, with digital set extensions and 3D environment needed in all directions. Even though this caused more work for VFX, it meant we would gain more productivity with our shooting crew, capturing more action at a faster pace than if we had shot on a raised set.
Unfortunately we only had enough stage for one-and-a-half docks, which meant that the set dec and art would need to work two teams to turn the set overnight to represent the other docks. As you can imagine, this became quite confusing for both our shoot crew and our cast, walking into the same exact stage with one-and-a-half docks that were laid out differently almost every day. To help alleviate the confusion, we asked the art department to create full-scale blueprints and miniature foam core models to discuss the script action.
We ended up leveraging these blueprints, along with a highly detailed bible of photos for set decoration that corresponded to the layout of those physical components on the set. We then matched our lidar scans and texture photos to both the bible and blueprints from the set to create our CG replicas. From a VFX standpoint, we needed digital stitching of practical and digital-double cast elements and environments as the main-unit photography spanned across 5-6 separate frag-set-pieces of docks, buoys, spaceships or cranes throughout the sequence. Gondival also required many multi-tiered renders of hard surface materials that made up the rock, docks and its surrounds that were interlaced and masked in digital dynamic atmospherics that pushed compute resources to their limits. We always knew we wanted Gondival to be heavily socked in and moody, but we chose to add the atmospheric elements using these computer simulations, because on-set atmos would have created quite a nightmare from the scatter of green bouncing around the stage. The apex of the sequence required complex, high frame-rate simulations for the melee of the Attack Launch and dock destruction that spanned across multiple shots.
Space:
We had so many one off in-space shots, and we wanted those shots to be interesting in their own right, yet visually cohesive and realistic.While we were filming, I started to amass a large collection of space imagery and made creative and technical notes for later reference. We sourced images from the NASA, NOAA and James Webb Space Telescope archives, including: ISS photos of Earth and the Moon, photos of Saturn, Europa, planetary moons auroras, nebulas and atmospheric anomalies including red sprites and sundogs that are caused by moonlight being refracted and reflected by hexagonal ice crystals in high clouds. All of this imagery was, and continues to be, used as a basis for a lot of the outer space and other worldly FX across both movies.
Can you tell us more about the mix of Nordic and Asian influences?
Zack was constantly doing his own pieces of concept art, smashing location photos together with craggily snowcapped Scandinavian looking mountain ranges in the backgrounds, which drove a lot of the digital surrounds in the village of Veldt. As Veldt was being conceptualized, Zack stumbled upon footage of an old abandoned Viking village nestled in Stokksnes, Iceland, that inspired a lot of our concept and atmospheric references. We also discussed the idea of how the Veldtian villagers would have survived in a very similar manner to the Norsemen, utilizing every piece of organic material they could for food and shelter. Zack also has an affinity for Norse mythology, so infusing that throughout the film was an easy choice.
In regard to the Asian influences, we introduced intricate filigree and details throughout the physical set builds, props and even in character costumes. Much like the Mongolian artisans in their heyday, our Production Designer Stephen Swain took great care in making sure to add ornate wooden details throughout the beams of the longhouse and granary, with our Propmaster Brad Elliot mirroring the handmade look of bronze, brass and copper alloy casting into all of the props, including Kora’s pistol.
The movie has many creatures and robots. Can you elaborate about their design, creation and execution?
We had a lot of really great artwork and physical makeup effects builds to reference from the beginning. Like any other dense sci-fi film, we wanted to make sure every one of them had a purpose and unique design but also, if they were of the same descent or from the same world, a similar visual language.
Justin Raileigh and his Fractured FX team did a really great job on laying the bases for some of the hybrid creatures like Haramada, Jimmy, the bedchamber alien, and the alien parasite in the bar to name a few. We handled some of the other, more complex makeup effects builds from a supportive role, opting to keep the animation and movement established by the puppeteers on-set with minimal paint, roto and cleanup provided in-post along with some minor augmentation here and there. Great examples of these characters include the alien bartender, the Xanadite bar patron, Dogfaced man, Daggus lift operator and the other countless alien and other-worldly creatures and characters throughout.
For some of the one-off digital creatures like the rat-pig and the alien gladiator, we used pencil sketches by Zack and very crude concept art that we turned into rough 3D assets with the help of Aaron Sims Creative. We then passed those along to our partners at Luma Pictures to enhance for the final shots. The other one-off creatures and animals like the Giant Koi, Snow Elk and Winter Garden bird, we kept more grounded and in-line with real world counterparts once we honed in on the color palette and details Zack liked.
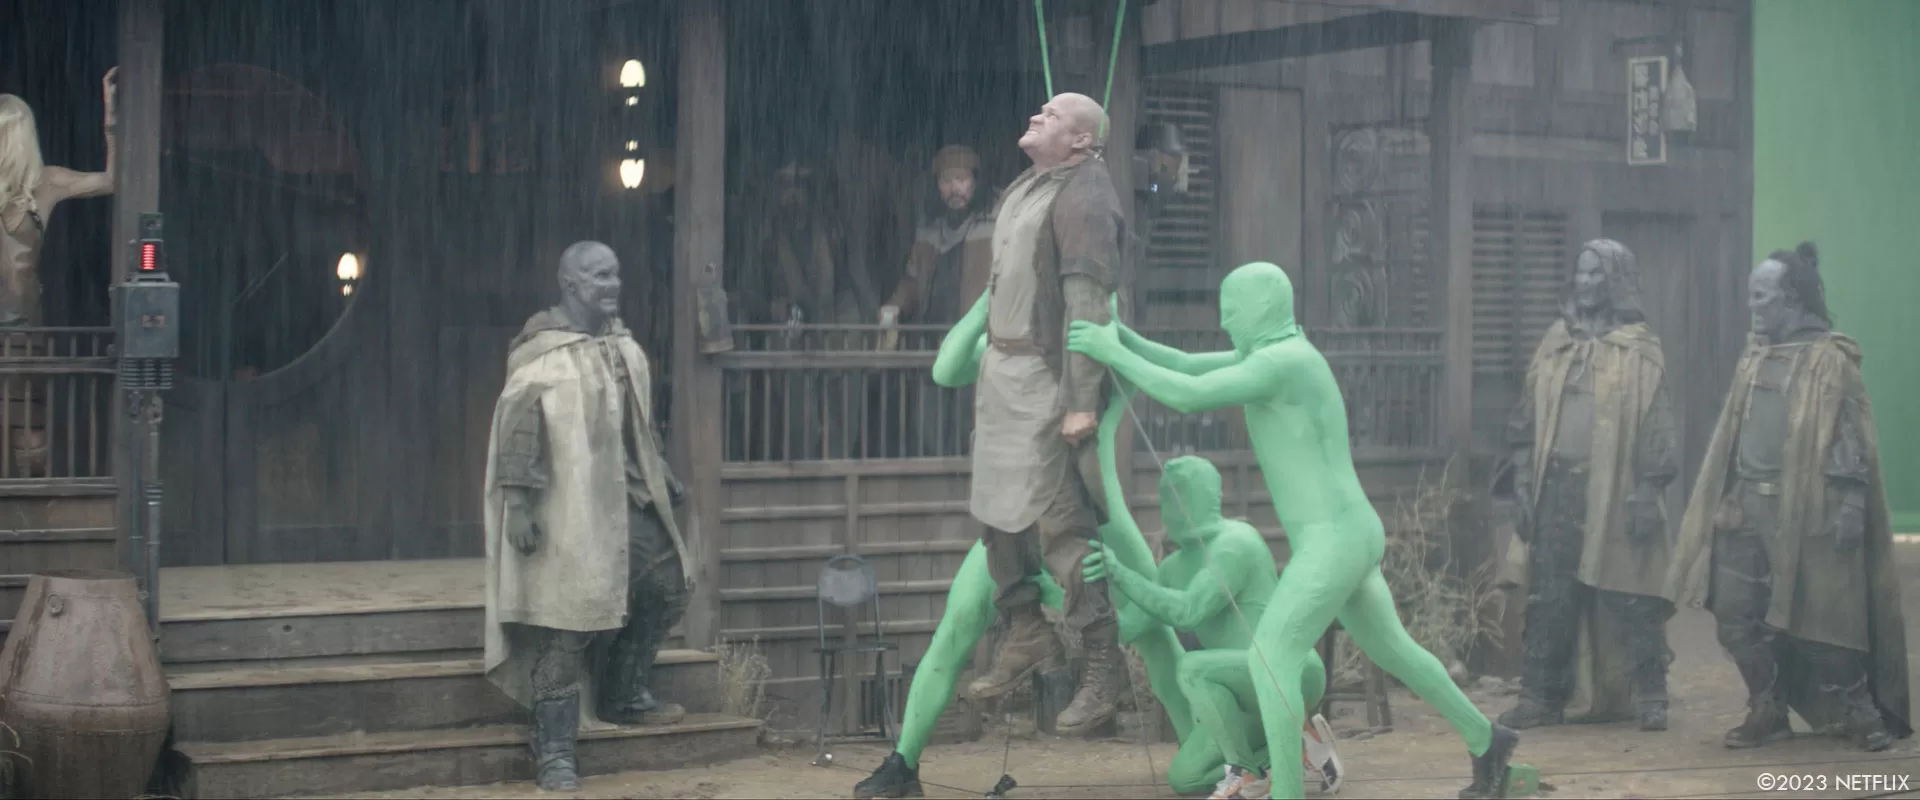
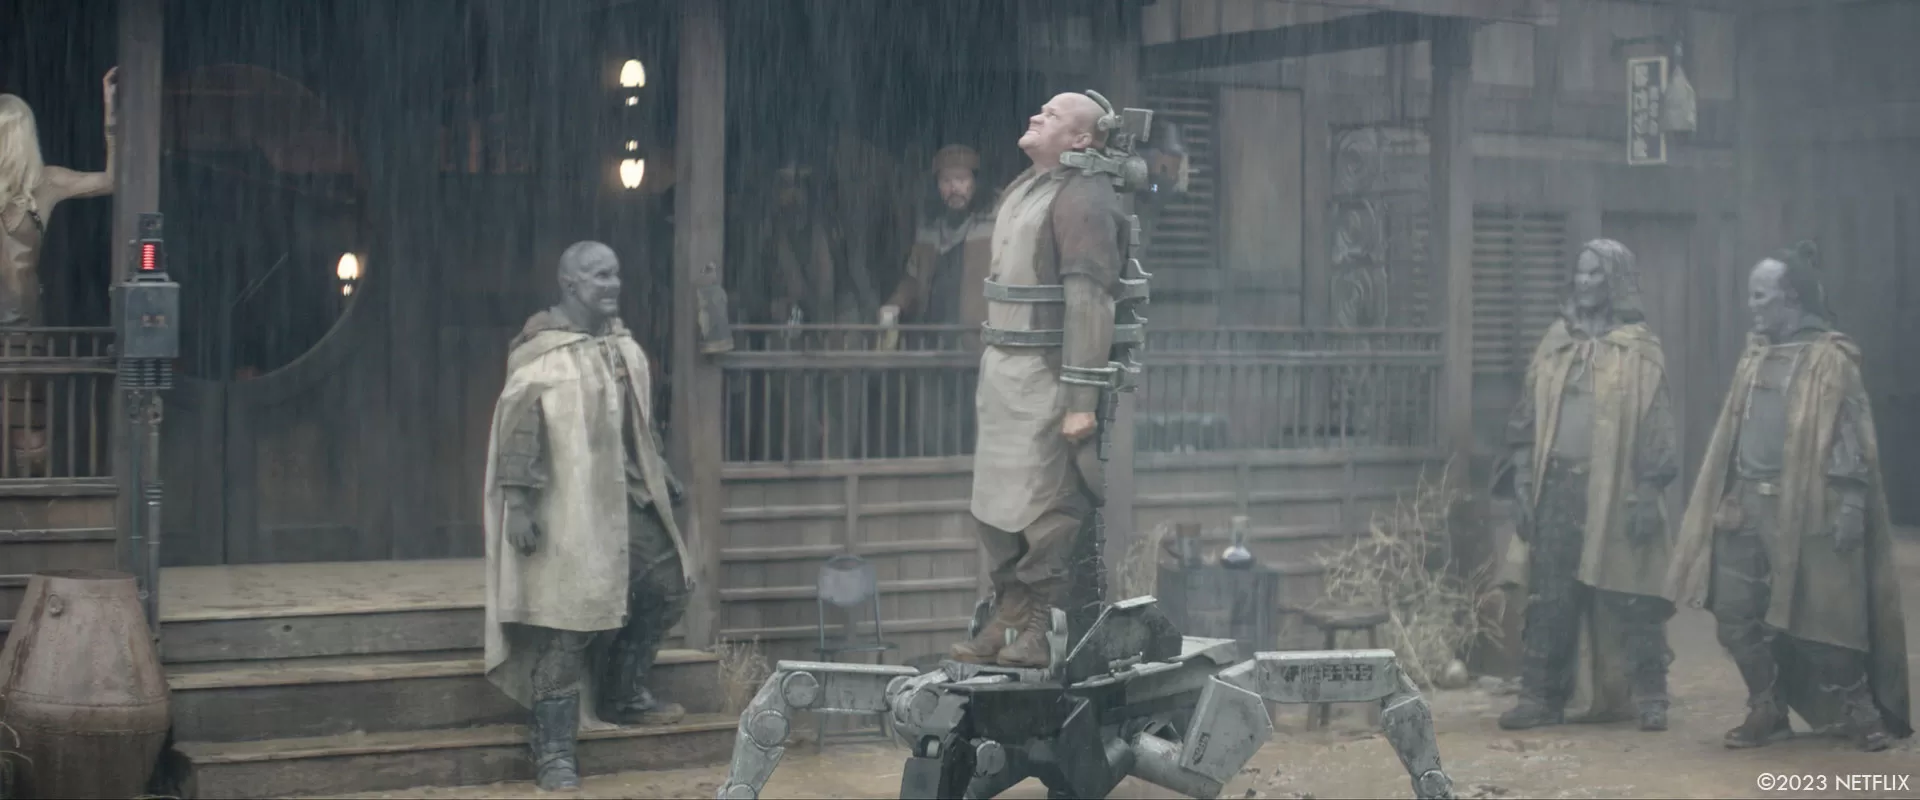
Beetlejuice Chairs:
For the aptly nicknamed Beetlejuice chairs, we had to create digital versions of the practical props built by Weta Workshop and our prop master. This proved to be a bit more challenging as we had to reverse engineer the asset rigging and animation to fit within two physical constraints: the crates that contained the devices, and the upright chairs themselves. We had to find a way to increase their size to match real world scale and feel threatening while also making sure we could hide our external crate underneath or behind the legs, spine, arms or other CG counterparts to feel as if the device was devouring itself from the inside out.
In certain setups, we were able to take a hybrid approach by mixing in stunt performances, SPFX radio controlled bases, and parts of the physical prop to blur the line between practical and digital. In shots where we could not take a hybrid approach, we usually added additional CG flare like CO2, sparks or groundwater interaction to help sell the weight and power of what we considered creatures in their own right. Even though the Beetlejuice chairs play in just a handful of scenes, it was quite an undertaking to figure out how to hit all the performances we needed to for those scenes, and Bryan Litson and his team at Framestore Vancouver did a tremendous job.
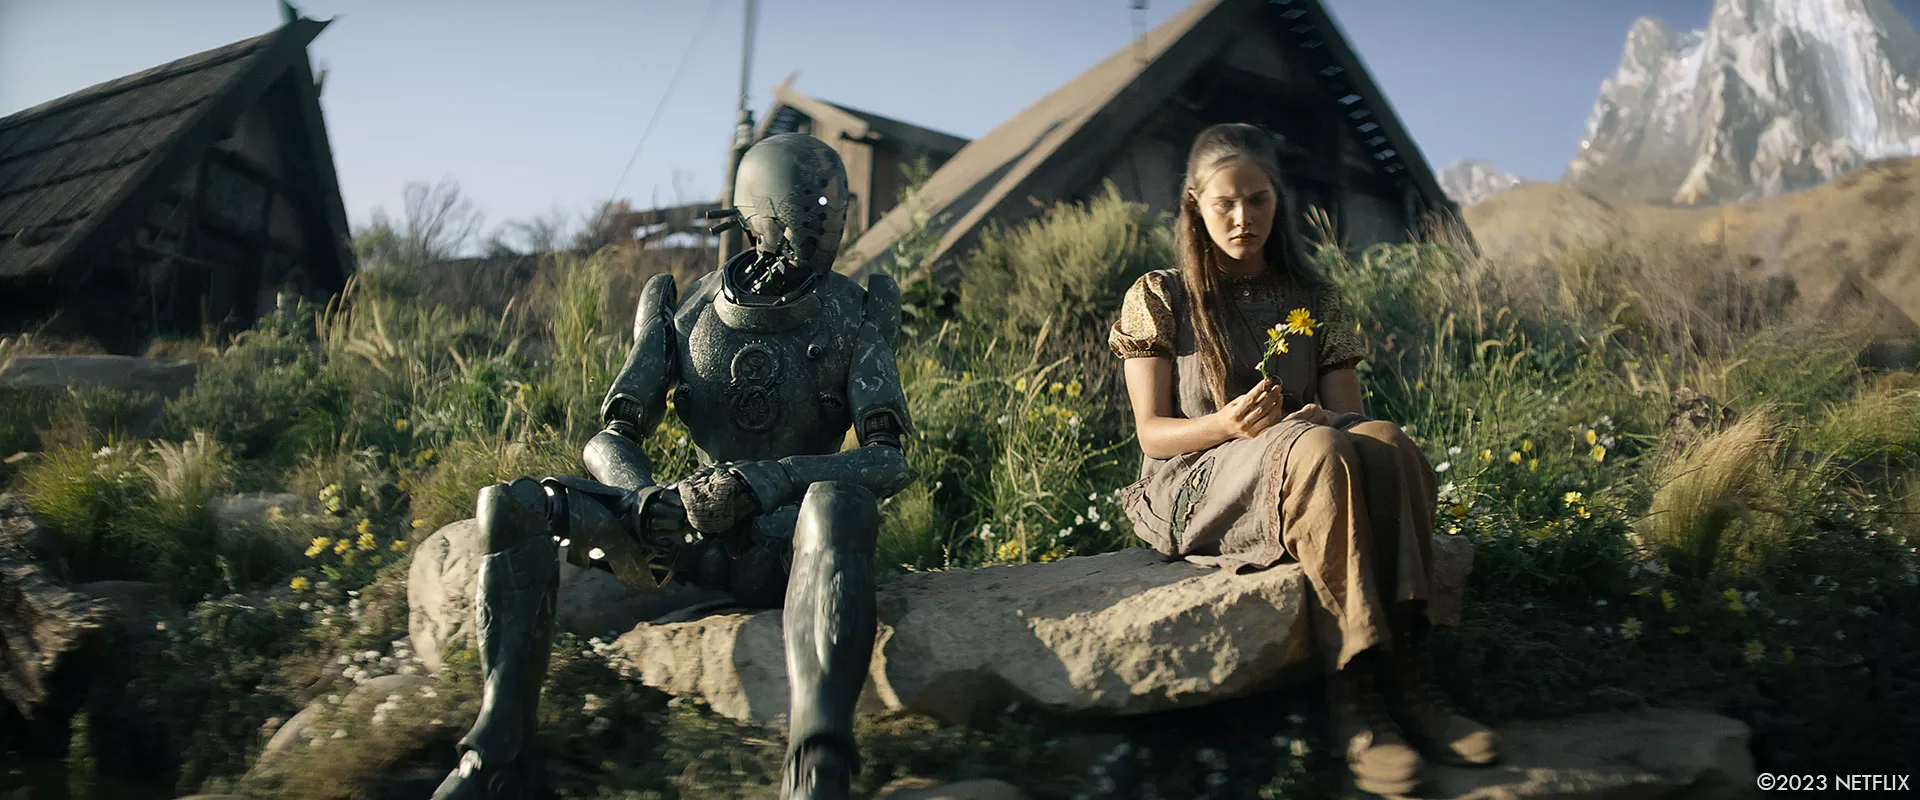
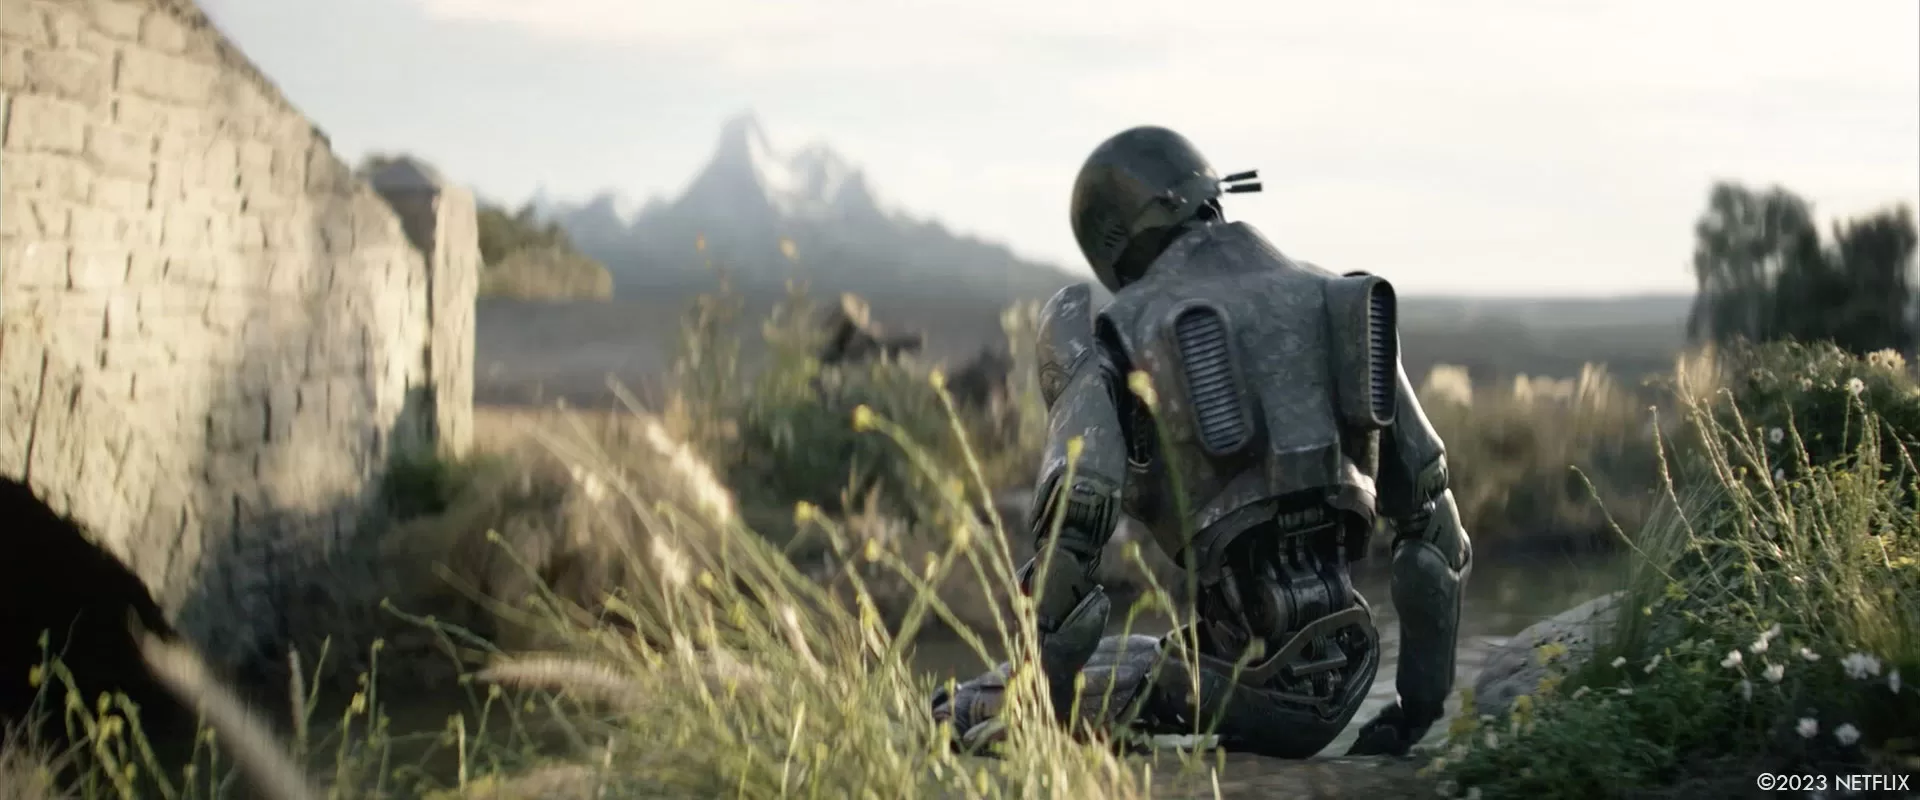
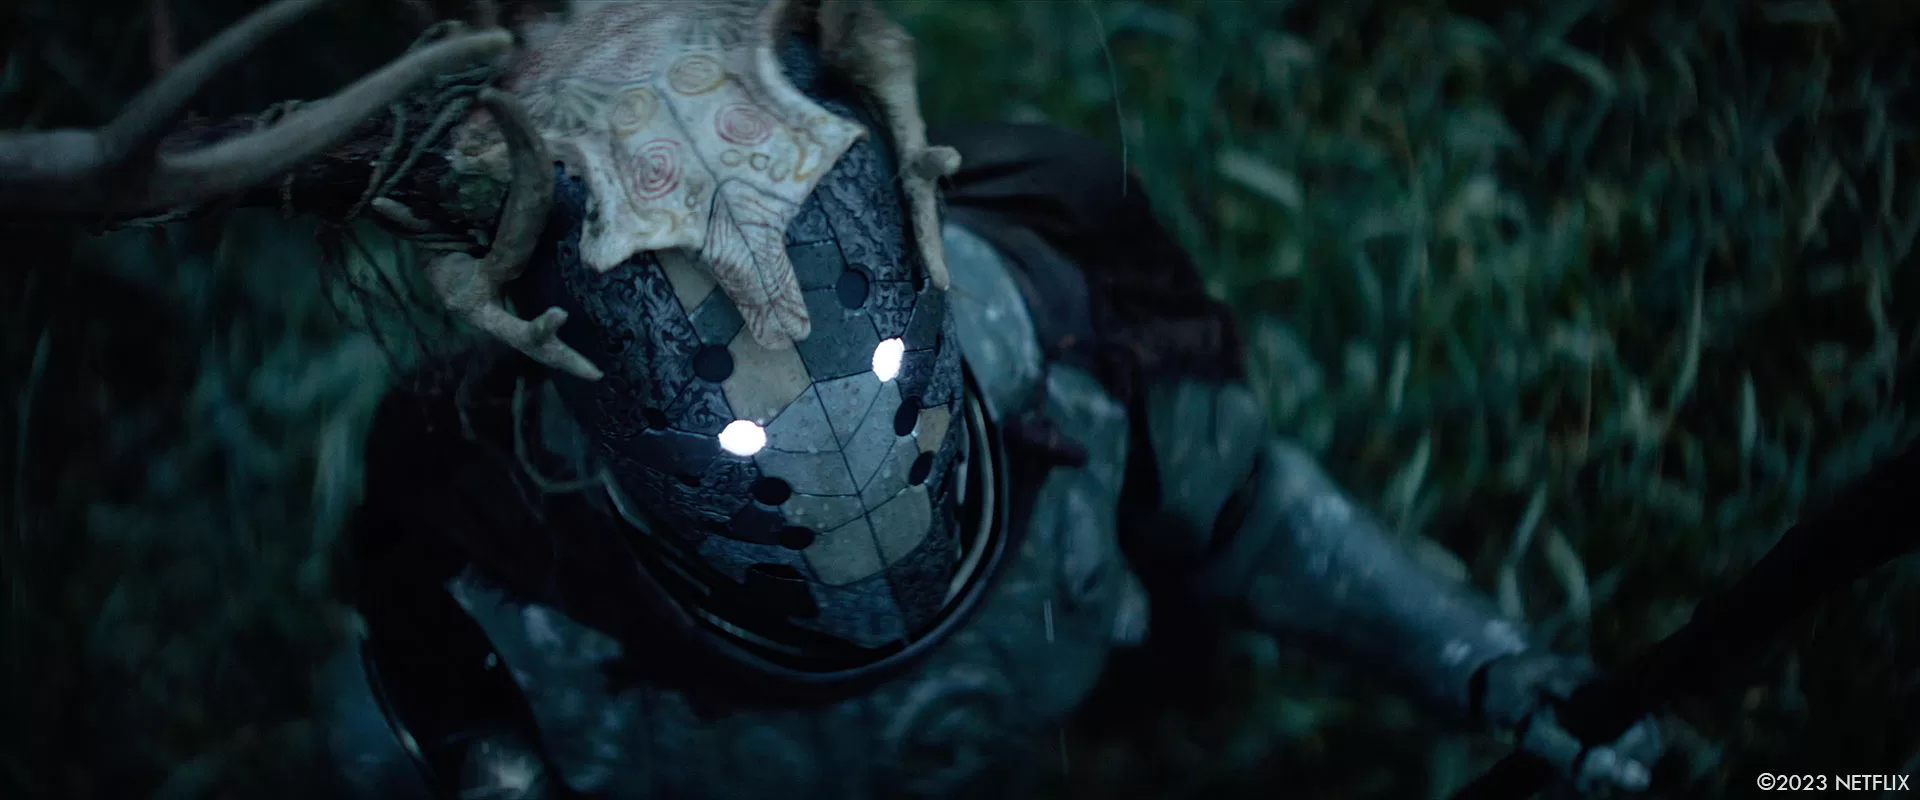
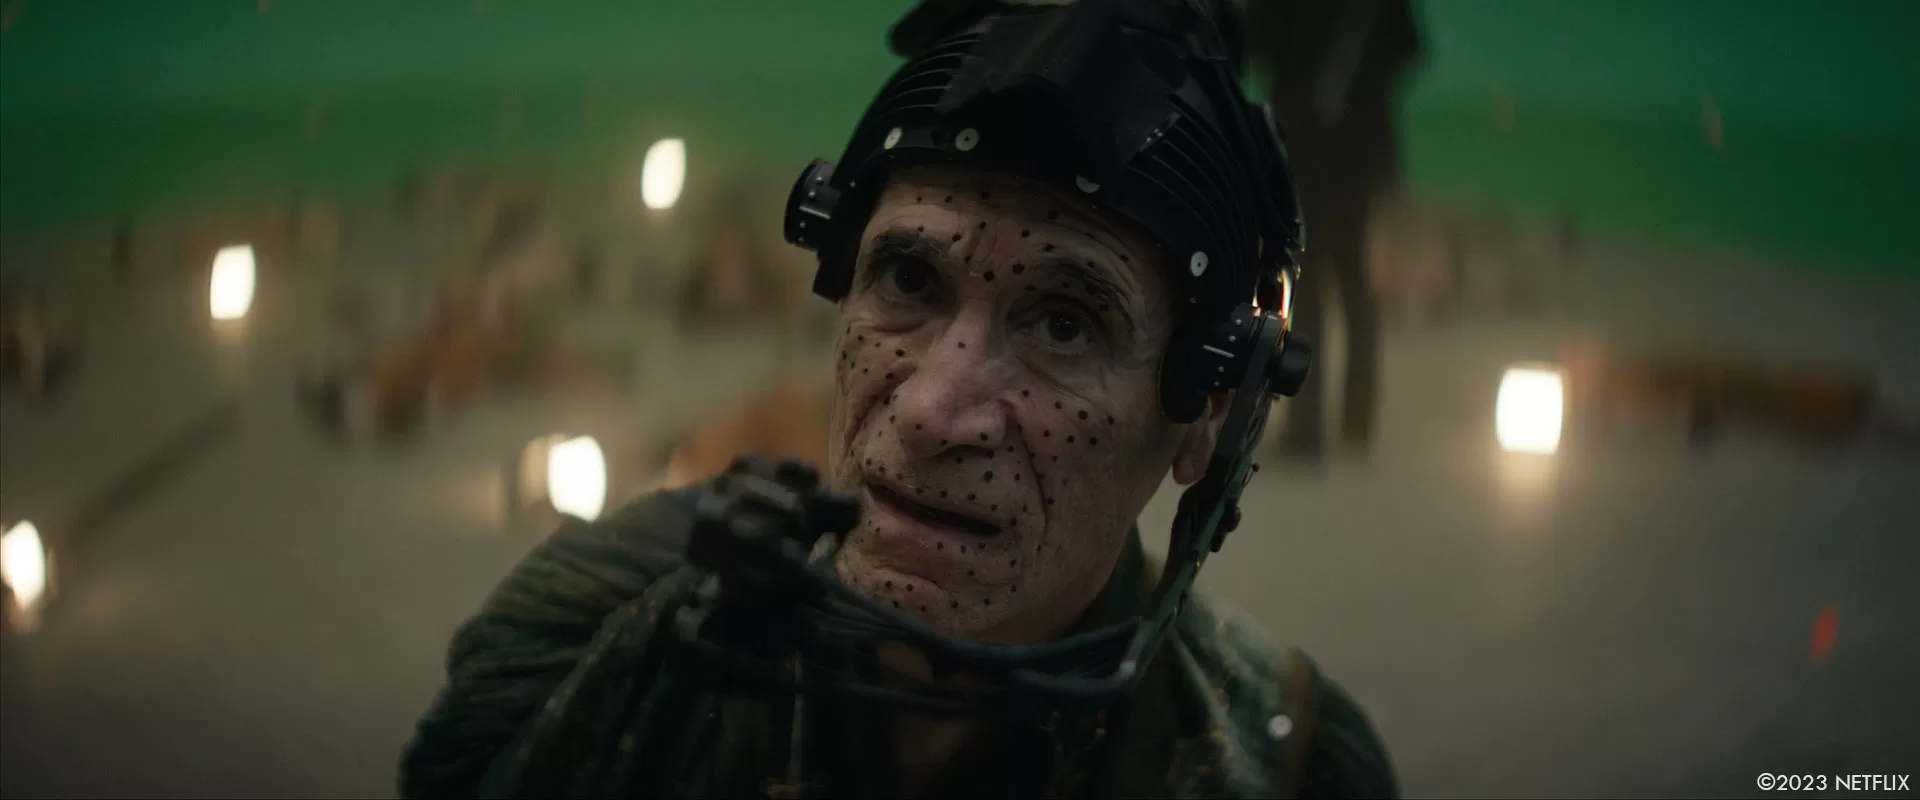
Jimmy:
Jimmy was the one character that took the longest to design and develop, but also was the most rewarding and enjoyable to work on through his inception in production, and execution in post. Early on in the process, we had dozens and dozens of ideas and concept art for Jimmy that the Art Department had created. Once we started to hone in on the basic shape, material and design of Jimmy, we began discussing shooting methodologies for the Jimmy sequences. I had a strong opinion on how I saw the final execution of Jimmy working, and I was pretty vocal throughout the process about the procedures and on-set passes we needed to make Jimmy look as rich as Zack and I envisioned. Once we had agreed that we wanted Jimmy to be performance-based, we needed to find our creature performer who would drive the physical sculpt of the head, upper torso and arms. We hit the jackpot when Dustin Ceithamer was cast.
One of my concerns I expressed when considering Jimmy’s physical actions on-set was the potential for a mis-match in performance and cadence if we recorded Anthony Hopkins at a later point. I suggested recording scratch tracks of Anthony with video reference that our editorial team could cut together well in advance of Jimmy scenes that Dustin could memorize and visualize.
During shooting, Dustin was fed the same tracks he had studied take-to-take to really get a performance-to-voice match that added another layer of believability and nuance to the character. In post we continued to design and manufacture all of the digital internals and the lower half of Jimmy. We once again enlisted Aaron Sims Creative to do some rough 3D sculpt work and geometry updates as well as some walk cycle studies to evoke more creative discussions.
Once the exploration was completed, we handed the WIP model over to Justin Mitchell and his team at Scanline VFX to finish the model and move it into lookdev. During that process we had to have a lot of conversations about Jimmy and his backstory – where had he come from and where was he going, both in the universe we were creating, but also across the four movies, and in action we had shot. We landed with a design that we felt was very much function in the front and party in the back. We tried to complement his green patina with golden brass bands as his inner thighs, but also knew we had to see certain components like gears, pistons and wires while also making sure we carried the negative space that humans have become accustomed to with robot design.
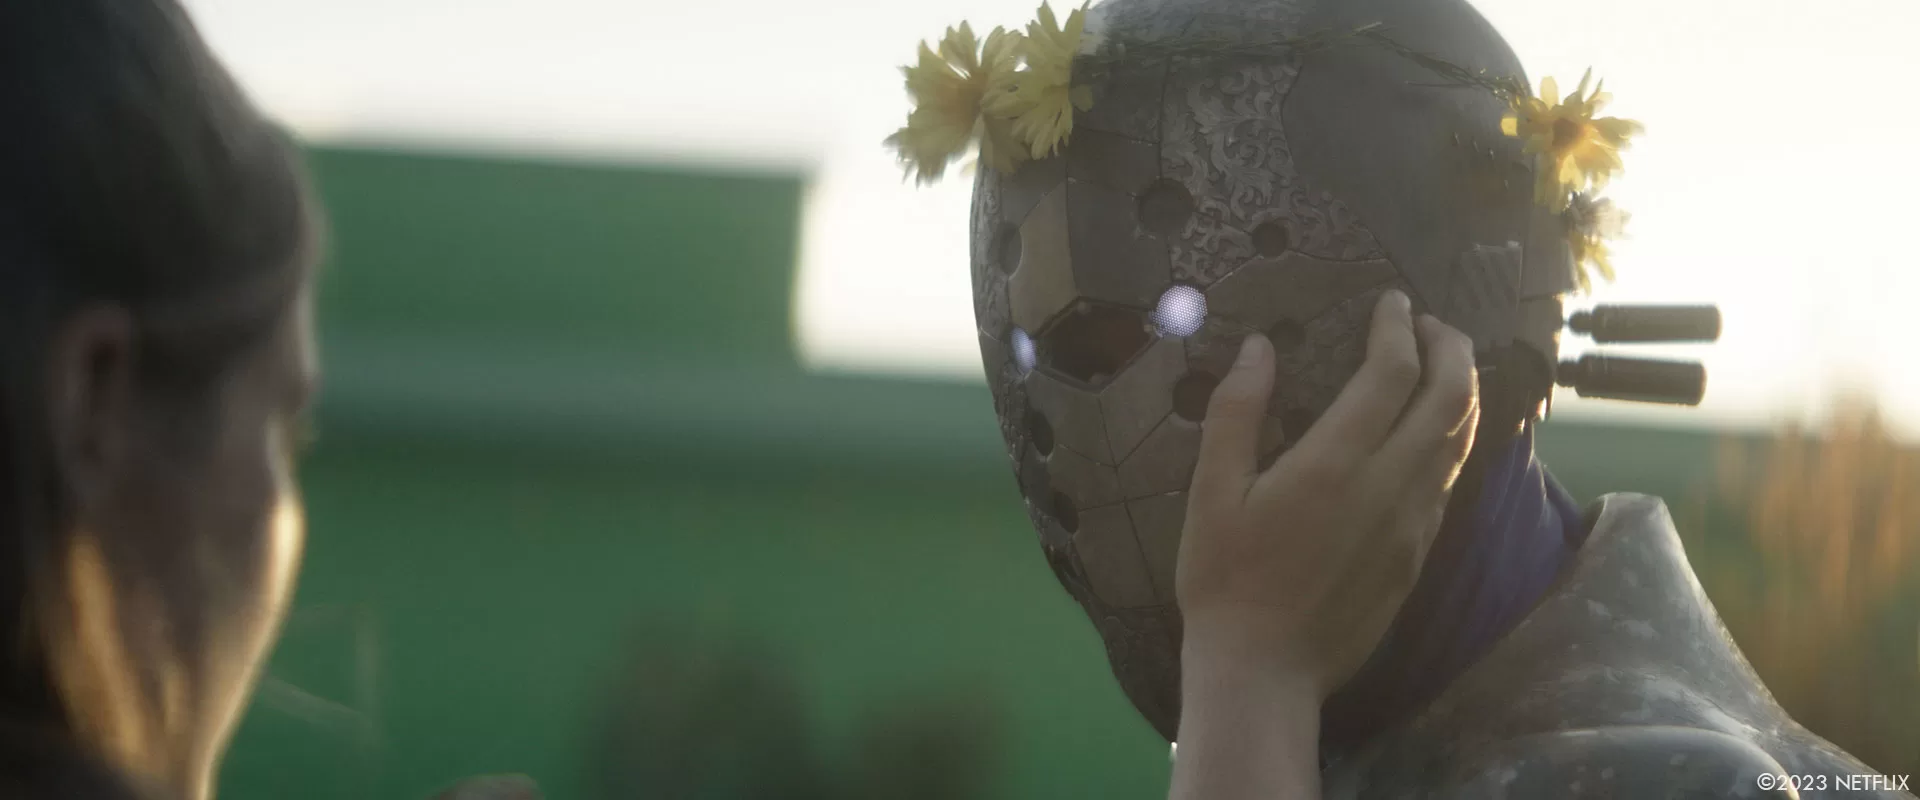
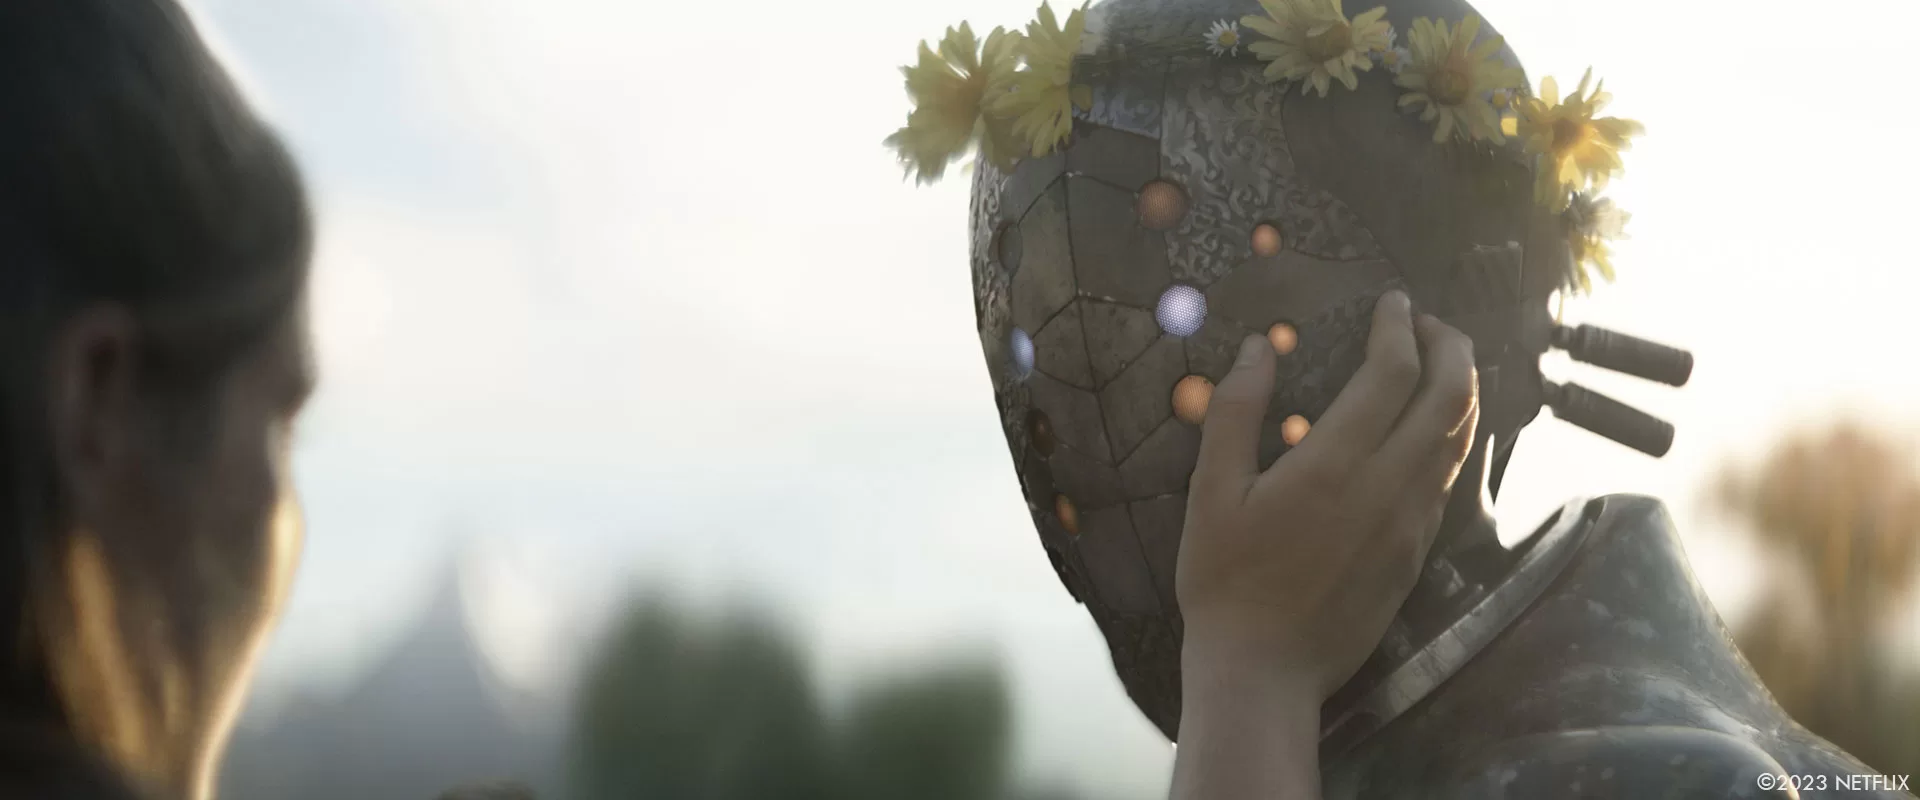
Once we got our approved asset ready for primetime, I had an ephiphany – I knew we had a bulletproof asset, but I also knew my intent in building physical components for shoot was to preserve those elements in the final shots. With a bunch of scenes in hand along with our turntable, I presented my case to Zack. I told him I felt as though the majority of performances in-camera were as he intended, and I really wanted to focus on conjuring human-like details in Jimmy’s faceplates to elicit emotion from Jimmy and for the viewers, which is exactly what we did.
About 85% of the Jimmy shots in-camera were executed with a hybrid methodology in mind; preserving the practical head, rich filigreed chest, and arms when possible. Digital enhancements and micro-performances focusing on the head area were added on a shot-to-shot basis, but were used sparingly to not distract from the performances and practical elements.
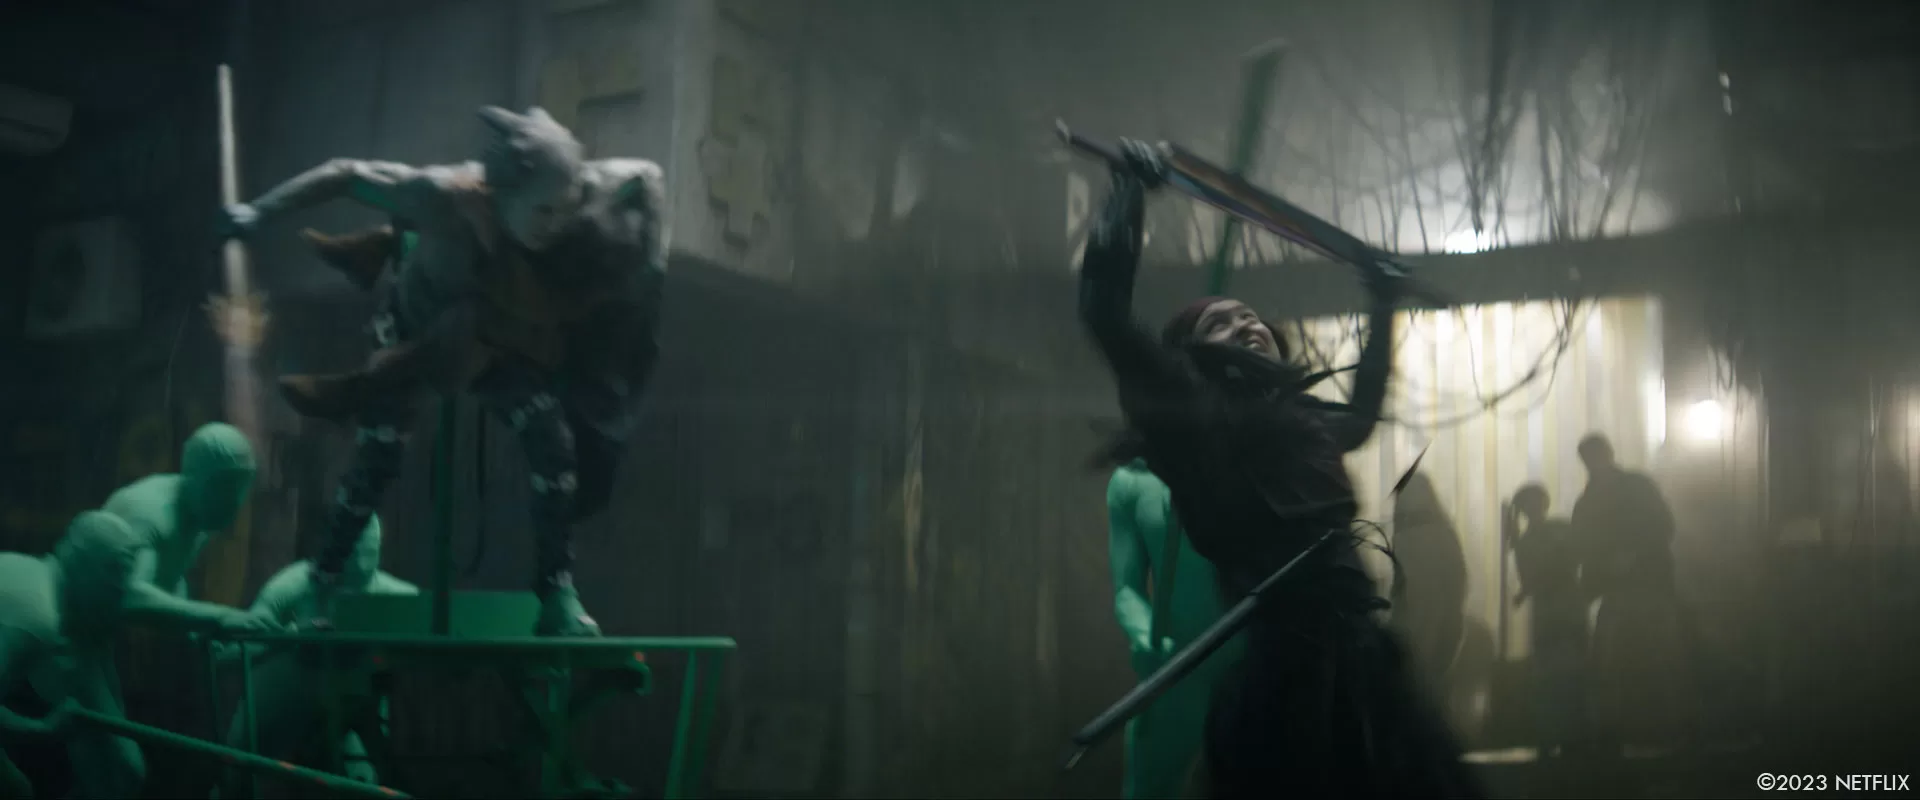
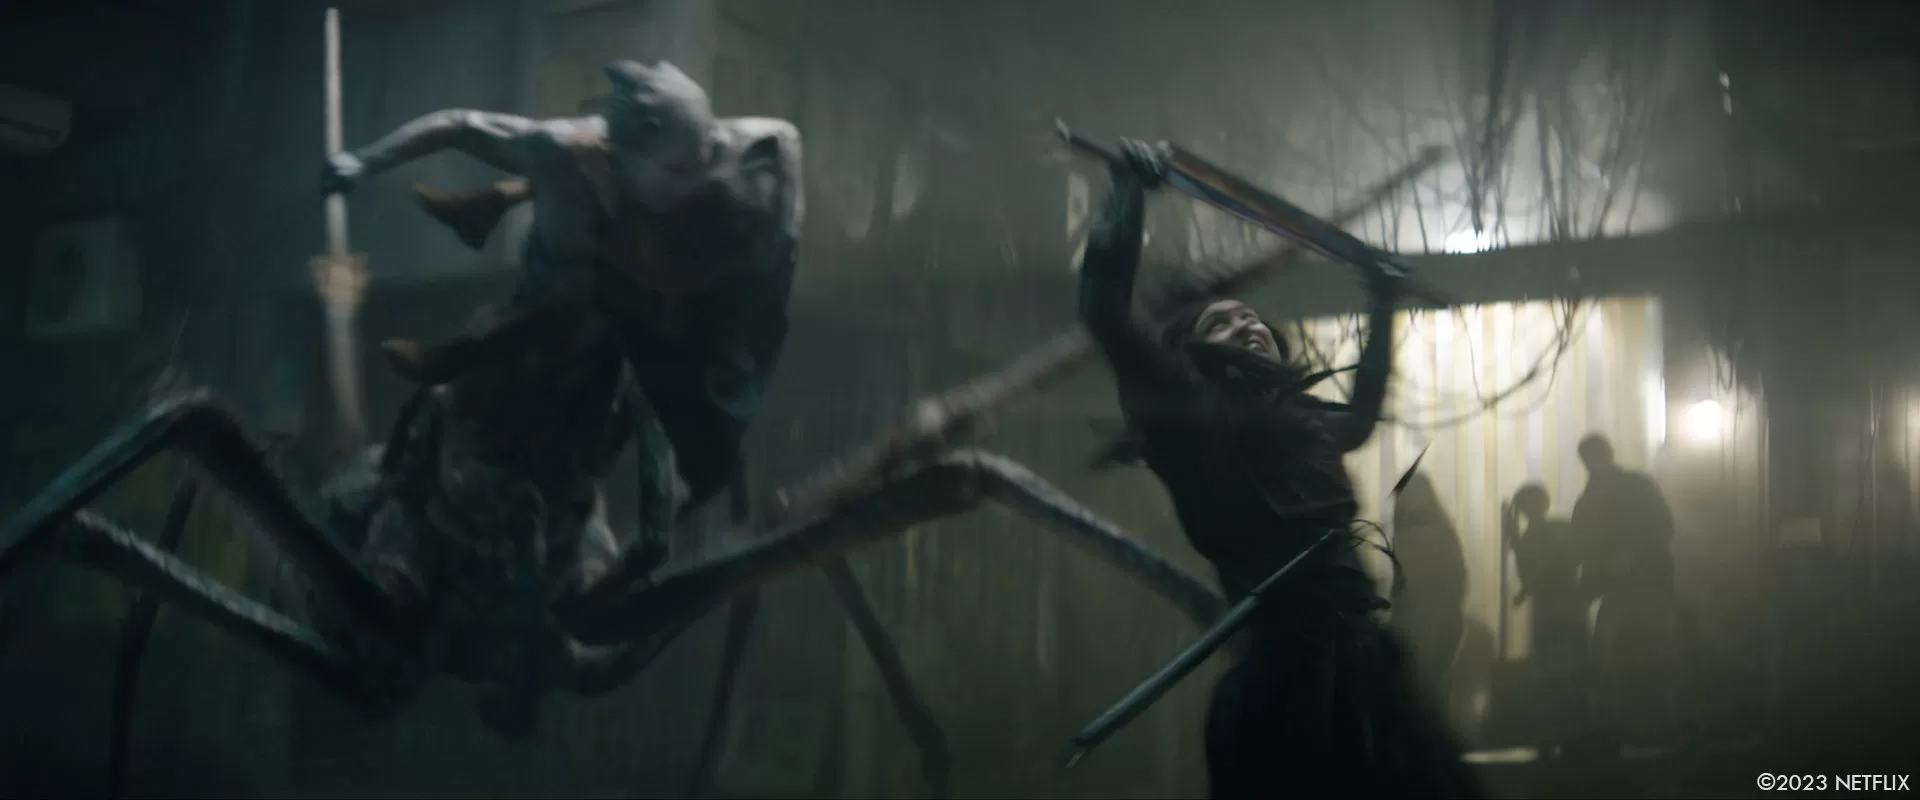
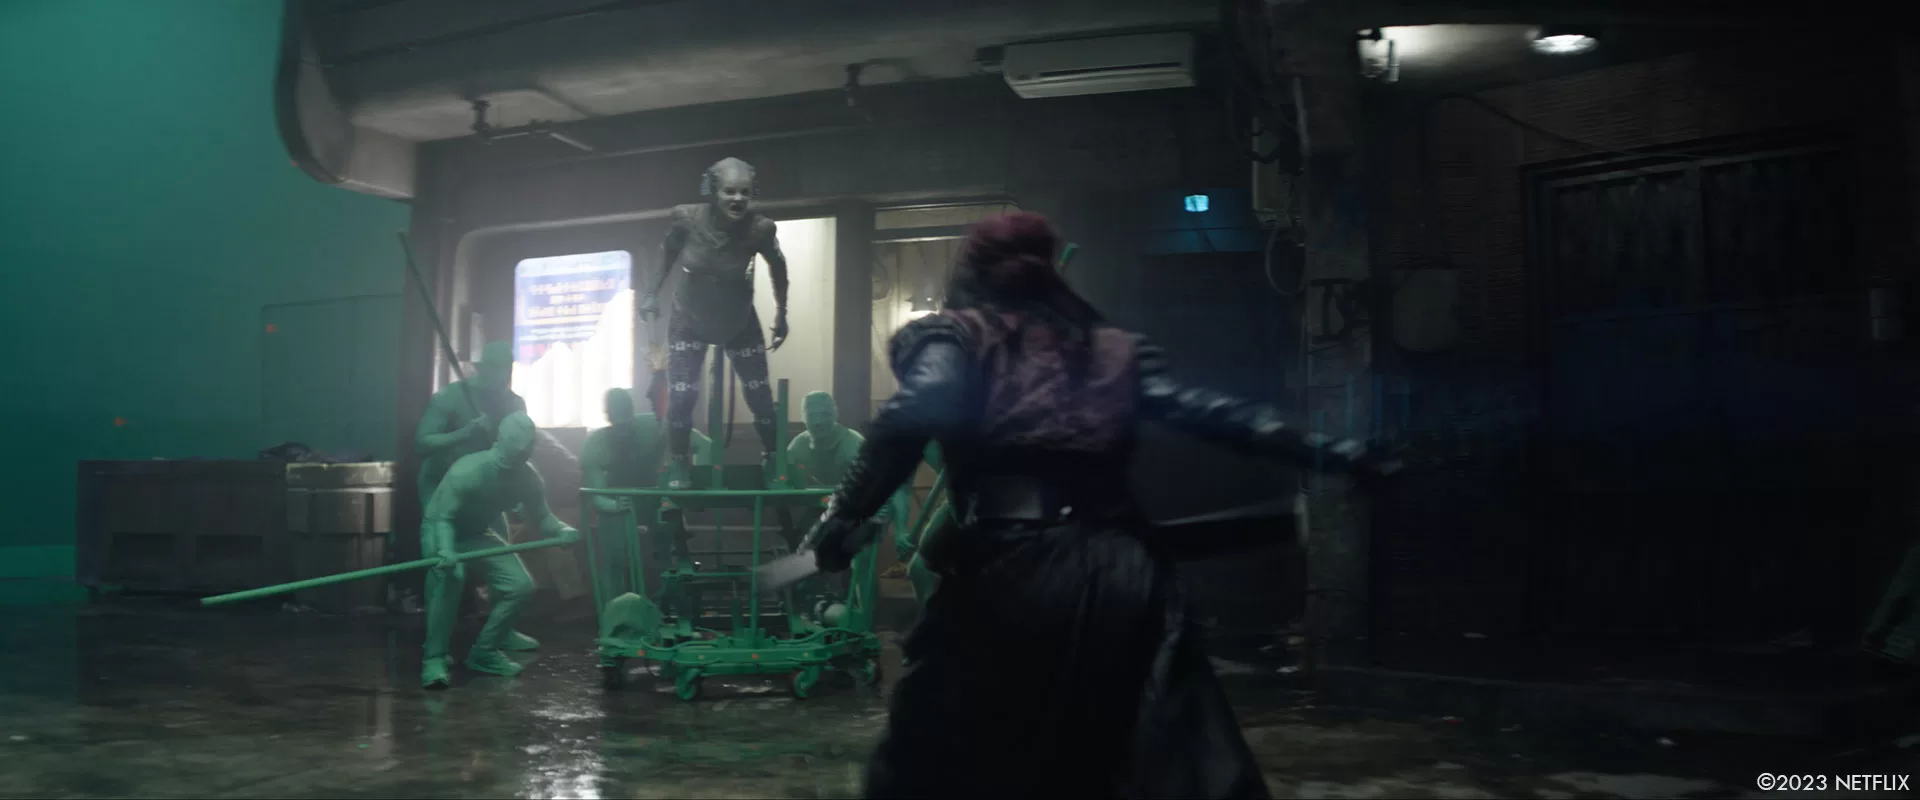
Harmada:
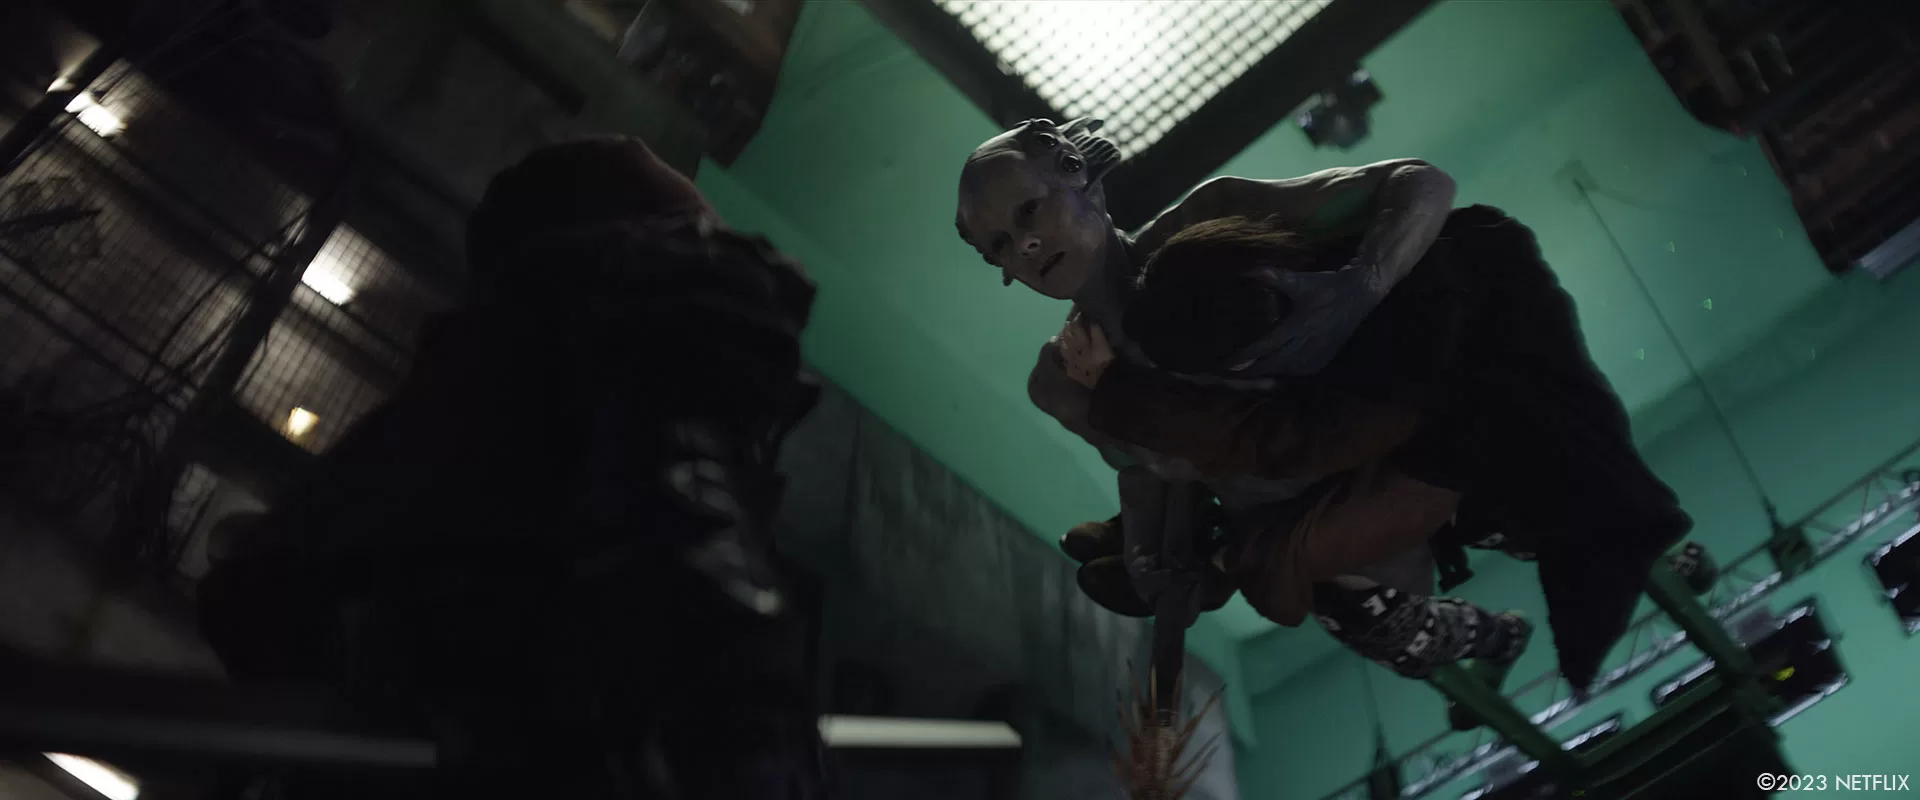
Harmada was another creature for which we had lots of early artwork, but still took a while to perfect as both her environment and design were continually evolving. As scripted, Harmada was always a spider-woman, but some of the design aesthetics changed as our Art Department worked concurrently on development of the Daggus environment. Once the environment started to take shape, we focused on final design of both the creature and the battle between Harmada and Nemesis in her claustrophobic and damp basement home.
Early on in pre-production I had suggested that our Art Department block out as many sets they could in 3D in the computer so we could leverage those for designing sequences across departments. With this sequence, we were able to take that 3D shape that was true to scale for the stage and the eventual physical build, block out a stunt space that matched those dimensions, and film stunt-vis with inertia suits to create digital pre-vis for the sequence, based on real world cameras.
The one problem we still needed to solve was exactly how the design of Harmada translated to shooting methodology. Initially we considered an all-digital creature, with potential for some facial performance capture for the closeup dialogue. My gut told me a hybrid approach would be a better solution, even though I knew that would make things more difficult.
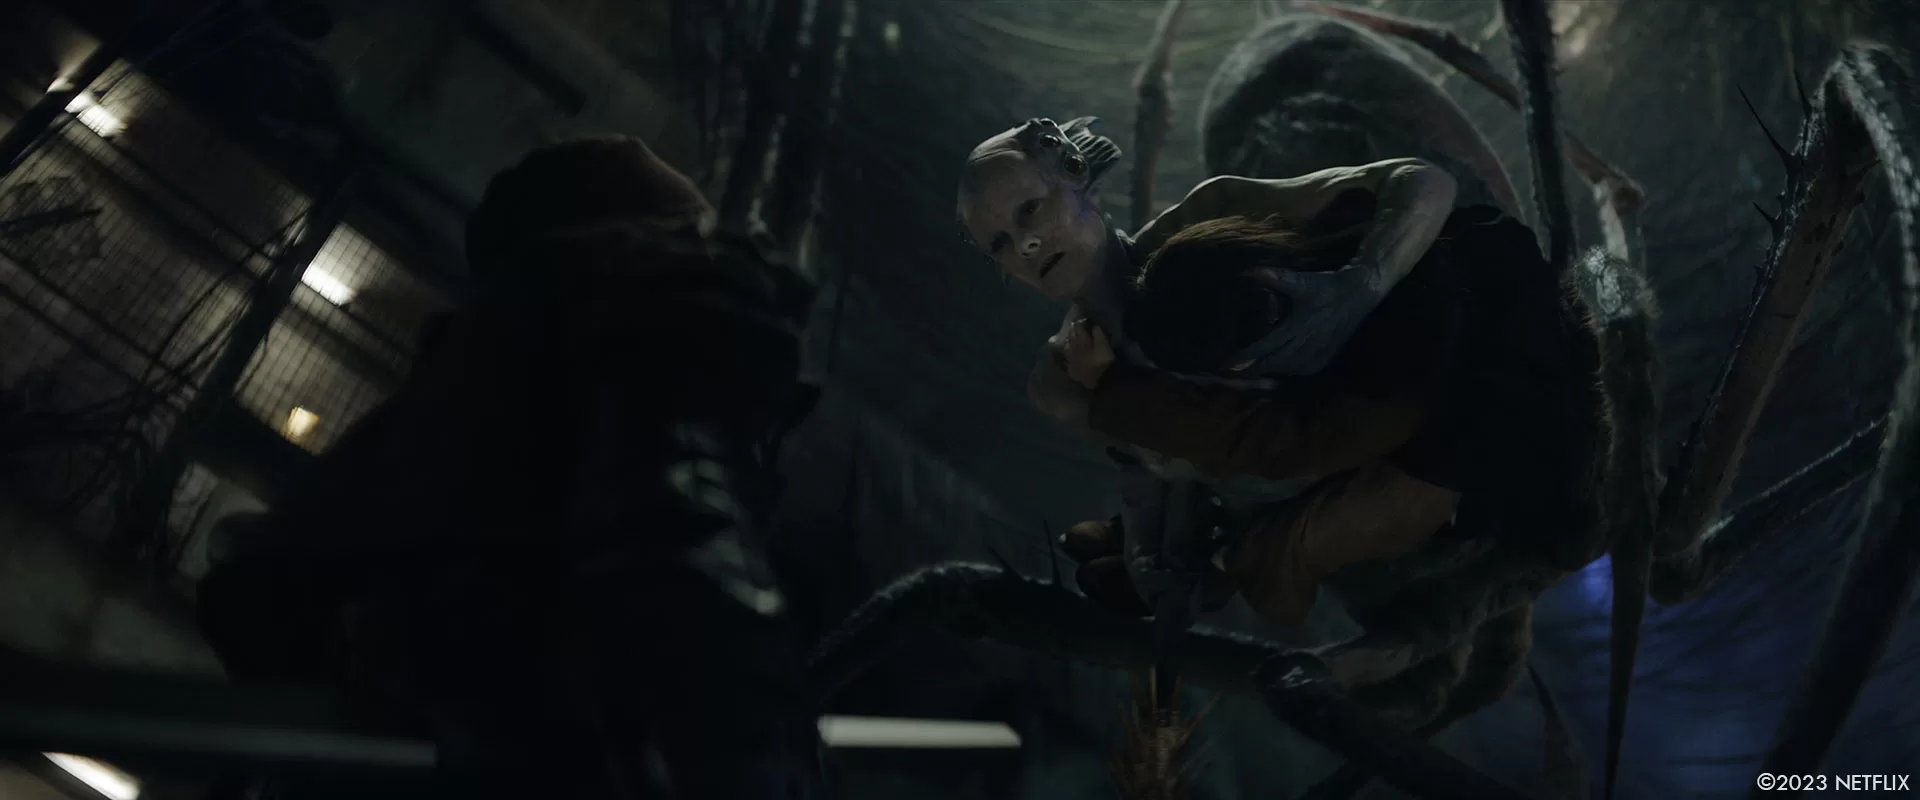
When we made the decision to proceed, we were able to get an early cyberscan of Jena Malone to rough into our 3D model of Harmada to start conversations with Makeup Effects, Special Effects and Stunts on the production side, and Robert Winter and the team at Framestore Montreal on the post side. From there, the creature began to take shape, with the Fractured FX team manufacturing a highly detailed upper torso and head fit to Jena’s proportions. Once that portion of the creature was created from the 3D model that the concept art was based on, we focused on figuring out the multiple rigs and stunt performers we would need to represent Harmada’s bottom half -eight legs and two pincers.
Our Special Effects Supervisor, Michael Gaspar along with stunt rigger Hugh Aodh O’Brien suggested three main rigs, two of which we used in the final sequence. For Harmada’s descent we used a parallelogram with a tuning fork attached to the end to allow Jena to wrap her legs around the fork for rigidity and comfort; for shots like this we ended up blending most of her digital takeover behind the little girl’s body or legs she was holding hostage. After she’d descended, we strapped Jena to our swivel rig, essentially a three-hundred and sixty degree cart that was pushed around the set by stunt performers in green suits. This rig also had the ability to expand and compress from the center of cart, triggered remotely by our special effects technicians on-set. Perhaps most impressively, Harmada’s legs were made of pool noodles wrapped with green tape.
Armed with this arsenal of tools, we devised a setup-to-setup breakdown of needs based on the pre-vis that our stunt team now had rehearsed in-situation as the set was built up around them.
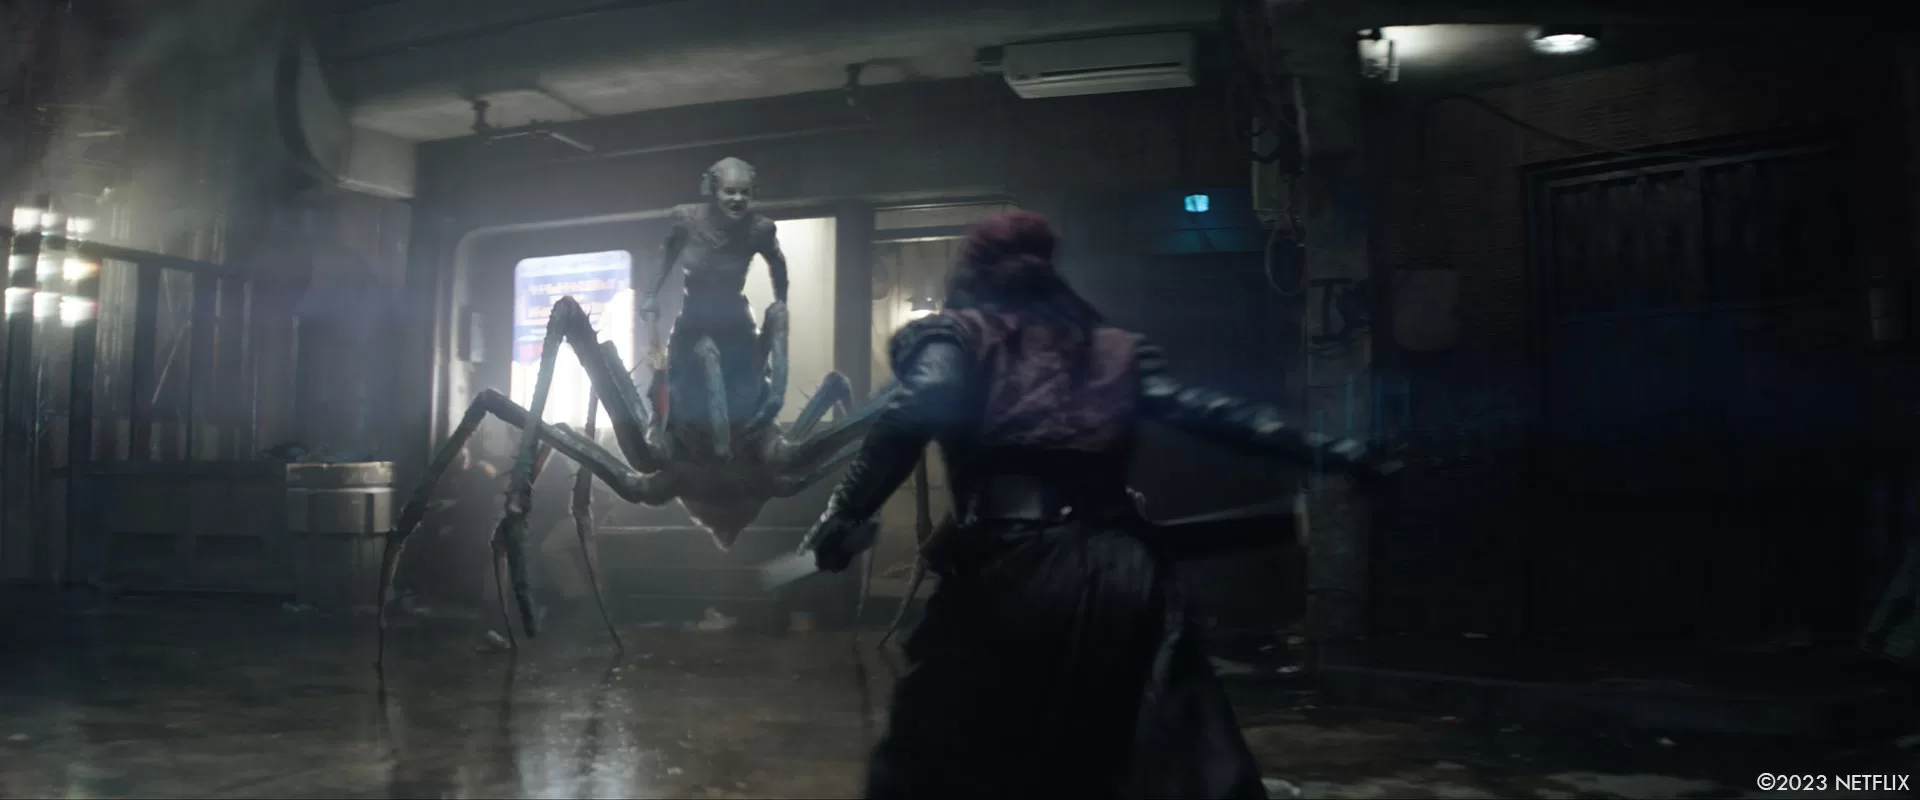
Across all of these films, this was one of the most intricate sequences to capture, and it was also an amazing example of the magic that can be produced by multiple departments working in unison with every toolset they have to support the script and director’s vision. Once we moved into post, we continued to explore Haramda’s lookdev, adding crustaceous features along the legs, a thin layer of specular sheen to match the practical suit, and a layer of fine hair that scattered light, helping to make her silhouette pop against the dark background plates.
Similar to the philosophy of filming Jimmy, we were purposeful of the action we filmed, and adamant to use it where we could. This meant the animation team had to keyframe around and in-between the plates that were shot which, at times, was not easy. Robert’s animation team at Framestore led by anim supe Loic Mireault sent lots of spider reference, sometimes poses and sometimes video with picture-in-picture clips as we blocked out the sequence. Because we were beholden to the action on-set, we served more of a supportive role, emphasizing the arachnid movement and hero animation when applicable to the plate action. I wanted to make sure we didn’t overanimate or overemphasize the arachnid activity to really let Jena and Doona’s performances shine so the audience could focus on the action, and not the gigantic eight-foot tall, ten-foot wide spider-woman. The final sequence is about 90% plate -based performance by Jena with digital takeover of the creature just below her sternum.
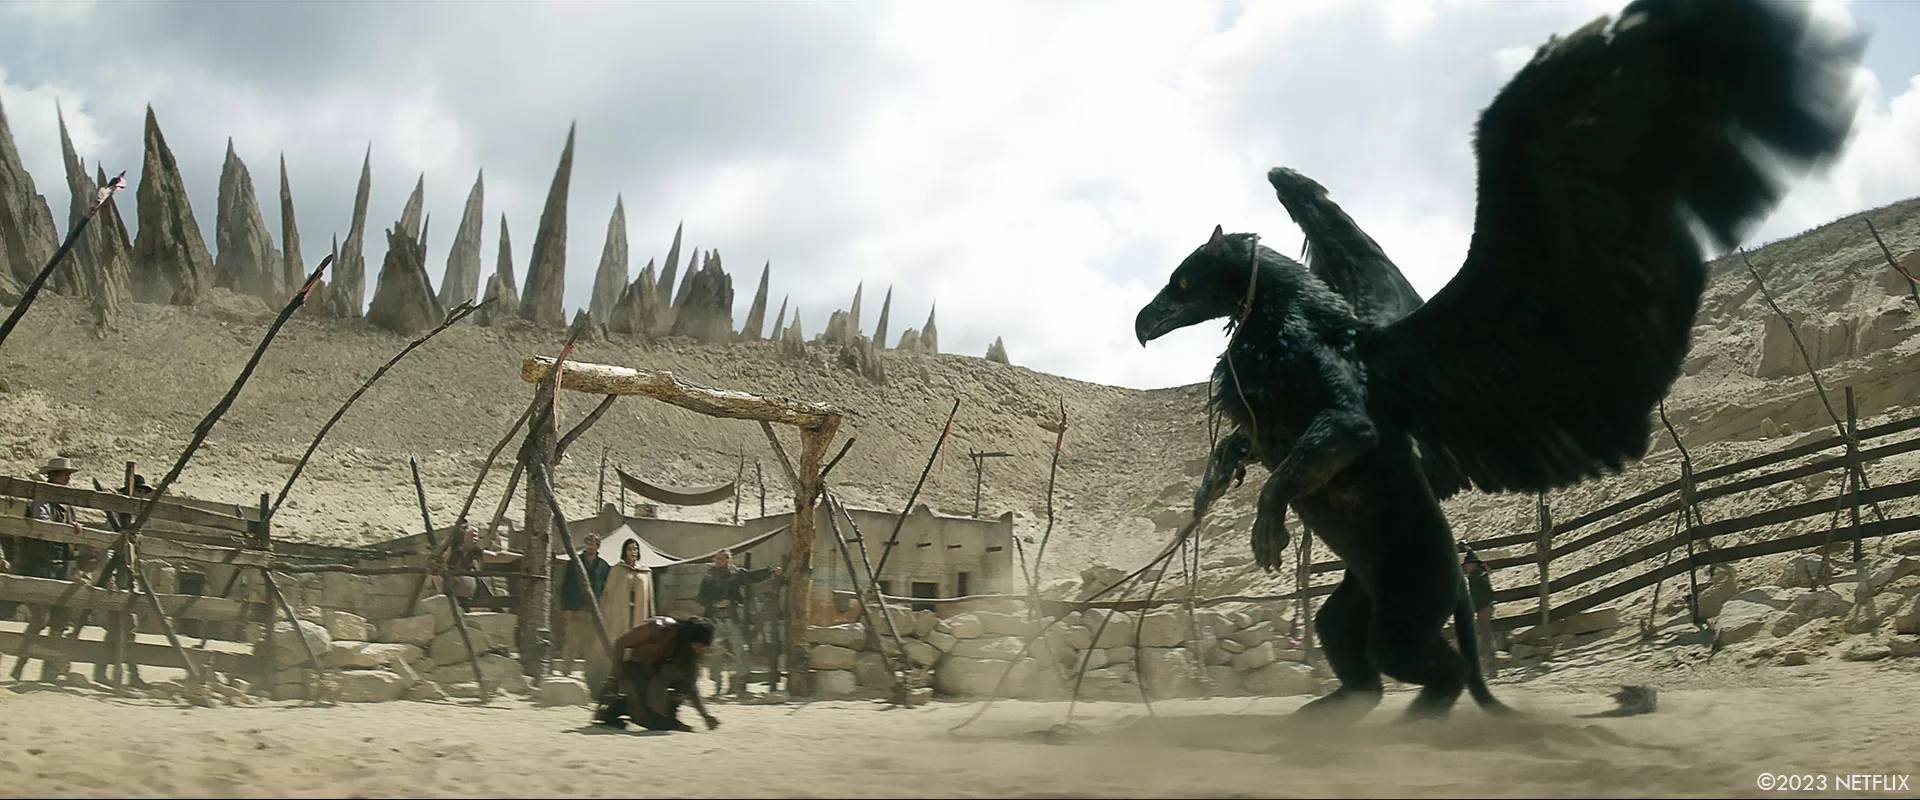
Beatrice the Bennu:
The inception of the Bennu was pretty straightforward from a conceptual design standpoint once we had an idea of proportions and scale. From script to screen, one of the biggest challenges I knew we faced was the interaction between Beatrice, Tarak and Hickman. We ended up exploring animation passes with the creature in a very crude tech-vis fashion to hone in on the movement cycle to inform builds for our interactive and rig pieces we would need. We would rely on these ROM cycles, along with a 3D printed model of the creature during filming to initiate conversations and direction for the cast members, creature performer, and special effects technicians operating the parallelogram.
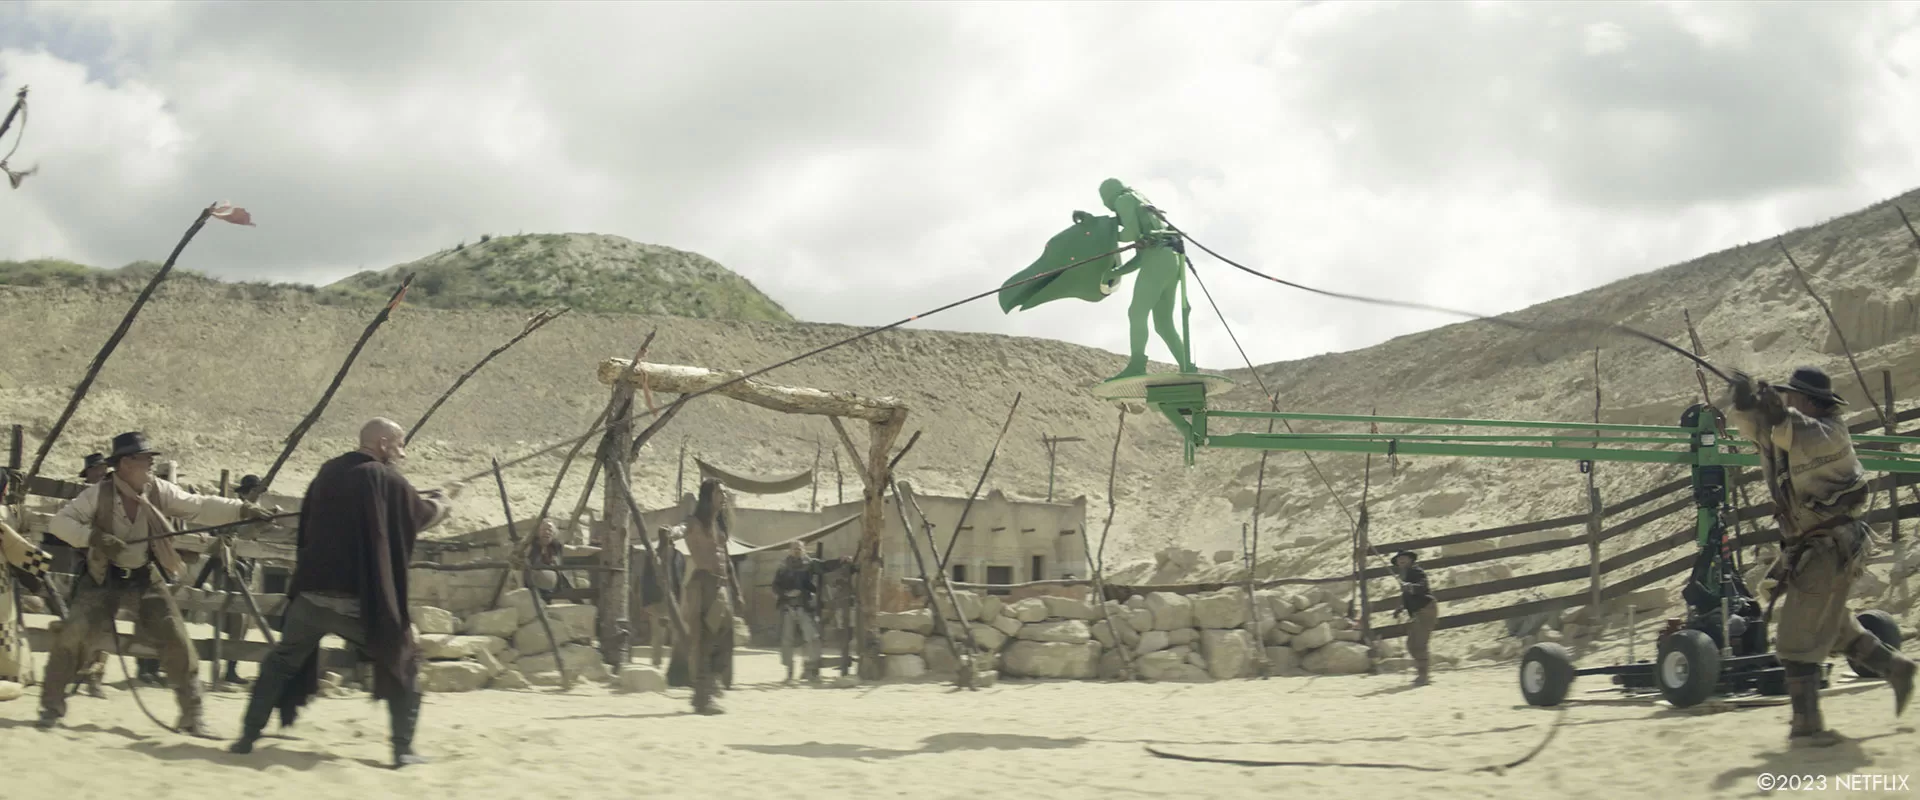
Once we narrowed the ROM selects, we were able to pinpoint the four major necessary components. For the interactions with Beatrice’s head and beak, props created a lightweight foam head that was proportionally accurate, but overall had a scale reduction of 20%. The foam head would then fall into the hands of our creature performer Albert “Spider” Valladares who wore a back harness with ropes that terminated at the hands of the stunt performers acting as ranch hands on the ground. This moveable head that could capture Spider’s calculated creature beats would be integral for eyelines and performance-blocking for the animation team once the edit was assembled.
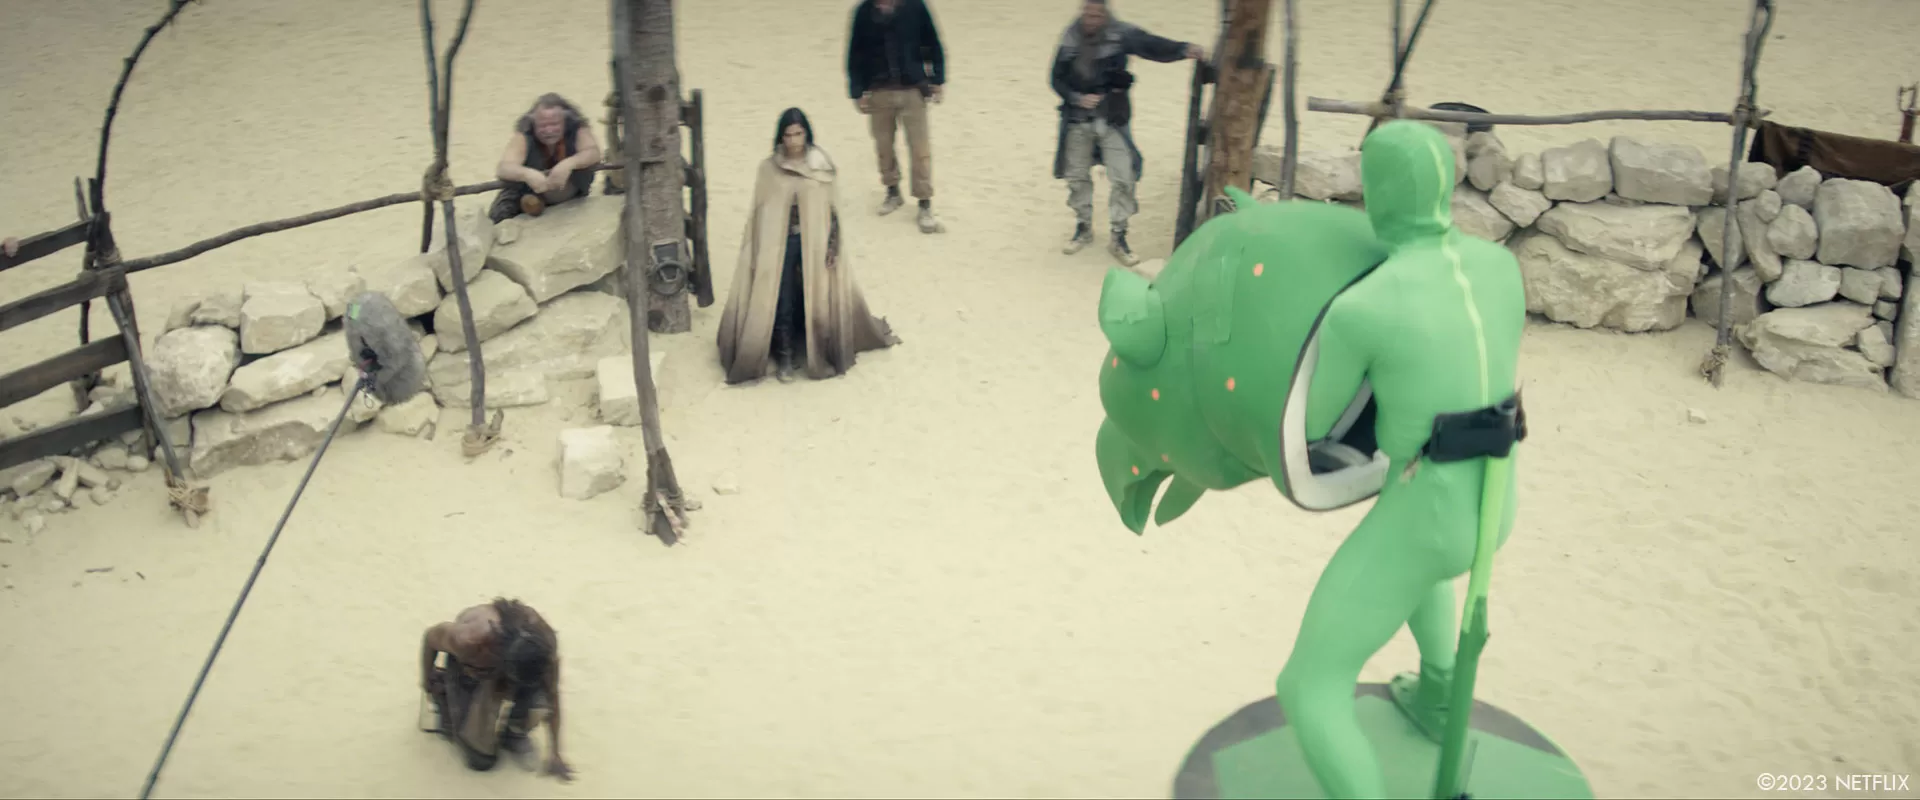
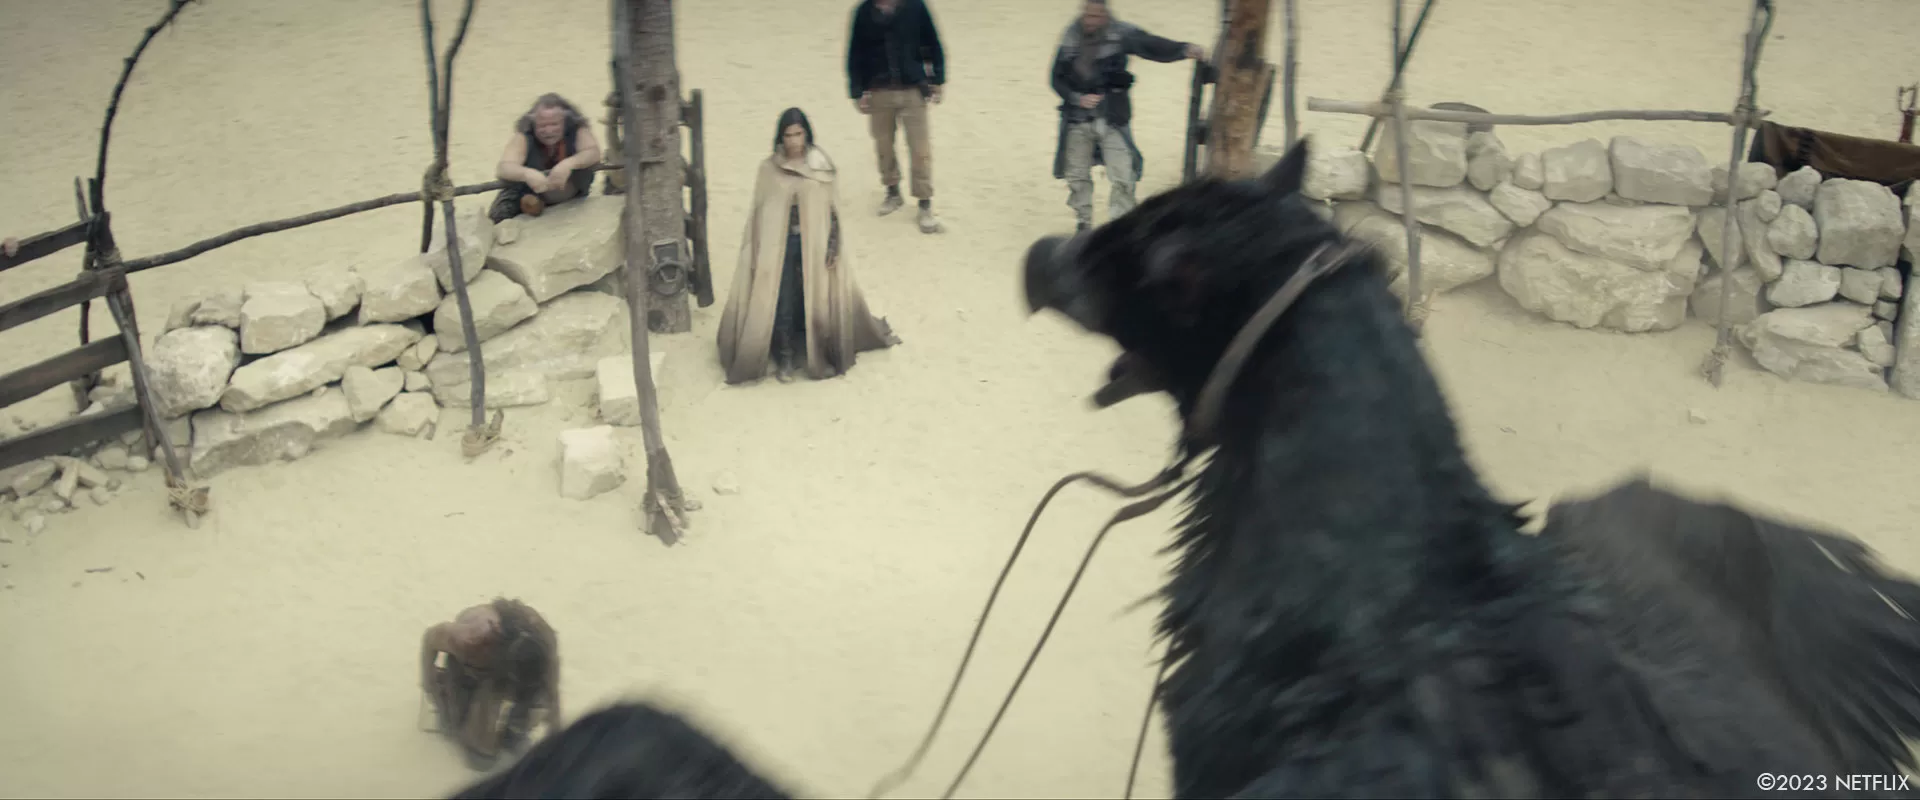
Another important piece to Beatrice was the parallelogram itself that had multiple degrees of axis and acted as the spine of the creature. These components comprised much of the initial part of the sequence, and were crucial tools for selling the presence of the beast in the same space as our ten cast members in and around the corral. On-set, we would jump in between takes to give performance notes to Spider and our special effects team to tie in with any of the actions or reactions needed for each setup in order to give us the best plates with performance between our practical cast and digital creature.
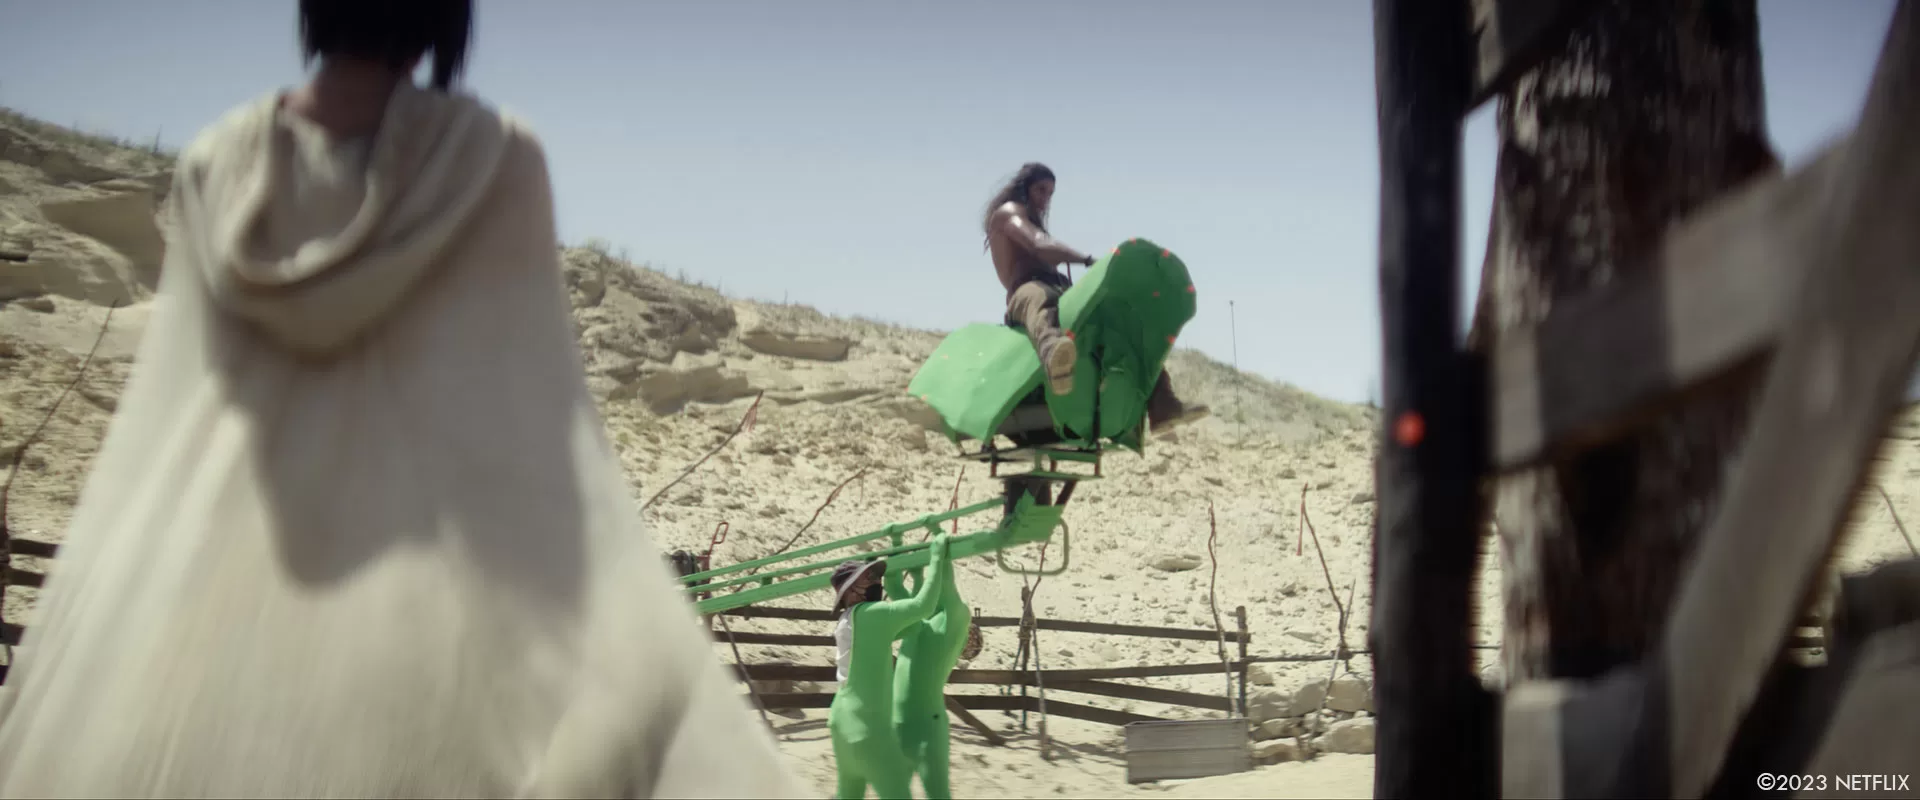
For the flight portion of the sequence, we shifted our needs, rigs and shooting location to include a suspended rock and roll truss that had a 55 gallon drum skinned with a green shape based on our 3D sculpt of the creature.This rig was controlled by multiple stunt performers that would swing the suspended rig back and forth based on the action beats. After successfully shooting the majority of the sequence, we had a unique opportunity in post to design the entire flight portion of the sequence with the use of post-vis and a trifecta of hero digital doubles and environment, spherical locked off camera plates that we were able to reanimate and recompose to our liking, and anamorphic action plates that covered very specific action beats within the sequence.
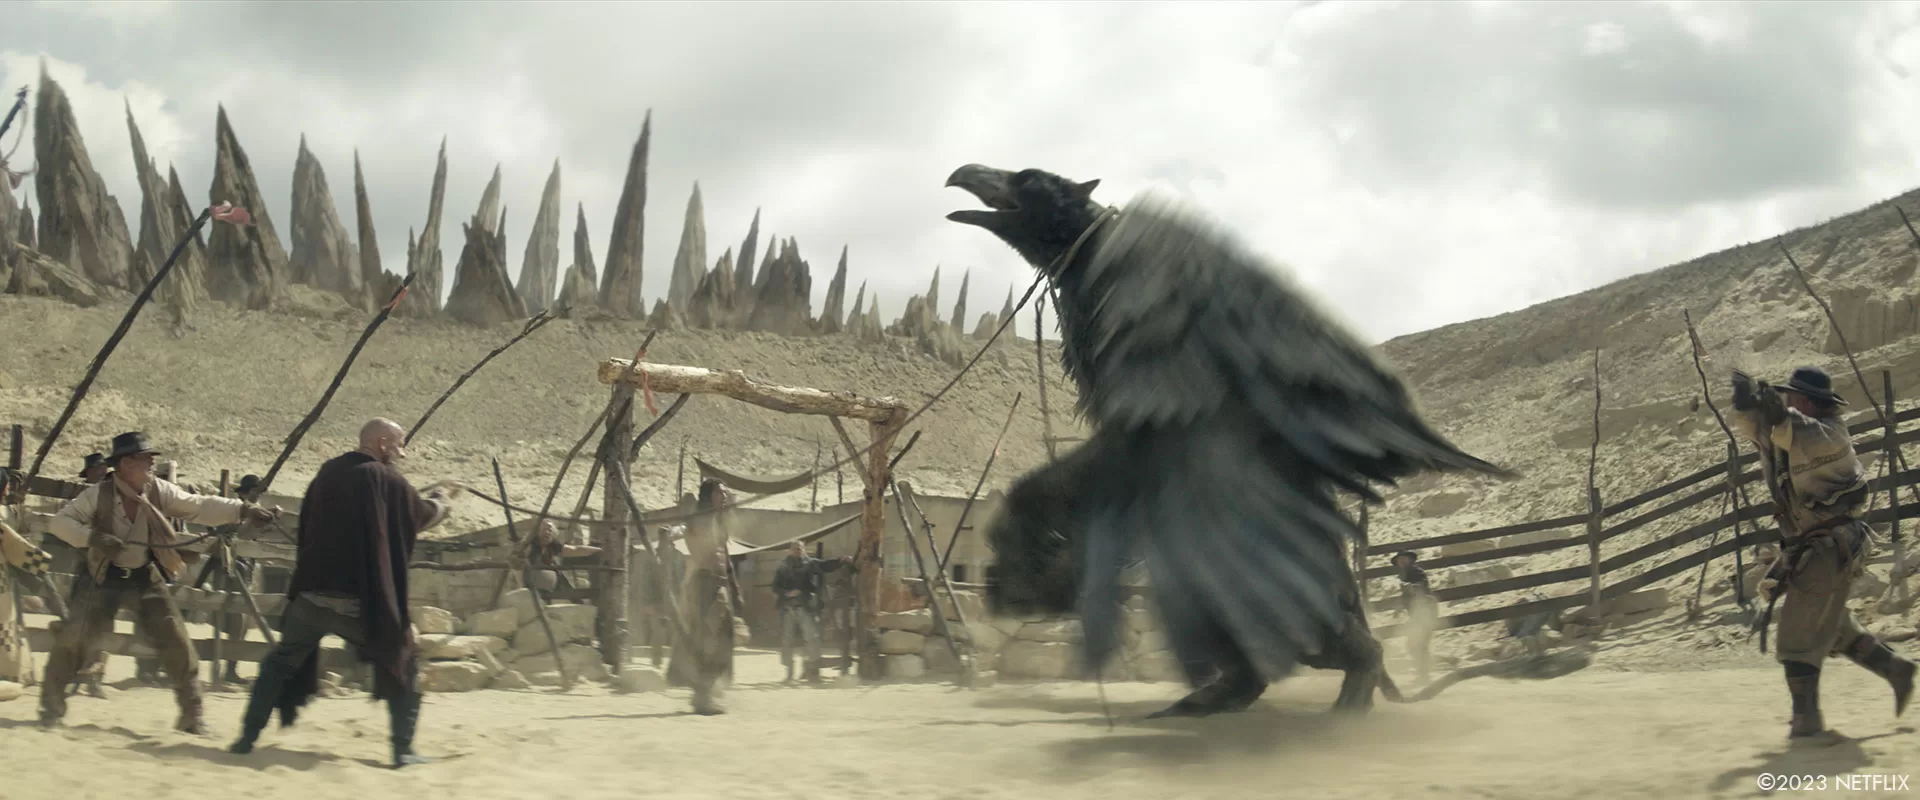
From a lighting standpoint, the plates and HDRI’s captured on-set provided us with a great base, but once we started to composite the Bennu into the shots, we realized that the bounce off of the bright sand in the plates was causing her to feel very over lit and bright from all the fill created from the ground, and caused an overall loss of detail across the asset. This was easily fixed with some adjustments to our scene lighting and composite adjustments throughout the first half and last half of the sequence.
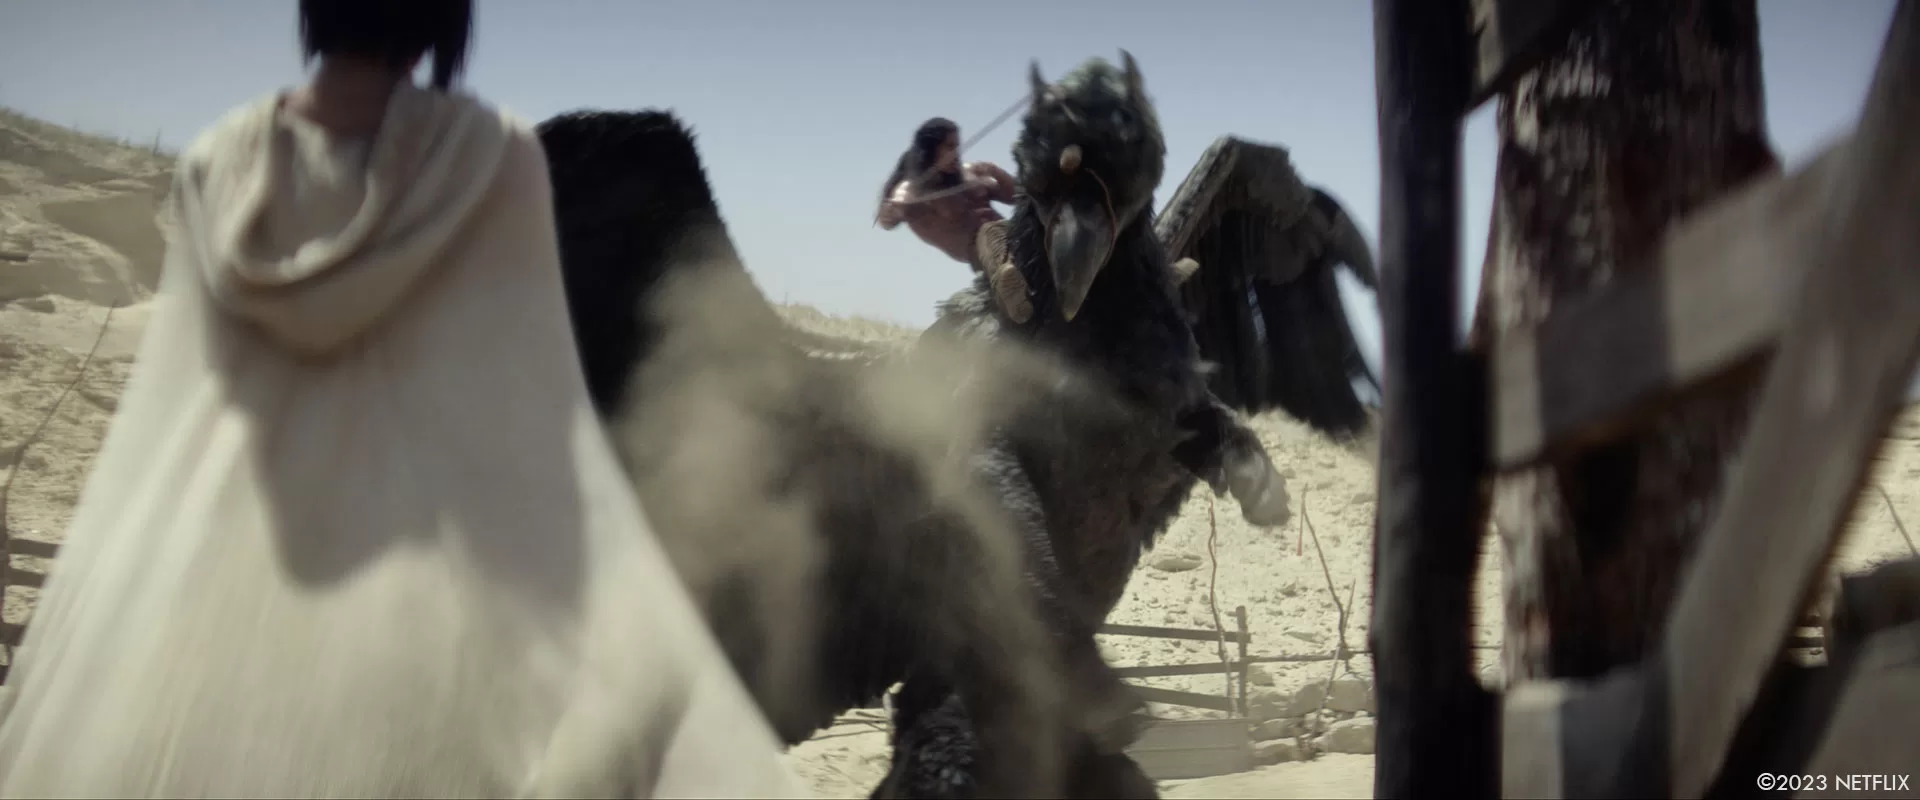
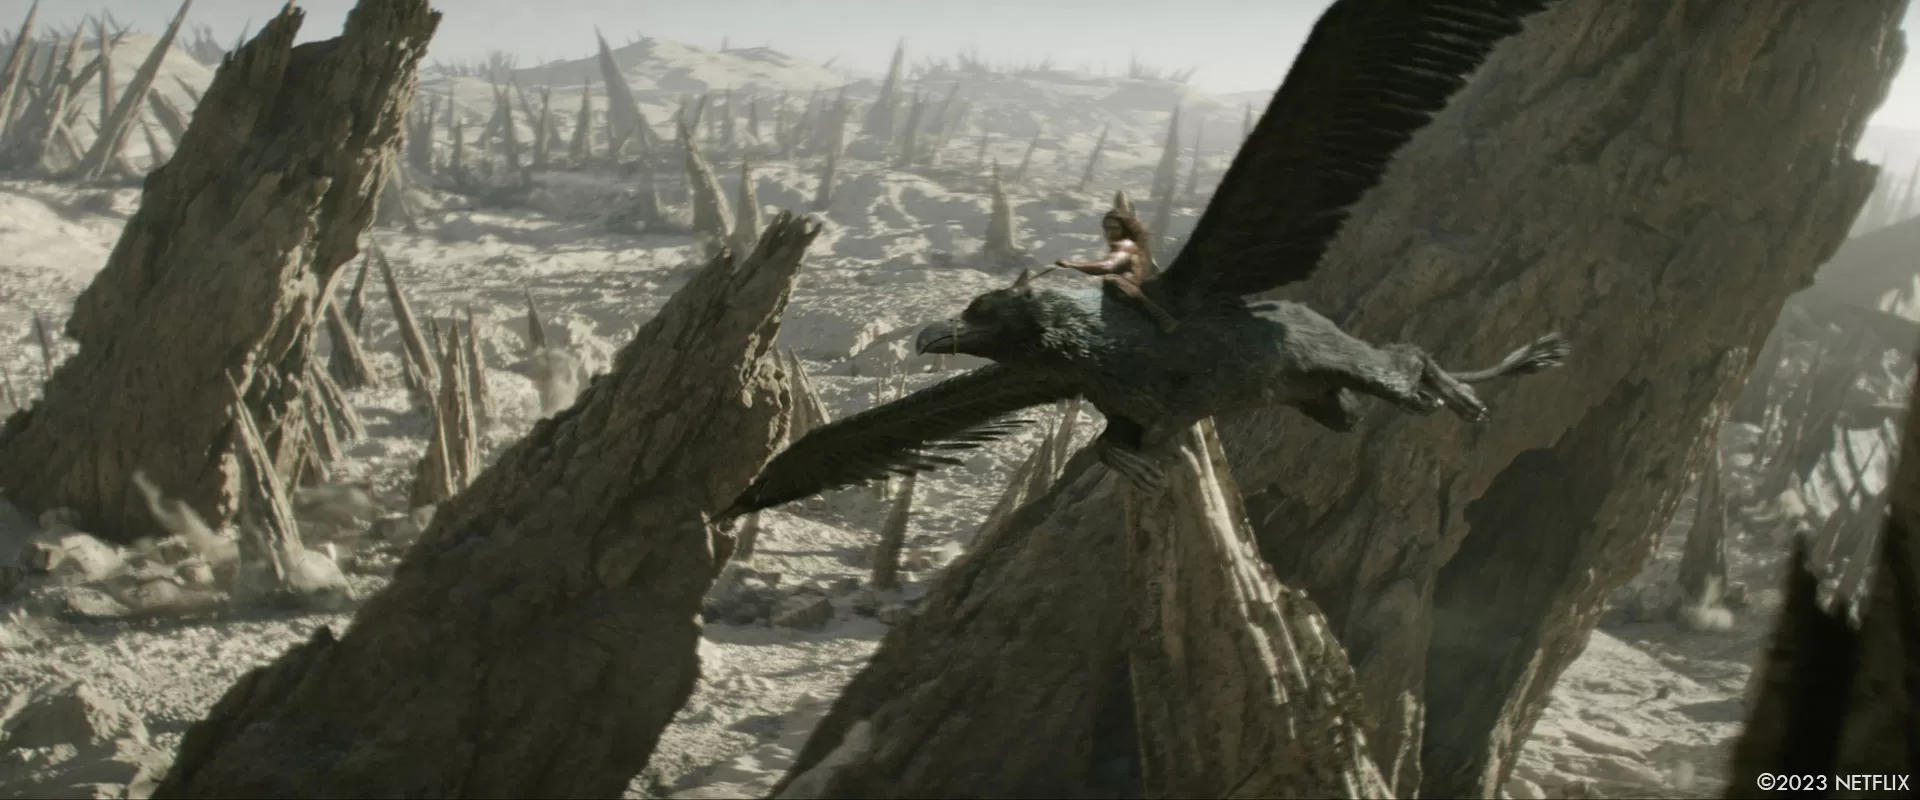
Another huge component to Beatrice was obviously her iridescent feathers. As if having a creature with thousands of feathers wasn’t difficult enough, we decided rather early on that those feathers would also have an iridescent and oily quality to them, similar to ravens. Getting into the micro-details of these feathers, we also peppered in layers of dirt, pebbles and fine particulate to make her feel more “in-world” for the dusty, gritty ranch of Neu-Wodi. Knowing of the performance and sequence beats early on helped Framestore understand the needs of the feather dynamics so they could develop new tools to use for the creature that netted very successful renders as seen in the flight portion of the sequence. For the flight, we spent a lot of time discussing not only feather ripple, and collision looks, but how the light would react to the iridescent and oily attributes as the griffin flew through this 3D space.
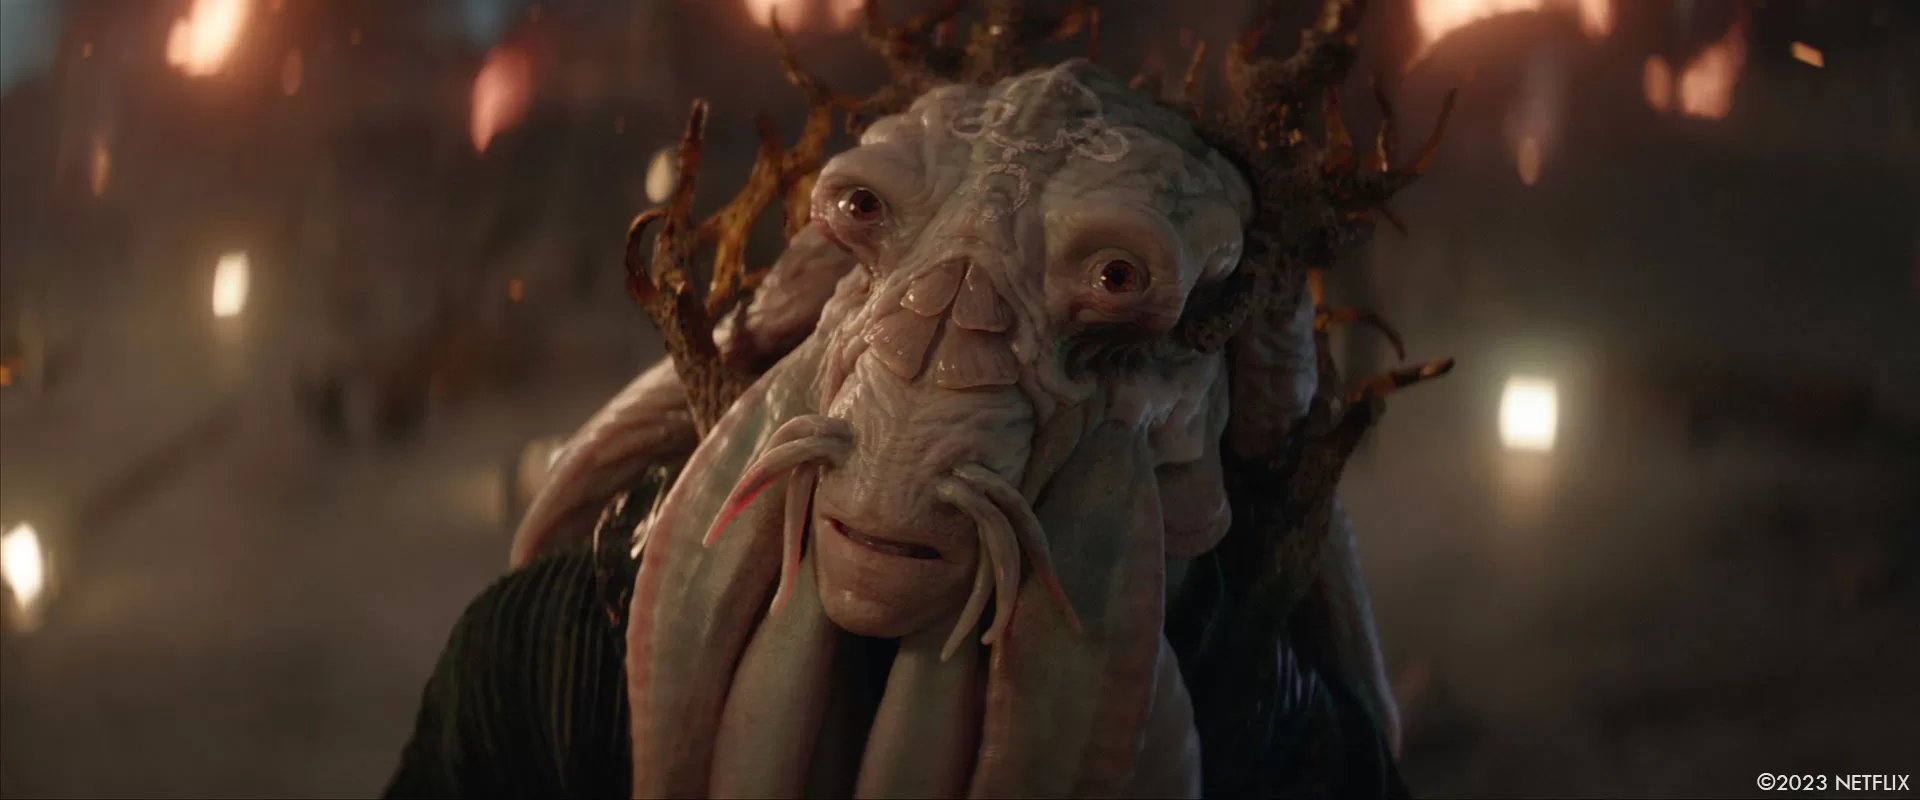
King Levitica:
We started out with a Z-Brush model of King Levitca that was designed by Fractured FX, with a 2D paintover of his clothing by our costume team. When it came time to decide on a shooting methodology for the King, I pushed for an actor to be the base of Levitica, with face cams to capture the nuances of the performance. We lucked out with Zack casting Tony Amendola for the role, as he brought such sincerity that we took care in making sure translated properly to his digital counterpart.


In post we explored Levitca’s finer details, referencing a bunch of ocean dwelling creatures including jellyfish, squids and eels. We knew Zack really like the base look in the concept art, but we tried to enhance the base by infusing subsurface veins and semi-translucent properties along with a wet, specular sheen throughout his face and tentacles to get his look more in line with our ocean creature reference. When the environment of Sharaan started to build up around the King, we decided he should have some spiritual tribal symbolism that tied back into the world around him, so we added hand-drawn paint on the crown of his head, inspired by African tribal face paint. Once we started placing the asset over Tony’s head, we realized that the weight and dynamics of the tentacles should be interacting, depressing and displacing Levitica’s wardrobe. The team at Weta, led by Ken McGaugh and Robin Hollander, created a hero digital double replica of the wardrobe, with intricate details matching 1:1 to the practical all the way down to the seam patterns cut by our costume team.
When it came to the facial performance and animation, we retargeted the facecap when it could translate, and when it could not, we found the areas of importance from Tony’s performance like eye twitches, upper brow furrows or subtle movement like separation of the lips, and made sure we honored that through the final animation of Levitica’s face. The team at Weta FX did a tremendous job of preserving and respecting Tony’s rich performances on-set, and making sure we could feel that action in every shot of Levitica.
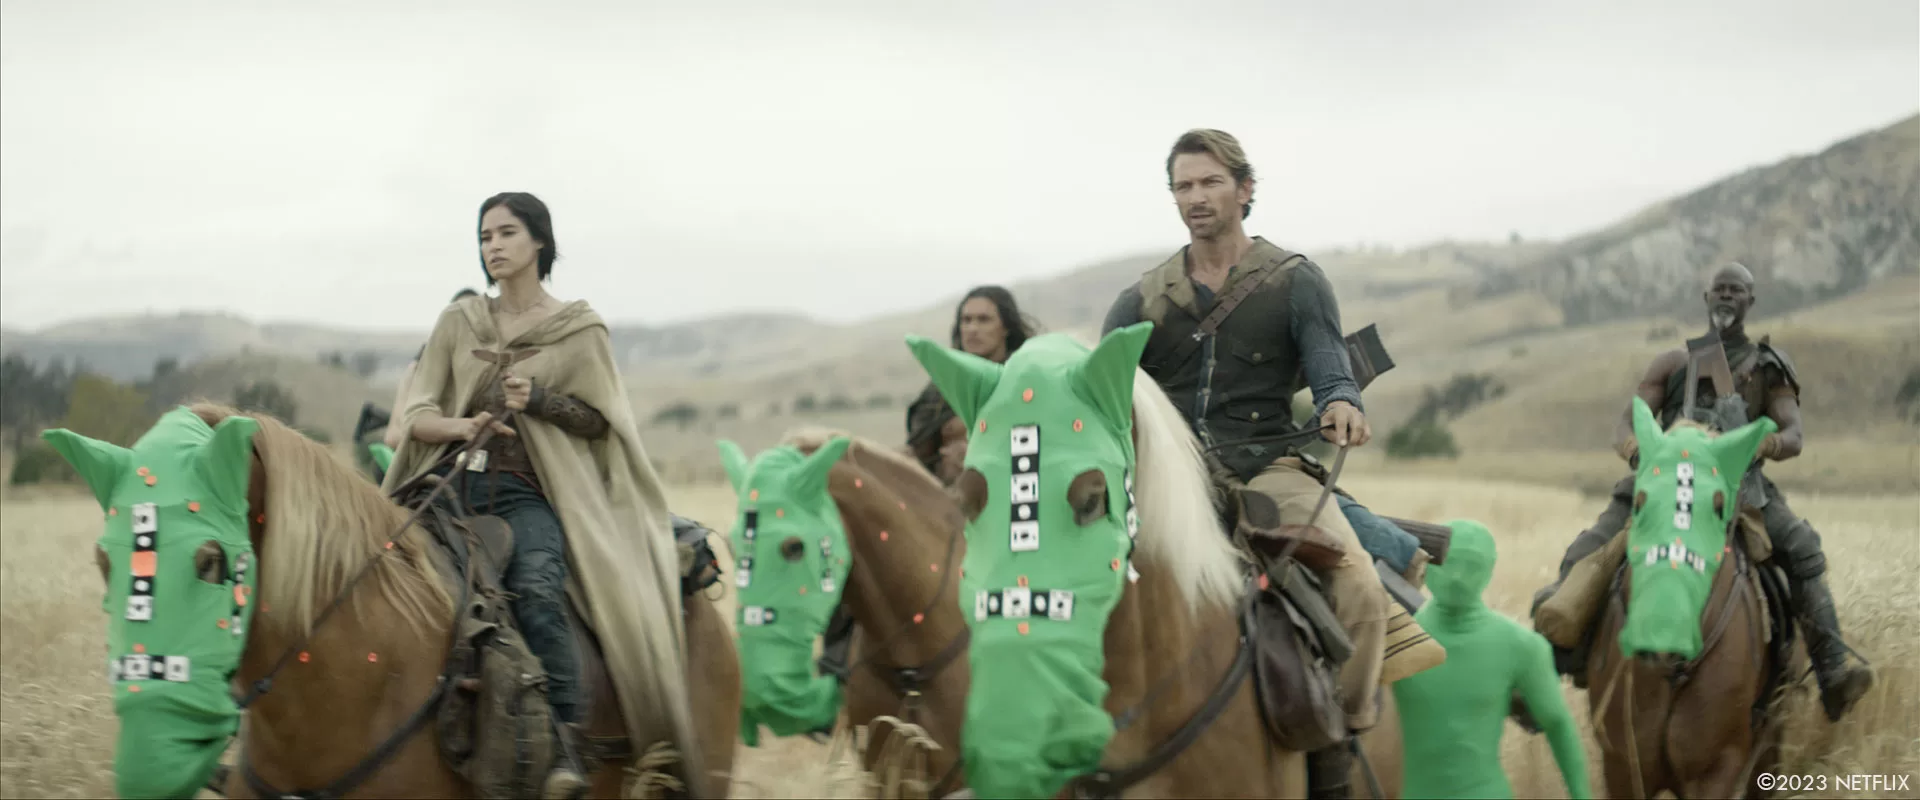
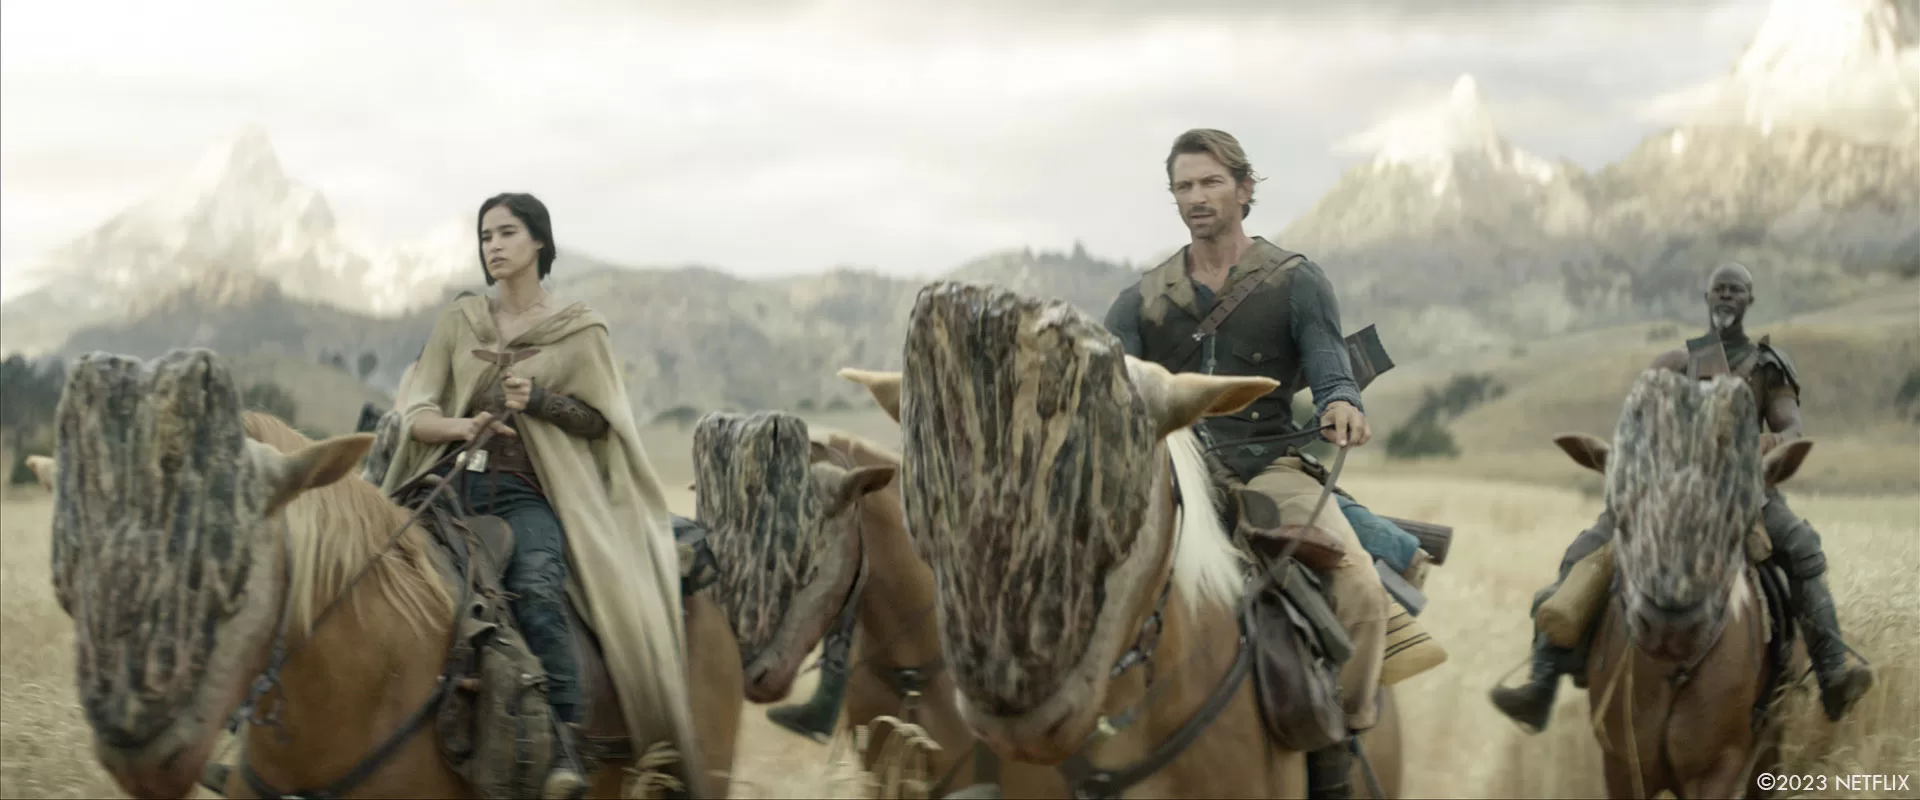
Uraki:
For the Uraki we initially explored more extensive CG creatures at a much larger scale that would have forced us to utilize special effects off-road rigs, but ultimately we decided to utilize show horses as the base for about 80% of the Uraki shots, with full digital replicas available for bespoke shots that Zack added in post. Once we got into the intricacies of the design, we decided to focus on the head area, with a unique casque shape dubbed “the toenail” for each of the variations. The tails were based on a combo of Rhinoceros and Hippo tails tied to the movement of the green horse tail stubs.
Because we had to marker up and dress the horses each time they were on set, we got to know their personalities. Each green horse hood was color-coded, and corresponding horse names and characteristics were noted in our horse bible throughout the shoot. These notes helped drive much of the secondary animation of the head, ears and eyes so the animation matched the horse attributes and performance in camera. Hercules was the pack leader, Thunder liked to stop and buck his head, and Apollo was sweet and affectionate.
How did you mix practical effects and digital effects for the creatures?
Anytime we could find a practical solution to the creatures we would try our best to preserve what we could in-camera. For this movie, we tried to mix in a bunch of special effects rigs to help support the performance for our larger creatures like the Bennu, Harmada and even the Beetlejuice chairs. From a Makeup FX standpoint, Zack had certain creatures he really wanted to feel analog, so we made sure we respected that directive and just helped with cleanup and removal of puppeteers.
With a handful of these creatures, the intent while shooting was to minimize VFX, but sometimes when the cut starts to take shape, and the storyline is changed, we end up jumping in to get more involved. I try to take a calculated approach depending on the direction because sometimes a 2D solution can be just as effective as a 3D solution if used correctly.
One example of a change from conception to the final cut is the alien parasite that is attached to a bar patron in Providence. The idea of pulsing energy from the parasite along the intestines attached to the patron’s neck was an afterthought, but ended up working really well as a story point once Dody Dorn changed the edit to include more close up shots of the patron with his eyeballs changing over in opacity as he loses control from the alien parasite.
Another subtle enhancement that we executed in post was the movement of Harmada’s eight eyeballs that were located along the crown of her head. These eyes were built into the suit practically but did not move. When we had approved the majority of the animation of Harmada’s body in the sequence, we felt like we needed to introduce some subtle tertiary animation into her eyes in certain shots to really sell the creep factor. We ended up adding the eye blinks and articulation to only a handful of shots where we felt it paid off or supported a character beat, and left the remainder of the shots as is.
Which creature was the most complicated to create?
Harmada, the grotesque fusion of women and spider, was one of the hardest creatures to execute to the high level of detail Zack expected. We took a complicated hybrid approach to the creature that relied on many departments including stunts, special effects, MUFX and VFX to execute the harmonious flow of performances on set with the rigs and actresses Jena Malone and Doona Bae.
Tricky question, which one is your favorite?
I can’t pick so I’m going to cheat. From an overall standpoint, our 10 foot tall, 22 foot long Bennu with a wingspan of 40 feet and over 56,000 iridescent feathers definitely wins. For technical execution, I’d pick Harmada, and for overall character development, Jimmy is my favorite. Levitica won my heart because of this incredible charisma that Tony Amendola brought to the creature. The Ratpig wins for most revolting.
One of Zack’s signatures is slow motion. What’s the main challenge with this kind of shot?
Long drawn out shots that are anywhere from 500fps to 1,000fps sometimes tend to get stale. When we didn’t have some sort of practical element or continuous action in frame, we tried to add detail that would keep the shot alive. Details like dirt and pebbles that had been kicked up from Tarak’s jump of the Bluff in Neu-Wodi, or tracer fire traveling across frame, ricocheting and causing slow-motion slag spatter across the surrounding environment. Some of the details we tend to add in traditional 24fps shots don’t hold up at the higher framerate, and we can’t really hide our sins behind motion-blur in these shots. From an implementation standpoint, these shots require more time: ingest and prep time, paint and roto, match-move, etc. Many of our HFR shots were data heavy, as the arduous simulations were run matching the native framerate. But, when possible, we created other efficiencies for some of the under 100fps shots, rendering simulations at a 24 or 48 time-base and stretching or retiming them to fit the native framerate. This technique also helped ground some of those simulations in a real world look, so we knew when we added them to a 60fps shot, they would still feel natural.
Another challenge we face often in these Synder shots is the application of dynamic re-speeds from editorial. Depending on the in and out frames of the multiple ramp points in a shot, we sometimes need to make creative choices to the added elements. Questions we faced in shots like these included: Does the feather simulation work at the native 1,000fps, or are we losing the ripple and collision detail everyone worked so hard to make visible? Is the animation working at this framerate, or would we get a better silhouette and stronger pose if we didn’t ramp it as fast as the plate ramps. We need to be careful when we trigger these explosive FX passes, as we need to make sure they expand enough in shot to show the scale against the Attack Launch while also highlighting the damage caused by the collision against the docks.
How did you work with the SFX and stunts teams?
There was a ton of collaborating with SFX and stunts to enhance the performances between the main cast and their digital counterparts like the intricately feathered Bennu, creepy arachnid Harmada and the Beetlejuice chair capture devices. I spent a lot of time discussing rigs, choreography and shooting methodology with Michael Gaspar and our amazing stunt coordinator Freddy Bouciegues, working together to find a common ground to support Zack’s creative direction. We had to be closely aligned for all of the cross pollination of work each department was responsible for, and we believe the visuals are successful because of the teamwork and willingness to succeed together as one, unified team during principle photography.
Did you want to reveal any other invisible work?
I love that you always ask this question, but isn’t the point of invisible work to not reveal itself?!? There are some really impressive shots in the Bennu flight that were never intended to become CG camera takeovers, but we ended up designing a handful of them in post to help the sequence flow better. One shot in particular blends from a practical plate and camera, to a complete CG takeover then back through to another practical plate and camera. It’s a pretty seamless composite in the end. Blink, and you’ll miss it.
Which sequence or shot was the most challenging?
The peak of the third act on Gondival proved the most complex, relying heavily on VFX to support the story and cast performances. It was a beast of a sequence that turned out looking better than all of us could have ever imagined, with the correct resources and energy aimed at the right elements at the right time.
Is there something specific that gives you some really short nights?
The custom anamorphic lenses that Zack dreamt up at Zero Optics. Zack really wanted Rebel Moon to look and feel very analog, and a shallow DOF and unique optics were a very large component of that recipe. These lenses were comprised of Leica Noctilux & Summilux spherical backs and Cineovison Anamorphic fronts that were rehomed together to form an extremely unique, but challenging set of prime lenses. Because the majority of the footage was daylight dependent, harsh lens flares and anomalies peppered our VFX plates. To support this shooting style, we shot an extensive library of lens flares and optical irregularities to help us replicate the distinctive look. Building upon our knowledge from the dream lenses in Army of the Dead, we developed a custom bokeh board that consisted of a unified and predefined pattern of small pin-hole LED lights. Depending on the lens’ FOV and focal length, we were able to toggle lights on and off to find the perfect alignment for the quadrants we needed to capture the kernel patterns and bokeh on each lens. Our goal from the beginning was to create a digital lens package that matched our physical lens to support this naturalistic, but unique style that also gave us the freedom to choose which optics we wanted to apply to our CG shots.
What is your favorite shot or sequence?
My favorite shot is the high angle over Beatrice the Bennu as it was one of the first that shaped that sequence and that creature’s look; it includes a ton of micro detail both in the animation, lookdev and lighting.
My favorite sequence is Sam and Jimmy at the river during sunset; the inflections in Jimmy’s faceplates and ears with luminance shifts in his eyes during the poignant moment complement the performances on set; it makes me well up with tears every time because it is such a simple but beautiful sequence.
What is your best memory on this show?
Even though it was a grueling shoot, and very compressed and difficult post-production, we always managed to have fun and carry a lightness about designing and creating all of the effects shots. While we were always cognizant about our cameras, lighting, composition, and story, at times we were also able to say, screw it, let’s just make some cool looking shots for the audience to enjoy. We had a lot of fun doing just that with amazing teams around the globe that also bought into that same mentality.
How long have you worked on this show?
April 2024 will mark 3 years.
What’s the VFX shots count?
1,380 shots spread across Framestore Montreal & Vancouver, Weta FX, Scanline, Rodeo FX, Luma Pictures, Mammal Studios and a nimble in-house team.
Without giving away any secrets, what’s the most exciting thing about Part Two?
When we hit the throttle, we don’t let off until the gas runs out!
A big thanks for your time.
WANT TO KNOW MORE?
Framestore: Dedicated page about Rebel Moon – Part One: A Child of Fire on Framestore website.
Rodeo FX: Dedicated page about Rebel Moon – Part One: A Child of Fire on Rodeo FX website.
Weta FX: Dedicated page about Rebel Moon – Part One: A Child of Fire on Weta FX website.
Netflix: You can watch Rebel Moon – Part One: A Child of Fire on Netflix now.
© Vincent Frei – The Art of VFX – 2024

