Alessandro Ongaro began his career in visual effects in 1998. He has worked on many films such as CONSTANTINE, HOW TO TRAIN YOUR DRAGON, KUNG FU PANDA 3 and MISS PEREGRINE’S HOME FOR PECULIAR CHILDREN.
What is your background?
After graduating from a Design school in Milan, in 1998 I moved back to Lugano in Switzerland (where I grew up) and started working for a small VFX Shop. A couple of years later I moved to Milan again where I worked on mostly Italian films until 2004 when I got hired by ESC Entertainment in Alameda, CA. That job led me to DreamWorks Animation where I stayed for about 11 years doing a lot of FX work. Finally in 2015 I joined DNEG in the Vancouver office.
How did you get involved in this show?
Last year in March, Stef and Susan came to Vancouver to meet us and told us a bit about the film and the different challenges they were facing, in particular the Environment work required for the Car Chase, we were really excited about having such a great opportunity to help them with the project, in particular for our Vancouver studio. About 4 months later we got awarded the show, right before the Car Chase sequence was about to start shooting which allowed us to get involved early on with the required Environment capture.
What was your feeling to be in the Marvel Cinematic Universe?
DNEG has had a long collaboration with Marvel Studios having worked on many projects including the first ANT-MAN. Personally I was thrilled about it, in particular because I loved ANT-MAN and I’m a big Marvel fan, so being able to contribute to their 20th film is certainly something I felt very fortunate about.
How was the collaboration with director Peyton Reed and VFX Supervisor Stephane Ceretti?
We worked exclusively with Stephane throughout the project. He has an extensive understanding and knowledge of the Marvel universe and in particular of their VFX process. He did a really great job in communicating Peyton and Marvel’s expectations for the film and yet kept an open-minded attitude to new ideas and always pushed us to creatively explore.
What were his expectations and approaches about the visual effects?
Stef really wanted to push the photo-realism from the first film, in particular in regards of the CG ants, character animation and overall look and feel. The idea was to be and stay as photographic as possible, so we tried to use as much as we could from the plates, limiting the full CG shots to just a few. This worked well in my opinion since it gave us a very good foundation to build from.
Stef is really pragmatic when it comes to VFX; this really helped us throughout the show and he was always focused on the big picture and made sure we could deliver the best shots that served the story. Marvel wants to make the best film they can and Stef wanted to make sure we felt part of it. He has been extremely collaborative and a source of inspiration for us.
How did you organize the work with your VFX Producer?
Janet Yale and myself originally split the work into two teams, Car (looking after the Car Chase) and Quantum (everything else), but throughout the project we had to somehow re-balance the workload since the shots count kept fluctuating because of cut changes, so the Car team looked after some other smaller sequences also.
Eventually Production Manager Jose Maria De La Puente joined the team and him and Janet worked really well together in managing and scheduling the large amount of work required for the project; because of the original high shot count and diversity of work for the Car Chase they decided to also split it into beats in order to better schedule and manage the different required tasks, in particular RPM (Roto, Prep and Matchmove).
Our build team was supervised by Ryan Woodward, and Pedro Santos was the Environment Supervisor. Along with his team, Pedro looked after the huge amount of work required to turn Atlanta into San Francisco, this was quite an undertaking.
Remi Cauzid was our Creature Supervisor and was responsible for all of our rigging needs, both for Creature, Vehicles and Post Anim, and Jeremy Stewart was our Animation Supervisor. For the FX team, we had Mitul Patel and Daniel Jenkins as supervisors, and Filippo Forno supervised all the CG Lighting needs for the film.
For compositing we assigned one supervisor per team. Jennifer Meire supervised the Car Chase, along some other smaller sequences, while Farhad Mohasseb was in charge of the Quantum team, specifically for the Kidnap Reveal, Ghost Diversion and Final Battle. We also had a fantastic team in Mumbai, led by DFX Supervisor Tim McGovern, which helped with the Car Chase.
Xavier Bernasconi, our DFX Supervisor, helped a lot gluing all the departments together, oversaw part of the build and FX dev while I was on set, and worked really closely with Tim McGovern during the last few weeks of production.
What are the sequences made by DNEG?
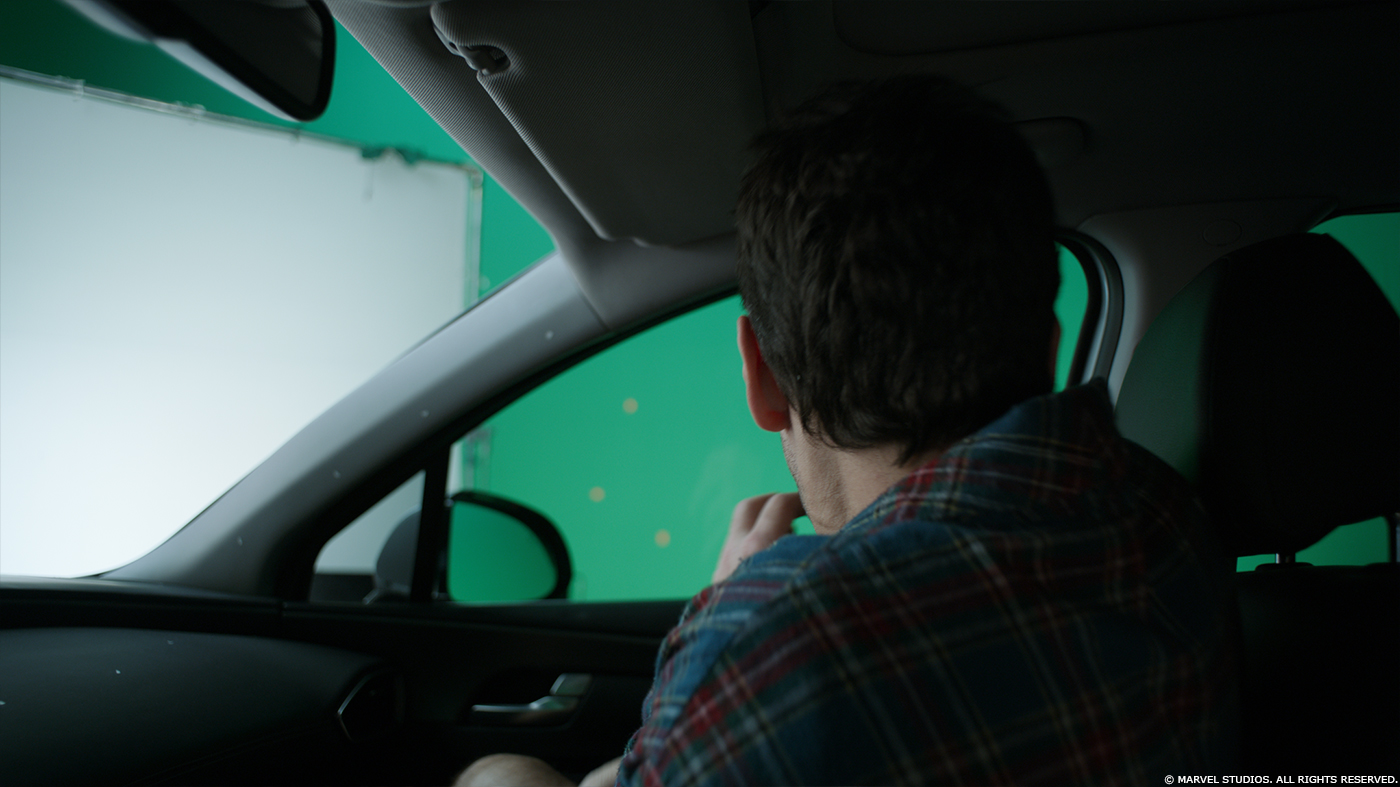
Kidnap Reveal, where Scott wakes up in Hope’s car and encounters the “Giant” pigeons.
Scott Channel Janet, when Scott first gets in the Lab and Janet “possesses” him, helping Hank and Hope to pinpoint her location.
Truth Serum Montage, the hilarious scene where Burch interrogates Luis and Ghost suddenly appears.
Ghost Diversion, where Scott/Ant-Man keeps Ghost busy in the old building so Hank can take back the Lab and prepare to go to the Quantum Realm.
Quantum Prep, where Hank does the Leap into the Quantum Realm.
Car Chase, the crazy car chase in the street of San Francisco.
Interior Lab Finale, where Ant-Man and Wasp fight Ghost while Hank and Janet return from the Quantum Realm.
Giant Man Sneaks Home, where Scott deceives agent Wu with an empty Ant-Man suit that eventually deflates so he can get back home before the FBI gets there.
So except for a few smaller sequences early on most of our big work happened in the 3rd act.
Can you elaborate in detail on the creation of Ant-Man and the Wasp?
We didn’t build Ant-Man and Wasp, our friend at Scanline did it, we ingested their models and textures and re-built the shaders at DNEG using the photographic references captured on set.
Can you tell us more about the shader and texture work for their suits?
At DNEG we use Isotropix Clarisse for all of our shading and rendering work, so for Ant-Man and the Wasp we just stuck with our usual pipeline, which relies on custom shaders and lights.
All of our shaders are Physically Based using a GGX Specular Function, which give us great results. Because of the continual scale change we controlled some of the shaders parameters with shading variables that were driven by a scale attribute baked with the character caches. This was particularly useful for Giant-Man where we had to crank up his displacement value up to 5 times in order to get the correct look.
How did you manage their rigging and animation?
For Ant-Man and Wasp the main rigging was pretty straightforward but one thing we had to make sure was that all the transformations and deformations were happening in the character local space. This was crucial to avoid precision errors in the caches when the characters where shrunken down to just an inch and a half.
Post animation we were running an automatic muscle pass. By default we kept jiggle and skin sliding off since with the pretty loose fit of the costumes we didn’t really require such features always on. Finally we were running either a full cloth simulation or just doing post sculpt on a shot by shot need
A lot of the Animation was keyframed by Jeremy and his animation team, but we also received some motion capture data that Stef and the Stunt team recorded at the end of the shoot. At times we also used our own Moven mocap system.
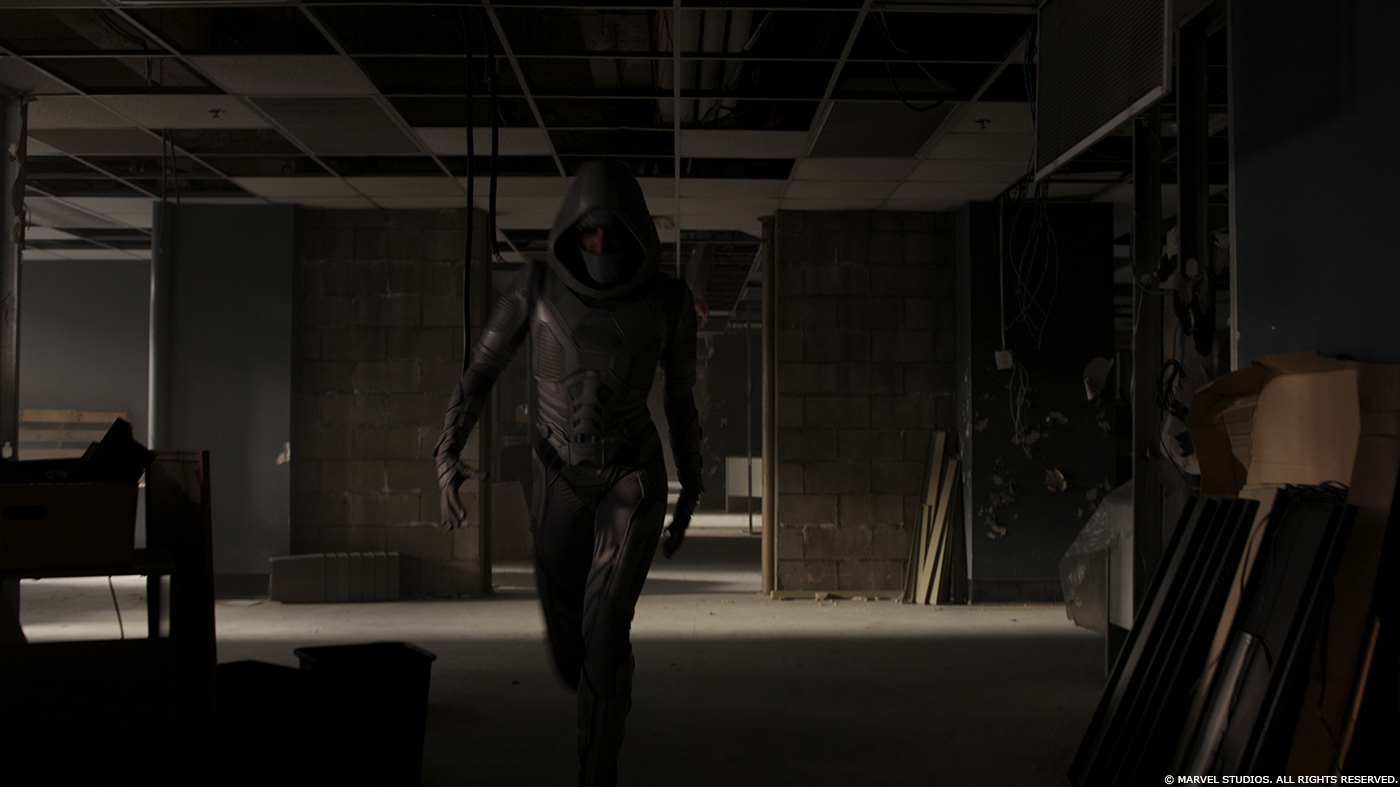
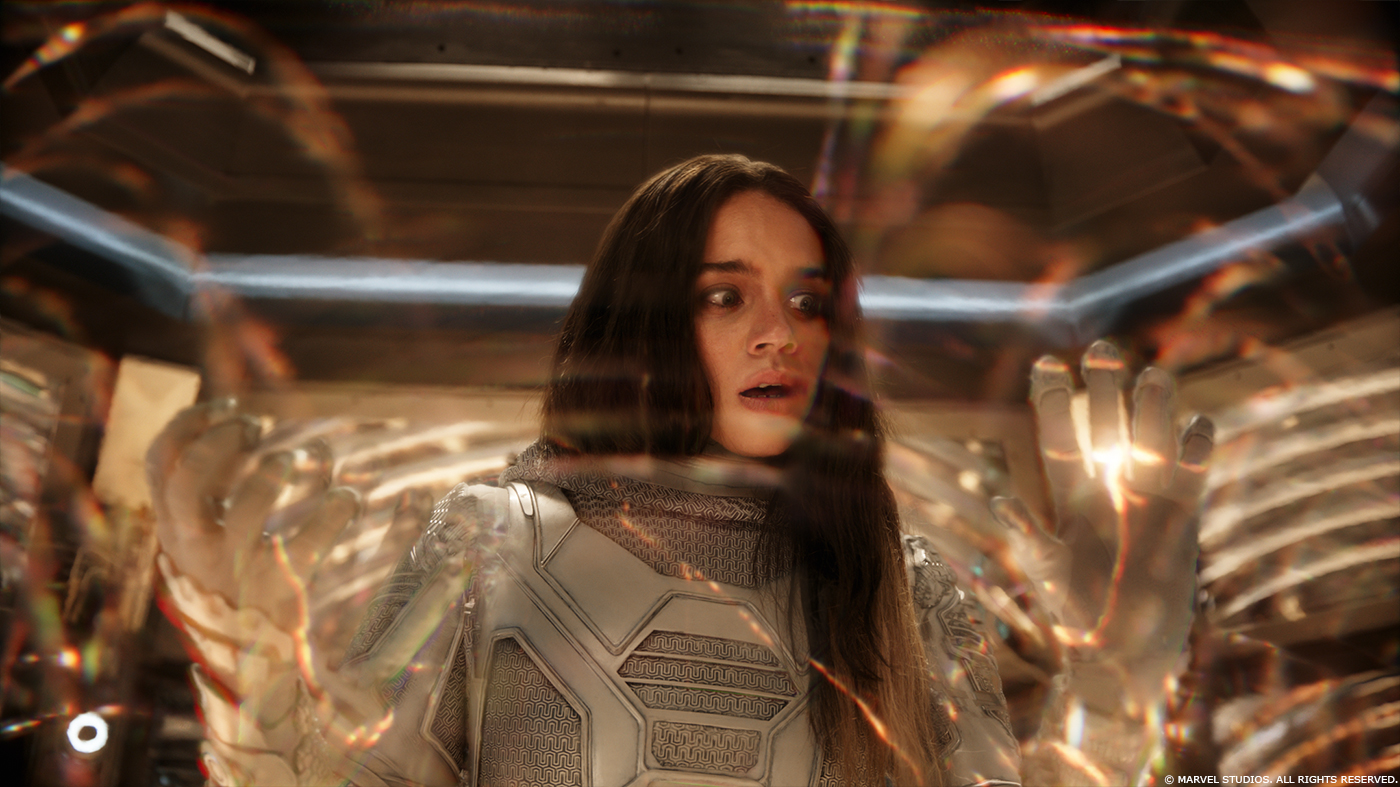
The new villain is Ghost. Can you tell us more about her creation?
Besides other hero assets that we built and shared with other vendors we were also in charge of building Ghost. As usual with Digi-Double the process started with a body scan of Hannah John-Kamen wearing the suit. This was taken care of by Clear Angle Studios who provided us with some very high quality data; we also made sure to receive cross-polarized textures.
From there Jordan Menard started building the model in Maya. We tried to build the costume following the same process as the Costume Department did to make sure that later on we would get similar deformation.
Jesse Balodis did the texture work in Mari with the help of Christopher Zammit while Jan Shubert and Patryk Urbaniak took care of the lookdev in Clarisse. Because toward the end of the film she’s not wearing her mask, we also had to build a variant without it, so a full face model with groomed hair was required.
Her rigging and animation followed the same workflow outlined above, but for Ghost we also had to add facial expressions. This was accomplished with a blend-shape system that relied on basic facial poses and expressions (FACS) provided to us by ILM, which used the Medusa system to capture them.
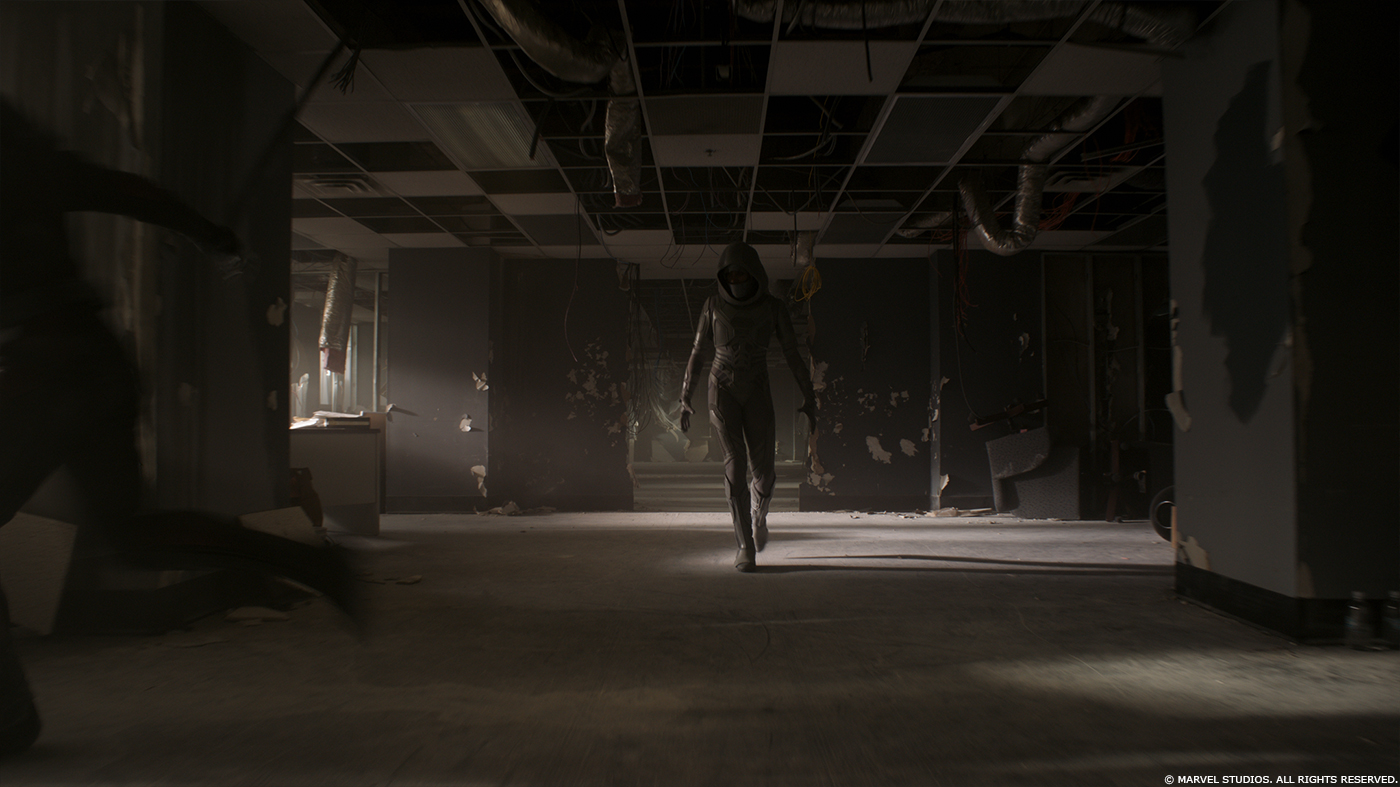
How did you design and create the phasing effects for Ghost?
The design started really early on; because we were building Ghost it made sense for us to work on the phasing treatment. There were some tests already done which Marvel shared with us, these were more an indication of what not to do rather than as an indication of her look – besides that we knew that she was capable of phasing through objects and according to script pages she was also able to suddenly appear and disappear (we referred to those moments as phase in and phase out). Peyton was very keen to maintain an optical look to it, so anything that was too sci-fi or magical was a no.
When you think about designing complex effects like this, you always want to start with some concept work, but in this case we knew it wasn’t the right approach, instead from the very first tests we explored ideas with moving pictures in Nuke.
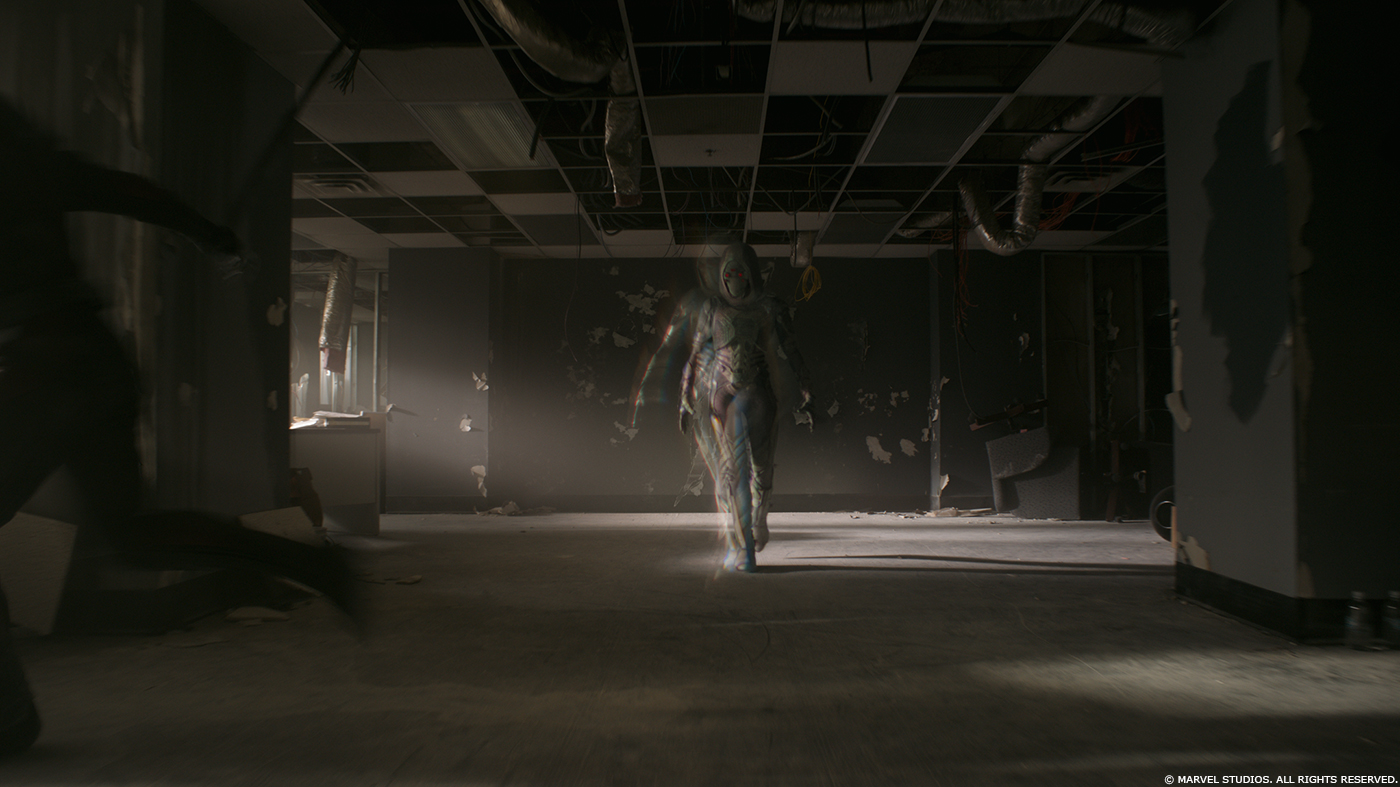
Because she is the result of a freak “quantum” accident we wanted to play with concepts that related to that branch of physics, which is also a constant reference throughout the film. Ideas like multiverse, space, time, matter, energy and quantum entanglement have been a source of inspiration so we started from there. We started exploring the ideas of Phantom images left behind (like a past version of Ghost) along with future images which were anticipating her actions.
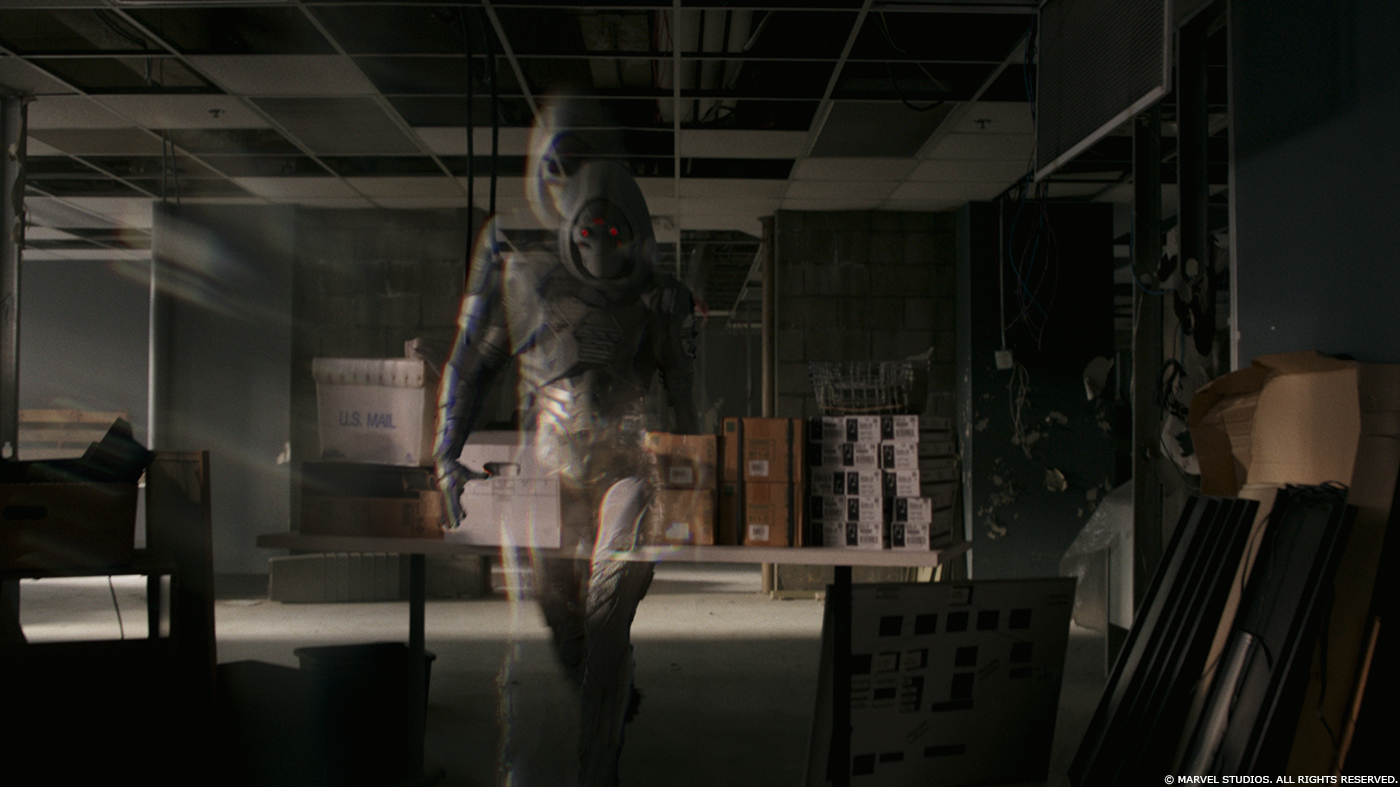
Comp Lead Ben Outerbridge did most of the early dev work in Nuke, playing with different treatment to gives her some level of transparencies, prismatic treatment, chromatic aberration and so on. From there we evolved into the alternate poses that became her signature look. The idea was something like, what would Ghost do if there were multiple copies of herself representing alternate realities, would she a make different decision, or react at a different time, while she walks toward us for instance, one could stop, one could take a different path, and so on.
There was a shot in the Ghost Diversion sequence where Ghost phases through a wall where we first played with the idea of the Alternate Phantom images, that was received extremely well at Marvel so we kept pushing toward that direction and started using them almost every time she phases.
This of course meant more work for the animation team, since the Phantom images were animated through keyframing. It also meant that our CFX team had to work on multiple Ghost assets within a shot, a task that became pretty challenging for the shots where Ghost didn’t wear the mask since the team had to also handle the hair simulation.
Because we had to convey the idea that for Ghost it was very painful to phase and this pain was also the motivation of her actions, we needed to add an extra level of details to her body treatment. So in parallel to Outerbridge’s 2D work we were working on the 3D aspect of it. FX TD James Charles, with the support of FX Lead Gero Grimm, tackled the task to add a body treatment or “Fritizing” as Stef liked to call it. This was achieved in Houdini as a sort of 3D displacement; it was a controllable/directable simulation pass that was making sure that no body parts of Ghost were affected (or displaced) for more that one consecutive frame.
Later on Mohasseb and the Quantum compositing team started exploring the idea to use alternate takes or retimed plates of Hannah’s performance blended in with the CG passes. At times we’ve also used Ghost performance from other shots. This turned out to be very useful in particular in the Interior Lab Finale.
For most shots the workflow always started with a body track of Ghost, meanwhile the prep department, supervised by Shane Meehan, was making sure Ghost was painted out since she was going to be replaced with the CG version; once completed, the animation team was next, putting on and animating the hood if needed and creating all the alternate phantom images through key frames animation, at times we were dealing with 6/7 copies of Ghost. The creature team was then running all the necessary passes, like muscle and cloth sim and for the shots with no mask on, hair simulation. FX simulation was next. Lighting was then rendering the beauty pass of Ghost, the FX passes, the Phantom copies and all the necessary utility passes (like transparency pass), all in deep render so that the Compositing team could put all the pieces together.
Being an effect that was driven by Ghost’s performance there wasn’t really a blueprint we could follow, each shot was somehow unique, her actions were dictating what the Phantom images would do or the timing of the effect. It was a creative process for everyone involved, all these elements had to be blended together nicely in order to not be too distracting; they had to help telling the story, the effect itself became a character on its own.
What was your approach for the big car chase sequence?
Oh boy! This would require a whole article on its own!!
Because of the high shots count and the diversity of the visual effects needed for the sequence, we decided to split it in beats. This facilitated the scheduling and management of the elements needed to move the shots through the pipe and allowed us to better handle the turnover of shots that of course didn’t happen linearly.
We were very fortunate to have a very detailed Previz done by Stef and The Third Floor, this gave us a pretty clear picture of what the big challenges would have been, including the massive environment work.
In post we were also receiving a very well executed Postviz with each new turnover, which once again turned out to be very useful as we could cut our WIP shots with the Postviz in order to evaluate the work done. It did really help a lot to maintain continuity.
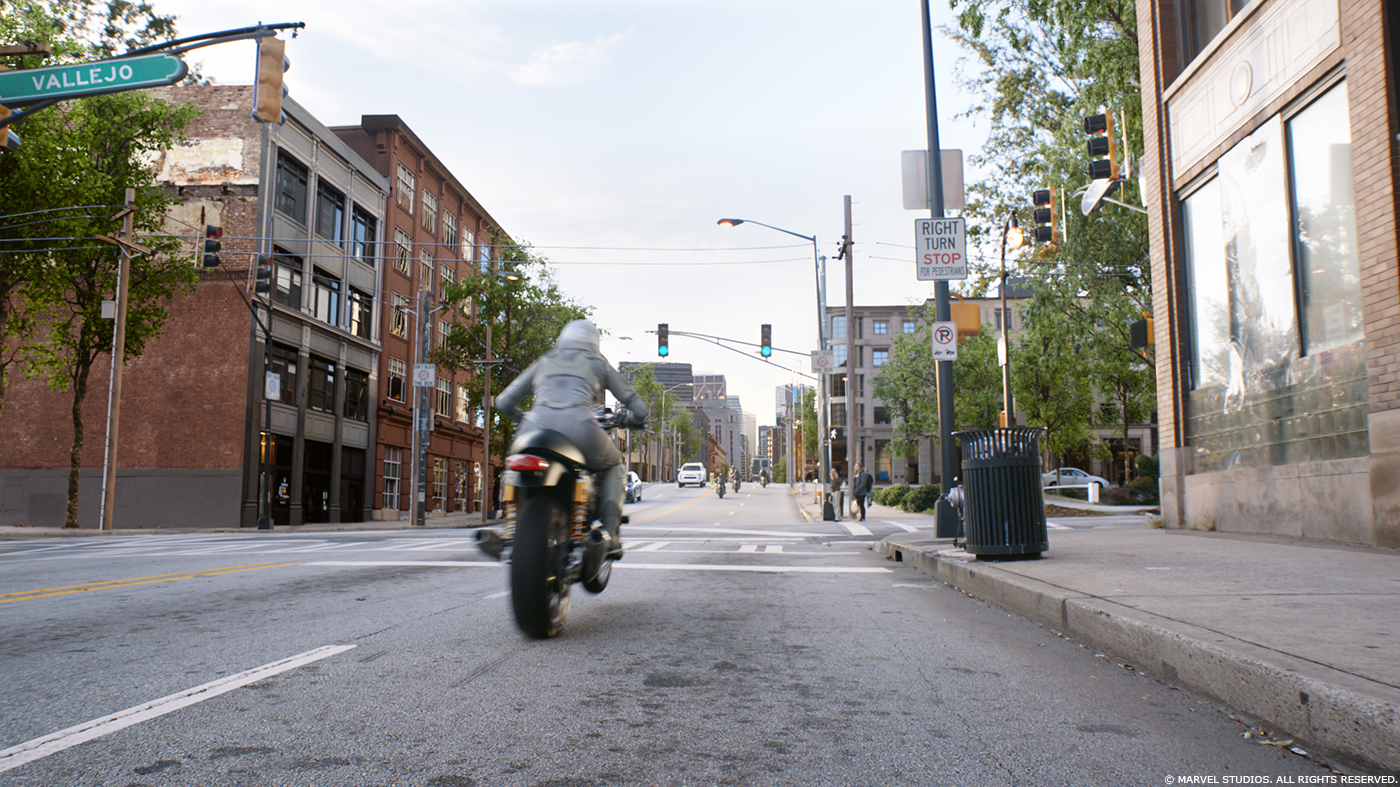
The rule of thumb was always to try and use as much as we could from the plate (an exception of course was the environment that had to be replaced in almost every shot) but having built some very detailed Digi-doubles and vehicles we had the ability to switch back and forth with the CG counterparts seamlessly or completely replace them as needed. Except for Lombard Street we shot all the stunts practically and either did a CG takeover or vice versa. There are a few exceptions where we replaced the stunt actions with full CG.
On set we had a custom built car with an array of 17 Red cameras mounted on it that we used extensively to run “array passes”, we used it both in San Francisco and in Atlanta. This array was then stitched in Nuke and mostly used for car comps.
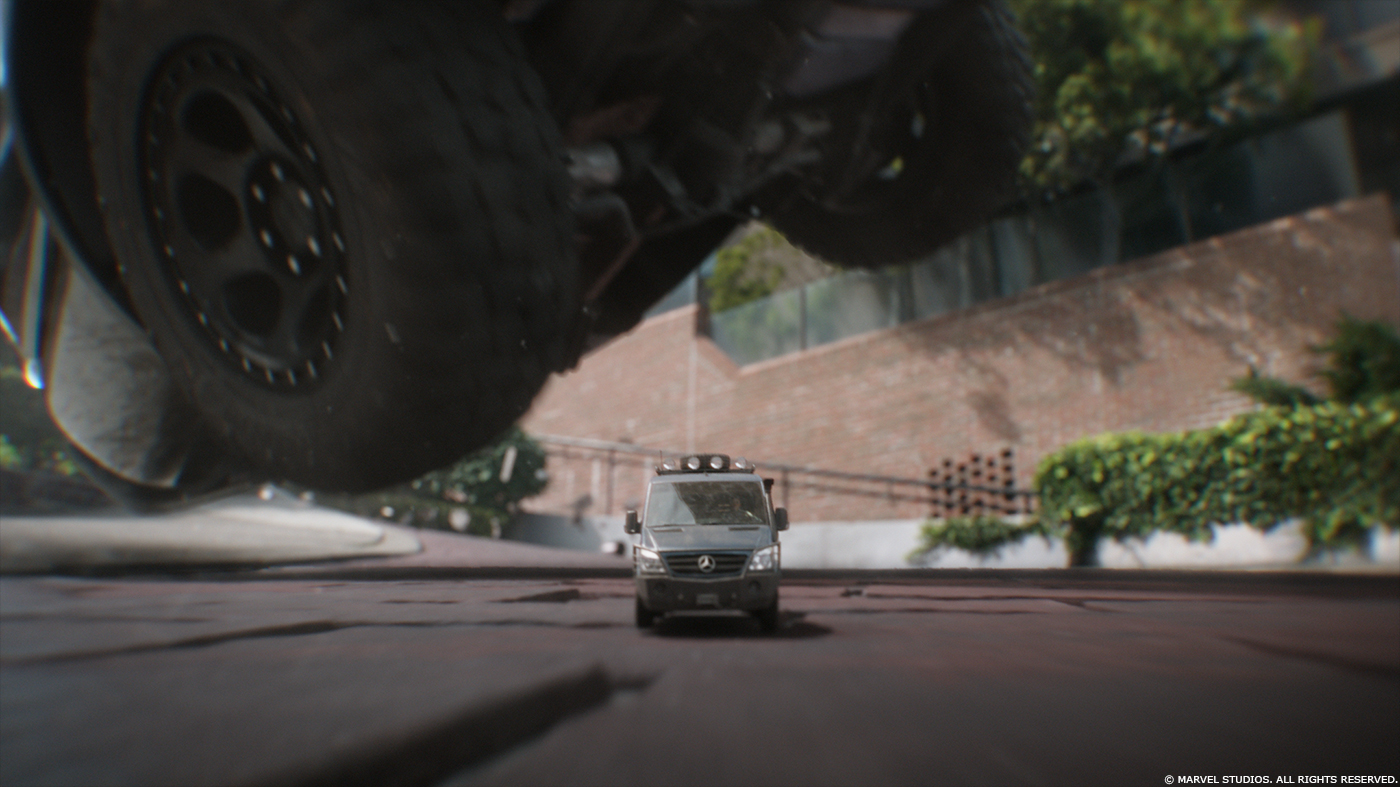
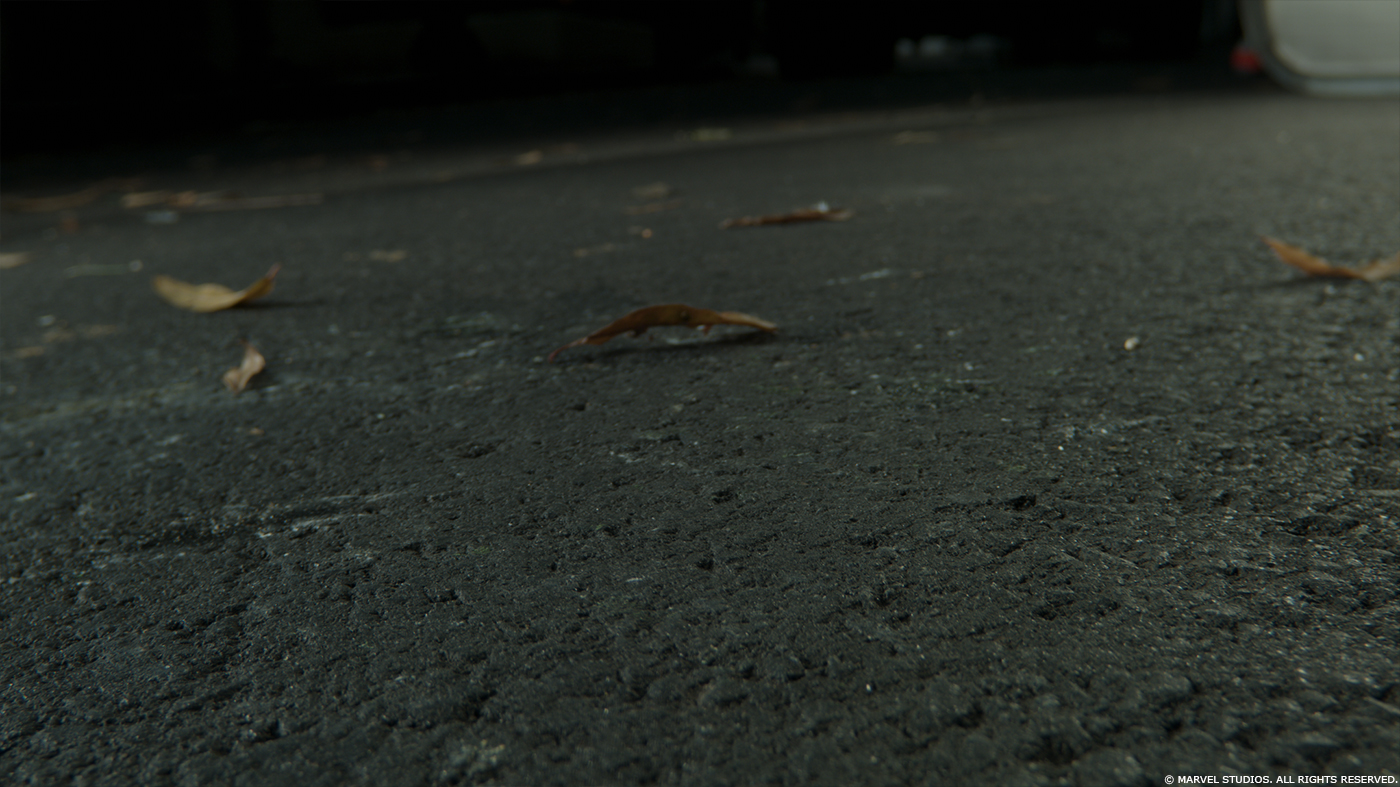
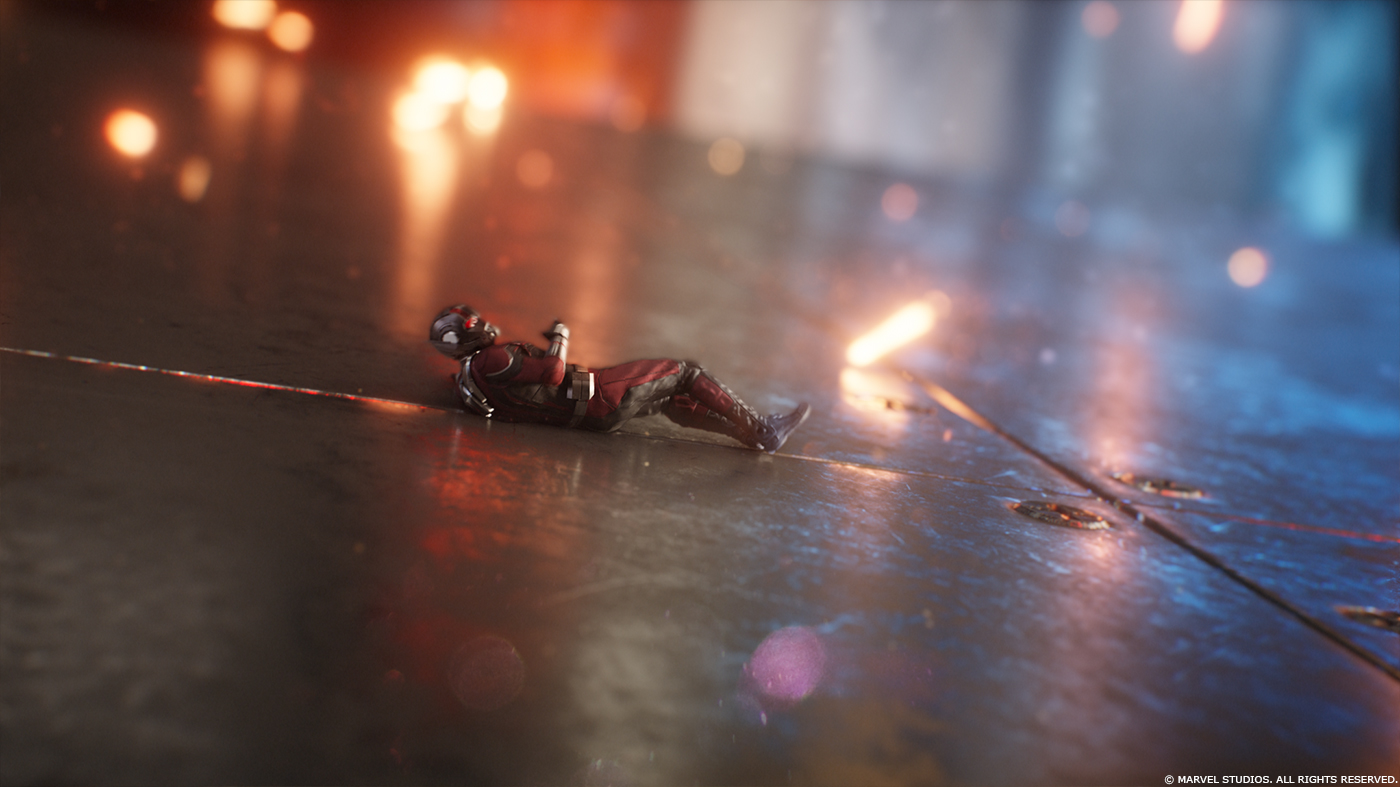
For most of the macro photography we shot with a Frazier lens, which is a special “macro/split” lens with almost infinite focus, mounted on Panasonic cameras that allowed us to go really close to the ground. But to really sell the scale and go even lower we ended up re-projecting the plate on the Lidar geometry captured on location and then clean all the projection issues either in 2.5D or in full CG. Depth of Field, bokeh, particulates in the air and all the nice lensing effects where then added in Nuke by the compositing team. A good example where this approach was used is in the car crash on Lombard Street or when we are under the Goon SUV (which is full CG).
While we used the Digi-Double for Ant-Man and Wasp only when they were shrinking and/or growing, for Ghost we mostly went all CG – again big kudos to the Prep team.
For lighting the shots, Lighting Supervisor Filippo Forno and his leads, Dominic Edwards, Roberts James and Adrien Dupont, organized the work for their team creating Clarisse lighting templates that were based on the different beats. For each shot the Lidar geometry of the location was available in Clarisse so that accurate shadows and proper reflections could be achieved through projection of the HDRI. This process was expedited with a tool DFX Supervisor Xavier Bernasconi wrote that allowed the lighting TDs to pick a location on an interactive map that linked the different shots to the SF locations where the data was captured, gathering the relevant data and automatically importing it into Clarisse (or Nuke if needed).
Although challenging it was a very fun sequence to work on, and Comp Supervisor Jennifer Meire, her leads Cleve Zhu, Kuba Pruszkowski, Stu Bruzek, and the whole compositing team really did a great job putting all the pieces together.

How did you create the various CG cars?
Clear Angle Studios did all the Lidar scanning and photography of the vehicles, not only the hero vehicles but also for every ND car we used on set – better safe than sorry!
We then ingested the received data and built the required vehicles at the necessary level of detail. For Hank’s Van, Goon’s SUV, Hellcat and motorcycle, Burch’s Escalade and Luis’ Veloster we really did push the quality since we knew from the beginning we were going to see them from very close (or from underneath) and had to swap seamlessly with the practical one.
The vehicles were built in Maya and we used Mari for texturing and Clarisse for look dev using our custom shaders. We then rigged them with DNEG’s standard car rig.
For Hank’s Van we also had to add a few variants since throughout the sequence it gets damaged and the dirt built up. The rig also needed to account for shrinking and growing.
Can you tell us more about the various destructions during this sequence?
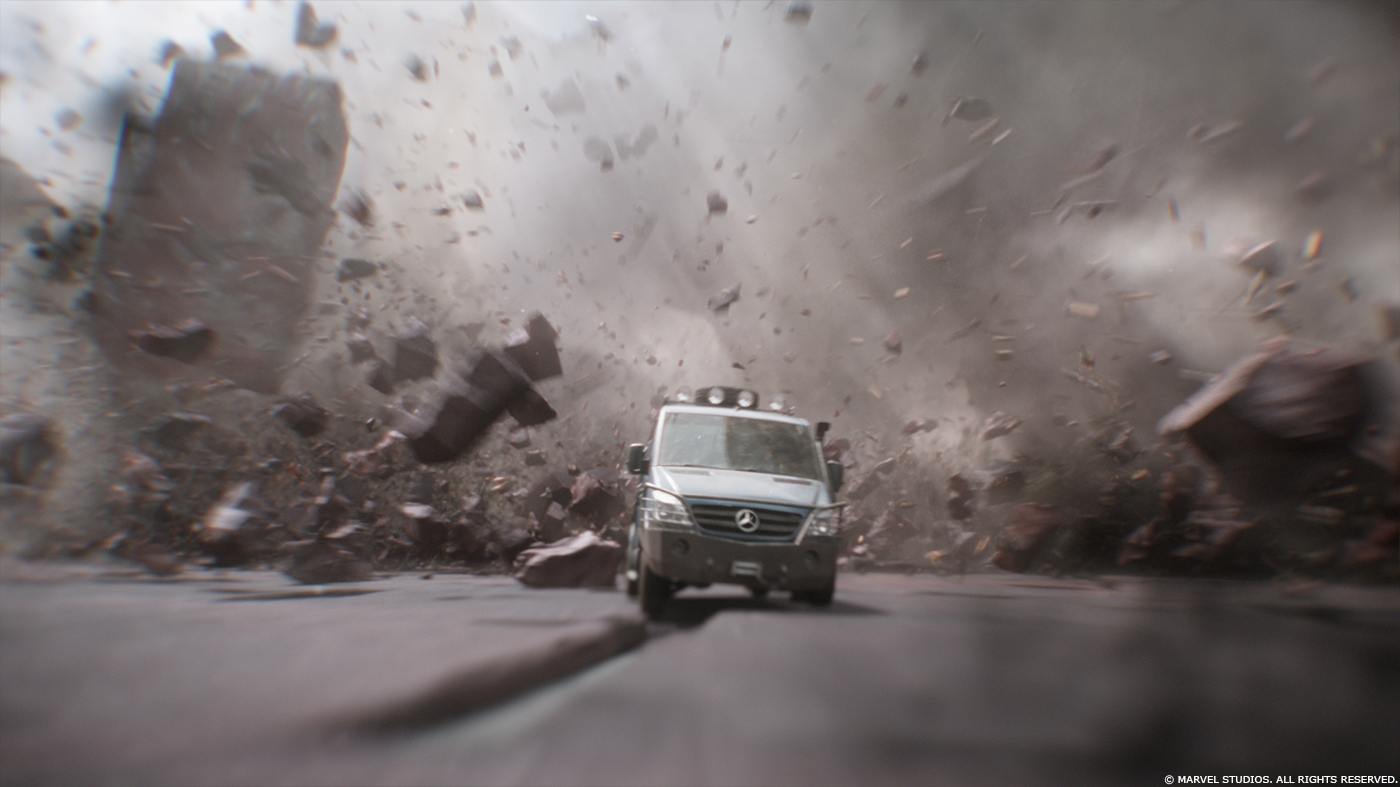
Although we shot all the stunts on location (except for Lombard) we ended up using different approaches depending on the shot. For the first car flip for instance, when the Van grows from underneath we used a CG Car all the way up to mid air and we transitioned to the plate, while when it rolls down the hill it’s all practical with just a clean up of the huge rig. Similar approach was used for when Giant-Man kicks Burch’s escalade – CG to Practical.
For the 2 shots where the black SUV crashes into the parked car while trying to hit the Van, we started using the plate but it never felt powerful enough, even when retiming the plate the dynamic wasn’t working, so we went full CG while retaining the parked cars and as much as much debris as we could.
For Lombard Street all the vehicles and crashes are CG. We first blocked the shot in Animation and when happy with the overall performance we cached the geometry and gave it to FX which created a damaged version and added the simulation passes, these went back to the build team who changed the texture and the look of the vehicles.
How did you work with the SFX and stunt teams?
I was very fortunate the be heavily involved with the 2nd Unit shoot for the whole Car chase, both in Atlanta, where we shot most of it, and in San Francisco. Jeff Hubberstad (2U Director) and Andy Gill (2U Stunt Coordinator) were very collaborative and happy to accommodate all the requests coming from VFX. I worked closely with Blaine Lougheed (Marvel 2U VFX Supervisor) and the on set VFX crew which was responsible of Lidar Scanning the location, survey the set, shoot HDRI, place marker, etc.
We had the Previz on hand on a daily basis; it was basically our bible. Having a good reference of how the shot should look was crucial since the days were busy and some setups pretty complex. The Stunts were rehearsed a few times, when possible, and shot with multiple camera to cover alternate angles while trying to keep the hero take as clean as possible. For each setup we were running a multitude of clean plates, references passes and tiles in order to be covered in case things went wrong.
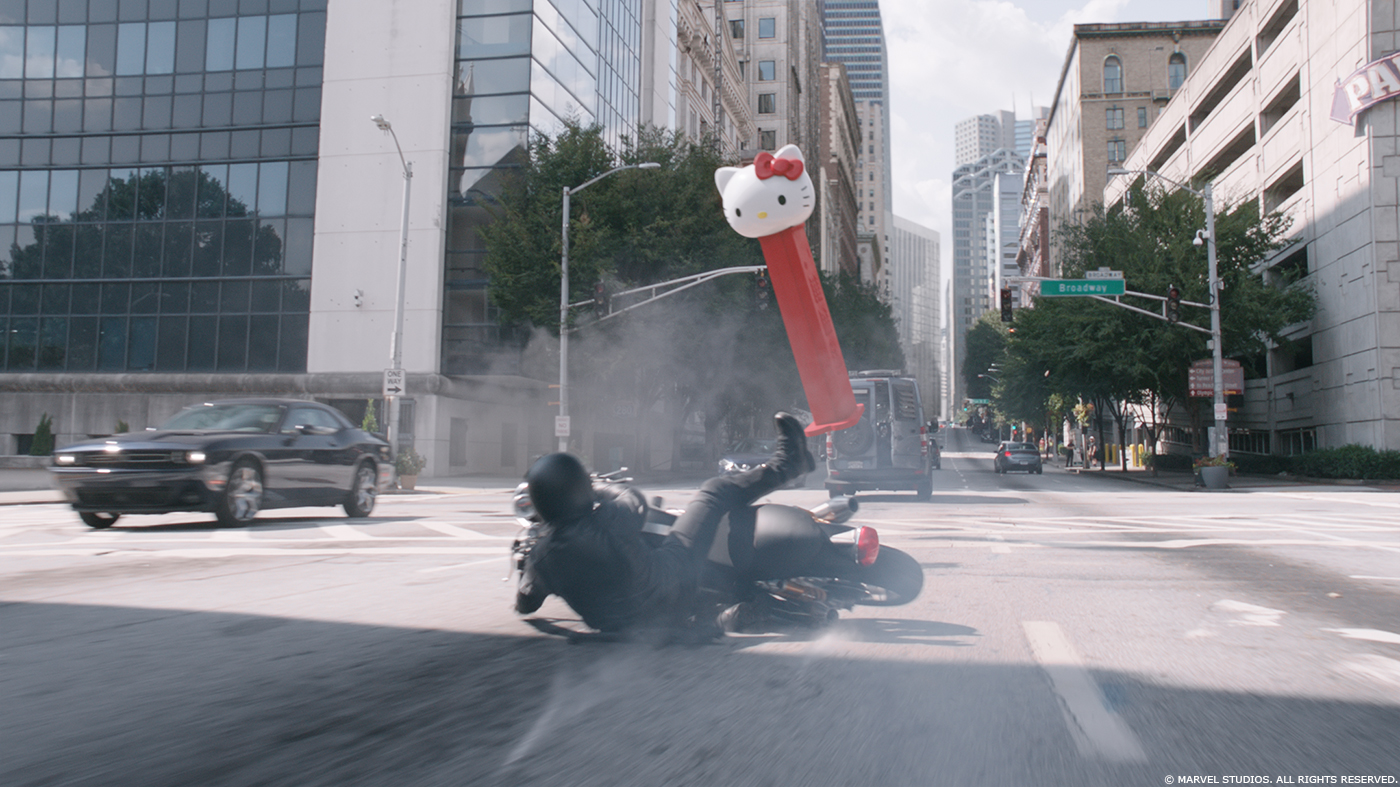
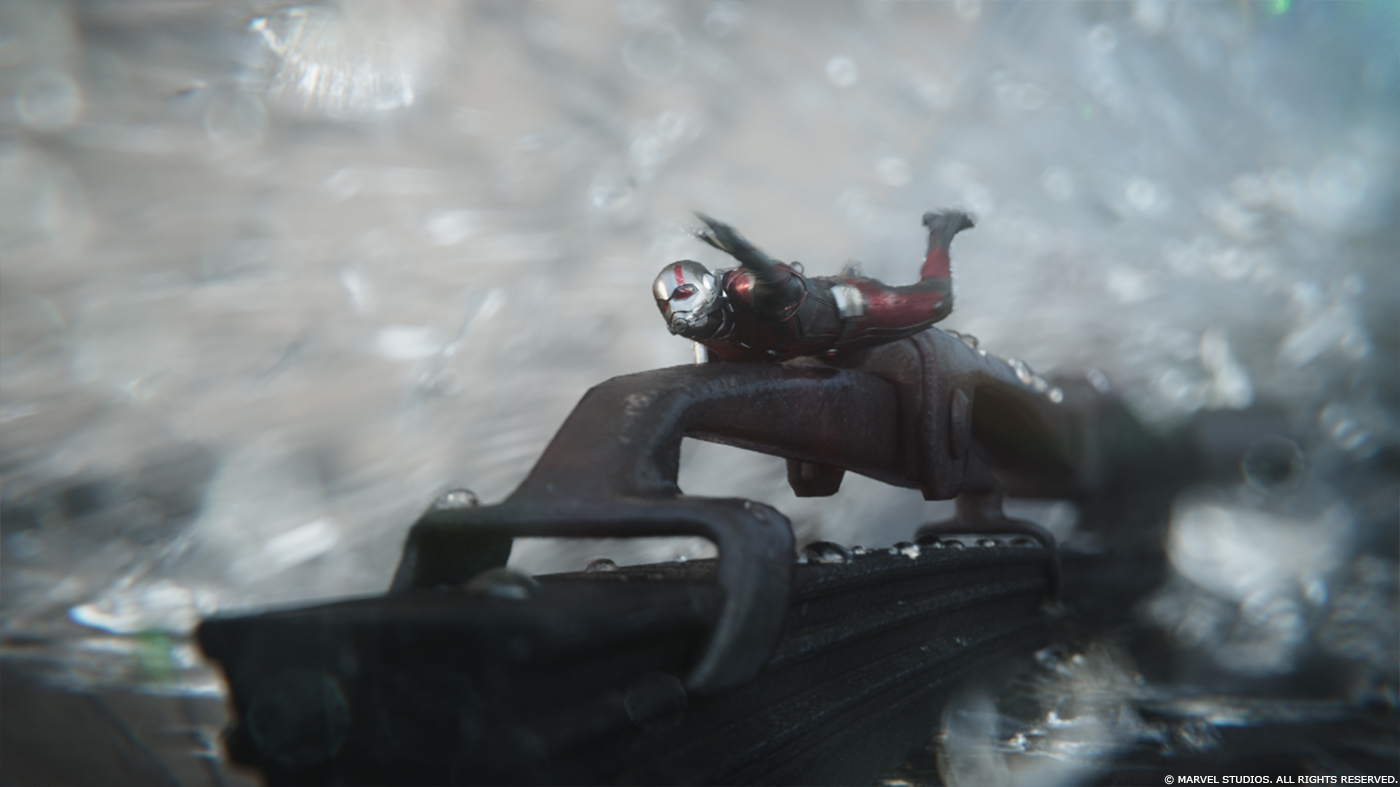
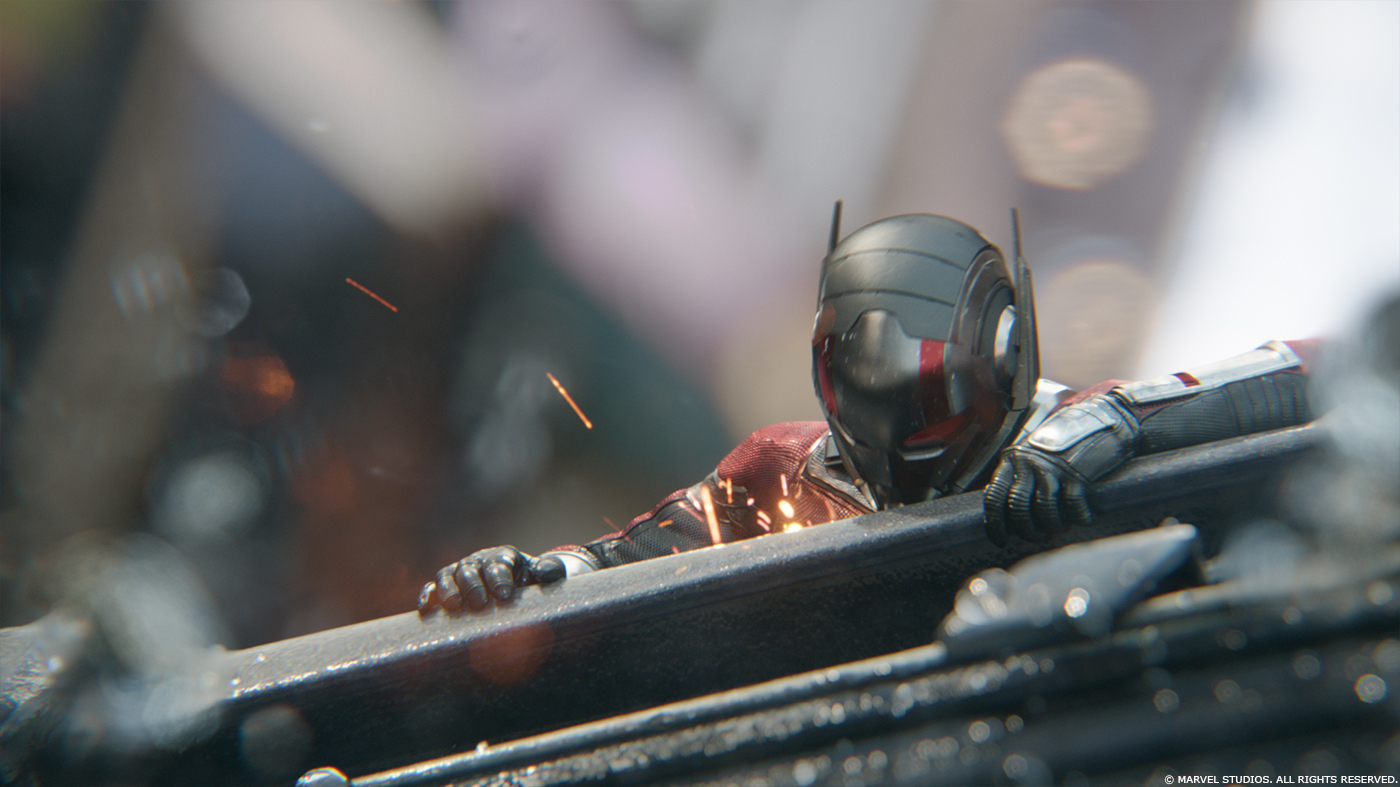
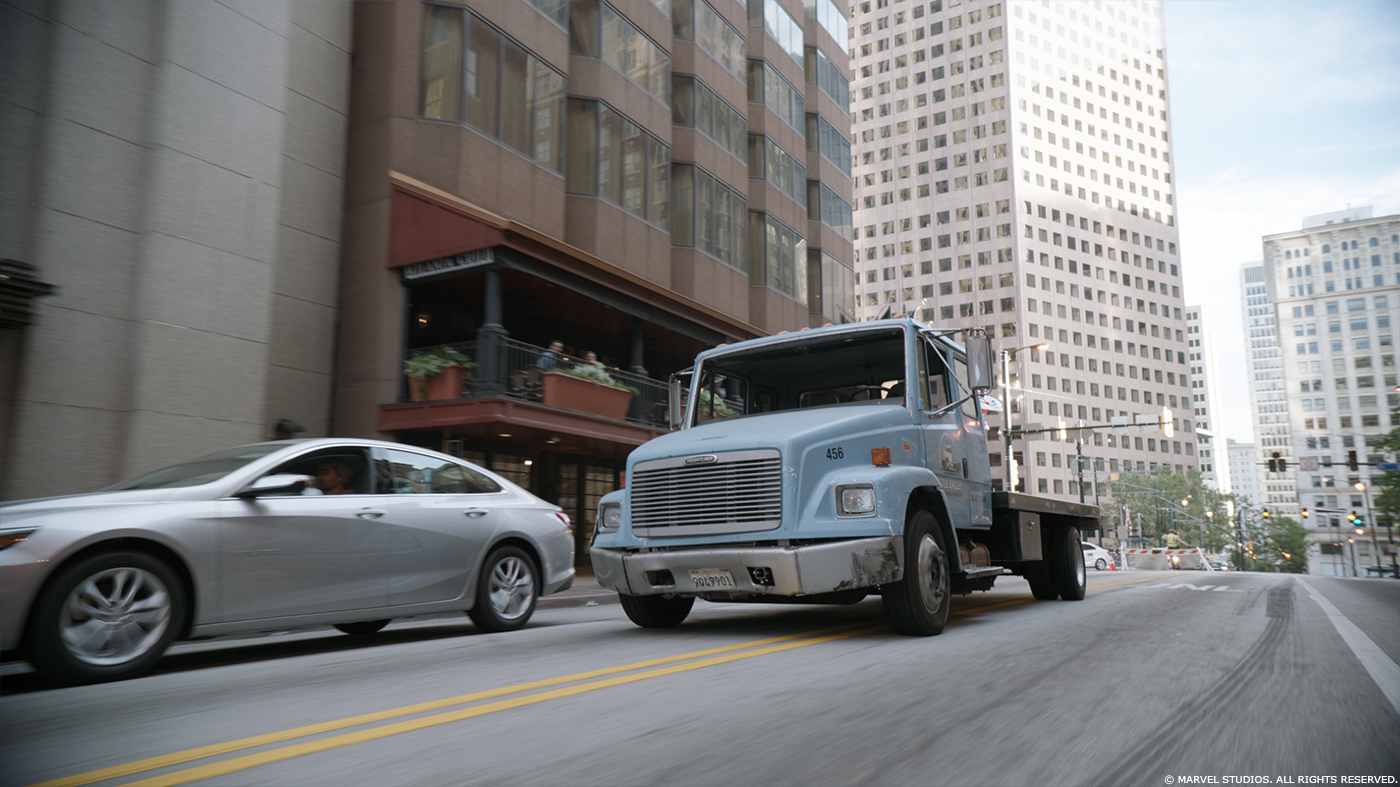
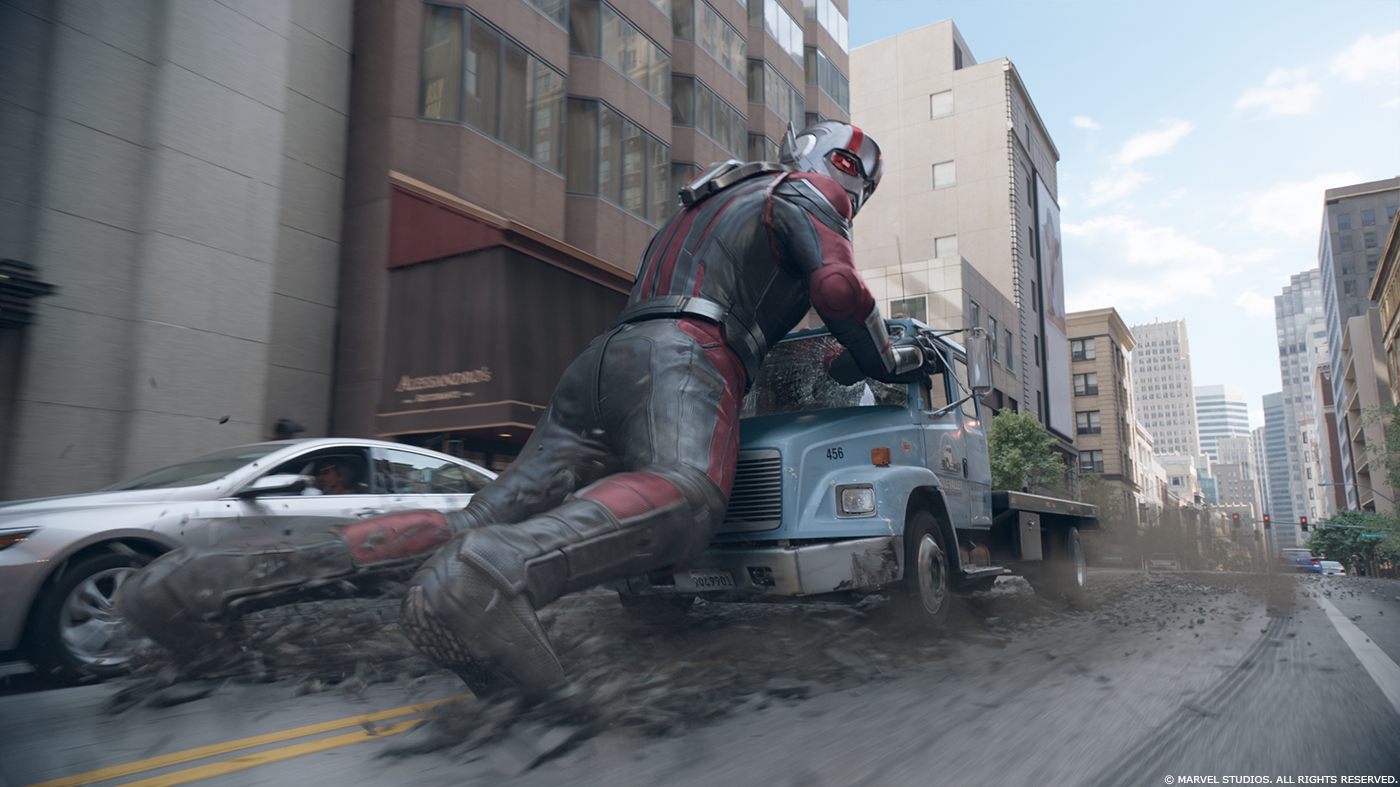
For the beat where Giant-Man is using a flatbed truck as a skate, one of the trucks we had on set was rigged by the SFX team with an hydraulic suspension system that could be remotely controlled to mimic the weight changes Giant-Man would cause skating. This worked great and we were able to use the practical truck in almost every shot.
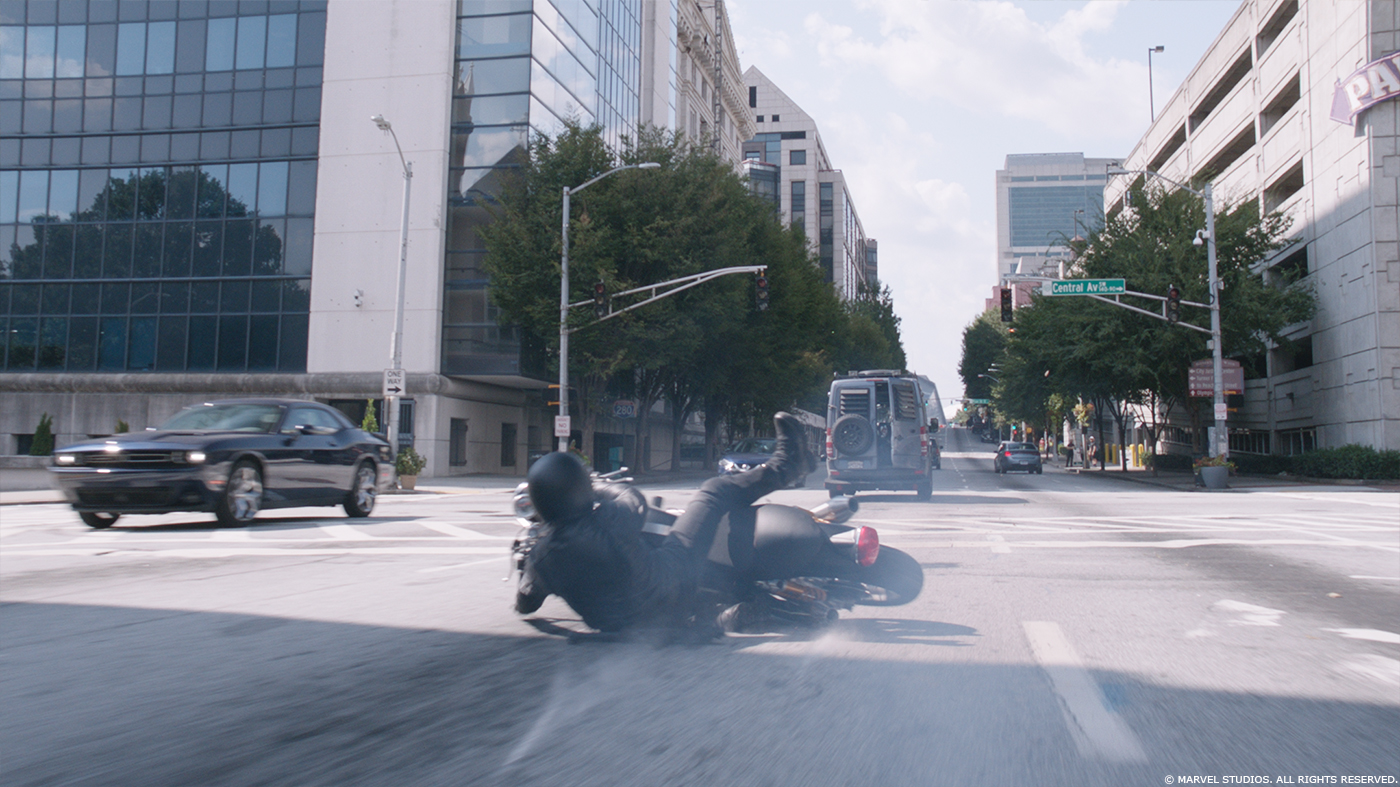
What was the main challenge to turn Atlanta into San Francisco?
Turning Atlanta into San Francisco was challenging for different reasons – the high number of shots, the area and locations covered, maintaining the visual continuity and the fact Atlanta doesn’t look at all like San Fran. On top of that, Atlanta is mostly flat.
How did you recreate the vast city of San Francisco?
We spent about a week and a half capturing as much as we could of San Francisco. Once again Clear Angle Studios, along with a team from DNEG, did the capturing. We Lidar scanned at a very high resolution and photographed image bubbles to use for re-projection. For certain locations the level of details was insanely high. Ingesting and sorting all this data wasn’t an easy task – thankfully Dan Kunz and his team in the shoot department took care of it.
While I was shooting in Atlanta, Alec Geldart one of our Env Lead, started putting together 2D concepts of key locations in order to get an overall understanding of the desired look and to give us an indication of where to use 2D, 2.5D or full 3D environment. We then started building a library of set dressing assets based on the photography done in San Francisco, things like water hydrant, mail boxes and the typical SF telephone poles and wires to mention a few.
With the Postviz of the first cut on hand we then mapped the whole car chase on a map based on the locations captured in SF, street by street, trying to maintain some sort of continuity and strategically avoiding hills. Luckily there are parts of the car chase that are actually shot in San Francisco – these helped re-establish the geography with the audience, also because the Car Chase is intercut with the Quantum Realm we were able to jump to locations as needed.
Then the real work started, with the tracked camera we always had the lined up Atlanta geometry that was Lidar captured with the 2U shoot. This was used as a reference to start the actual environment work. Work that could have been as simple as 2D background extension, or 2.5D & 3D environment for the most complex shots, or a combination of all of the above. Set dressing was added to add more details and extra parallax, in particular in shots where we were replacing only the background with painting.
Some locations where more complex than others, like where Scott and Luis crash the van (we had to build a full 3D environment) or the beat where Giant-Man stops the flatbed truck. In this particular instance, shot on Peachtree St in Atlanta, the complexity was off the roof. Also we then cut to a shot that was actually taken in San Francisco, so we had to add some features from the Atlanta plate into the San Francisco one (like cobblestone on the ground) to help with the cut. Furthermore, for proper reflections and shadows, the Environment team had to provide custom made HDRI images based on the generated environment to the Lighting team.
At the end, Pedro Santos and the Environment team had to create about 100 unique locations.
Can you elaborate in detail on the creation of the ants and the pigeons?
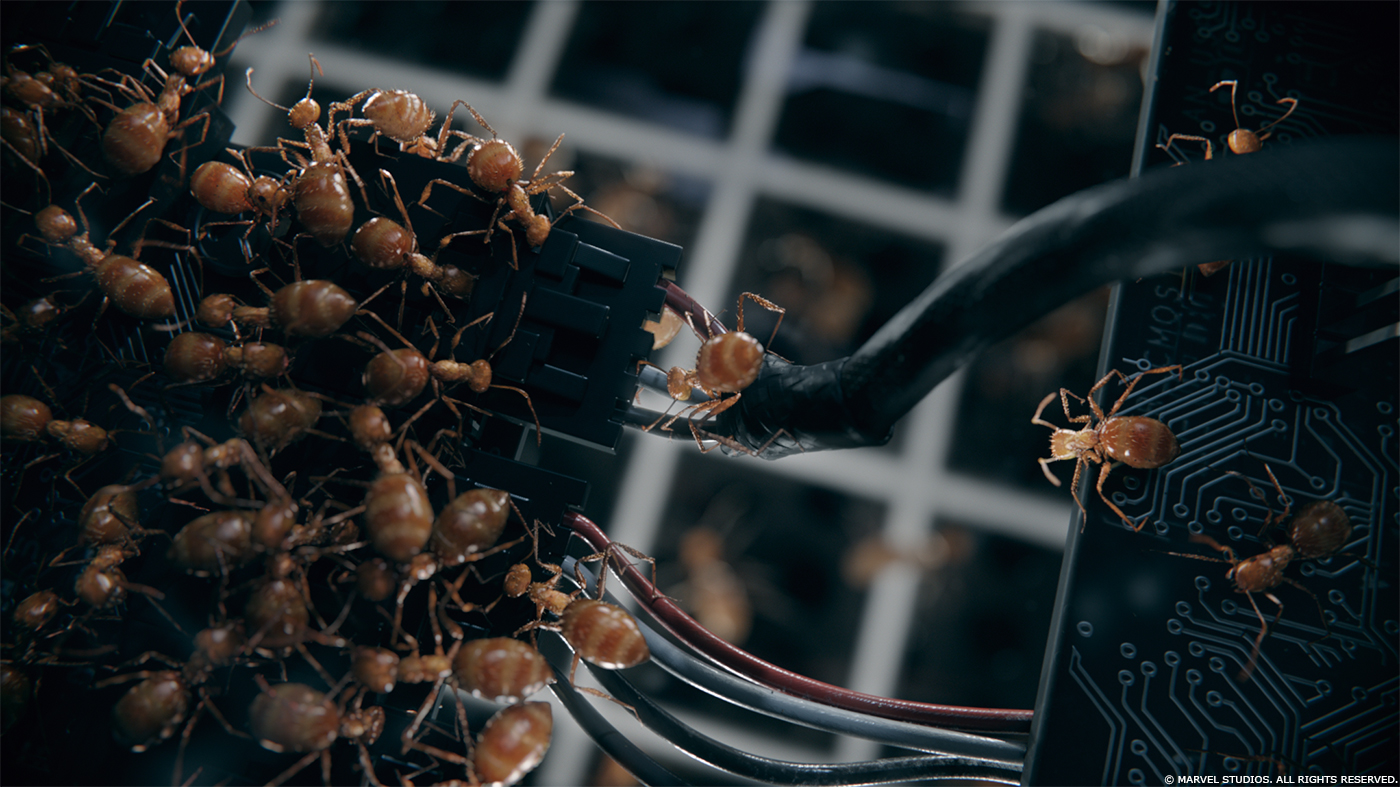
We built 2 ants, the Flying Ant and the Crazy Ant. As mentioned before, Stef wanted to push the photorealism from the first film, and the Ants were no exceptions.
For the Flying Ant we started restoring the asset built for the first film and after making some minor model changes, we added hair and re-worked from scratch textures and shaders to give it a more realistic look, we also added a layer of dirt through a controllable texture layer and scattered geometry. We then shared the asset with other vendors.
The Crazy Ant was a new asset so we started from scratch using photographic references and finished with the same dirt layer. Both ants shared the same basic Animation rig.
For the Pigeon we followed the same process, we gathered a lot of photographic references and Daniel Axelsson modelled it “oven ready”, proxy wing and tail feathers were added for animation purpose. Extra details were added to its legs, beak and in particular on the area surrounding the eyes using ZBrush. Once again the texture were hand painted in Mari and combined with Clarisse procedural shaders. The rig was pretty standard but extra animation controls were added to the eyes and the proxy feathers.
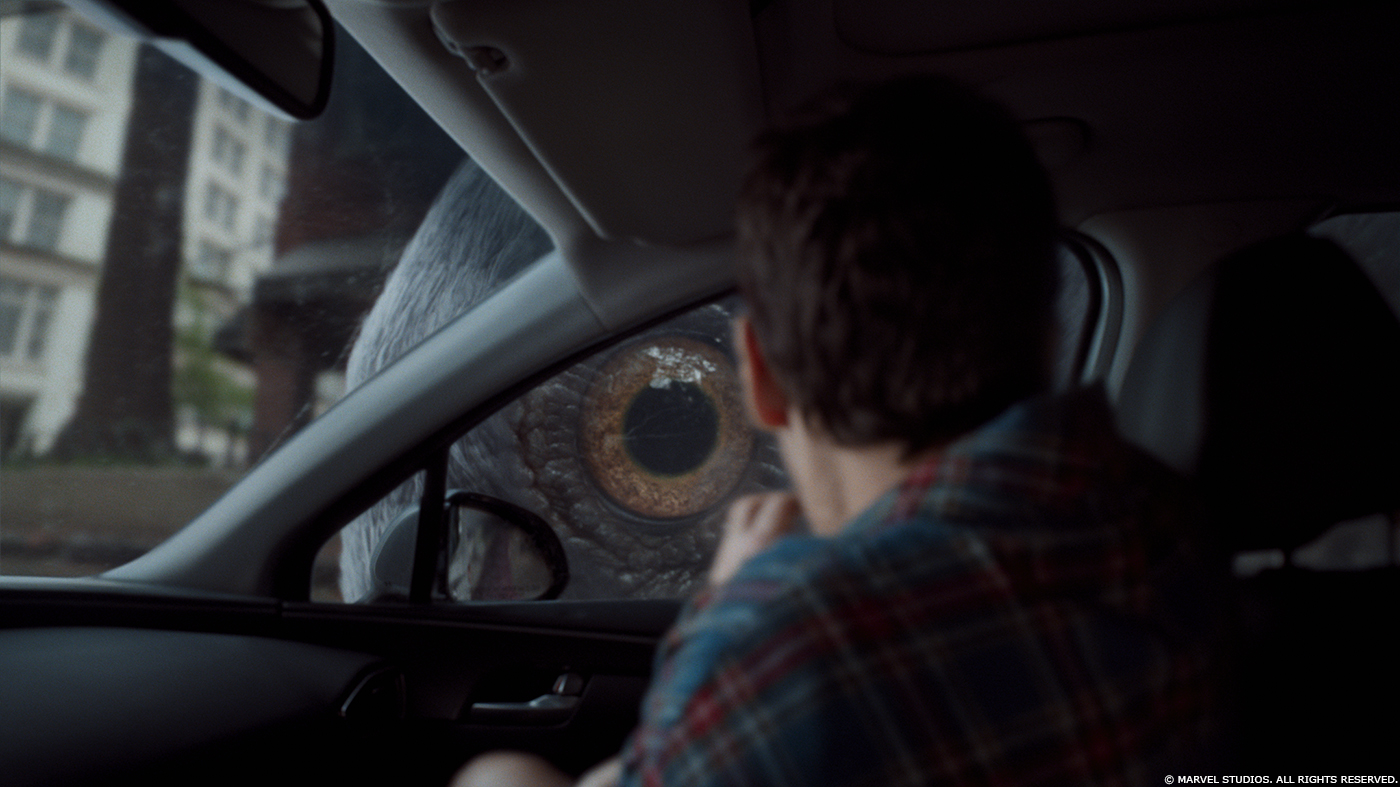
How did you handle the challenges of the eyes and feather for the pigeons?
The eyes were modelled anatomically correct, with all the different internal parts as separate pieces (pupil, circle of correlation, inner and outer iris) so that we could animate them as needed. Pigeons have a very intricate, fractal-like texture in the Iris, and although we were planning to build that part procedurally, the Build team managed to paint super high resolution textures and displacement maps that in the end worked out well. To help with the wetness a meniscus geometry was added. The caustic effect inside the eye was faked using textures.
Both the short body feathers and the longer wings and tails feathers are procedurally generated in Houdini and rendered in Clarisse. The long feathers were created using the proxy feathers as basis, while for the shorter body feathers Jan Shubert groomed the shafts like hair and the barbs were then procedurally generated.
The color of the feathers was inherited by painted maps, while the iridescence area around the neck was achieved through a procedural shading network in Clarisse. Extra bits of fine dirt was then scattered in Clarisse. A physical based hair shader was used. The same model was used for the Extreme Close-ups, the medium and the wide shots.

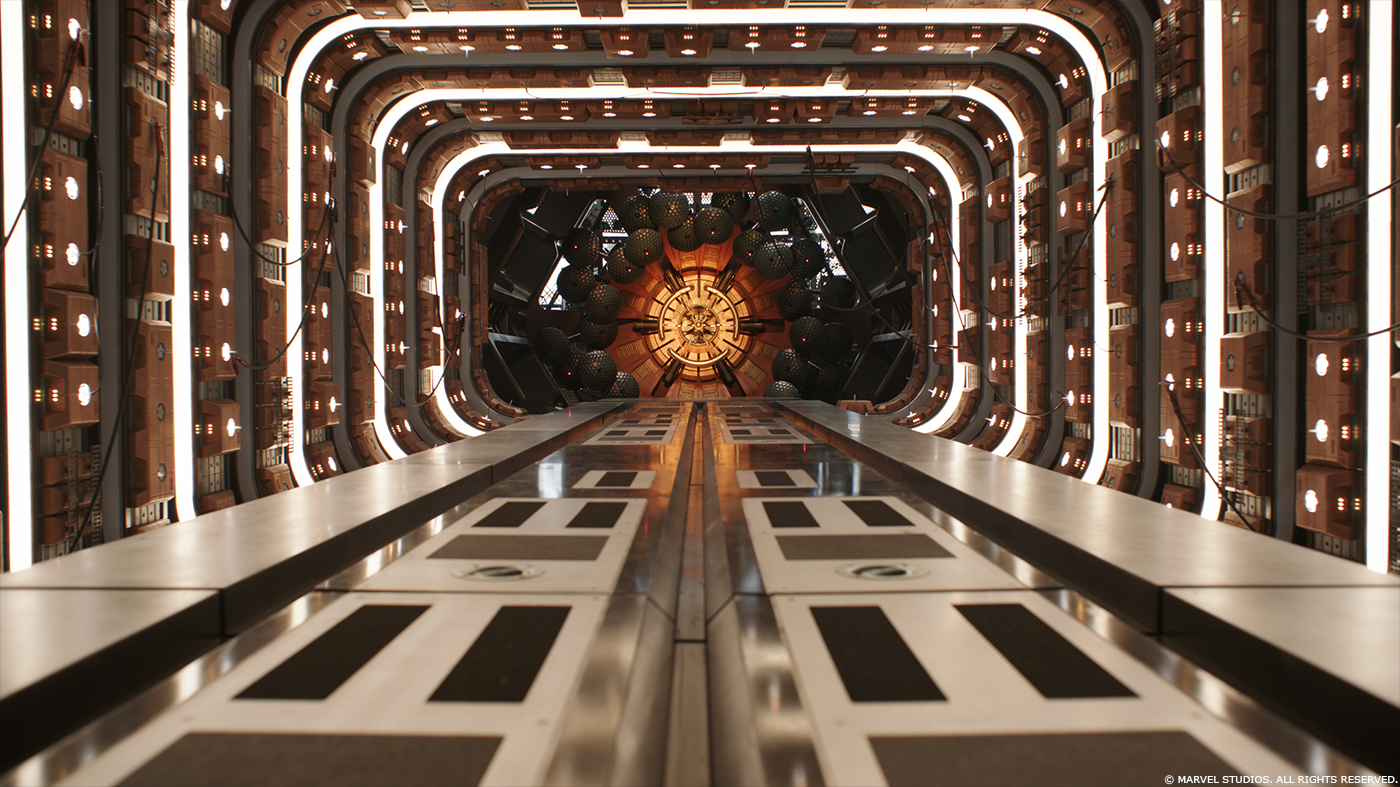
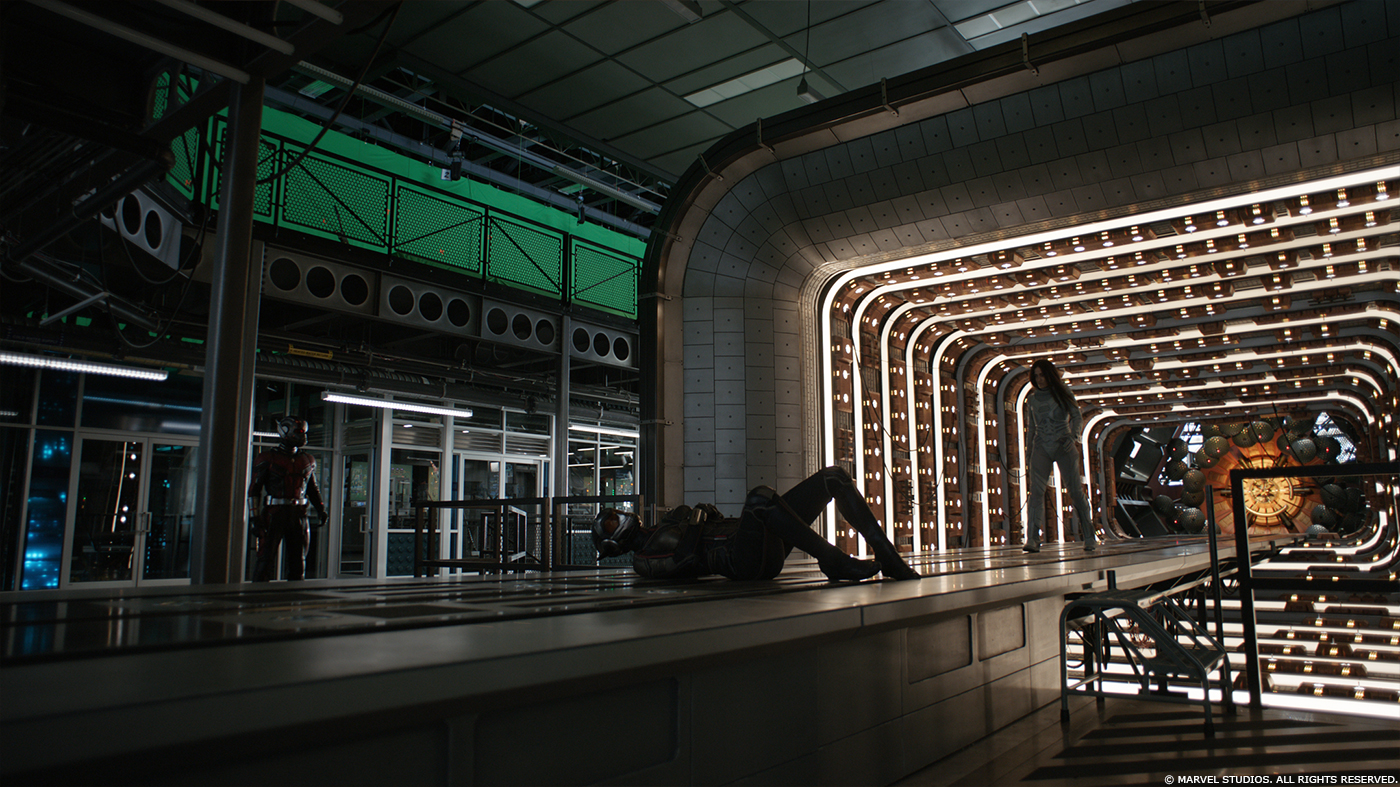
How did you create Hank’s lab and the Quantum tunnel?
Hank’s Lab was a beautiful set built by Marvel’s Production Designer Sheperd Frankel and his team. I was totally blown away by the details and size when I first set foot in it. Not only the perimeters but also the tunnel itself, the spinning bellows (although not capable of moving), part of the giant antenna, two of the giant shock absorbers where physically built. Having all these practical elements was of great help for the extension work DNEG was tasked with, completing one of the sides and extending the top floor (including the giant antenna that was later on animated by the team at Cinesite).
While on set at Pinewood Studios, we discussed different ideas on what to build for the missing side. Some fun/crazy ideas came up but we settled for the giant Duracell batteries and its enclosure. We also mirrored some of the pieces from the built side, like the staircases and the giant shock absorber. We also added a particle accelerator on the top floor and extra windows panels to close all the gaps to the ceiling. For the tunnel itself we built a mid resolution version that was suitable for projections work and worked well enough for added reflections and interactive lighting for the required FX, the spinning bellows where built and rigged as hero pieces since they had to animate and we replaced them in every shot.
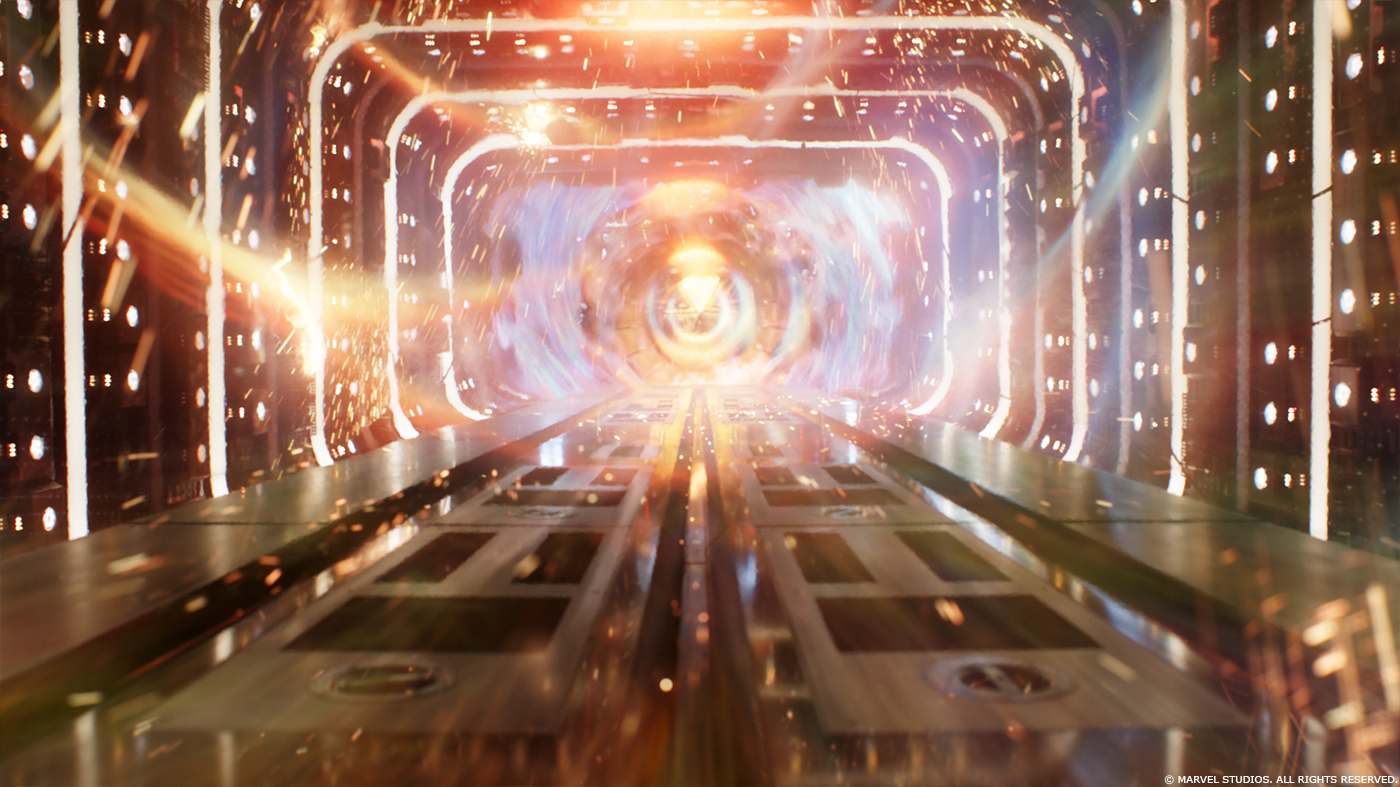
Eventually, we also replaced the geometry at the end of the tunnel with an animated version built in Houdini by the Environment team that was heavily inspired by the DOCTOR STRANGE kaleidoscopic effect.
For the Lab, besides the usual Lidar geometry, we also received CAD scenes built by the Marvel’s art department, which were of great help.
Can you tell us more about the FX creation and animation?
Once again the challenge was to create something that would sit nicely in the overall look of the film and somehow connect to the topology of the tunnel itself.
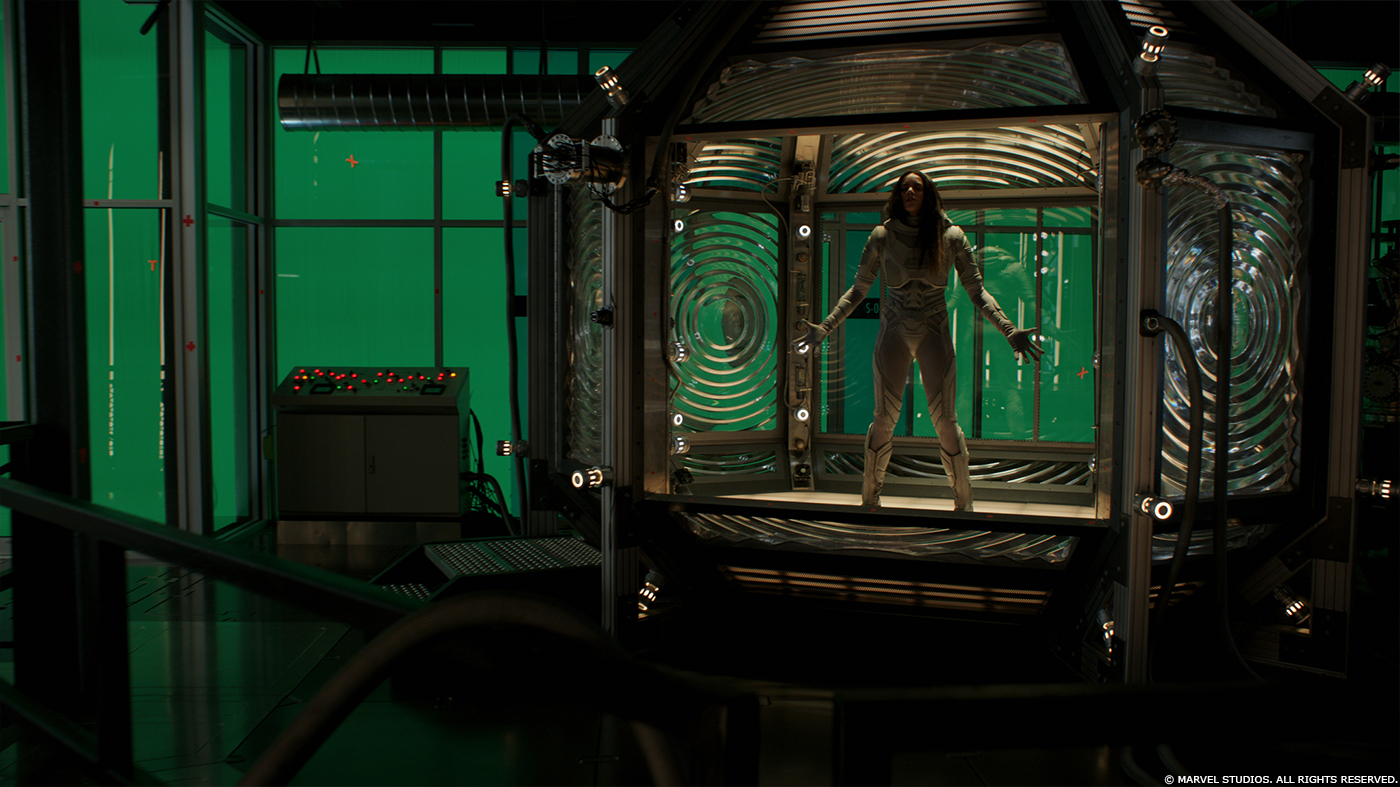
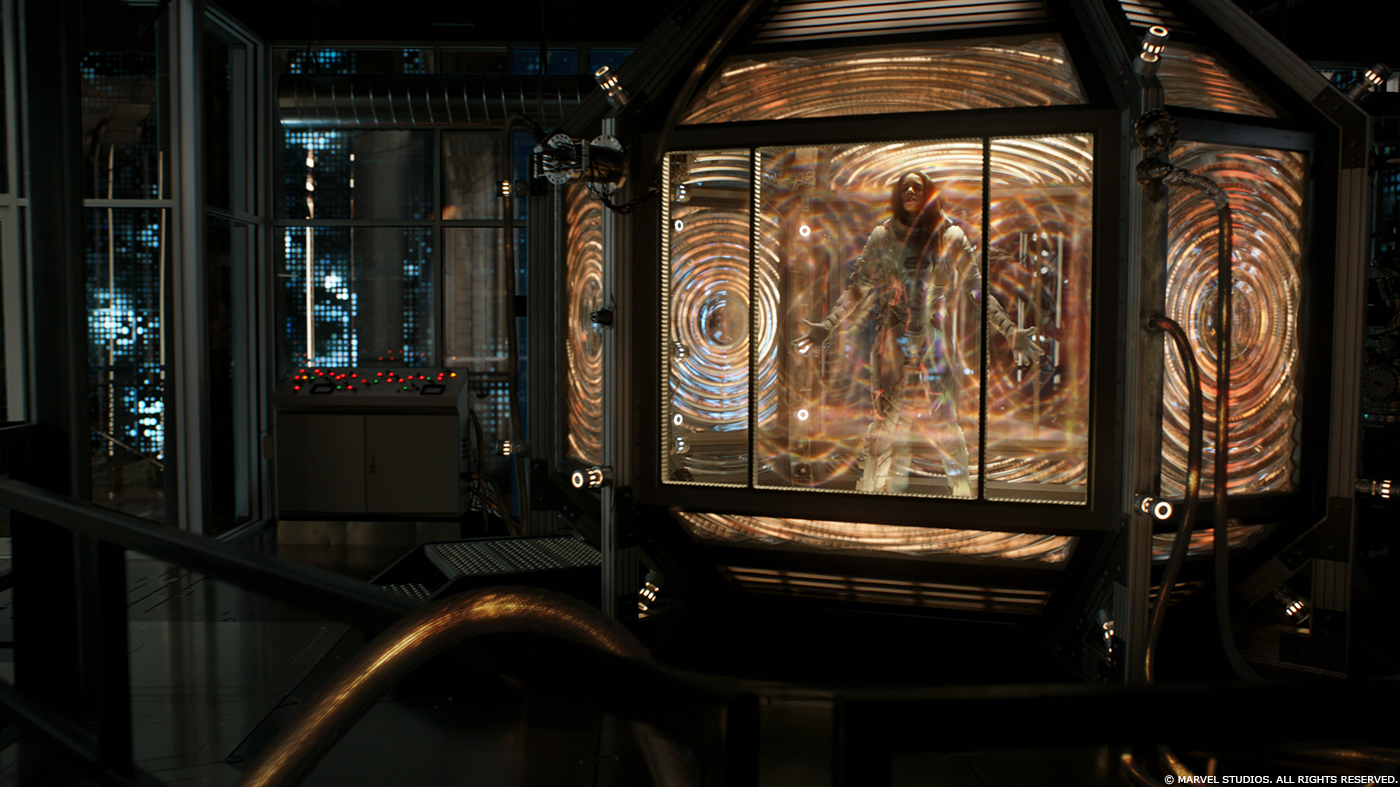
We initially drew a few concepts to try to get our head around it and although the final result turned out much different, something that was carried over was the idea of rings of energy. We also used the concepts of rings of energy for the design of the effects in Ghost’s containment chamber in order to give a sort of visual continuity that would make them feel part of the same world.
One thing we were trying to avoid was to give it a portal look. Ben Outerbridge and Gero Grimm worked on the initial tests using one of the Interior Lab Finale shots, Gero providing effects passes and Ben working on the compositing. At the same time Luma Pictures was working on the Tunnel as seen in Ghost’s flashback, so Stef would send us their work pointing out elements he really liked. We used Luma’s work as reference and we built from that. It was important that although the tunnel seen in the flashback was an older version created with older technology (Tunnel V 1.0) they would still feel connected.
The Tunnel had two key elements – a core made of revolving energy in the area enclosed by the spinning bellows, and the colourful rings of energy emanating from there. Also a volumetric element was present inside the tunnel. We first see the Tunnel in its stable state in the Quantum Prep sequence, it’s interesting to point out that we see a sort of progression of the energy level as a reflection on the Quantum Pod. In order do that, instead of raytracing all the necessary elements, we rendered and pre-comped everything as a spherical render from on an axis aligned camera placed in front of the mouth of the Tunnel. In Nuke we then accurately mapped it on the Pod’s glass making sure it would align properly with the reflection of the practical tunnel.


When we are back in the lab for the Interior Lab Finale sequence the tunnel is now in a sort of unstable state, this is because Ghost has plugged in her containment chamber in order to channel Quantum Energy, which is supposed to fix her.
In order to convey this instability we needed to add extra elements to it in form of burst of energy emanating from the core, extra rings (we called them Chaos rings) and some sort of energy bolts on the surface of the Tunnel that were generating sparks, a lot of sparks.
FX Supervisor Daniel Jenkins and his team created an enormous amount of element passes – from the core and energy rings, to the extra burst and sparks. Everything was done in separate layers so that in the compositing we could pick and choose what was needed in any particular shot. All these FX caches where then picked up by the lighting team for rendering. The lighting department was also rendering all the necessary reflections and interactive lighting. We rely a lot on deep compositing at DNEG and this was no exception. Every shot was fine tuned, and at times we needed to go back to FX to either adjust the simulations or to add even more elements (did I say more sparks?).
Marvel really wanted this to be big and colourful, it had to feel like a crescendo up to its epic moment when Giant-Man reaches out and saves Hope.

Which sequence or shot was the most complicated one to create and why?
A lot of our sequences came with their own challenges, either technical or creative. The Car chase being one of these. The enormous amount of environment work, digi-doubles, shrinking and growing, macro shots, car crashes all added up to the intrinsic complexity of an action scene that gets continuously recut. The Interior Lab Finale was another one, everything comes to a conclusion and there is a lot going on in there too. Ghost Phasing and Fighting with Ant-Man and Wasp while they Shrink and Grow back, The Tunnel Fx, The Pod Returning from the Quantum Realm and the emotional moment between Janet and Ghost toward the end all required a lot of work that had to be tweaked per shot and fine tuned to add to the story without becoming too distracting. The pigeons were also a challenging technical task because of the natural complexity of the feathers.
Is there anything specific that gave you some really short nights?
I didn’t really lose sleep on anything in particular (I always need my 7h per night!) but developing and getting the final look of the Ghost Phasing approved required a bit of an effort from everyone involved. We had an excellent team on it so I’ve always felt confident in our abilities to nail the look.
What is your favourite shot or sequence?
There are so many to choose from! I’m very proud of all the work DNEG had done for the film; there are some great macro shots in the car chase, like Lombard Street, or when Ant-Man is on the wiper blades, Giant-Man on the flatbed truck turned out great, so did all the Environment work. The Interior Lab Finale is another sequence with a lot of great work I’m very fond of – we did some of the best Ghost Phasing shots in there – and the Quantum Tunnel Effects look great!
What is your best memory on this show?
There are so many great memories but ultimately it’s the fact I was surrounded by an amazing group of people who really pushed themselves to the limit with their passion and exceptional skills. There was such a great feeling of camaraderie and seeing all the great work coming together was such a rewarding experience I’ll never forget.
How long have you worked on this show?
For about 10 months including the time spent on set.
What’s the VFX shot count?
About 500 shots made it to the final cut of the film but we worked on quite a few more than that.
What was the size of your on-set team?
We had four people during the Environment capture in San Francisco, but for the actual shoot I was the only one from DNEG.
What is your next project?
Unfortunately it’s a bit too early to tell!
What are the four movies that gave you the passion for cinema?
Since I was a little kid I’ve always had an inner passion for cinema, something I think I took from my Grandfather, but specifically to our industry films like THE EMPIRE STRIKES BACK, RAIDERS OF THE LOST ARK and eventually JURASSIC PARK and TERMINATOR 2 had a big influence on my career path.
A big thanks for your time.
// WANT TO KNOW MORE?
DNEG: Dedicated page about ANT-MAN AND THE WASP on DNEG website.
© Vincent Frei – The Art of VFX – 2018


 & Steve Ellis (VFX Supervisor – ILM)")