After telling us about his work on ABDUCTION, Greg Liegey is back on The Art of VFX to explain his work on TOWER HEIST.
How was your collaboration with director Brett Ratner and Production VFX Supervisor Mark Russell?
Mark has a deep understanding of the process which helped us zero in on hero looks very quickly after the previews were delivered. He worked hard to keep all the vendors in sync with each other and get us consistent in terms of the big picture. That allowed to get into the fine-tuning stage earlier in the schedule.
Brett is a force of nature – he works on an instinctual level. He doesn’t over-analyze, he reacts. When the rest of us diverged into talk about technical aspects of the project, Brett would make sure to bring it all back to the visuals. He helped us concentrate on the story-telling.
What have you done on this show? Method worked on six sequences and two stand-alone shots within Arthur Shaw’s apartment. We also completed 10 shots of digital alchemy (gold enhancement) using 2D color treatments or complete 3D replacements for gold objects in the scenes.
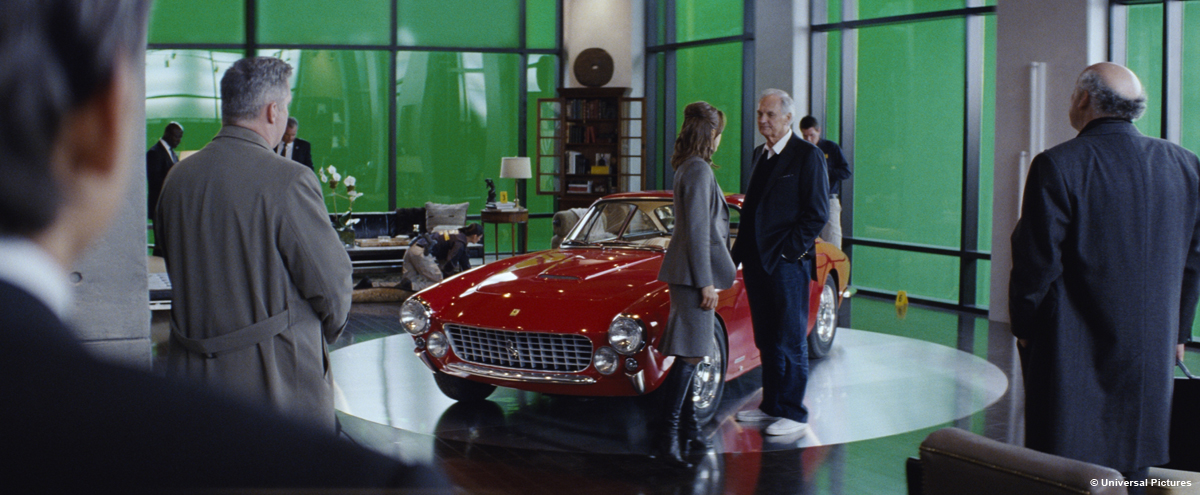
What was the size of the greenscreen for the penthouse?
The greenscreens wrapped around three sides of the apartment set and ran about 70 feet from end to end. They were about 26 feet tall and set back 50 feet from the glass.
Did you need to do some extensive roto work?
There were some angles where the actors ended up in front of multiple layers of apartment windows. The windows in those shots acted like ND filters which made the greenscreen very difficult to key cleanly. So for those, our roto team of David Marte and Alejandro Monzon did lots of articulate roto including reconstructing hair detail to a very convincing degree.
Many shots also required roto to limit areas of the reflective surfaces such as the floor where the greenscreen would have keyed cleanly even though the surface was opaque. We roto’d those areas & used the key to comp in an appropriate reflection.
The gold shots depended on solid roto for their success. The color correction shots had the objects roto’d from the scene and the 3D gold shots required articulate roto for the people holding the objects.
Which elements and assets did you received from production?
We received all of our NYC background tiles – HDRI stills and moving video footage – from Production. Other CG assets like the Ferrari model and the CG NYC were shared amongst the vendors.
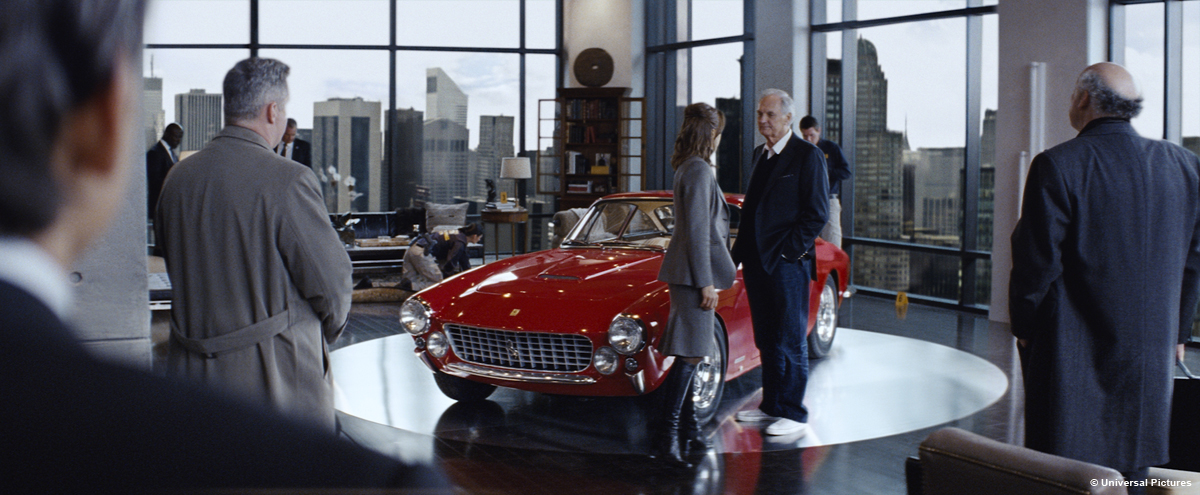
Can you tell us more about the creation of this huge and well known background?
In the earliest days of the project, Peter Marin, the Method VFX supervisor who started the job in New York, and two senior composite artists, Aleksander Djordjevic and David Piombino, teamed up to construct a NYC skyline “bubble” in Nuke. The bubble was a sphere mapped with a stitched panorama of NYC skyline stills. Our matte painter, Amy Paskow, cleaned up the stitches and enhanced sky detail for particular views. Also, the BG plates were shot with trees in full summer greenery, but since the movie takes place around Thanksgiving, we replaced the trees with more autumnal versions. In order to align the perspective from inside the virtual apartment, we used the Google maps satellite view of Manhattan to place the bubble in relation to the apartment geometry.
After our preview delivery in May, we wanted to go for a more precise skyline placement. CG artist, Justin Maynard lightened-up a CG model of NYC so that it could be loaded into Nuke as a placement guide for the compositors. The CG NYC allowed for an exact placement of the BG bubble to match the view from the real-life penthouse apartment at the southwest corner of Central Park.
The Time Warner towers are huge reflective buildings which dominate the southwest views from Shaw’s apartment. We felt they needed special treatment for more realistic reflections and parallax. The panoramic still images of those buildings had frozen reflections and, as stills, would have no parallax on moving camera shots. Since all the apartment shots were shot with a Steadycam, we knew that it would pay off to add live reflections and some levels of parallax. We modeled the Time Warner towers and projected cleaned-up (reflection-less) textures onto that geometry. Then we positioned cards at the surfaces of the Time Warner faces to reflect the bubble environment. The reflected bubble on standalone geometry created a great sense of movement and life for what would have otherwise been much more dull and static.
As the show progressed, we placed several additional front row buildings on cards to further enhance feelings of parallax.
Due to the numbers of windows shots, did you create some automatic setups and scripts?
We created and maintained the BG bubble for use in all apartment shots. Eventually, we devised individual panoramas for each of the different scenes – varying the skies & lighting of the city for variation to match the different times of day for each sequence.
Did you share assets with other vendors?
We did share with Gravity since some of our sequences were so similar. They gave us their Ferrari model so we could use it as the basis for exterior reflections which we used to replace set reflections on the live-action Ferrari in our shots.
Can you tell us more about the gold enhancements shots?
Talking about the gold shots will be a spoiler for anyone who hasn’t seen the movie. At the finale of the film, the defrauded workers each get a piece of Shaw’s solid gold Ferrari. The props used for those shots had various gold treatments – some of which photographed better than others. Once the filmmakers saw the footage in an early DI session, they realized that the gold props weren’t as convincingly gold as they could be.
Starting with the simplest-solution-is-best mindset, we attempted 2D color corrections contained by articulate roto. For certain objects, that method worked very well – we gave the dull props a much more lustrous look.
Other objects proved to be tougher cases and didn’t respond as well to the 2D route. On those shots, involving the steering wheel and the grille, we resorted to a CG replacement of the props. The actual props were delivered to us so we could model them photogrammetrically. Justin Maynard modeled the pieces and matchmoved them to the actors’ action in the shots. Jaemin Lee textured and lit the pieces to match the plates. Flame artist Chris Hunt composited the objects into place – painstakingly adjusting the lighting balances and textural feel to give the objects the same reality as the props in the footage – only more golden…
What was the biggest challenge on this project and how did you achieve it?
The biggest challenge on the show was keeping the fine edge detail of the FG plates while compositing them onto bright-to-blown-out backgrounds. We also had to balance the window reflections to always give a sense that the glass surface was present.
Andy Jones wrote a tool for Nuke which helped us get smooth, clean keys for the greenscreens and still maintain a high level of fidelity to the original plates for extra-fine edge detail. Retaining that detail made the difference in selling the shots.
Was there a shot or a sequence that prevented you from sleep?
Aside from the number of shots & the time we had available (i.e., the standard problems!), David Piombino had a tricky shot featuring the tail-light of the Ferrari. The anisotropic reflections in the glass had to have the exact right refractions of the skyline bubble in order to be convincing…it was touch and go…but we all had faith that he could pull it off.
What do you keep from this experience?
This job was my first job at Method Studios after the merger with my former company CIS Hollywood. I was away from my home base in LA and working with a group at Method NY whom I had never met before. Luckily, in addition to being warm and welcoming, they are an excellent team of resourceful artists. We got the job done and had some fun along the way.
How long have you worked on this film?
Method Studios started work on the film in January 2011 and completed work in early October.
How many shots have you done?
Method Studios worked on 160+ shots, of which 138 are in the final edit.
What was the size of your team?
We had five artists working on CG and matchmove; five composite artists for the main show (and four-to-five more during crunch times); two roto artists; two paint artists; one matte painter and a production team of three.
What is your next project?
I moved directly onto Garry Marshall’s NEW YEAR’S EVE which is delivering now for an early December release.
Jesper Kjolsrud began his career on the film THE BORROWERS. After working 10 years in London with MPC and Double Negative on films such as PITCH BLACK, STALINGRAD, THE CHRONICLES OF RIDDICK or 10,000 BC. In 2009, Jesper joined teams Image Engine in Vancouver. He will work on the films DISTRICT 9, GREEN ZONE or THE LOSERS.
What is your background?
I got in to computer graphics through a university course in the north of Sweden. It was unique for using industry standard hardware and software, something that was very hard to get experience with at the time unless you already worked in a facility. That led to an animation job in Gothenburg and after a few months a position at MPC in London through one of the guest lectures from the course, Paul Franklin. One of the first jobs I worked on was THE BORROWERS, which was supervised by Peter Chiang and when he a year and a half later approached some of us to set up a new facility to do his latest job PITCH BLACK I moved on to what became Double Negative. I stayed there for over 10 years until my family and I felt like a break from London, which ultimately led me to Image Engine in Vancouver.
How did Image Engine get involved on this show?
We got a call from the director, Matthijs (Van Heijningen), and the VFX producer Petra (Holtorf) towards the end of 2009. They had seen and liked our work on DISTRICT 9 and thought we’d be a good fit for the job.
What was the Director’s approach to visual effects?
Matthijs is a very experienced commercials director who’s done big projects with complicated VFX so having that knowledge we tried to fit the job around him. In commercials you tend to work with artists directly so we tried to do the same without bothering Matthijs with the processes and pipelines of a project of this scale.
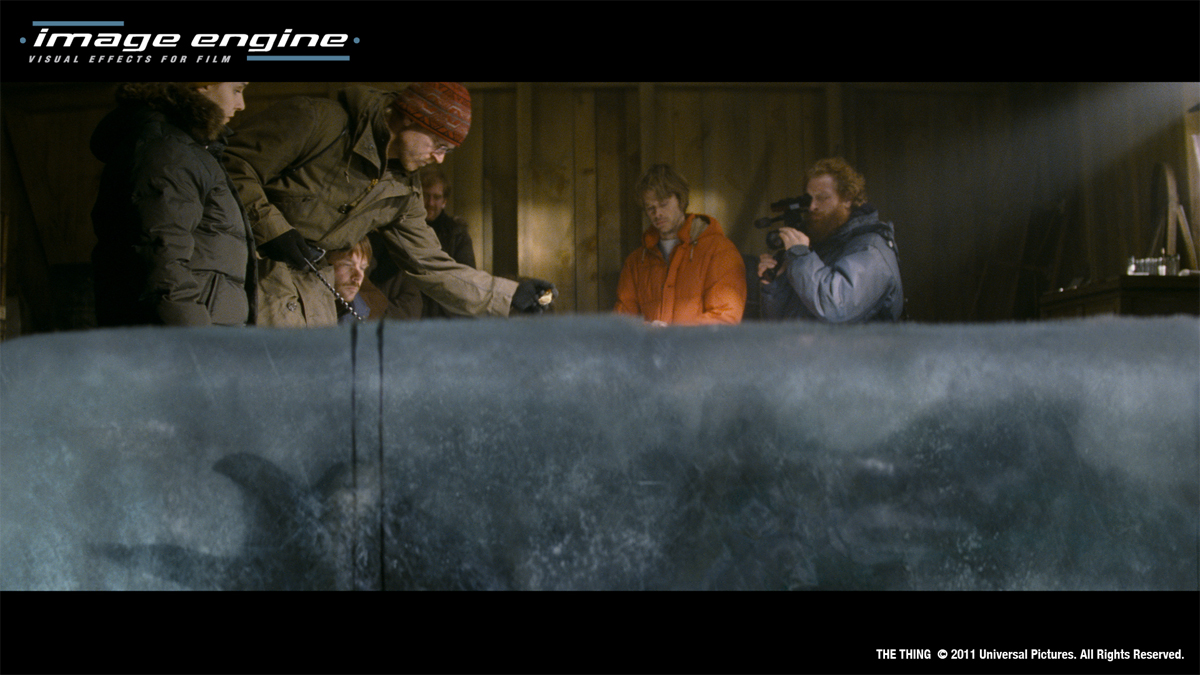
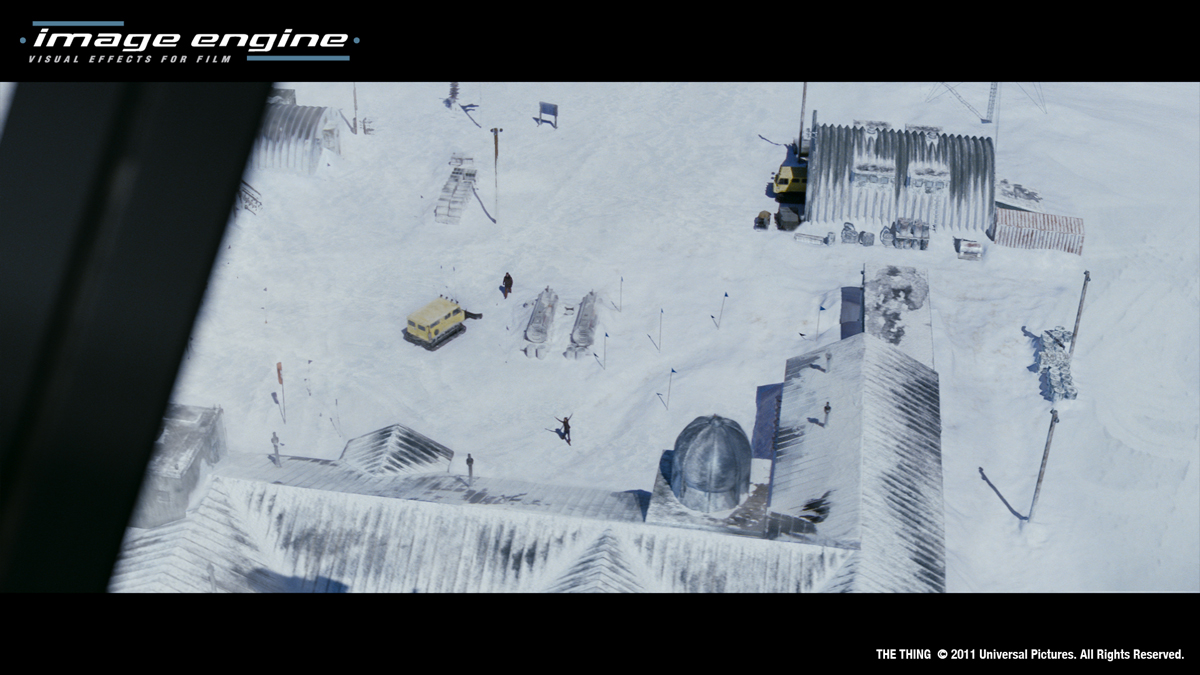
What was the real size of the exterior set of the base?
The base itself was built as a 1:1 scale set based on the production design with only certain areas like the back of the building missing as it was never featured. It was built in a quarry in Toronto against a slope that would fit in to the geometry of the mountain location in BC.
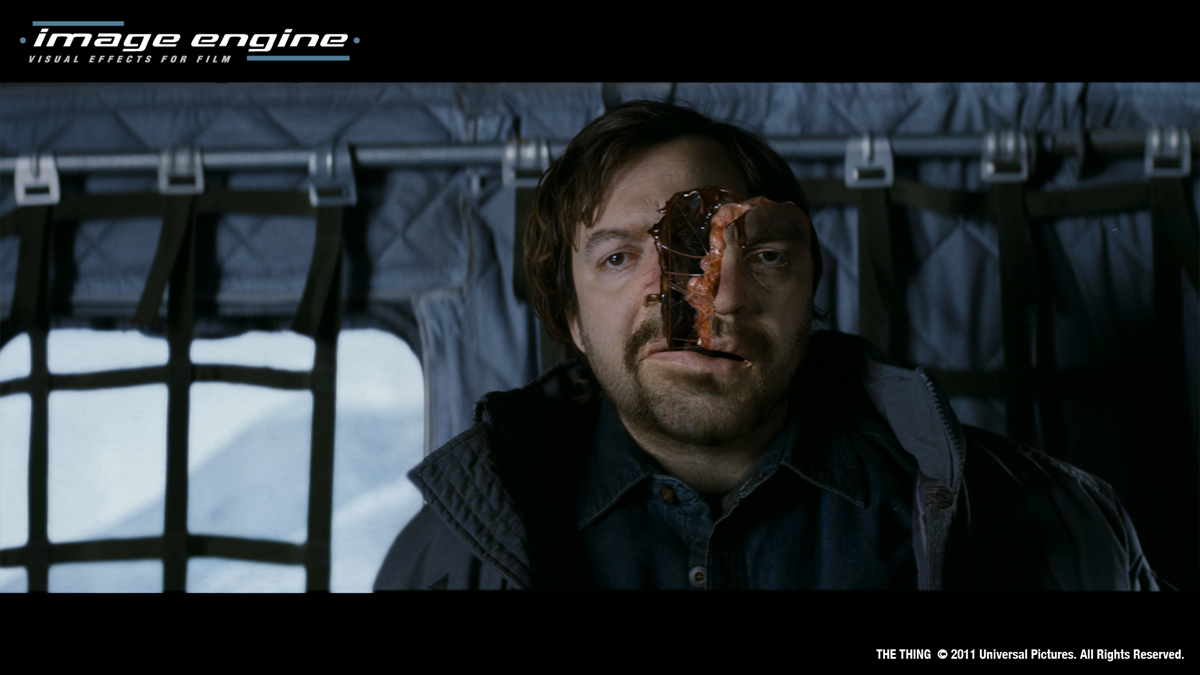
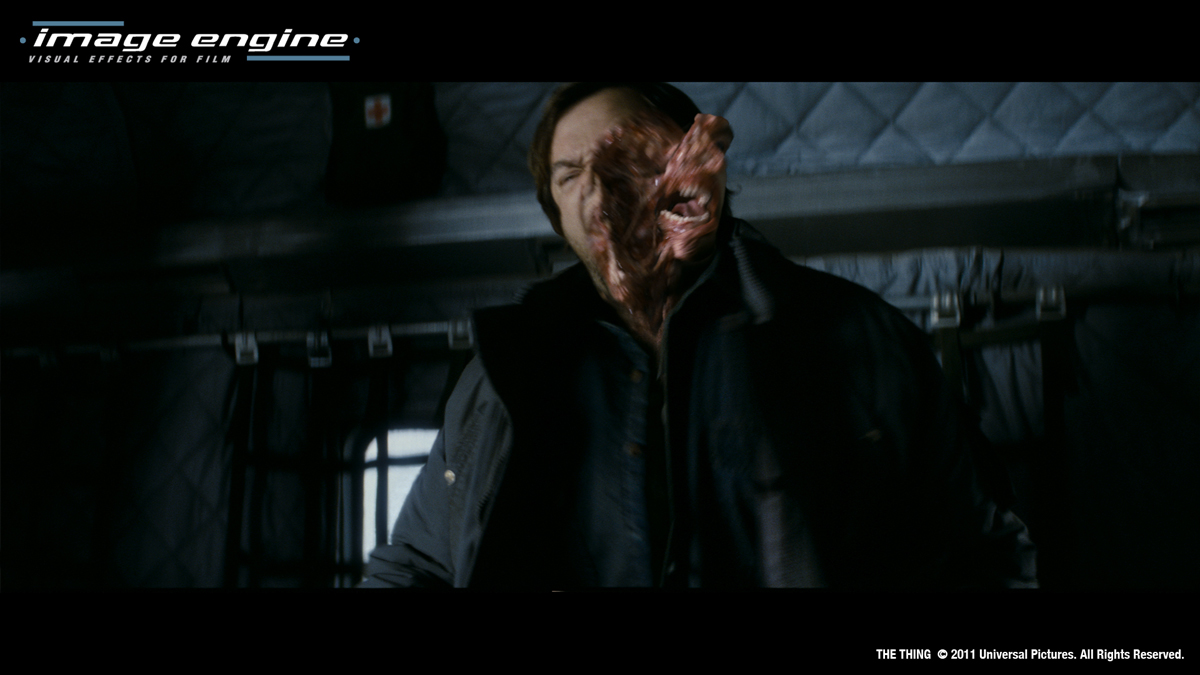
What was your feeling to give your contribution to the great and scary creatures that Rob Bottin and John Carpenter have created?
One of my favorite parts in Carpenter’s version is when the severed head grows legs. I for one wanted to see more of that. And the gruesome double-headed monster the Americans find. The way it was lit and filmed worked great but it was dead. I would have loved to have seen it move. With the techniques of the early 80’s that was extremely difficult to pull off but that’s something we can do quite well today.
Was there a shot or a sequence that prevented you from sleep?
If there’s one thing I’ve learned so far, you can’t let work interfere with sleep. Sleep is far too nice for that.
What do you keep from this experience?
Although the project was a huge challenge I’m very pleased how well it turned out. There are always curve balls being thrown at you. All shows have their challenges but now I’m more confident than ever that we can handle it.
How long have you worked on this film?
I started prepping just before Christmas 2009 and we finished the show at the end of May this year so about a year and a half.
How many shots have you done?
We ended up doing around 550 shots.
What was the size of your team?
I think we peaked at around 100 people.
What is your next project?
I’m currently working on another Universal project called R.I.P.D. It’s another creature show so in a sense we’re carrying on with what we were doing on ‘The Thing’.
// Neil Eskuri – Digital Effects Supervisor
How was the collaboration with director Matthijs van Heijningen Jr.?
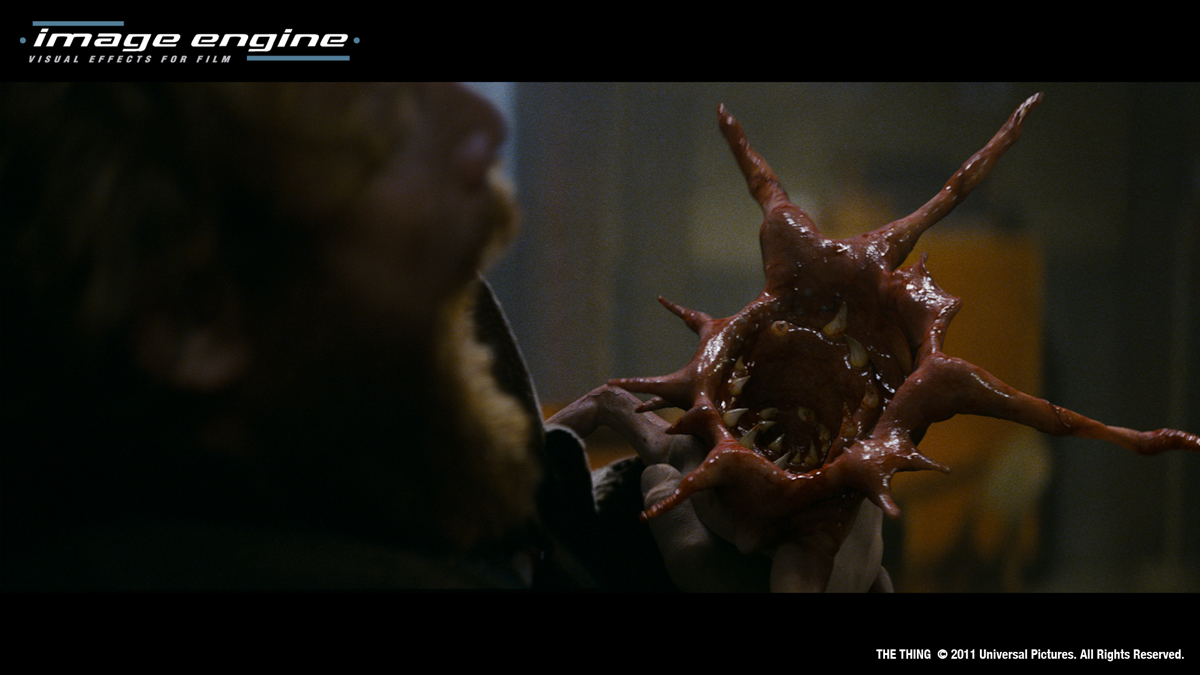
Collaboration with the Director was pretty good. Matthijs had a lot of great ideas and disgusting images that he would send us for the look of the different creatures. Their maw, or mouth, what he thought the feet and toe nails might be. The gruesome inside tentacles from swarming snakes and worms. He sent close-up shots of insect feet and bird feet along with nature footage of Cuttlefish and squid hunting their prey. He often said he wanted the creatures to be ‘horrifically beautiful’.
How did you recreate the helicopter?
There was a ‘shell’ of a helicopter on set so we had good reference images from those shots. The only time we used the actual set copter was when it was on the ground and the interiors shots. Whenever it was flying, it was our model.
By photographing the actual model, we used those images to build and texture the CG model. Then the lighting was generated from HDRI images taken on set.
The look of the rotors went through several variations. Because of the rotational speed of the rotors and the shutter speed of the camera, the look can be different. Finding that right mix with motion blur took a lot of trial and error.
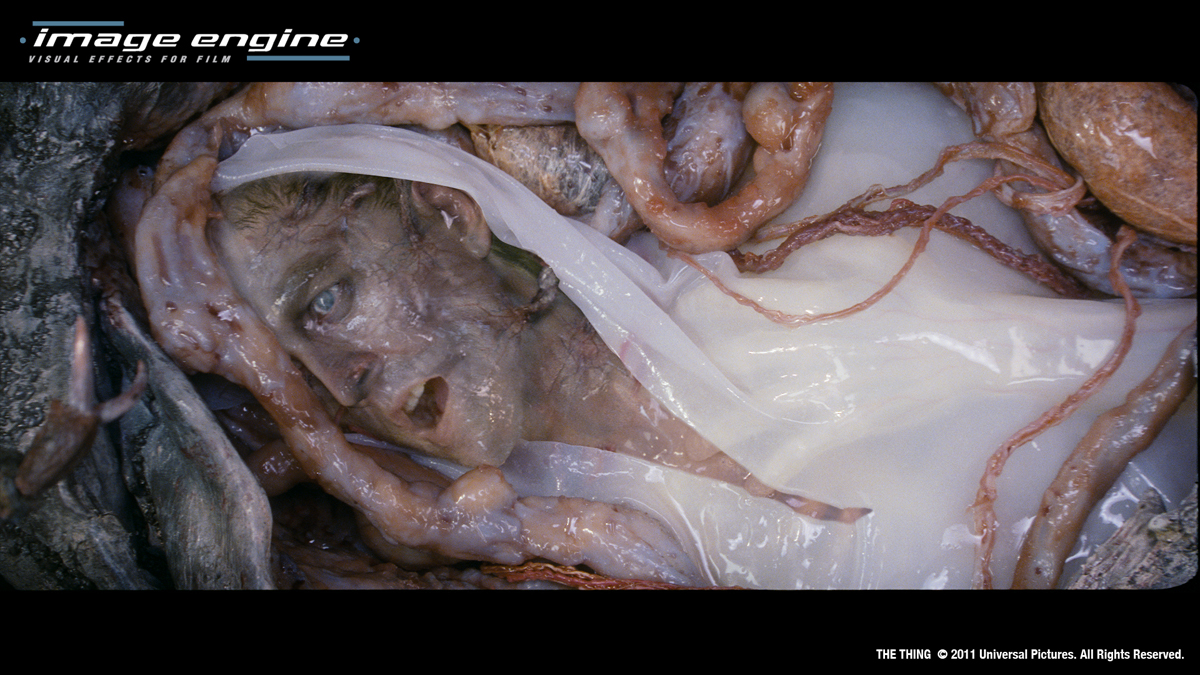
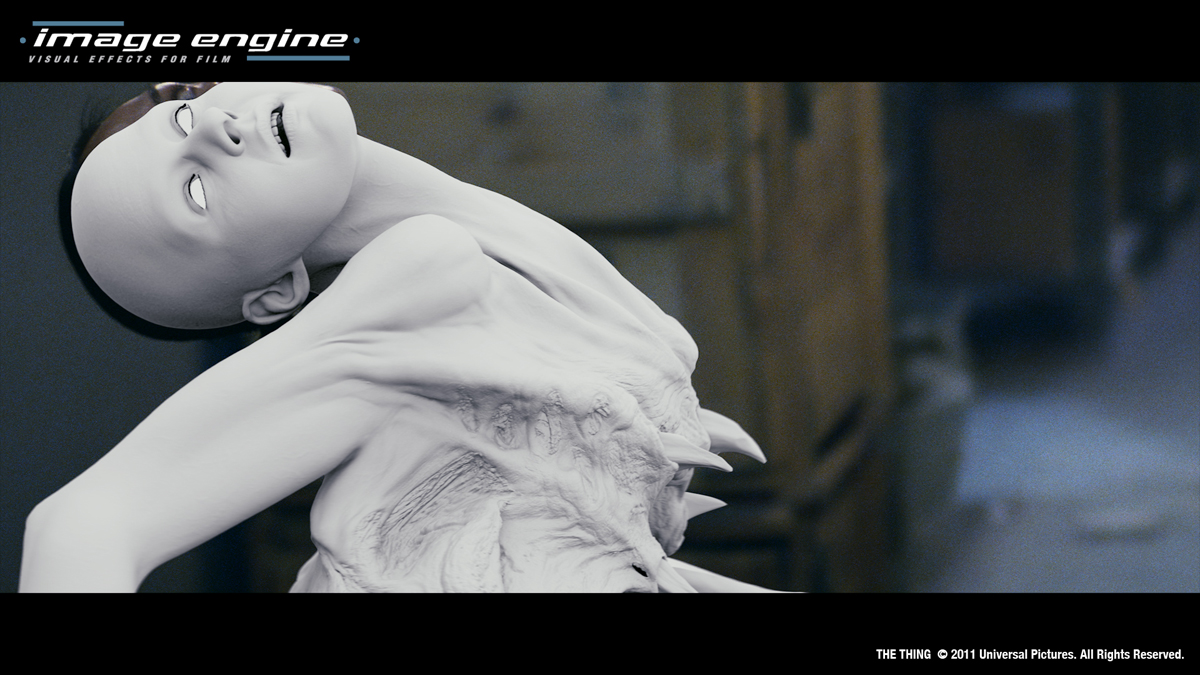
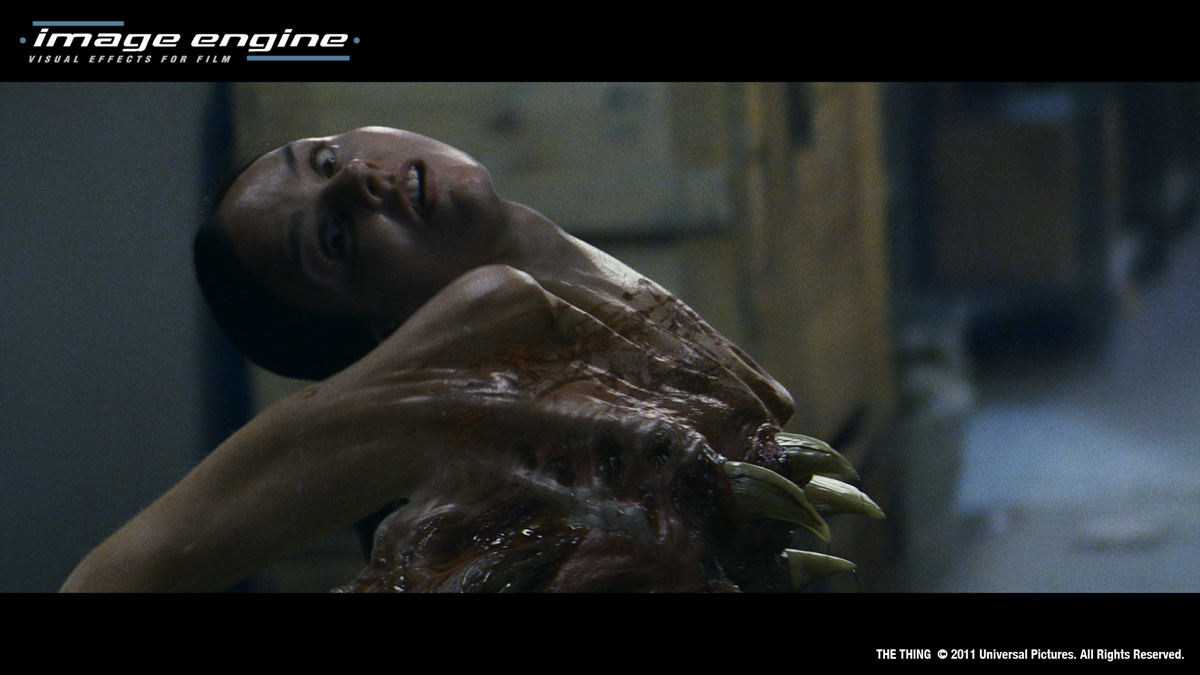
Can you tell us more about the impressive transformations shots and especially the one with the woman?
Juliette’s transformation was always a question mark because, although we knew what she was going to look like once she was fully transformed, how she got there was unknown. We had our concept artist, Juliana Kolakis, go through several different ideas and stages of how her chest would change. Matthijs constantly asked what we would see, how much of her human-ness remained? How much alien is pushing through the skin?
A ‘beat sheet’ was created based on the cut, which would explain what would be seen in each shot. This changed as the cut changed. Matthijs then suggested that the alien should already be pushing through the chest before her sweater falls off.
Since tentacles are a big part of the alien look, this gave us the idea of ball of snakes trying to push through the skin, which is what you see in the first shot. Then as the teeth of the alien mouth rip the skin, we see the inside tentacles push through while Juliette’s head is forced towards her back. Her proportions constantly made it difficult for animation since we now had this huge mouth and claw on her thin legs, how was she going to move and look powerful? Like most things, a lot of trial and error and versions were made to bring her to life.
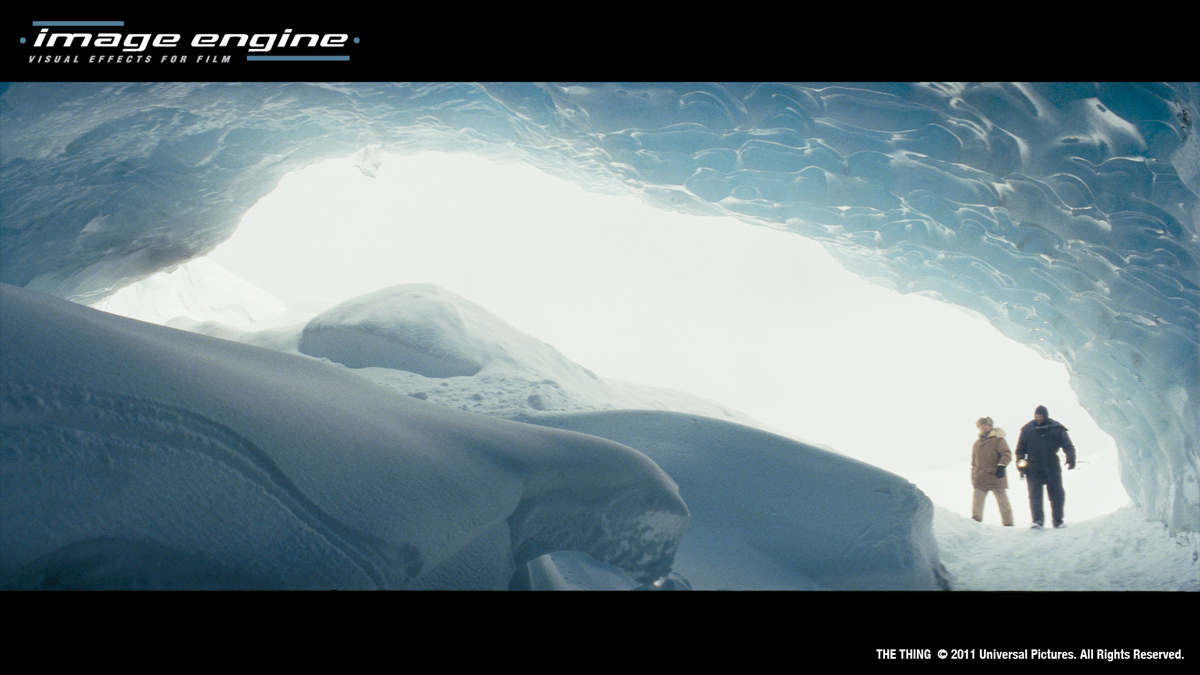
Can you tell us more about the huge ice cavern and the spaceship?
The Spaceship was to be 1000 ft. in diameter and over 60 ft. high. A good portion was buried and covered in ice and snow so you wouldn’t see it all, but still have an idea of how huge it was. After we got the original model, certain design elements had to change once shots were being laid out to convey the vast size of the ship and the cave and still keep the framing Matthijs wanted for the shots.
Since the actors were shot on small mock-ups of the ship, when the designs began to change we quickly knew that very little, if any, of the set pieces could be utilized in the shots. We only kept the very edge of the ship and the hatch from the original photography.
Like most elements, the Ice Cave went through a lot of different versions. There were several meetings to discuss how long the cave had been there, the evolution of the cave over the centuries, if ice columns had been created from the ceiling to the ship, and a schematic was created to show the types of ice and snow in different areas of the cave. Again, armed with hundreds of images of different types of ice caverns, several concept art pieces were created to give the sense of a vast expansive ice cave and sub-caves housing the alien spaceship. It was probably the most difficult look to achieve.
Was there a shot or a sequence that prevented you from sleep?
They all kept me awake at night. Often, I’d wake up at 2 in the morning with some part of the project on my mind. Each had their own trials and tribulations, but the louvre sequence to blowing up the alien was the part that kept me awake the most.
Those sequences came at the end of production with very few weeks left. We still didn’t have the final designs for the ice cave or the spaceship and the Sanders alien was going through a complete overhaul. We knew it was going to be a tough finish, but with the talent of the crew and the flexibility of the Image Engine pipeline, we were able to deliver.
// Fred Chapman – Lead Character Technical Director
Can you tell us more about the design of the creatures?
The initial creature designs were provided to us from production. These designs go through several stages of approval before they reach us but it is still possible for us to suggest tweaks.
Most creature designers work mainly on aesthetics, they want to design something that looks cool and original, however what works for a static design won’t always work when it starts moving. We need to imagine what’s going on under the skin, where are the muscles, bones, tendons, how are the joints structured to give the range of motion required and also convey sufficient strength. In order to convey a sense of realism in a creature it needs to appear to interact with real world forces so each body part needs to appear to be able to withstand the stresses it would be under were it really moving in that environment. For example we requested bulkier muscles in the front limbs and stronger looking shoulder joints for the Edvard-Adam Thing so it would more able to support the mass of the torso, trying to keep the essence of the design and add just enough reality to make it work in the scene.
Once we’ve modeled, rigged and animated a creatures then the clients will get to see it move for the first time, that’s when the next round of design tweak requests start, these requested changes can sometimes go right through to the week of final delivery. At least one of the creatures was totally unrecognizable by the end of the show compared to what they had in mind on the day they shot the sequence.
What was your feeling to give your contribution to the great and scary creatures that Rob Bottin and John Carpenter have created?
The creature effects in the 1982 film were amazing for their time; I’ve always been a huge fan. It’s such a great honor and challenge to be involved in creating the modern equivalent and I’m really proud of what we achieved. Audiences are much less forgiving now than they were in the 80s so the approach used then would simply not have worked this time around. That said, we were very conscious of remaining faithful to the style and character of the creatures in John Carpenters film so I really hope that shows in our work.
Clients no longer have to accept that whatever they get in camera on the day of the shoot is the final version they’re forced to use in the film. They now have the option to come to us afterwards and describe what they really want or how they’d like to take it further. As long as the time and resources are available we can keep working on it until we achieve the result they’re happy with. That’s why in the final release of the film there are almost no practical creatures visible. I take it as a back-handed complement when I read reviews saying the CG creatures were not as good as the practical ones because I know the ones they thought were practical were ours too.
Can you tell us more about their creation and the challenges you have to achieve with them?
There are a number of huge challenges we faced on this show. The visceral, organic nature of the creatures is always a difficult look to re-create. From a rigging point of view we work from the inside out, even though you never see it the viewer has to get the sense that there is a complex internal anatomy to the creature. We don’t have the time or resources to try and recreate all of that underlying anatomy so much of what we do is about understanding the complexity and trying to mimic it as efficiently and simply as we can.
The rigging for those creatures should have been difficult. Can you tell us more about it?
For me the trick to rigging for VFX is about keeping the node graph as clean as possible. However good your initial planning, things will always change so you need to keep the rigs adaptable right through the show. There are 3 main ways we achieved this, by making use of custom nodes to keep the number of nodes and connections low, using a modular rigging system for consistency across each asset and not requiring too much from any single rig.
Most things we need to do in rigging can be achieved using existing nodes and a bit of ingenuity in how to use them. To create complex behavior often requires the layering up of one bit of rigging on top of another to create the final solution. This is both inefficient computationally and messy when you need to debug something not working right or make requested changes. In these cases I like to think about the data flow, what are the inputs an animator needs to have control over and what are the final outcomes that the rig needs to achieve. Then I work out the most efficient calculation to get from A to B and we create a single node to process this calculation.
Our modular rigging system, named “riglets” allows us to position pivots and controls in a template and connect up a rig from its component parts, a torso, clavicle, arm, hand, etc. As soon as we have a stable solution for how we want a body part to behave, we make it a riglet and the riggers should never have to think about that again, freeing them up to spend more time on making the deformations look better. It also allows us to mix and match body parts, so we can put a tentacle coming out of a chest or an alien foot on the end of an arm, etc.
A general rule I like to work to is to build rigs which are capable of doing around 70-80% of what the asset needs to do. It’s very common when you start building a rig to think about the extremes of what will be required and to try and to factor everything into a single solution. This can result in an overly complex and slow rig. I prefer to look at what are the core things a rig has to do in ever shot and build the rig to do that. If in a single shot it needs to do something different then we treat that as a special case and may build a custom rig asset or just fix it in the shot.
The most critical thing about any rig is how the animator feels about using it. Ultimately rigs are just tools for the animators which puts the rigger in the role of servicing the requirements of the animators. We need to strike the right balance between speed and detail, sometimes having different levels of detail of the same rig for use at different stages in the shot development. Its a constant challenge to stay one step ahead of what they may require and ensure that they are able to achieve what they need to as smoothly and efficiently as we can.
Can you tell us more about the impressive transformations shots and especially the one with the woman?
There is no set process to achieving the transformations, each one was handled as a one-off and in most cases required a number of different effects to be layered up to create the final shot. It was also an iterative process in narrowing down what the clients wanted. Initially we’re given quite a vague concept like “these two heads merge together” or “the skin on her chest rips open to reveal a giant mouth”. Exactly how we achieve that depends on the very specific details. Does it happen fast or slow? Does it start at the top and work down, or in the middle and work out? What happens to the extra skin? Does it shrink back, fall off, dissolve away? Until we’ve answered all these questions we don’t know for certain which parts we’ll do in rigging, animation, cloth, fx or comp. These transformation shots are often the most collaborative between the different disciplines, each having to adapt to what works best for the others.
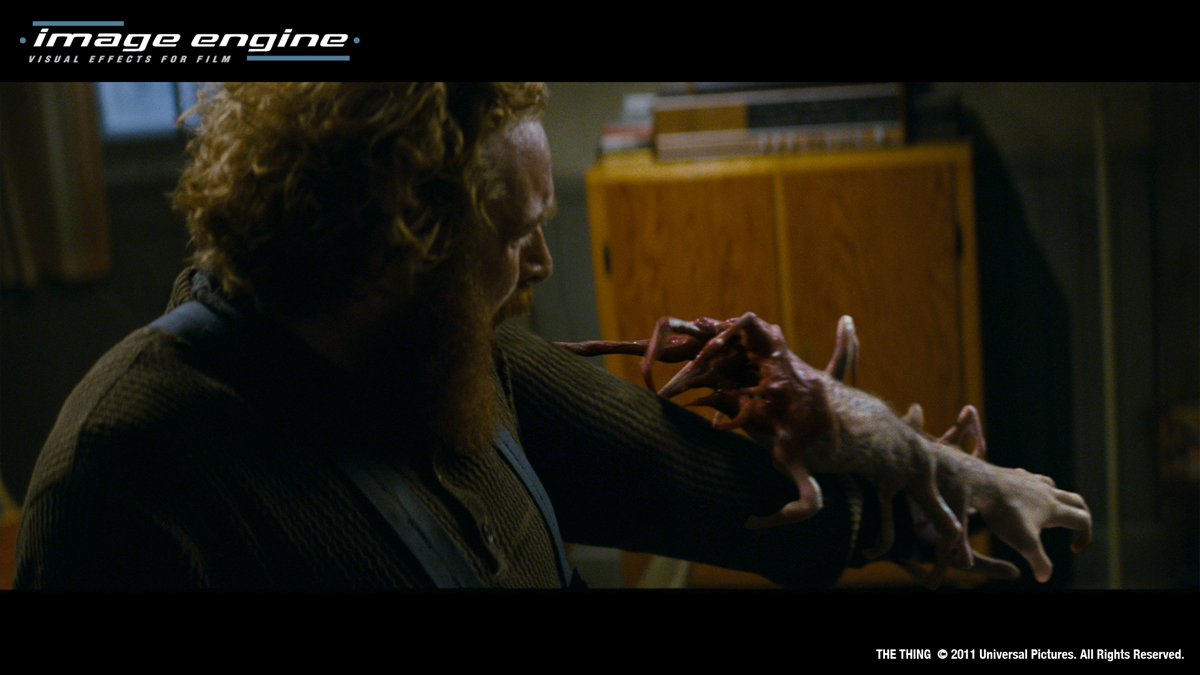
How did you create the terrifying arm that attack one of the character?
The arm creatures were actually some of the easiest rigs to build and maintain. They’re good examples of why a modular rigging system was a good approach for this show. Through the show the redesigns meant the number of legs changed, human fingers were merged together and the mouth areas changed significantly. Each time we could easily go back to our modular template, make some adjustments and rebuild. One of the reasons these rigs were so simple was due to the proprietary multi-bone ik and spline ik nodes we created. Compared to standard out-of-the-box solutions these nodes have so many more features for controlling the exact behavior of each bone and shaping of the leg. For example in a segmented 5-bone leg the animators can control the weighting of each bone to adjust how much automatic movement goes into each bone with additional animated override. It also took care of IK/FK blending. All of the control values feed into a single node which outputs transform values directly into a single joint chain. This single proprietary node gives complete control and flexibility with the absolute minimum number of nodes and connections. The same is true for our IK spline tool, which gives us a huge amount of extra control over twisting, aiming and scaling of joints along the chain. We had a multi-bone setup for each leg and the claws around the mouth and our ik splines for the spine, mouth sphincters and muscles. That’s pretty much the whole rig.
What are your software and pipeline at Image Engine?
For rigging we use Maya as our main package with a significant amount of proprietary software on top. That’s everything from our cross-platform asset management tool to our custom constraint node.
What do you keep from this experience?
That I’m so lucky to be working on awesome films, for an awesome company, with some awesome colleagues. Image Engine is small enough that we can really be responsive to a client’s needs, we can make bold decisions and be really creative and efficient. At the same time we’re big enough that we have some world-class talent, especially in the RnD team who work closely with the artists to create tools and pipelines that enable us to create top quality work.
We developed some great tools and techniques on THE THING that we will definitely be using again but we’re not complacent, there’s always plenty of room for improvement.
A big thanks for your time.
// WANT TO KNOW MORE?
– Image Engine: Dedicated page about THE THING on Image Engine website.
Greg Liegey begins his career in Visual Effects in 1992 at Cinesite L.A. where he worked on such films as UNDER SIEGE 2, CONTACT or SPACE JAM. Then he worked as freelance at Sony Imageworks and ILM. In 2002 he joined the team of CIS Hollywood (now Method Studios) and work on films like MATRIX REVOLUTIONS and CONSTANTINE. As a VFX supervisor, he has worked on films like THE MUMMY: TOMB OF THE DRAGON EMPEROR, I AM LEGEND or FAST AND FURIOUS 4.
What is your background?
I’m from NYC and went to Pomona College in Claremont, CA for English Literature & Art History. I started working in Hollywood for Paramount Pictures in a development office and soon took a job at a fledgling Cinesite LA in 1992 through a friend’s connection, and have stuck with VFX ever since. I spent seven years at Cinesite working as a composite artist, then I freelanced at Sony Imageworks, Manex and ILM for three years. In 2002, I landed at CIS Hollywood working first as composite artist, then composite supervisor, and eventually visual effects supervisor… where I continue, though now we merged with Method & took on the Method moniker, Method Studios.
How did Method Studios got involved on this show?
As CIS Hollywood (at the time), we acquired the show because of the unfortunate circumstances of Asylum’s closing. Lionsgate brought us the show because of previous work with them we did in conjunction with our sister company Efilm.
How was the collaboration with director John Singleton?
Working with John is a pleasure. I’m happy to say that this was my second opportunity after working on 2 FAST 2 FURIOUS. John always keeps focus on the storytelling aspect of every shot. The details he wants in VFX shots are the ones which move the story along, even if that means stripping things out and simplifying.
What have you done on this show?
We had two main sequences and some miscellaneous shots.
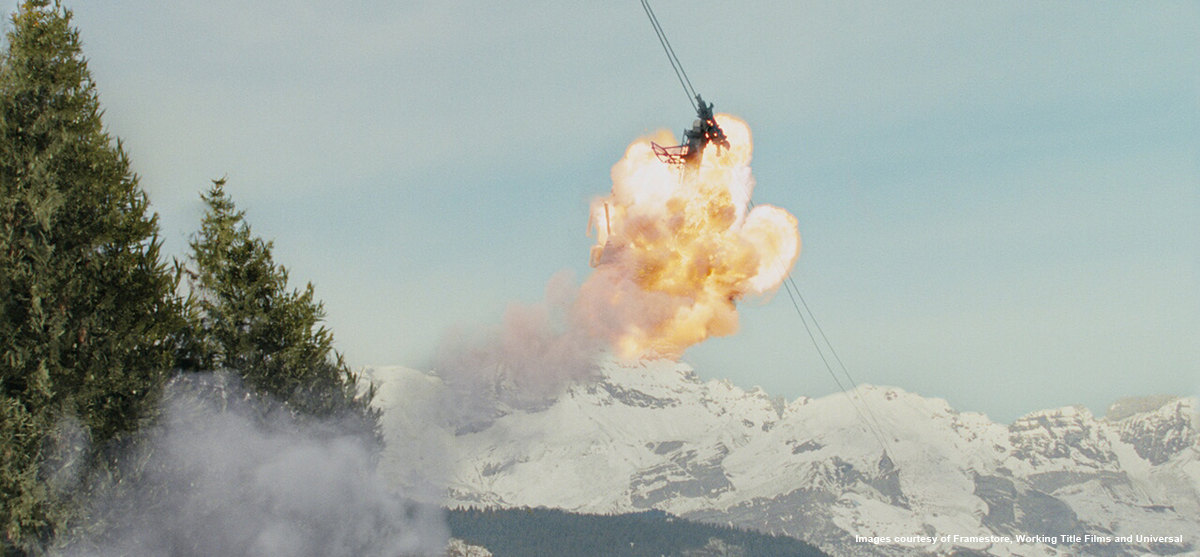
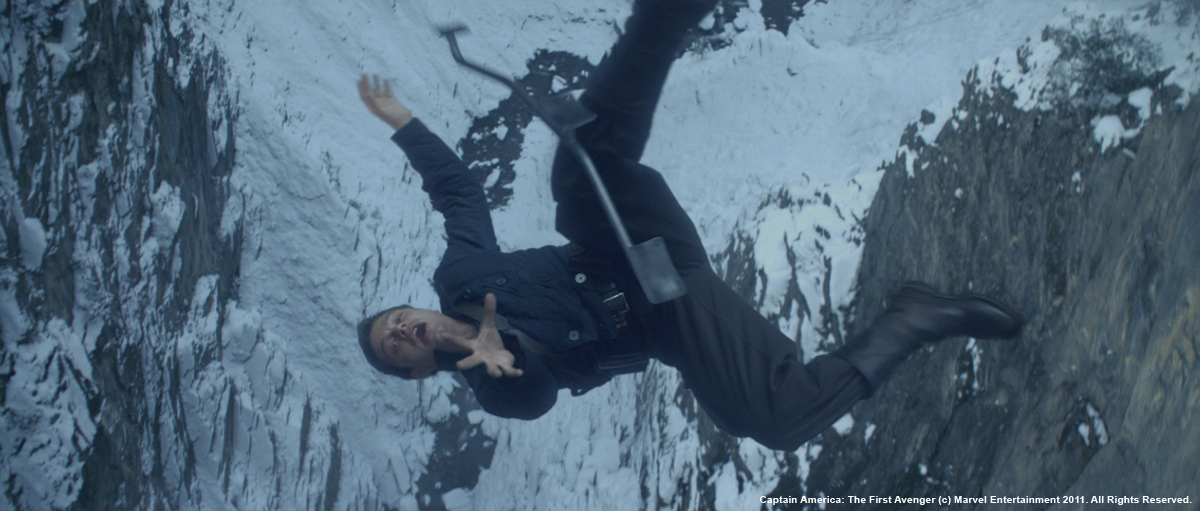
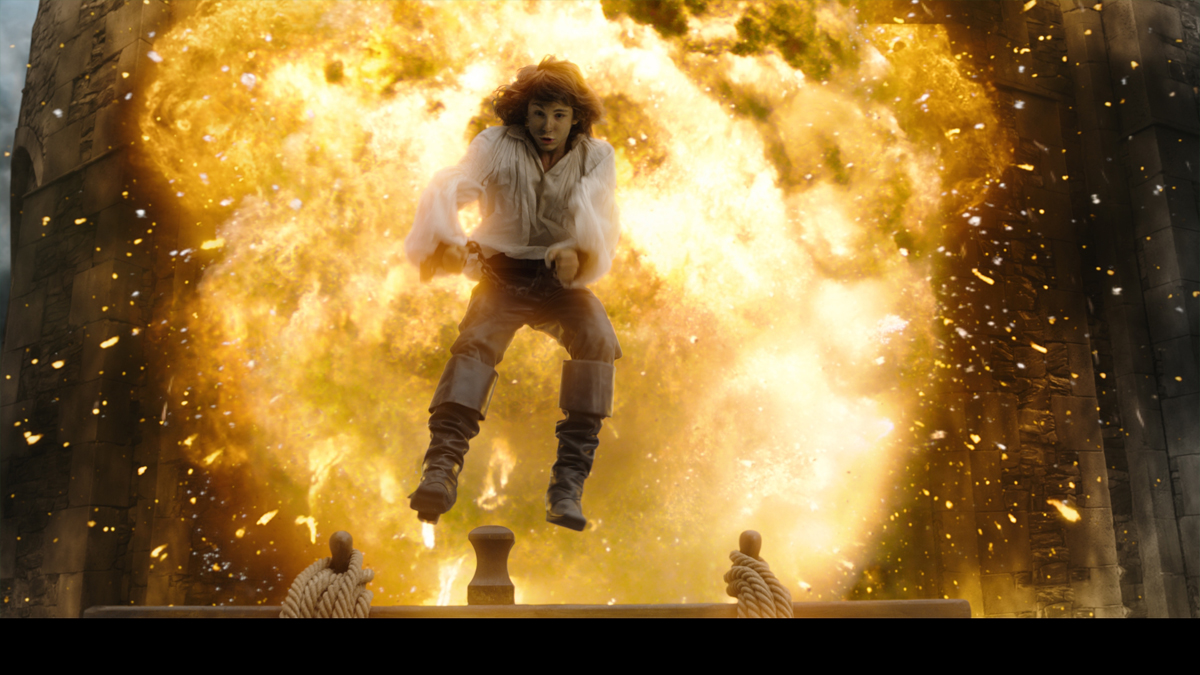
The major sequence involved the catastrophic explosion of the protagonist Nathan Harper’s (Taylor Lautner) house. The background plates of the exploding house were shot as miniatures at Kerner Optical.
Can you explain to us the shooting of the miniature explosion?
// Note: This question are answered by Andy Foster, VFX Producer at Method Studios. He worked for Asylum during the miniature shoot.
From what I remember the miniature explosion was shot with 4 cameras at 72 fps. The camera positions for the miniature shoot were matched as closely as possible to the live action footage shot at the real location for the house.
For the aftermath we shot both vista plates and motion control matched to the angle and moves of the previously shot live action plates of the actors. The motion control moves were based on camera tracking data based on the live action plates themselves. The miniature house was at 1/4 scale. We shot multiple passes of the “aftermath” camera setups with varying degrees of smoke and residual fire to provide a wider assortment of elements for the comps.
The Kitchen was shot at 48 fps on full size set piece that consisted of the stove, it’s surrounding cabinets and a hold out shape for the bar at the entry to the kitchen. After the house and kitchen setups were complete we shot various generic smoke and falling fire ember elements.
VFX and Kerner worked back and forth seamlessly to lock in where all the camera positions would need to be placed on set. To help accomplish this a 3D scene of the set was built based on a combination of the miniature blueprints and provided measurements. Cameras were placed within the scene and than lined up to match the tracked live action shots that were currently in the cut. This allowed everyone involved to see the potential outcome of how the shots would be comped together before anything was actually shot. It also helped in spotting any potential difficulties with the suggested camera placements.
What was your feeling to work with miniatures? It’s something that is unfortunately becoming increasingly rare in VFX.
I’ve always liked working with miniatures. The physicality of miniatures gives them a presence which is often hard to duplicate using CG especially with slow camera movement or variable lighting such as fire. The way light interacts with an actual surface is both subtle and complex – very hard to duplicate exactly. The brain excels at discerning small anomalies in surface texture which are born out of necessary CG shortcuts. Which is not to say you can’t create absolutely wonderful CG – you can – but the best results require lots of time spent creating various depths of reality to fool the eye.
Can you tell us in detail how you put the miniature elements on live action plates?
We lined up the miniature plates with the live action plates for time sync which took a bit of give and take. In some shots, the miniature explosion was a couple frames too fast in its acceleration and in others a couple frames too slow. Nonetheless, it’s a tribute to the experience and expertise of Kerner Optical that the elements were tuned to the live action within that small range!
With timing sorted out, next we established the basic splits – the areas of transition from miniature to live action. The house miniature was detailed and a good match to the live action set, so that made things a lot easier. The trick is finding lines of demarcation which are a bit unexpected, so that the transitions can be meshed together without jarring segues. We had to pay special attention to blending the shading variations between miniature & live action as the explosion develops.
Lastly, we added additional layers of atmospheric elements to further blend the miniature & live-action worlds. Smoke, fires and floating embers bridge the elements and help connect them to each other by creating layers of depth which encompass everything.
How did you manage the lighting and camera movements challenges?
Camera movement was tracked for both live-action and the miniature. Then we justified one to the other and locked them together. Using the 3D cameras, composite artist Kama Moiha placed additional layers of deep background on cards at the appropriate distance so that the parallax would sell the feeling of environment and distance for the shots where Nathan and Karen sat at pool’s edge while the house smoldered behind them.
Lighting was merged by hand placement of soft rotos & animated color corrections. We also added spot fires and their lighting effects on top of transition areas to help break up any obvious divisions between the two worlds.
Did you enhanced the explosion with CG elements like fire and props?
There were instances where composite artist David Rey added fireball elements to the miniature explosion footage to hide rigging, obscure undesirable debris or heighten the level of danger for the actors in the set piece. We also created specific, hero CG debris pieces in a number of shots to supplement the existing miniature debris. The hand-placed CG debris allowed us to fill in gaps and create a sense of increased menace to the live-action actors.
How did you create the water simulation?
We used two different types of effects simulations.
During the initial explosion, Aaron Schultz used RealFlow to create impact splash simulations. The CG splashes were needed to churn the practical pool surface to show impacts from various debris coming from the miniature house. They are subtle in the scheme of things, but go a long way in extending the feeling of destruction from the BG miniature to the FG live action plate. Without them, there were areas of relative calm in a frame full of action. We wanted to amp up the action everywhere.
In another instance, David Santiago used Houdini to create bubble simulations to enhance a large piece of the house plunging into the water. The original photography had a large practical chunk of debris chasing the actors into the pool, but since it was built to protect the actors, it looked a bit too safe and innocuous. David ran multiple iterations to get the velocity & acceleration feeling right – the difficulty was a routine one: the CG effects tended to look orderly & regimented compared to the chaotic reality which we needed. Using more than one pass helped mix up and obscure the systematic look of the CG and allowed the compositor, Kama Moiha, match the reality we wanted to portray.
What was the biggest challenge on this project and how did you achieve it?
The biggest challenge was getting representative temp versions of all the house explosion shots to editorial as soon as possible. We could tell early on that the sequence was extraordinarily difficult to edit since the effects were such a large part of the action in every shot. Without having a sense of the way the effects would play out made it tough to know how the shots would work together. Once we got temps together, we still had to work hard to improve certain aspects of timing to show that particular shots could work in the edit. Working closely with everyone in editorial, we were able to fine tune the effects shots to allow more latitude & possibilities in the cutting room.
Was there a shot or a sequence that prevented you from sleep?
Haha – only everything at the start of the show…but once we started working down our ‘to do’ list, things got clearer and we knew we could do what needed to be done…
What do you keep from this experience?
We worked with a great team of people – on the Production side and at our company. Those relationships are the true value of any job.
How long have you worked on this film?
We started in November 2010 and finished in May 2011.
How many shots have you done?
We worked on 48 shots.
What was the size of your team?
We had six compositors, three CG artists and a matte painter… plus myself and the production staff of two.
What is your next project?
I moved directly onto TOWER HEIST at Method NY until September and then back to Method LA for NEW YEAR’S EVE which wraps today!
What are the four movies that gave you the passion for cinema?
Movies I watched as a kid: THE ADVENTURES OF ROBIN HOOD, SHE WORE A YELLOW RIBBON (any of the Ford/Wayne westerns during the “4:30 Movie” Western Week), LAWRENCE OF ARABIA and STAR WARS.
Takashi Yamazaki started his career in 1986 at Shirogumi as a model artist, then it will work as a VFX designer before becoming director. It will directs movies like JUVENILE, RETURNER or DEMON WARRIOR 3. He is the VFX supervisor for most of his films.
What is your background?
I have been strongly interested in Monster films since childhood, especially, backstage work had drawn my attention, and I had kept thinking how I wish I could make Monster movies when I am older. When I was in a junior high school, I watched two revolutionary films, STAR WARS and CLOSE ENCOUNTERS OF THE THIRD KIND, and my inclinations toward SFX films got stronger. I may add that there are so many people who have been influenced by these two fantastic movies, and I think that many people who are involved in VFX and CG are close to my age.
A few years later, I watched the making of STAR WARS EPISODE V: THE EMPIRE STRIKES BACK on television and made up my mind to have a job like this, so I started to widen my knowledge and to improve my skills by obtaining technical books.
In 1986, I entered Shirogumi, a Japanese VFX production company, as a miniature maker. Even though I had worked as a VFX designer on many Films, Commercials, and Event footages, I realized that there was almost no opportunity in Japan to find a VFX job that I wanted to do when I was younger. Then, I decided to create new demand by myself.
I wrote a script with a lot of aliens, spaceships, robots, and time traveling, which is called JUVENILE. This script caught the attention of Japanese production company, Robot, and I made my debut as a film director. After some films, I won several prizes with ALWAYS: SUNSET ON THIRD STREET.
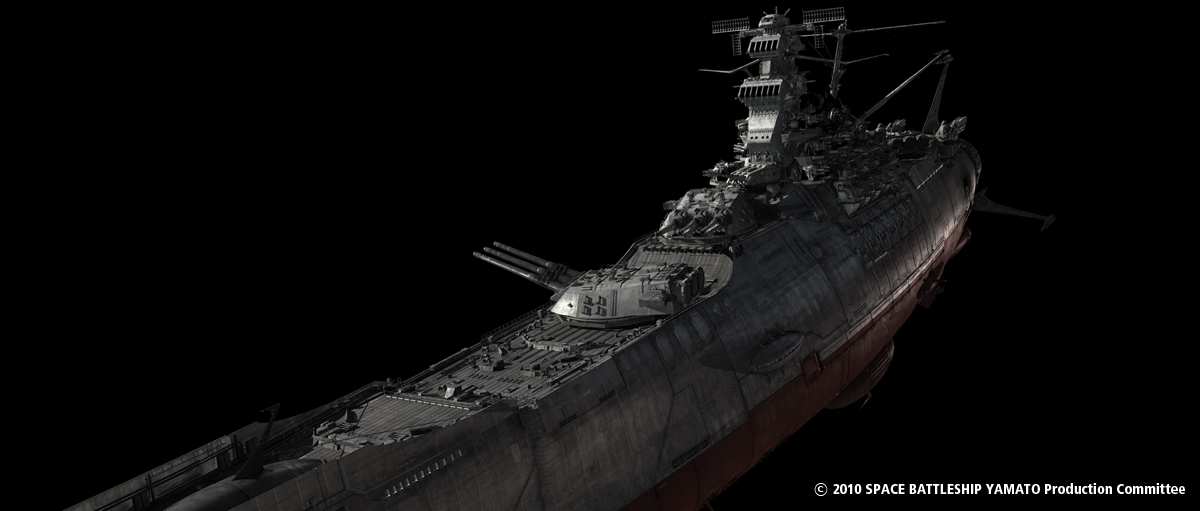
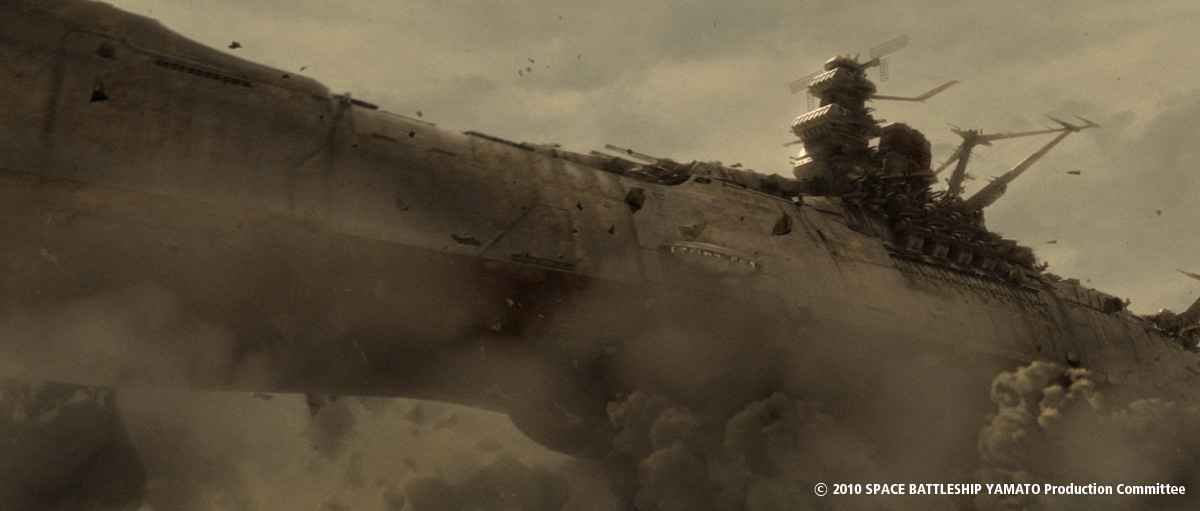
Can you tell us your approach on this space opera movie?
At first, screen writer Shimako Sato participated in this project. I have worked with her so many times, I told her that I would like to help this film in any position because of I was a big fan of the original animation of SPACE BATTLESHIP YAMATO. It will be my pleasure if they use my ideas in any scene.
One day, I got a call that the production crew was looking for a director and they offered me through my experiences of film JUVENILE, RETURNER and DEMON WARRIOR 3.
To be honest, I hesitated to take this position as a director because I was not ready to direct such a dream project, however, I realized that it was a chance to make my childhood dream come true, so I undertook the position with honor.
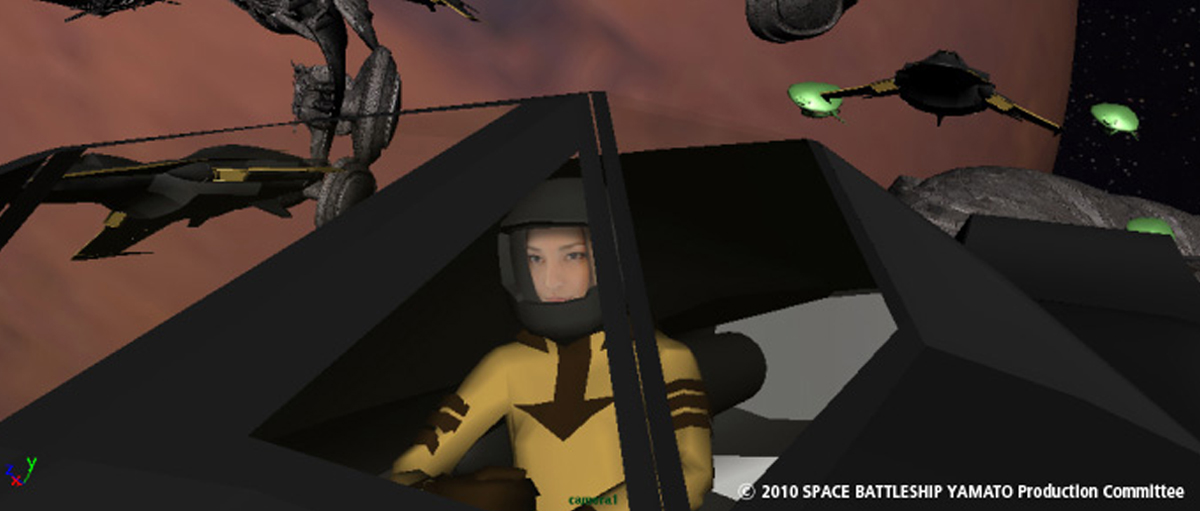
How did you create the shot that start from the eye of Yuki Mori and stops in a middle of a huge space battle?
Shot of Yuki Mori’s eye was shoot by macro lens with DSLR Canon 5D Mark II. This scene starts from close-up of her face to full body, I took a track-back shot by crane camera with a six axes motion ride with actor. Six axes ride makes reality in shot. We switched CGI actors and aircrafts when the crane stops in the final position.
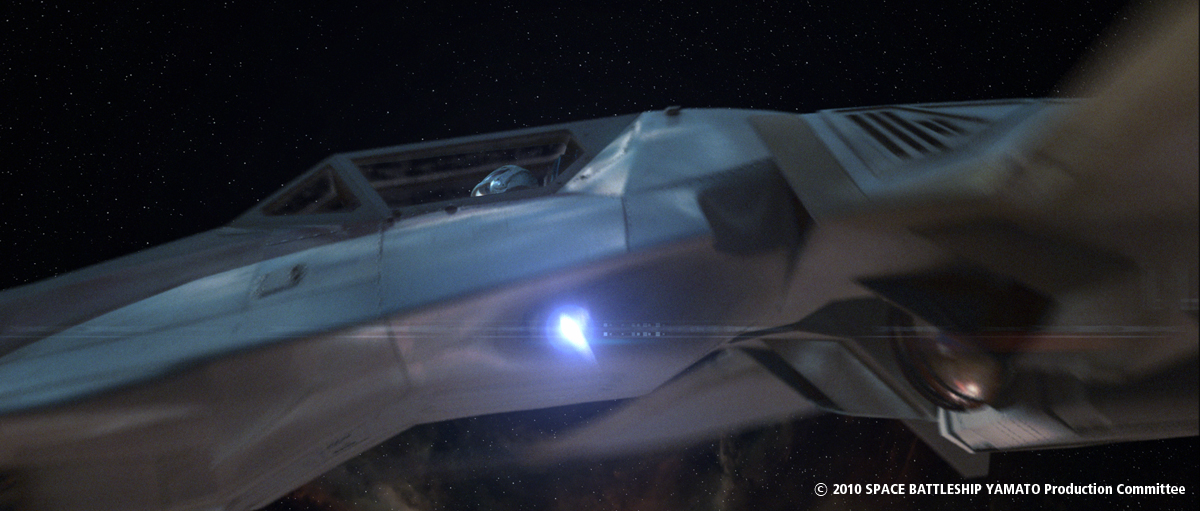
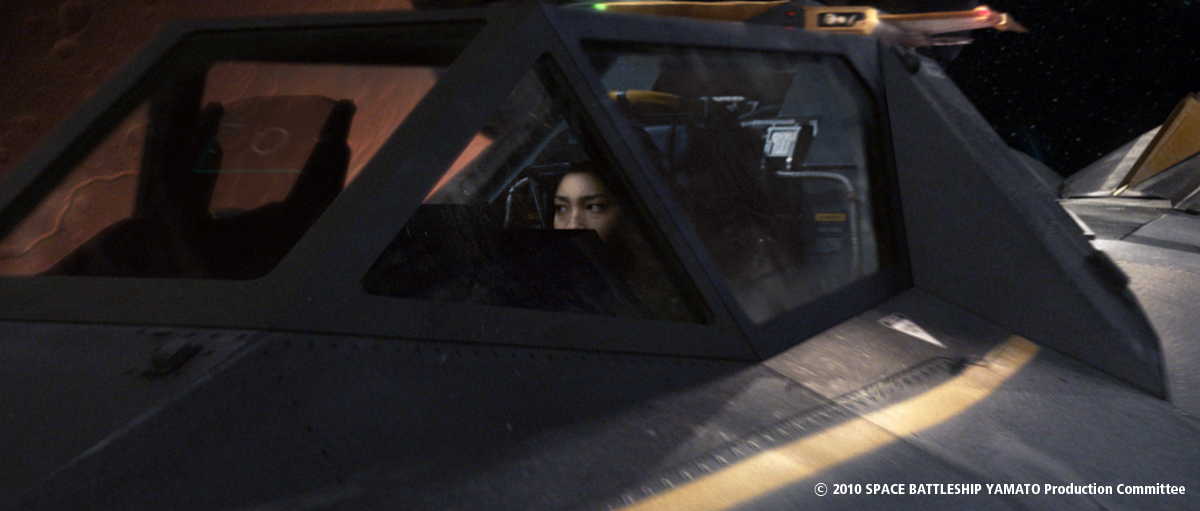
How did you filmed the shots showing pilots in their cockpit?
We shot actors on a six axes motion ride set. Motion ride is a part of the set, we created full body by CGI. It was difficult to composite glass on cockpit by complex reflections, we shot with cockpit frames and replaced by CGI.
Did you create previz for the choreography of the space battle?
Pre-Visualization (previz) was a important for such as VFX film.
For actors, I let them imagine the background of the scene. Previz helps them recognize around the shot.
For a stage team, They need to design the stage size of the scene, miniature team also design and create props from camera position in previz.
For me, I need to find a rhythm and tempo for editing film.
For editing, editor needed previz to fill for un-finished VFX shot.
Therefore, I started to work on previz a few month before shooting, and the CG team also created previz for own VFX scenes.
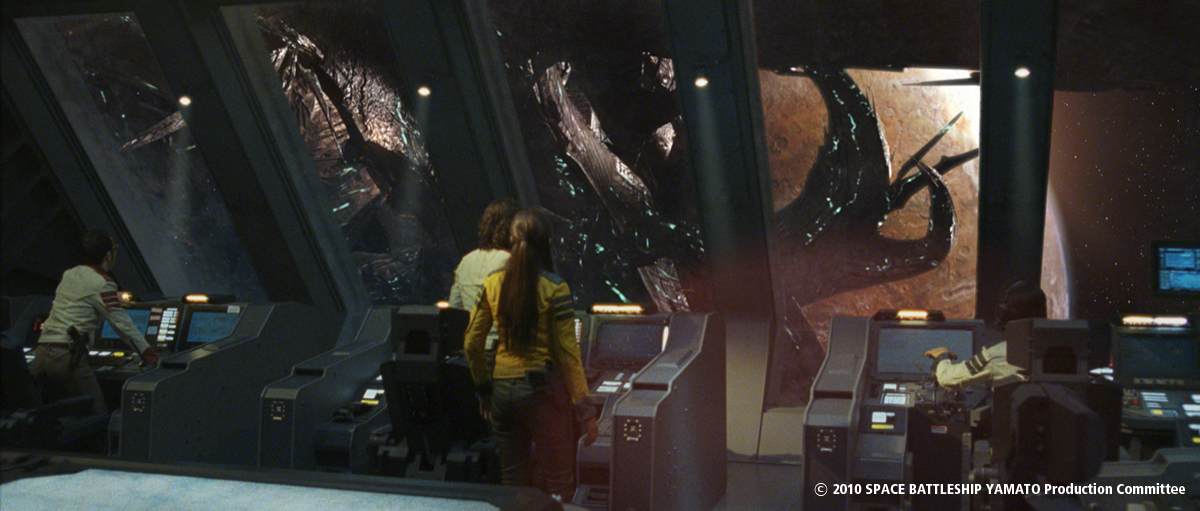
Can you tell us more about the creation of the huge set extension? How did you create them?
It was created by an ordinary way. The camera tracked the minimum sets in front of a green screen backdrop with 2d3 Boujou match move software and we composited with the CGI set.
But there is a problem on the stage size. The actor couldn’t go through left side in the frame. We switched him with digital actor when passing the another actor on the middle.
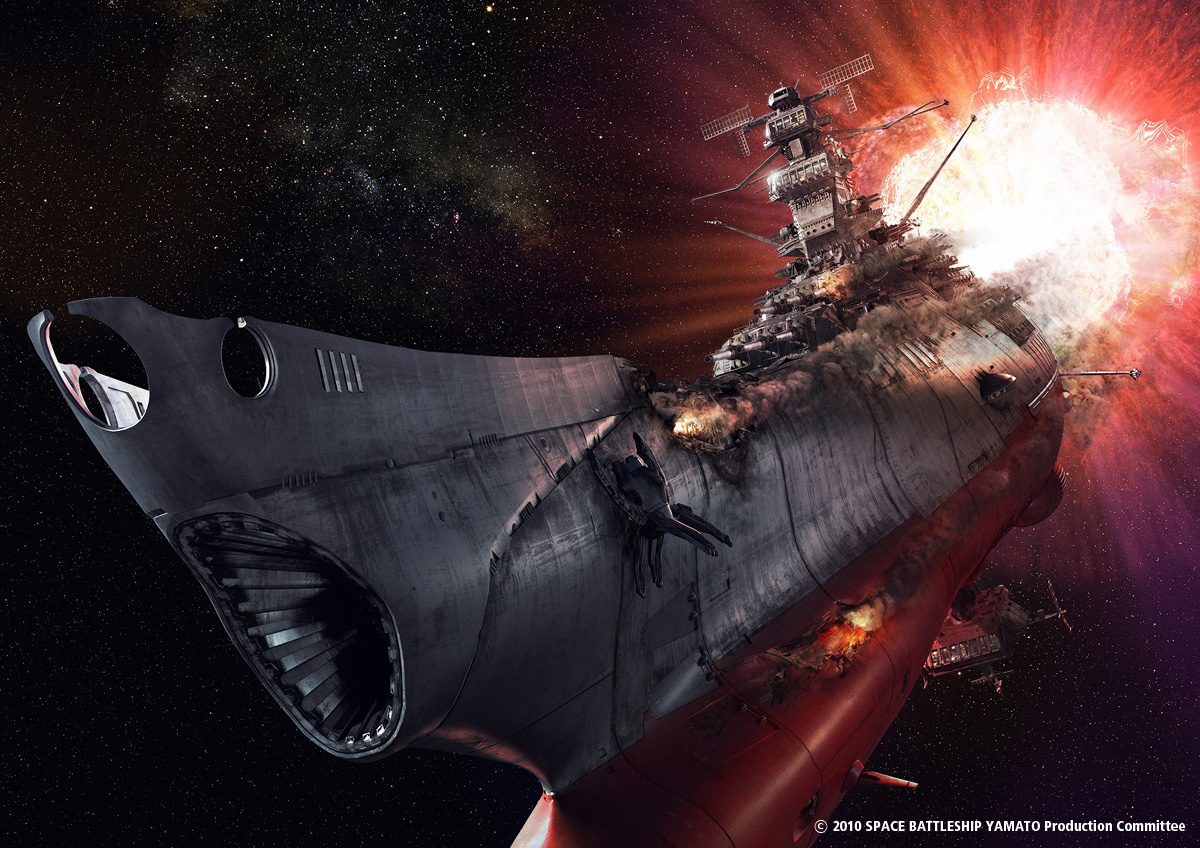
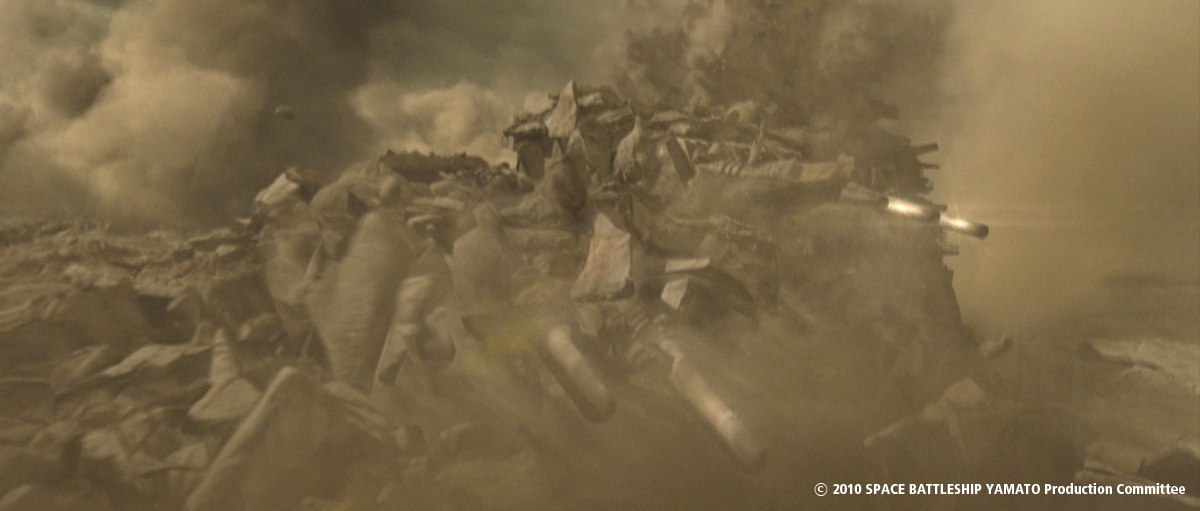
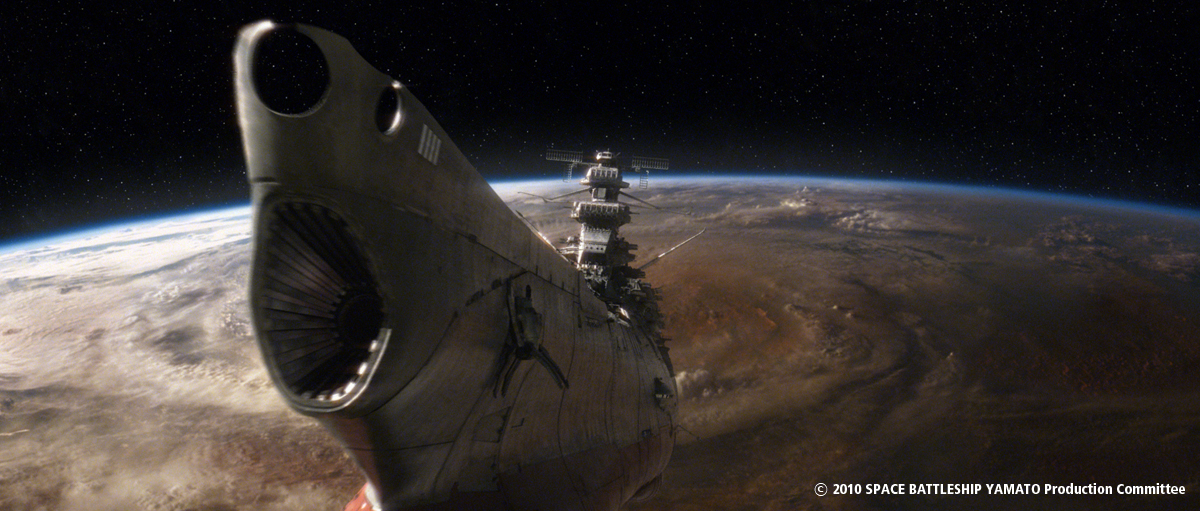
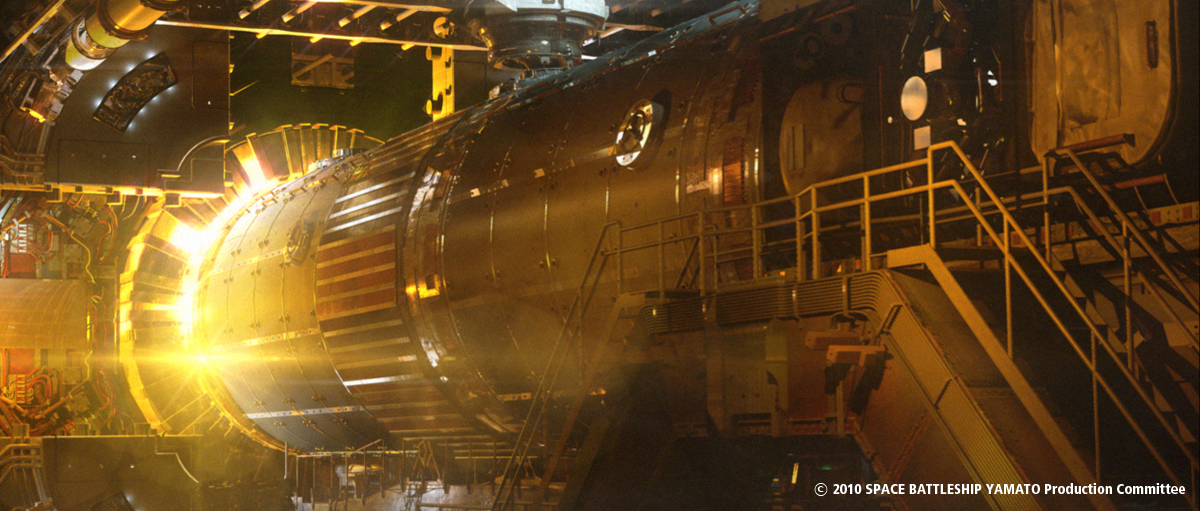
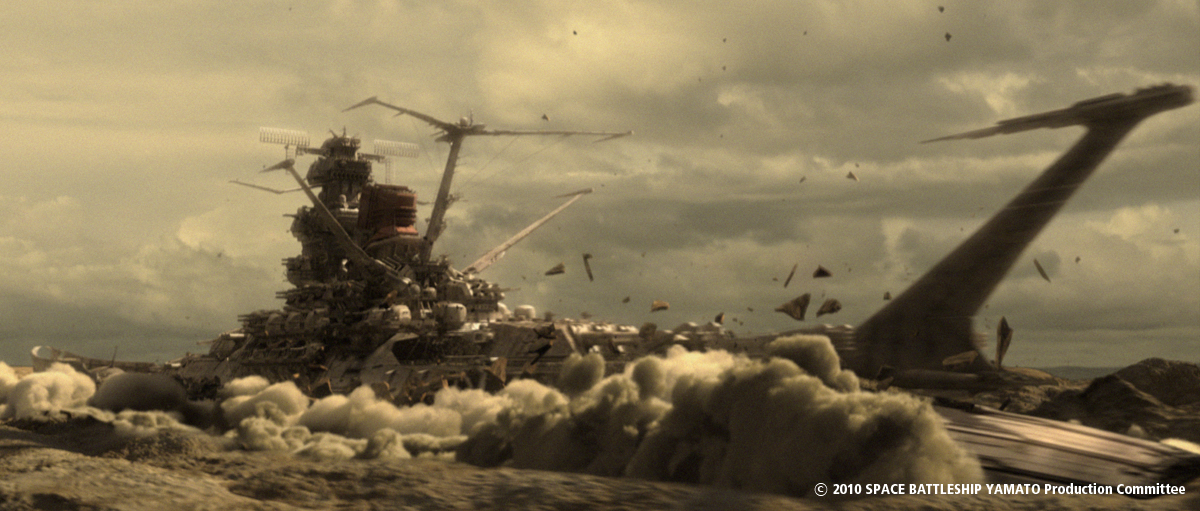
How did you create the impressive shot in which the Yamato is going out the ground?
This scene is the prominent to describe film of SPACE BATTLESHIP YAMATO, I thought this is a very special. However, It was very hard task to for my team who did not have enough effect skills for braking huge objects, smokes. We started with a research for software for braking objects.
After the research, we decided to use RayFire plug-in. but RayFire plug-in is made for 3ds Max and our team was using Maya. We start to learn basic operation from 3ds Max team’s. We were able to use RayFire on 3ds Max exporting FBX from Maya. Finally, we could finish this sequence by the deadline. So, we used 3ds Max as an expensive plug-in for effects.
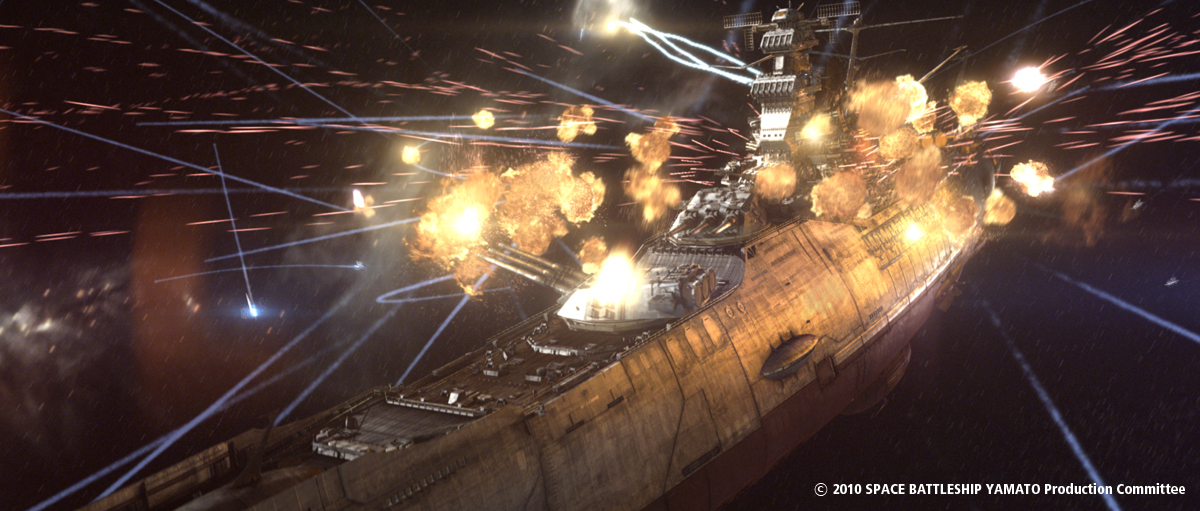
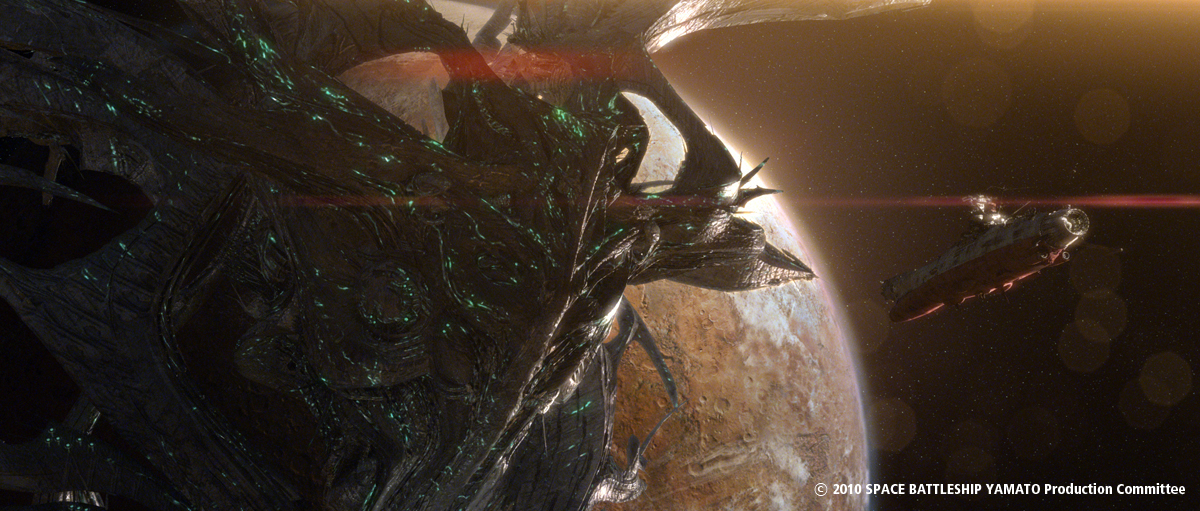
Can you explain to us the creation of the shockwave and explosion that destroy the enemy armada?
For the explosion of Gamilas carrier, I told my broad intention to Kei Yoneoka, the CG artist whoes specialty is in visual effect. The details of the intention was; “The Engine of Gamilas forms micro-black hole if it gets damaged. At the moment, everything around it is drawn into, but when it goes to the critical point, the engine of Gamilas triggers a large explosion.”
I left everything else to Yoneoka after I expressed the ideal implosion and the timing of release by using onomatopoeia effectively. For more specific information, please go to his website.
Kei Yoneoka: “This shot can be divided mainly mother ship destruction by black hole and huge explosion. Most of them are made with 3dsMAX. I put keyframe animation on the sphere object to control of the timing that black hole begins to occur and speed of rotation. Then I used FumeFX’s velocity information which emit from sphere object to make particle an organic motion. After that I rendered those tens of millions particles by using Krakatoa. When I made a center core of black hole, I used Realflow with computing vorticity then I extracted that information and rendered by using Krakatoa. The destruction of mother ship was done by Thinking Particles.
The huge explosion after shrinking of the black hole was also put keyframe animation on the sphere object to control of the expanding timing. Then I used FumeFX’s velocity information which comes from sphere object to make particle an organic motion. I put a plant or microorganism’s picture to the tens of millions particles as a texture then rendered with Krakatoa. I sculpted emitter object having bumpy shape with modo in advance in order to make an organic style.”
How did you create all those pyro elements such as the missile trails, lasers and explosions?
We mostly used N particle of Maya for the pyro elements. I combined a lot of shooting footage on explosions.
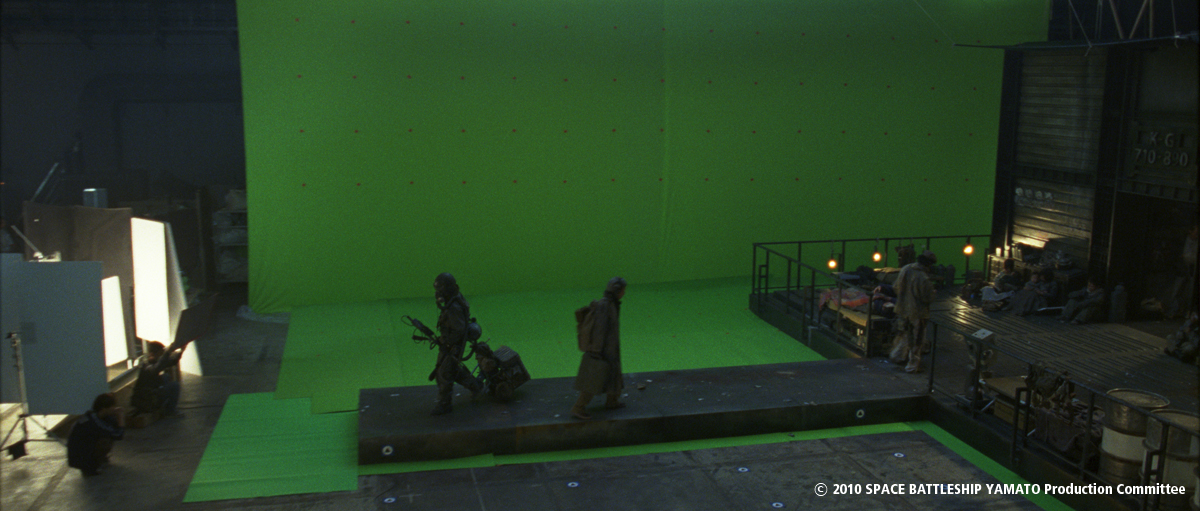
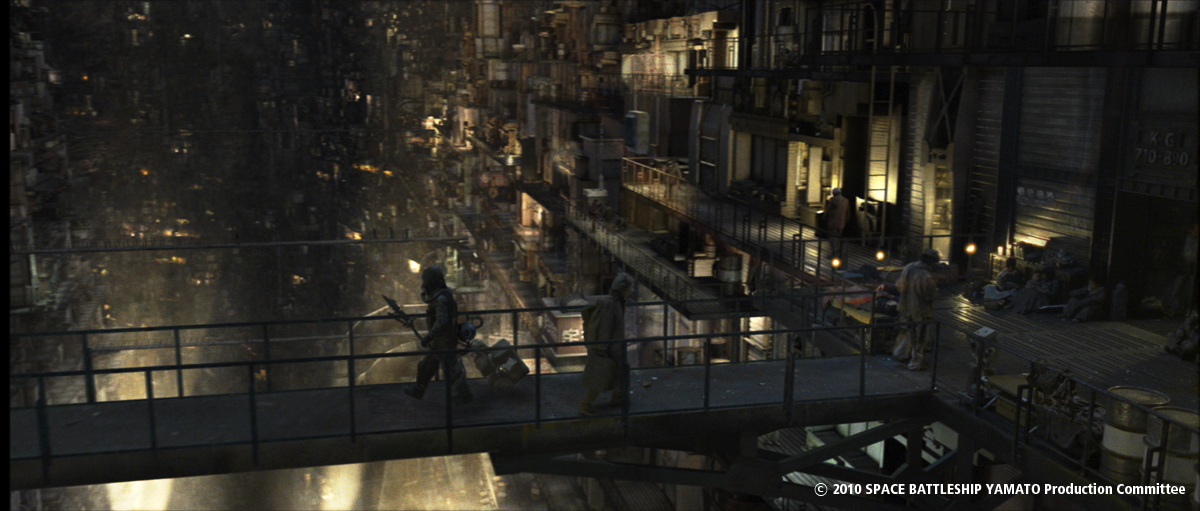
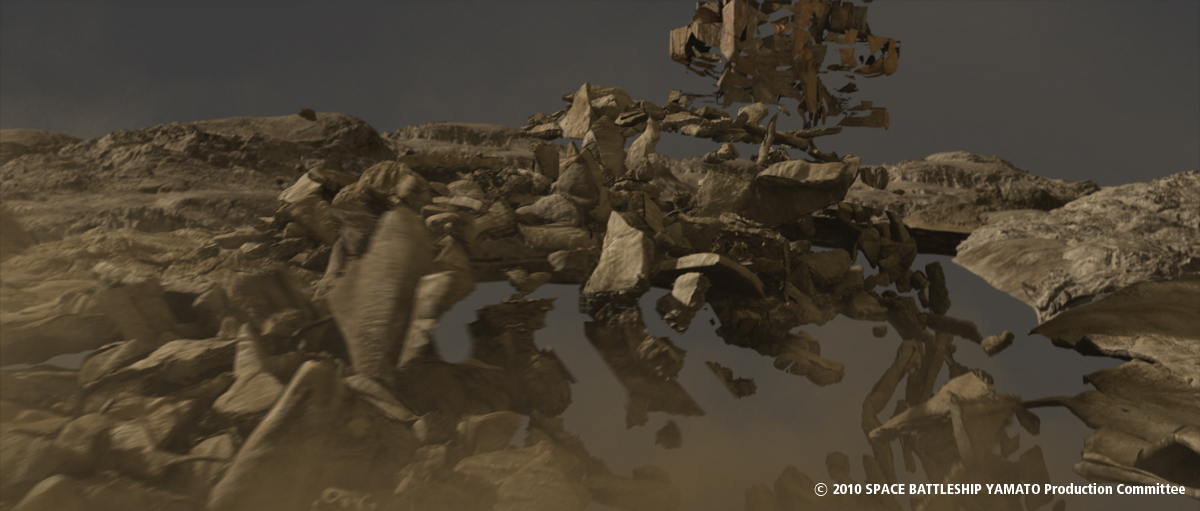
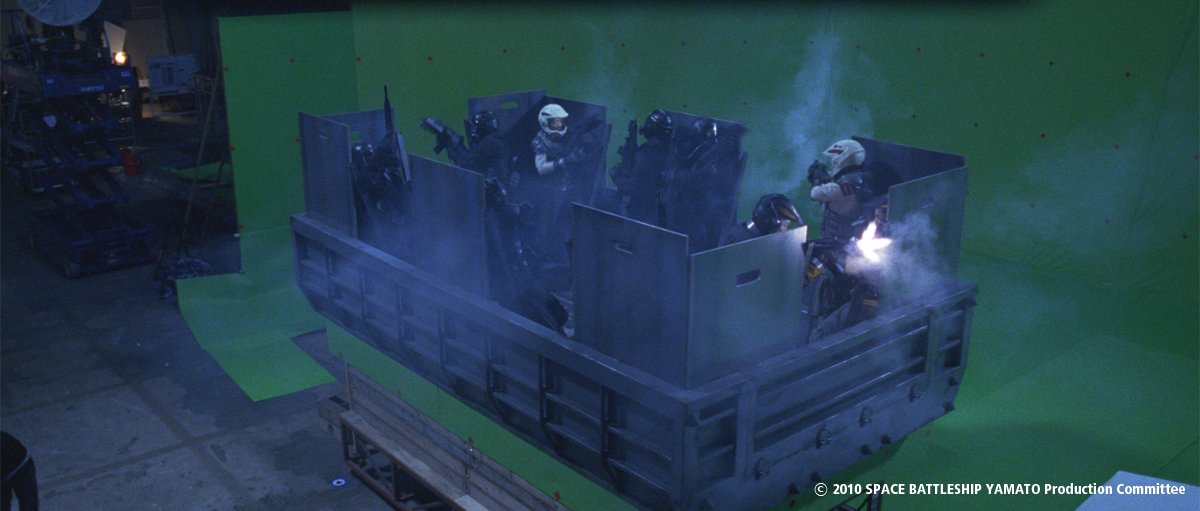
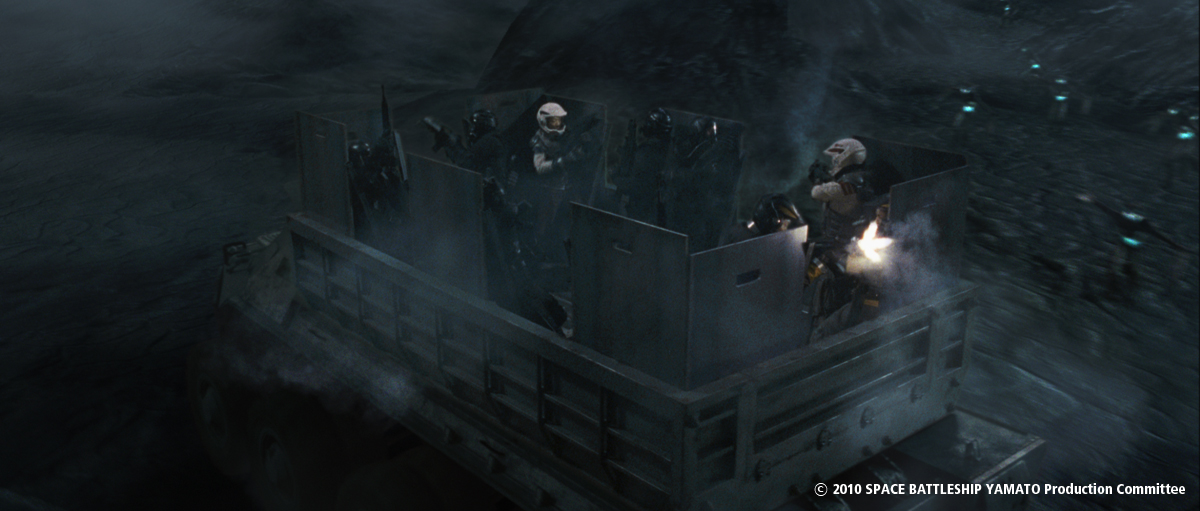
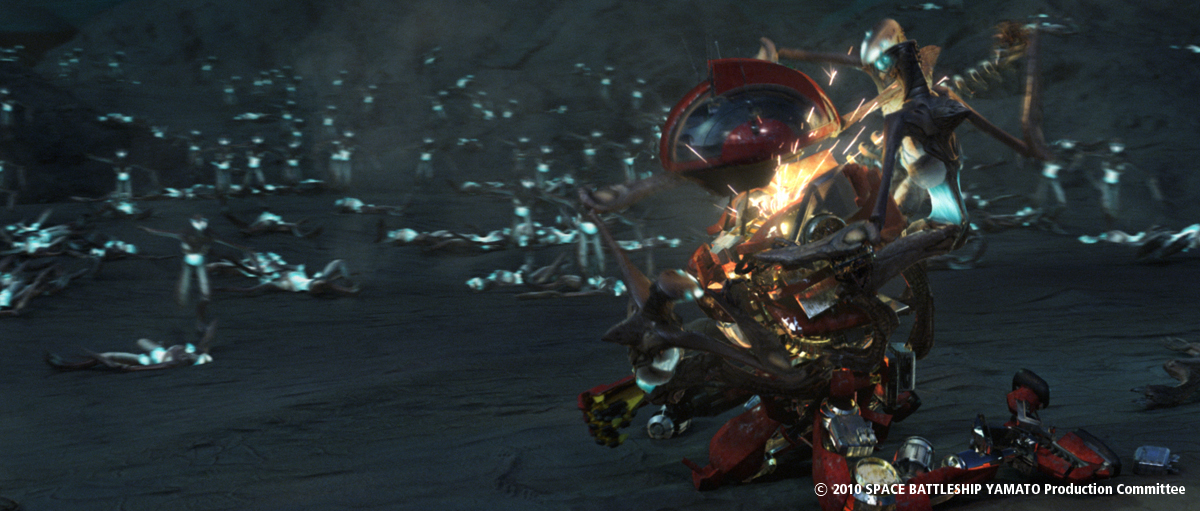
What was the real size of the sequence with the heroes on a truck?
It was very tiny studio. There is a only truck in front of green screen. We shot a crane camera to make it looks like following a moving truck. And we covered CGI elements around truck.
How did you create all the huge environment around them?
We created the strange rocks using Pixologic Zbrush. We also put matte paintings and photos of miniature for background.
Through the scene, Actors performed arriving in the enemy’s territory and fight with Gamilas fighters, and arrived to innermost place and escape from there. But we shot only truck and some rocks on green screen, we had to create hole backgrounds digitally.
This whole scene was quite difficult challenge for us to create many kinds of backgrounds, but we are confident that the audiences did not realize how little the actual stage size. This is VFX.
Can you tell us the creation of the particles going off Yuki Mori?
We used Maya nCloth for them. We just processed the particle, but I was particular to blew jacket and helmet by the shock of the particles.
How did you create the beautiful final explosion?
The final explosion was also made by a CG artist, Kei Yoneoka whose speciality is in visual effect.
The concept for this scene was to re-create the sad, but beautiful atmosphere of what one of the original piece FAREWELL TO SPACE BATTLESHIP YAMATO depicts and to make it 2010 version. Yoneoka created mysterious and beautiful explosion, which deserved to cap this film, by incorporating marvelous gaseous nebula-like image in an aftereffect of the blast, which looks like supernovas.
Kei Yoneoka: “In this shot, I also put keyframe animation on the sphere object to control of the expanding timing. Then I used FumeFX’s velocity information which comes from sphere object to make particle an organic motion. For the emitter object of the element like a dark nebula, I used gray scale texture which I modified cloud or white cape pictures to make the particles having a natural distribution. Those tens of millions particles was rendered by Krakatoa.”
Did you create specific tools for this show?
No, we did not invent any tools. I focused on employing what we had efficiently.
What was the biggest challenge on this project?
The biggest challenge was that the Japanese described full-scale cosmic space in a science fiction film. Compared with Hollywood films, the budgets are small (I guess one-tenth or one-twentieth.)
And we did not have enough knowledge. I also never done before there are a lot of challenge.
We have been working hard to remind me that Japanese can produce cosmic space feature film.
I hope this experience helps me with next challenge.
The difference between Hollywood and us is not only the budget.
It will be experience, I believe.
Has there been a shot or a sequence that prevented you from sleeping?
We always prepare the knowledge and skills before start project. But this project was started without enough skills to describe such as special effects. It was unprecedented challenge to produce the significant shot of a theatrical released film as learning basic operation of unfamiliar software.
We spent a lot of time for this scene, so I felt really relieved when we finished the shot.
How long have you worked on this film?
We worked on stage for 3 months and 6 months for the digital work.
What are your softwares and pipeline from Shirogumi?
We used Maya as a main CG software, 3ds Max and RayFire for certain scenes. Nuke for compositing, ZBrush for special modeling, Photoshop for matte paintings and Thinking Particles for explosion effect. We used DPX from DI room of IMAGICA, the post production company.
How many shots have you made and what was the size of your team?
The total number of shots were 436 cut.
There were 34 original staffs, 21 people for support and 12 people for motion capture related work.
What do you keep from this experience?
I realized how difficult it was to produce cosmic space films in Japan.
However, I believe it will refine through this kind of project. So, I would like to keep challenging for the new things.
What is your next project?
One of the next project is called FRIENDS NAKI IN MONONOKE ISLAND.
It is a digital animation film based on an old children’s tale (or a fairy tale), which is created with miniature background and CGI characters technology.
http://www.friends-movie.jp/
The other project is called ALWAYS SUNSET ON THIRD STREET ’64.
This is the third series of ALWAYS. We shot with real 3D camera, so it is a true 3D film It is not 2D to 3D converting film. My idea is taking audiences to the three-dimensional world in 1960’s Tokyo.
http://www.always3.jp/
What are the 4 movies that gave you the passion of cinema?
CLOSE ENCOUNTERS OF THE THIRD KIND
STAR WARS series
SEVEN SAMURAI
IT’S A WONDERFUL LIFE
A big thanks for your time.
// WANT TO KNOW MORE?
– Shirogumi: Dedicated page about SPACE BATTLESHIP YAMATO on Shirogumi’s website.
After studying in Korea and Canada, Eui Park returned to Korea and worked at Next Visual Studio on over 40 films including THE CHASER, THREE KINGDOMS or THE MURDERER.
What is your background?
Hong-Ik University (Seoul-Korea) / Product Design.
Centennial College (Toronto-Canada) / Film & Video Production.
A.I (Vancouver-Canada) / Visual Effect & Digital Animation (Master grade).
For the complete filmography, click here.
How did Next Visual Studio got involved on this show? Next Visual Studio worked on Daniel Lee’s THREE KINGDOMS in 2008. He was very satisfied with the VFX work for the film and it led to a great relationship between the two parties and we have been working on his films including 14 BLADES ever since.
How was the collaboration with director Daniel Lee?
Daniel is full of passion for films and always tries his best for the best results. He’s always attentive to the details while never losing sight of the big picture. Frankly, at times it was difficult on our end because Daniel likes trying out new things.
But he always had a clear picture of what he exactly wanted which led to good communication. As a result, we ended up with an output that the director wanted to express onto the screen. At times his strenuous efforts to share ideas with the other teams and staff slowed things down a bit but we all eventually learned that it all paid off as everyone was always on the same page. So even in the midst of all the fatigue of being on set, I was able to share that same passion that Daniel showed.
What was his approach about visual effects?
Daniel came to me for most of the CG work and shots that needed to be expressed using CG. Daniel focused more on the overall beauty of the shots more than a blockbuster shot overloaded with CG. So I set the foundational guideline for the shots while I tried my best to reflect Daniel’s ideas and opinions onto them. Again, because Daniel had such a clear picture of what he wanted, we had a very smooth overall work flow.
Can you tell us more about the main title?
In the trailer we used “Fluid CG” and created a dragon using smoke. I’d like to mention this because the reviews were great. Hollywood has used Fluid CG to create many elements of different shapes and forms in films such as THE MUMMY and PIRATES OF THE CARIBBEAN but it hasn’t been so widely used in Asia. But NEXT Visual Studio has done a lot of R & D work on Fluid CG, which has been popular in fantasy and natural disaster films, and through many in house tests, we’ve been successful in utilizing it on screen. We didn’t use it on the actual film itself but the trailer helped add a fantasy feel to it. We have recently been using Fluid CG in trailers for Korean films and Titles for Korean TV Series.
How did you create the super slow-motion of the warrior girl?
We shot the background and the characters in High Speed and created a digital double for the girl.
How did you create her dress?
We tried many simulations on the action of putting on and off the dress. We customized Maya with a simulation tool called Qualoth to make this possible. The movement of the dress itself didn’t give us much trouble. But the character wore 3 different layers of the dress and the act of taking off each of those layers caused problems like the overlapping of the different layers, unnatural expression of the fabric, and the difficulty in naturally expressing the semi-transparent fabric. We needed to put in the extra hours to solve these problems.
Did you create some digital doubles for this show?
Yes, the part where the Girl Warrior fights as she puts on and off her dresses was entirely expressed using a digital double.
Can you explain to us the creation of the city in the desert?
The desert city doesn’t exist in reality. We used an ancient Silk Road concept so some of it was shot on set while the establishing shots were expressed using a Full CGI.
What were your references and indications for the city?
We researched reference pictures of ancient Islamic cities keeping in mind that these towns were probably built around the Silk Road economy. We focused on creating a worn out look of the city and details such as the trail marks of wagon wheels. We also used pictures of towns we believed were similar to the ones we were creating.
What was the size of the sets for this sequence?
The set in Yin Chuan is a wonderfully designed set and provides great space for us to shoot in. However, due to the large number of tourists visiting the sets, the space allowed for the actual shooting was very limited. Furthermore, there wasn’t even a main building, so for each building, we had to set up a wall and create the rest.
How did you create the fireworks?
Fireworks was a relatively easy CG work than the rest. We shot the actual fireworks on camera first but the fireworks looked too modern so we went ahead and created the entire Fireworks scene using CG. The fireworks on location was eventually used for recreational purposes for our crew as we lit up the Chinese night sky over wine and beer. We used particle effects to give fireworks a more old look.
Did you help the stunts to be more impressive?
We erased hundreds of wires and added weapons when necessary.
About the final fight. How did you create the dress in fire?
In the beginning we tried to attain as much live source as possible but the costume prepared was not a material that burned to ashes but rather melted under extreme heat. We couldn’t get the look that Daniel wanted. So we used particle effects to express the burning dress.
Can you tell us more about the warrior girl whip?
The whip around the girl’s waist was used as a belt then it was whipped out and it moved around like a snake. So we spent a lot of time animating it. We shot most of the scenes that involved whips without the actual whip.
How did you enhanced the blades of Donnie Yen character?
For Donnie Yen, he used a sword that was attached to his wrist. It was too dangerous to use an actual blade. We used only the hilt when shooting it live then added the blade using CGIs.
Did you develop specific tools for this show?
We didn’t develop any new tools but for cloth simulation, we customized a software called Qualoth.
What was the biggest challenge on this project and how did you achieve it?
The most difficult shots were those involving Toto, the girl warrior putting on and off her dresses. Hundreds of simulations were done and only after many trial and errors were we able to come up with the final output.
Was there a shot or a sequence that prevented you from sleep?
The action scene in Toto and Chenglong’s last scene was the most challenging. This scene robbed the entire CG Team of sleep. The city’s Full 3D shot also gave us a tough time as we tried harder and harder for a better quality.
What are your softwares and pipeline at Next Visual Studio?
There aren’t huge differences in software amongst studios. For pipeline, we use an in house software called AINEXT. It’s a web based program so our clients can check and confirm the shots anywhere and anytime. Recently we developed an application for Iphones and Ipad so that our clients can check on our daily works and confirm them using mobile technology.
What do you keep from this experience?
I realized once again how important VFX design and concept work during the PRE-PRODUCTION stage is. With sufficient preparations in these areas, we were able to enhance the quality of CG and try different things. And through such work process, we were able to give the director what he wanted from the beginning. This boosted the overall confidence of our CG team.
How long have you worked on this film?
The actual shooting period was 3 and a half months. CG work in the post production took another 4 months.
How many shots have you done?
We worked on a total of 700 shots.
What was the size of your team?
Around 10 Supervisors and Producers and 30 compositors, 20 3D Artists, and 10 Art team members.
What is your next project?
We are currently working on Daniel Lee’s next film, WHITE VENGEANCE. This project involves around 700 cuts and most of them involve crowd simulation, Battle scenes, and work involving castles and other architectures.
What are the four movies that gave you the passion for cinema?
I loved films since I was very young. There are way too many great films in this world so it’s difficult to pick out a few. But the film that helped me grasp the essence of film was the GHOSTBUSTERS. Honestly, I was shocked when I first watched this film. I don’t think there ever was another film based on a strong story that did a better job visually expressing what all human beings have once in their lives imagined but was never able to see with their eyes. I was also inspired by films like BACK TO THE FUTURE and KINGDOM OF HEAVEN. All these films helped me choose this career as a filmmaker.
Eddy Wong founded Menfond Electronic Art in 1990 with his brother Victor. They are the first to create the full computer graphics in China, it was for the commercial EPRO Paging. There are also working on cinematics for video games like PARASITE EVE or FINAL FANTASY VIII. In 2001, they created the first full CG animation feature, MASTER Q, with director Tsui Hark. Eddy Wong supervised the VFX of many films including INFERNAL AFFAIRS trilogy, LEGEND OF ZU, HOUSE OF FLYING DAGGERS or NEW POLICE STORY.
What is your background?
I graduated from China Central Academy of Fine Arts in 1989 and created Menfond in Hong Kong on September of the same year. Then started doing computer animation and special effects till now. My company has expanded to Suzhou in June 2007. Throughout the past 22 years, we created over 850 TV commercials and thousands of visual effects for 90 feature movies.
How did Menfond got involved on this show?
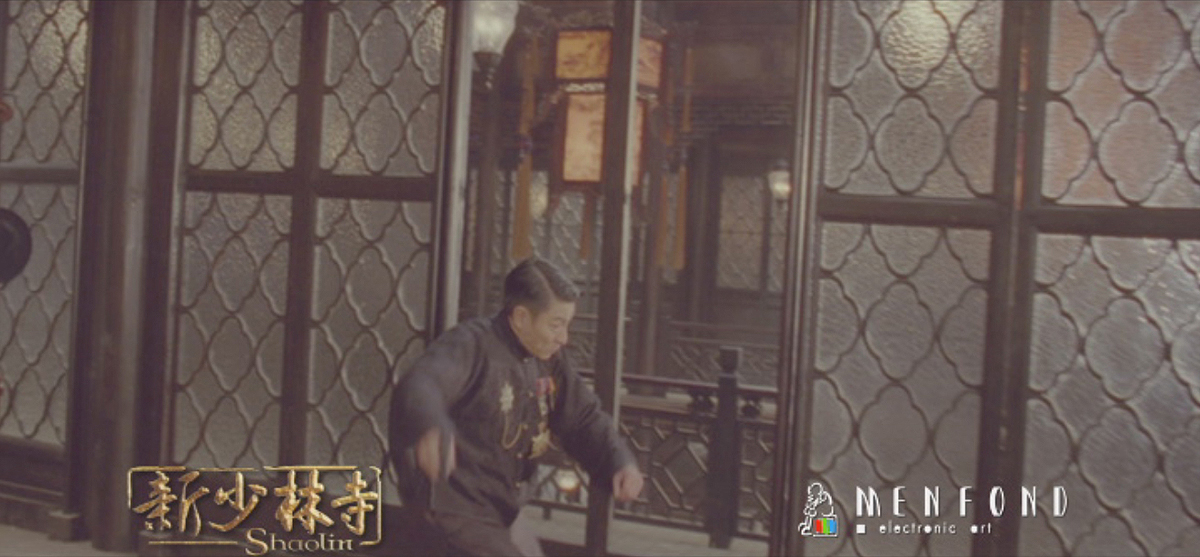
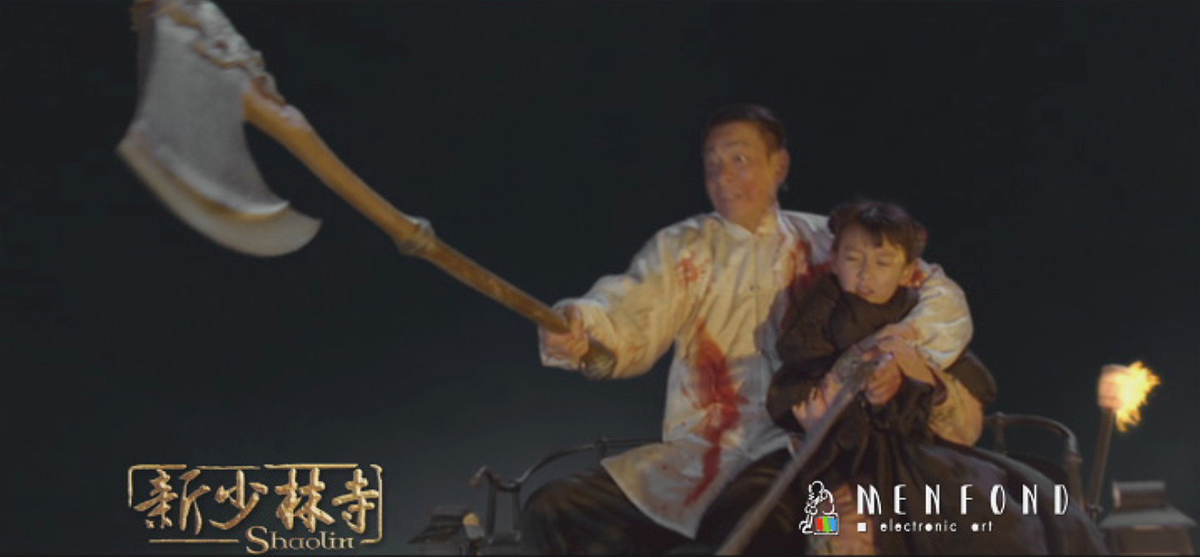
Benny approached me in 2010. After reading the script, I was really interested in it because it was the very first time that Andy Lau acts as a Buddhist monk with numbers of fighting scenes. Also, I believe that working with Benny with his careful and earnest attitude, we would definitely experience a lot from it.
How was the collaboration with director Benny Chan?
I worked with director Benny Chan in 2004 for the NEW POLICE STORY, so I know his working style well. Through detailed and extensive discussions, we knew he always desired for new effects with a strong sense of reality, thus, we did a lot of researches to find the best solutions to cooperate with director’s ideas.
What was his approach about visual effects?
Benny has his own thought on visual effects. “Don’t let the exaggerated special effects influence the drama development” was his direction on visual effects.
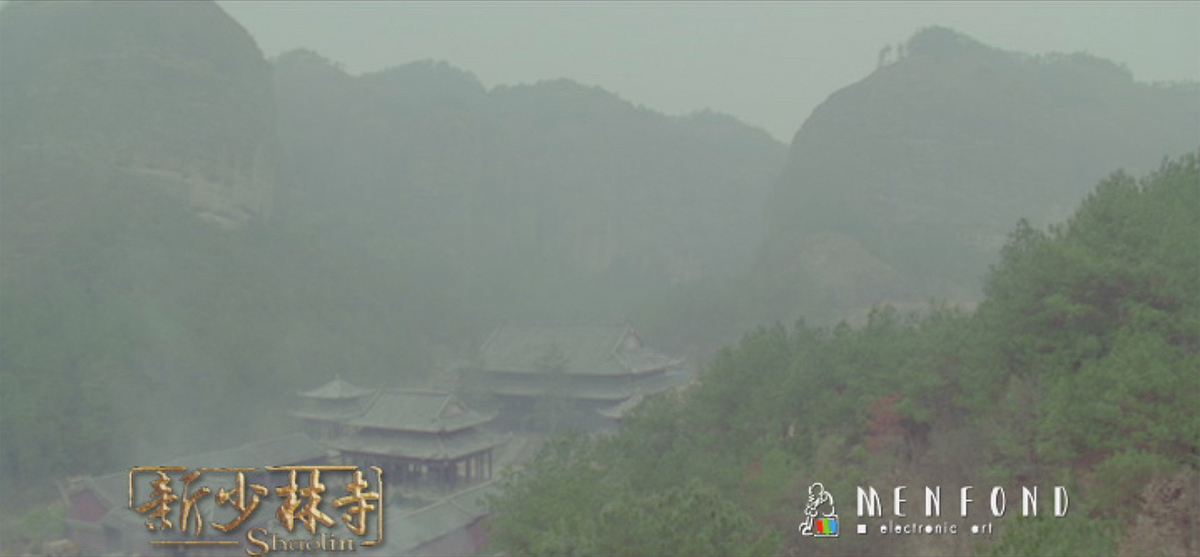
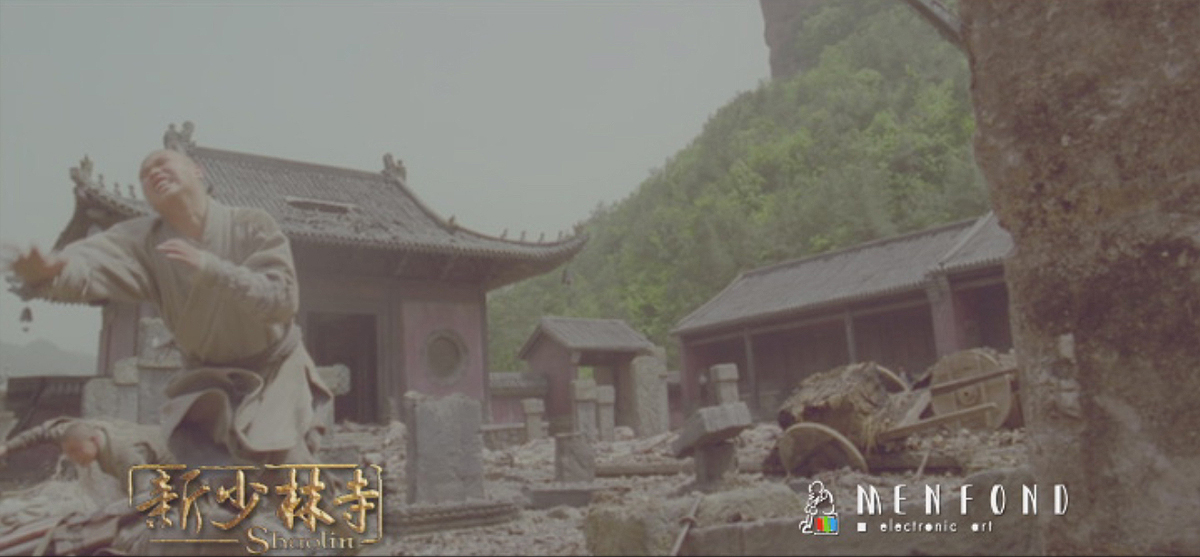
The location of the Temple is beautiful. Can you tell us where is it and have you enhance it?
The temple was filmed in Zhejiang, China. We researched various temples from that region and era, then proceeded to add our own creative enhancement to portray the Temple in a more grand and magnificent manner.
Have you made some set extensions for the Temple and how did you create them?
Yes, we extended part of the temple. From our research and various reference photo’s we built a 3d model in Maya. With camera tracking software we tracked the live footage and incorporated that into our 3D scene and added texture and lighting to match the live footage. Then our compositing team put all the elements together and fine tuned the image for output.
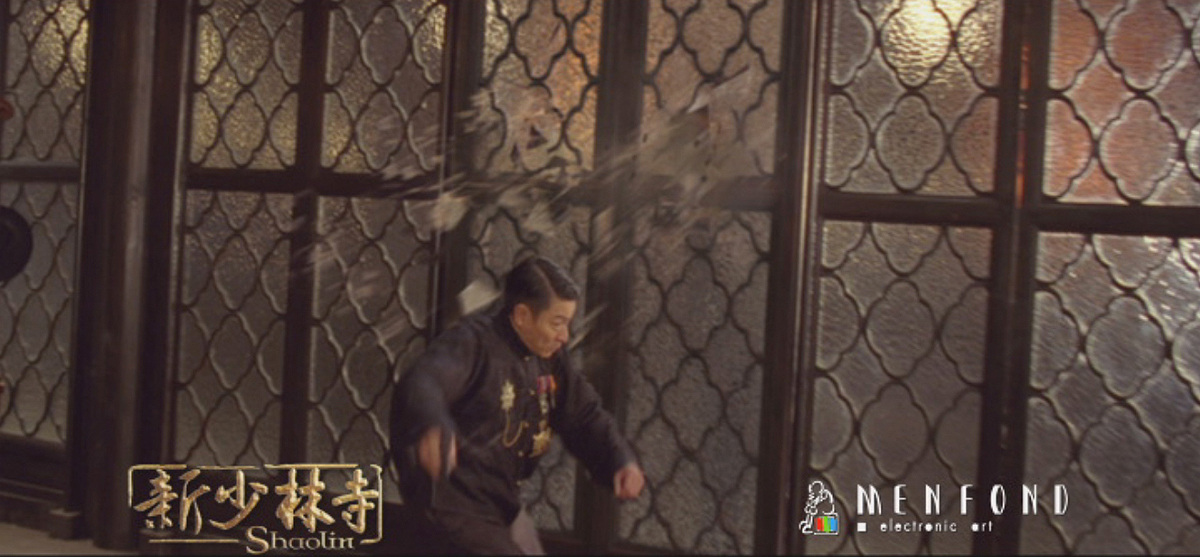
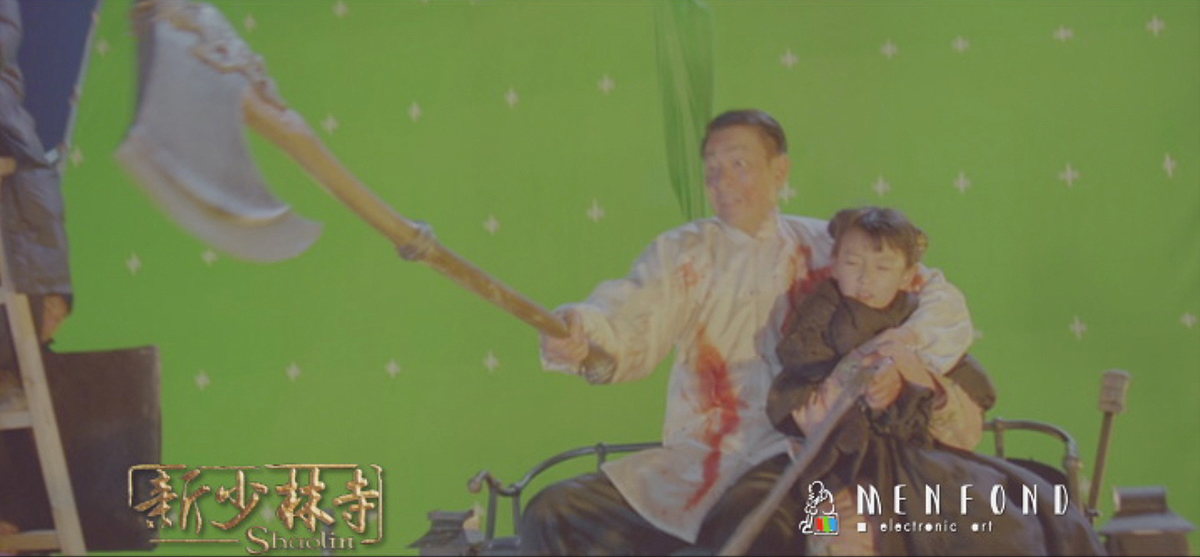
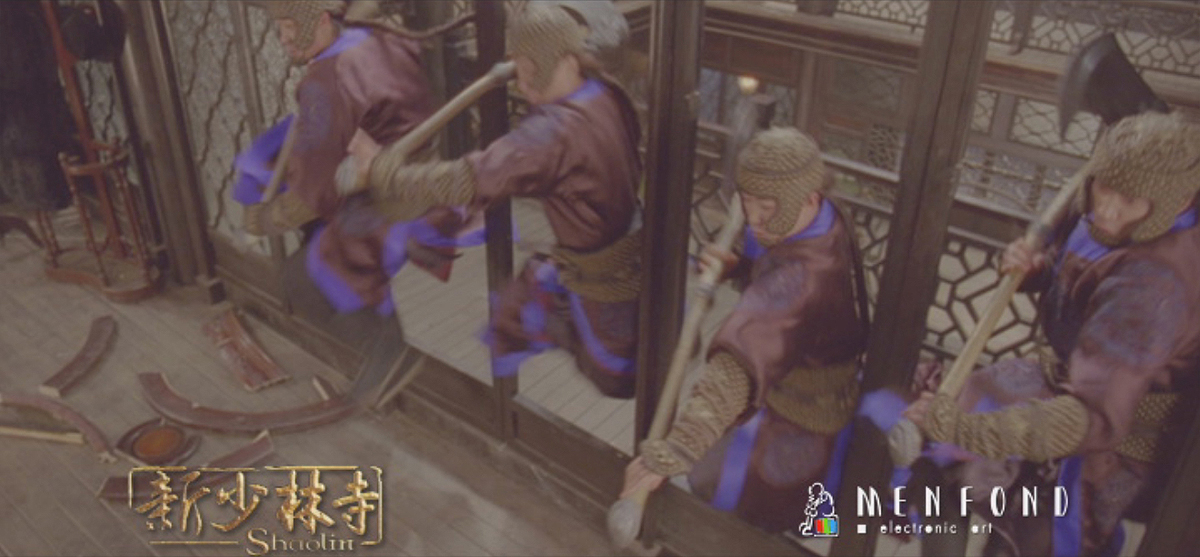
Can you tell us what you have done on the Restaurant Ambush sequence?
A lot of the flying axes, broken glass, and table debris were CG simulated for the actors’ safety and for us to have more control to frame the shot properly.
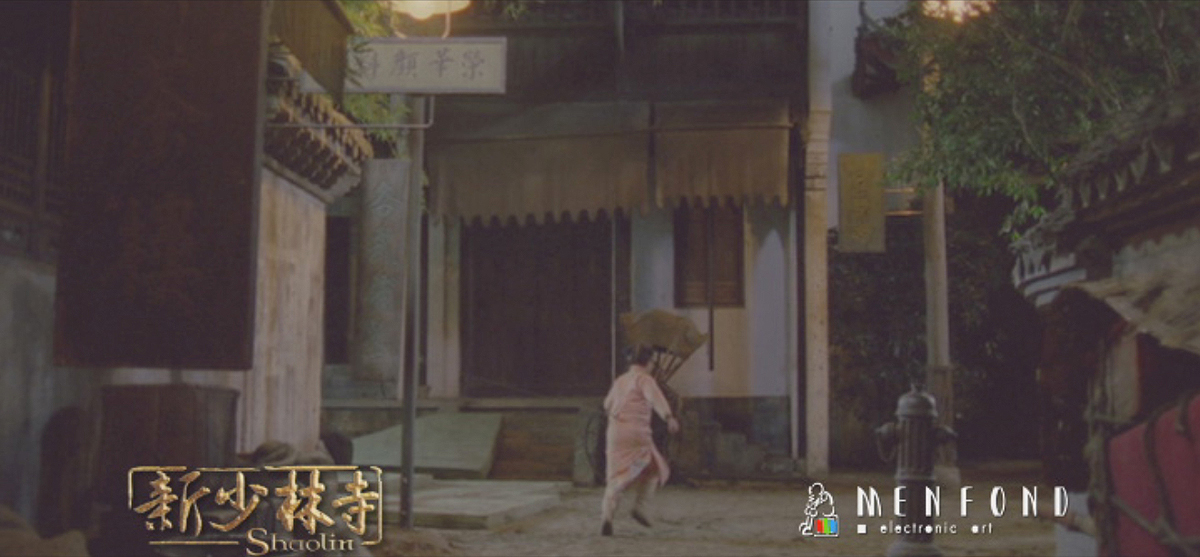
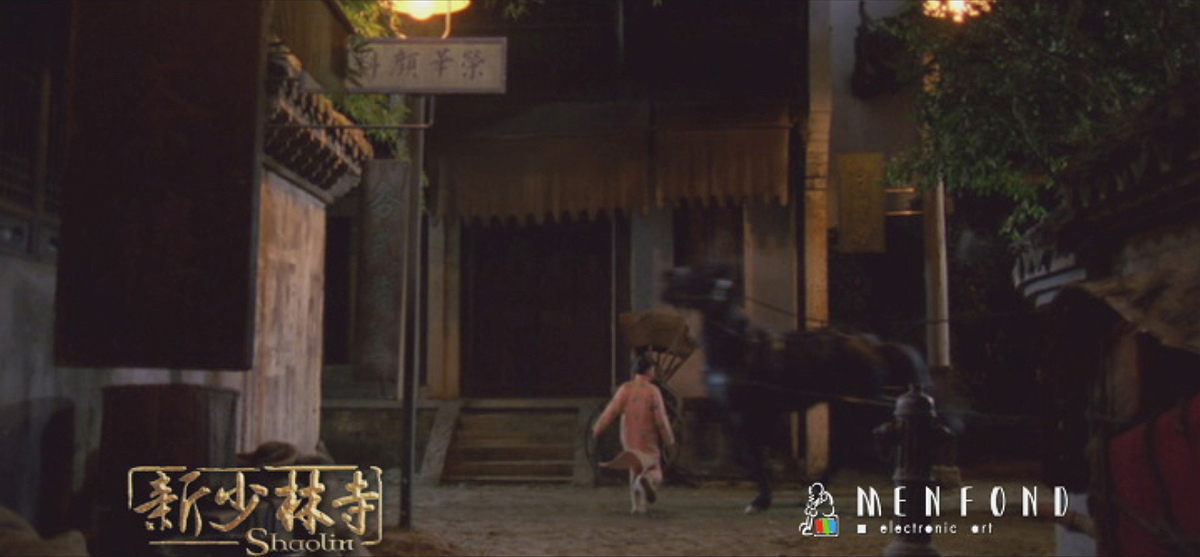
How did you made the shots in which Nan is hit by the horses?
We shot the cart and the girl as separate elements. First we filmed the girl crossing the road and via a wire rig attached to her we were able to simulate her being hit by the horse carriage. Then we filmed the carriage aspect of the shot with a stunt crew and then in After Effects rotoscoped and composited the two elements together.
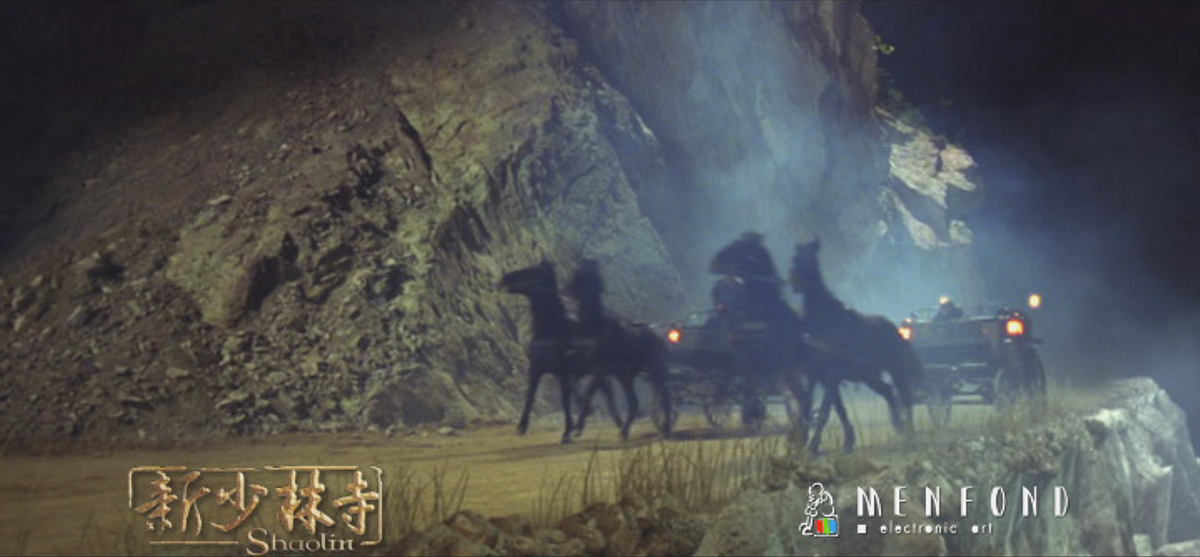
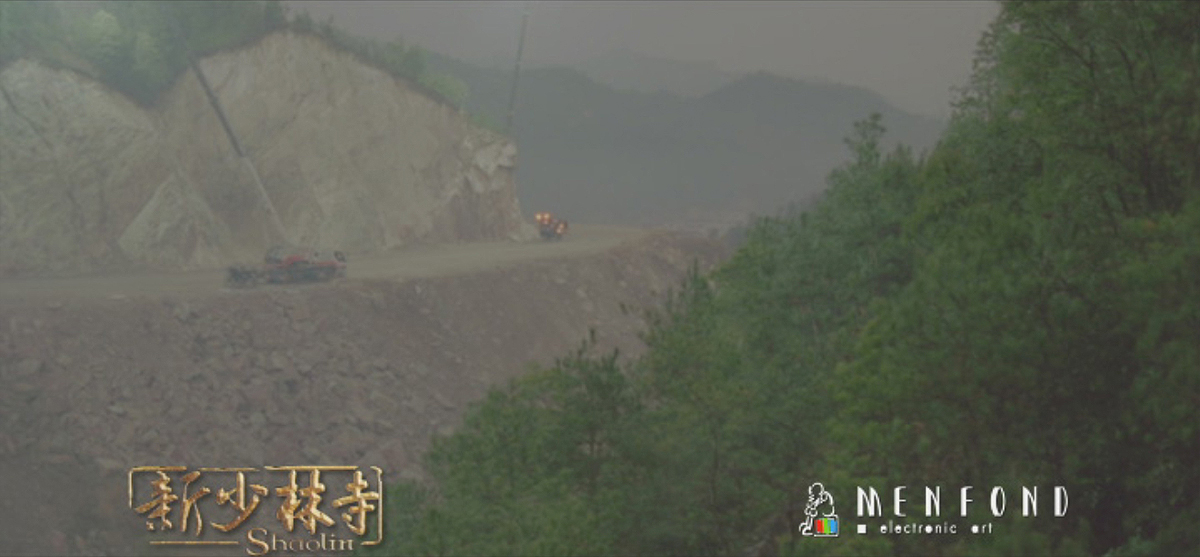
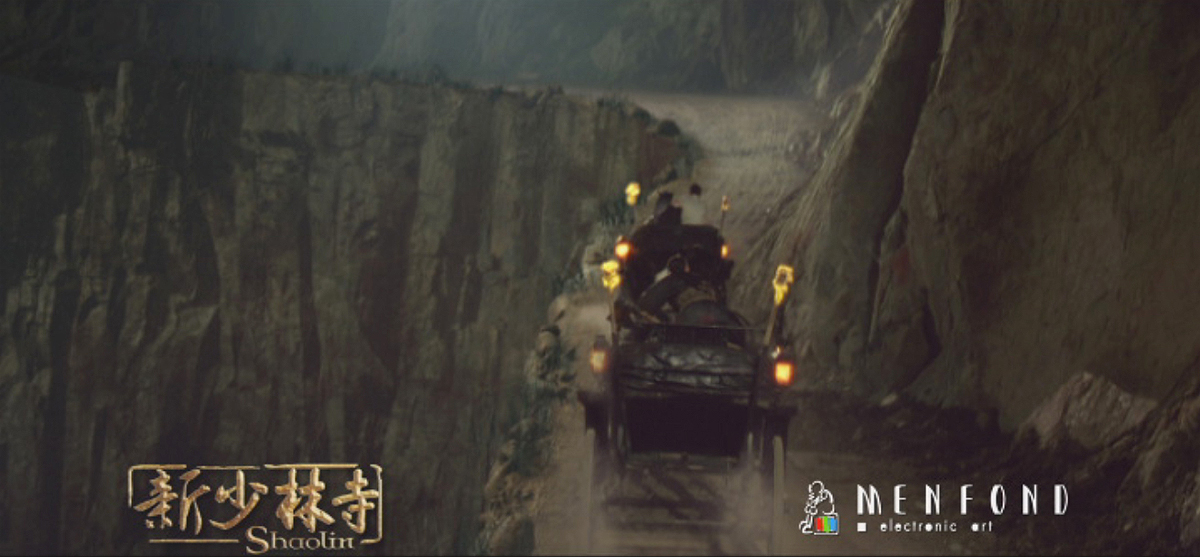
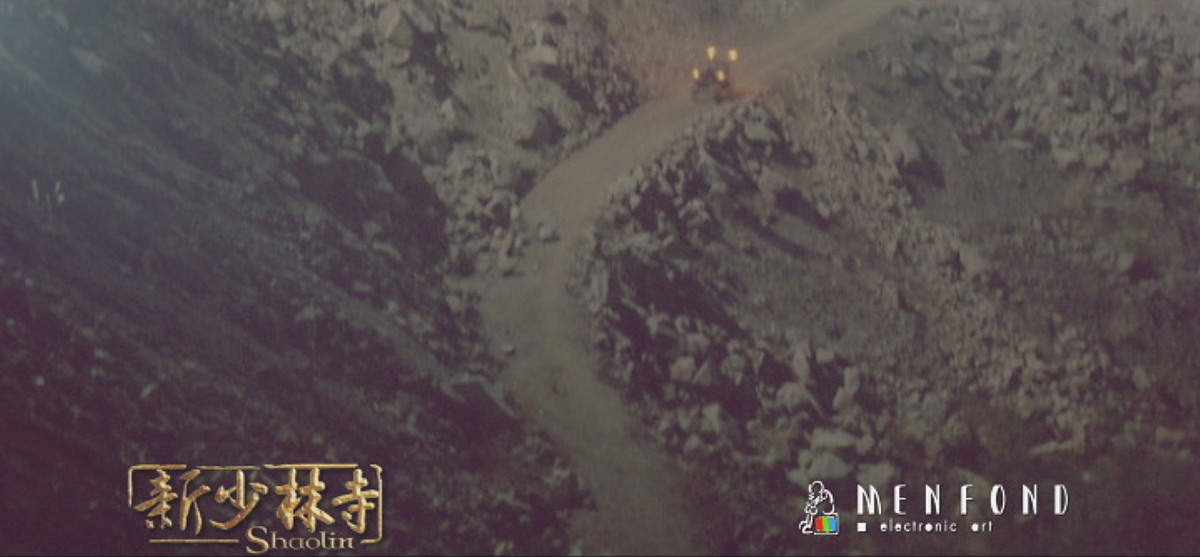
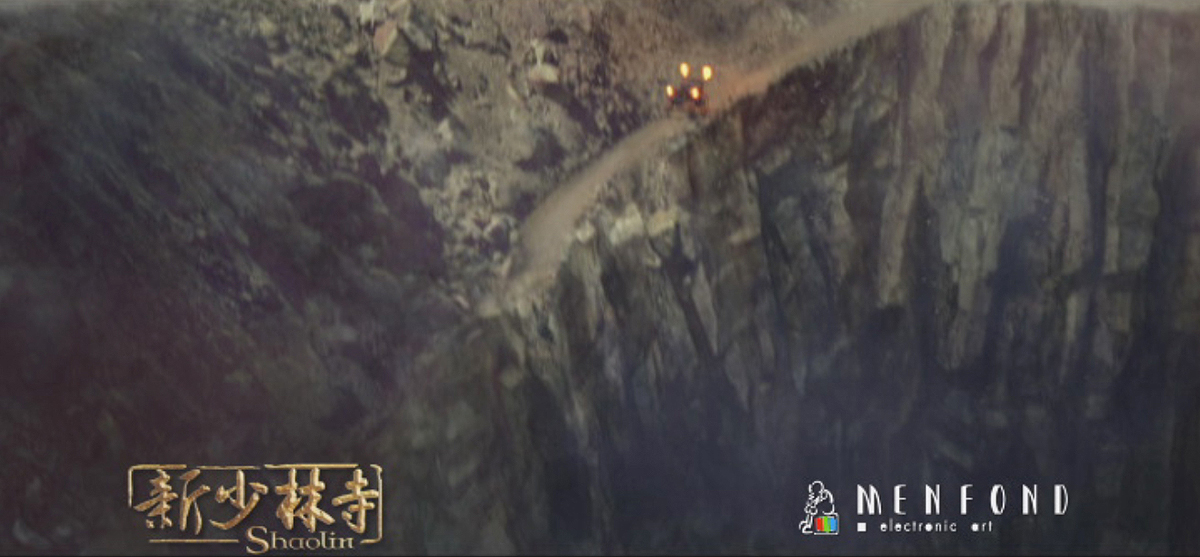
How did you create the huge canyon for the chase sequence?
We had an expert stunt driver control the cart next to a white line we drew on country a dirt road and then we build the canyon in 3D. After camera tracking the live footage, we incorporated the camera into the 3D software and textured it accordingly.
Then our compositing department rotoscoped out everything beyond the white line from the live footage and composited the CG canyon into the live footage to make it look like the carriage was diving precariously on the edge of the cliff.
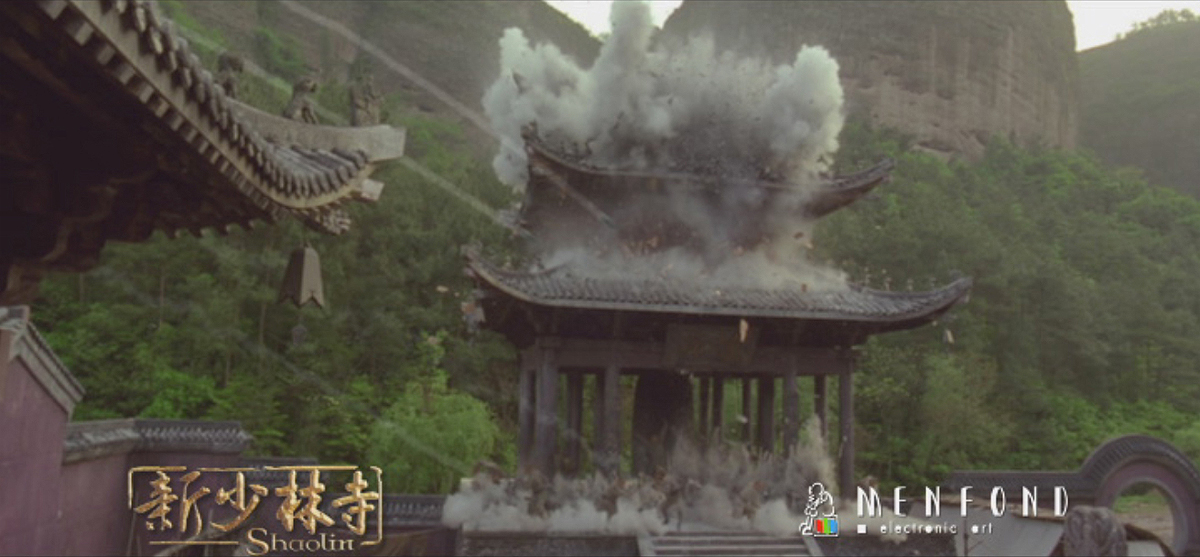
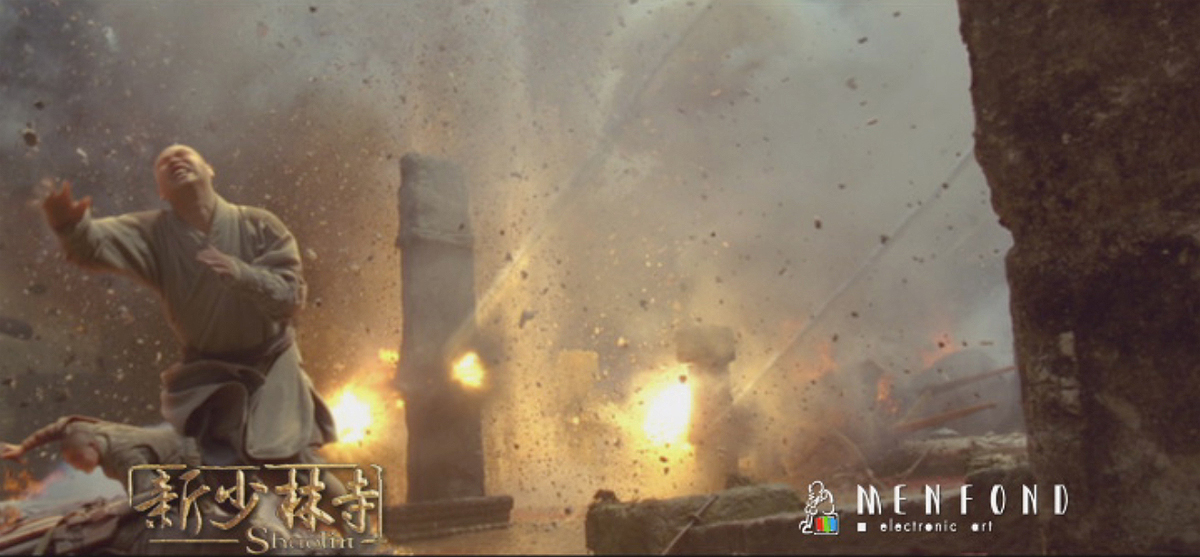
Can you tell us more about the Temple destruction?
A life size set of the Temple was constructed and blown up for that scene. Then we filmed the soldier’s reaction and cannons separately and composited the elements together.
Did you use models for this sequence?
It was determined that a 1:1 set piece of the temple was to be built and blown up to properly portray the scale of the explosion.
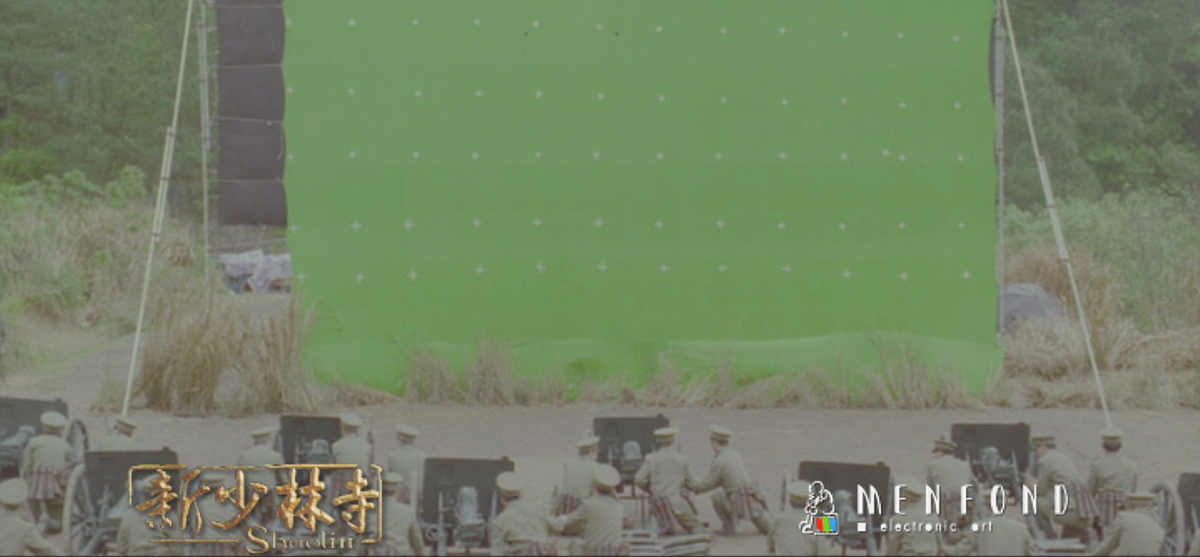
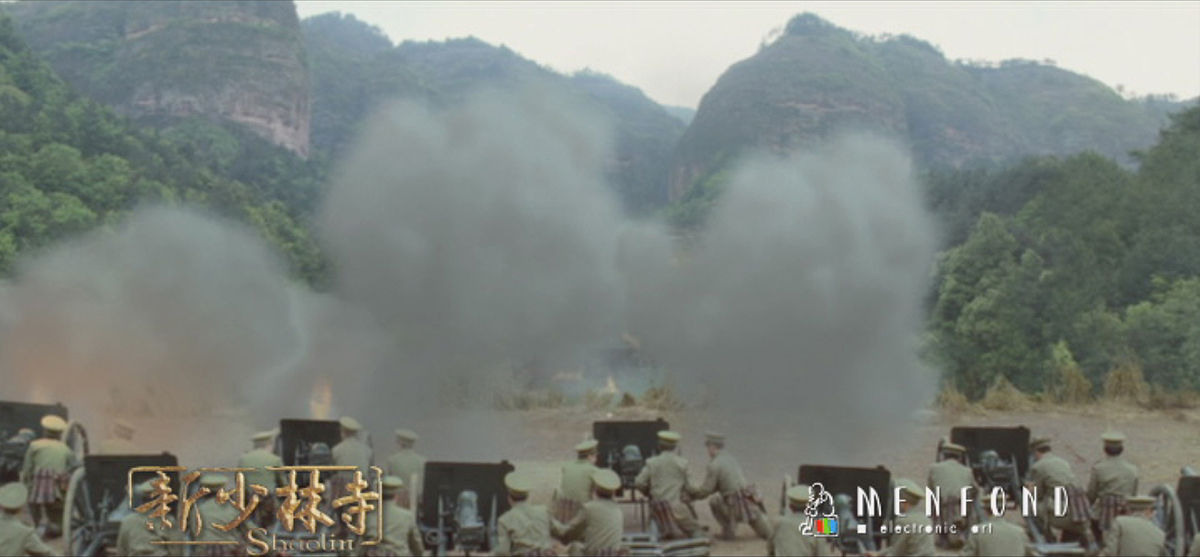
In many shots of the final sequence there are big explosions really close to the actors. How did you mix those?
We tried to film as much practical special effects at the location as we can so that way the light of environment is as realistic as possible but for obvious safety reasons all the actors, explosions, and bombs were shot separately. With the actors being filmed separately the pyrotechnics crew were able to create big cinematic explosions. In fact only the cannons were computer generated. All the elements were then composited in After Effects.
How did you create the different environments and especially the wide shot of the Temple with the British soldiers?
Research is a very important part of our work, so we tried to find as many photos of Shaolin in the 1920’s as we can. In addition to the photos from the various different location shoots, our creative team were able to draw a detail matte paint to composite into the background of the live footage.
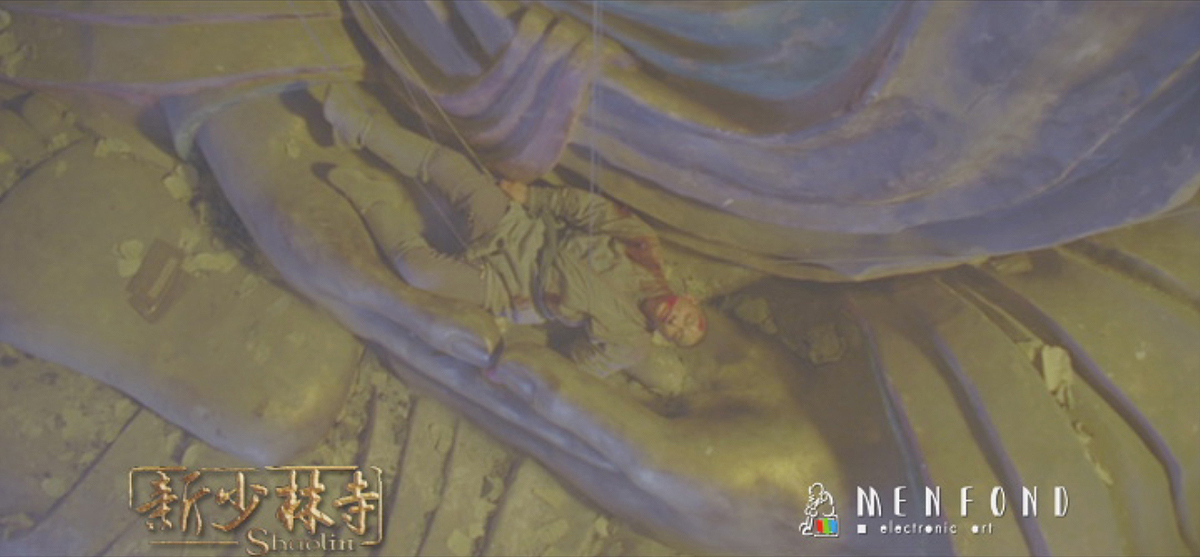
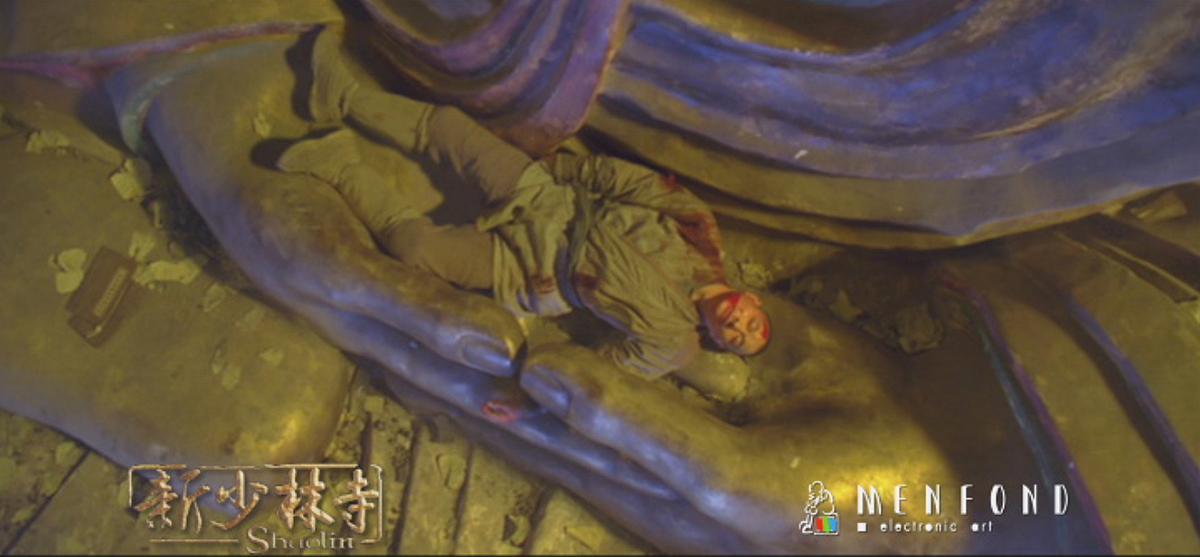
How was filmed the beautiful shot in which Andy Lau in falling on the Buddha hands? Did you made something on it?
That was mostly done on set. Andy Lau was suspended with a wire rig and the stunt crew were able to simulate him falling on the Buddha. The wires were then removed in post production and the blood was simulated in 3D and composited in After Effects.
What was the biggest challenge on this project and how did you achieve it?
The biggest challenge would be how to generate new ideas. Let’s take the huge canyon for the chase sequence as an example. As we said before, it took abundant of time and process to create the scene. Thus, we have to strike a balance between time and production cost.
Was there a shot or a sequence that prevented you from sleep?
It would be the huge canyon for the chasing scene as it created a really tense atmosphere which makes audience feel so excited.
What are your softwares and pipeline at Menfond?
We mainly use After Effects, Autodesk Maya, various 3D tracking softer for matchmoving live footage, and Photoshop. First we gather research of the elements we have to model for the project a hand, then our modeling department creates the elements for our motion department to animate, followed by texture and lighting who realistically render out the elements to composite into the live footage. During this time the live footage is also rotoscoped and had any wire rig removed as necessary. Finally all the elements are put together in compositing and outputted to be scan for film.
What do you keep from this experience?
This was a really great opportunity to work with Benny and his professional team again. We have learnt how to cooperate with director and deal with emergency which was really a valuable experience for me and my team.
How long have you worked on this film?
We worked for about a year.
How many shots have you done?
Around 350 CG shots
What was the size of your team?
Over 100 artists.
What is your next project?
We are now working with famous Hong Kong movie star Cecilia Cheung, Zhang Ziyi and Korean star Jang Donggun in Shanghai for our new movie DANGEROUS LIAISONS. And we will make shanghai’s former glory come alive again in this movie.
What are the four movies that gave you the passion for cinema?
TERMINATOR 2, JURASSIC PARK, TRON (1982) and THE ABYSS (1989).
Kyle Yoneda has worked for over 10 years in visual effects. In 2005 he joined the team of Mr. X and works on projects such as SHOOT ‘EM UP, RESIDENT EVIL: EXTINCTION, Whiteout or SCOTT PILGRIM.
What is your background?
I’m the Effect Supervisor at Mr. X. Inc. For THE THING, I was our in house CG Supervisor. I have 12 years experience in VFX work, the last 7 of which I have spent here at Mr. X.
How did Mr. X got involved on this show?
We’ve worked with Universal on a number of projects over the years. They approached us to bid on THE THING and we were really excited to get on board. Because we have a lot of experience with CG vehicles, digi-doubles and CG environments we were a great fit for the project.
How was the collaboration with director Matthijs van Heijningen Jr. and Production VFX Supervisor Jesper Kjolsrud and his team of Image Engine?
The collaboration with Matthijs van Heijningen Jr. was mostly through the VFX Supervisor Jesper Kjolsrud. We worked together in getting the look of the sequence to be what Matthijs wanted. Being in Toronto and Jesper in Vancouver we communicated mostly over phone with previewing tools to close the distance. It was a great creative process and working with both was exciting and rewarding when we could all see the shots building the story of the opening sequence.
What have you done on this show?
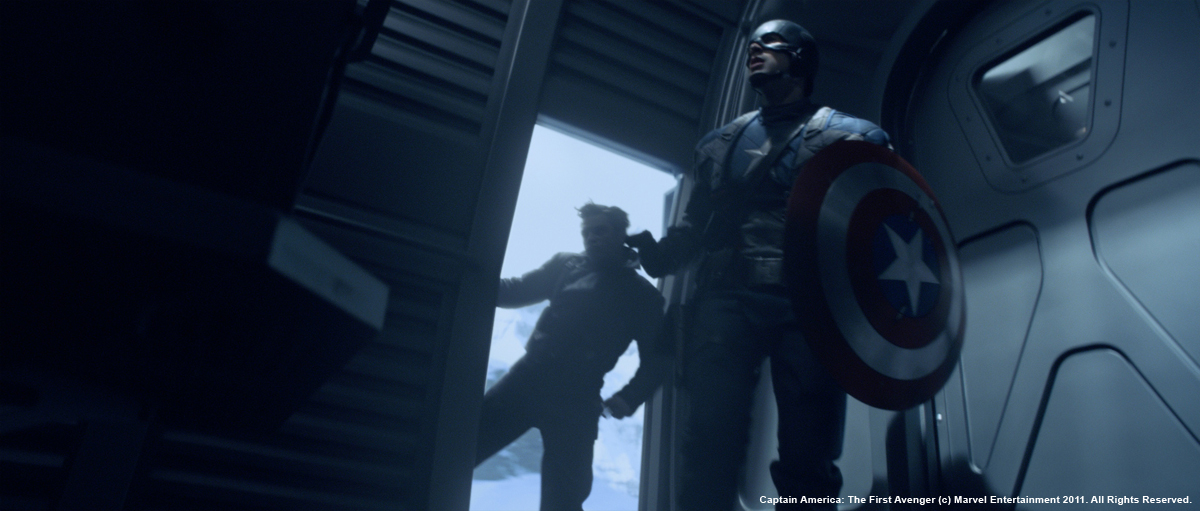
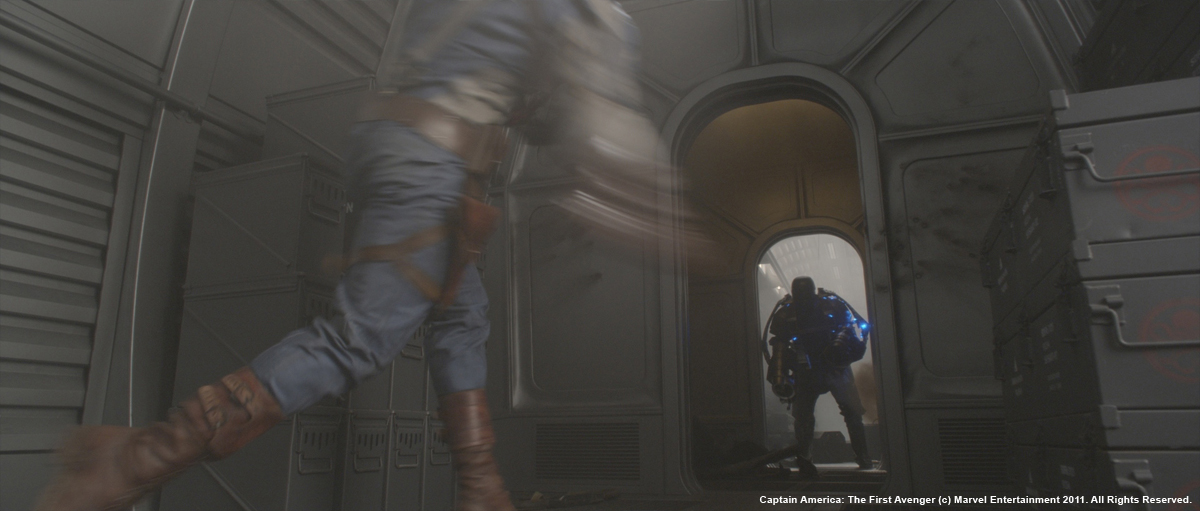
The sequence Mr. X. was working on is the opening sequence up to the title shot of the movie.
How did you recreate the vehicle?
Although many of the shots had an actual Spryte that we shot on set here in Toronto, we did make a digital double for some of the more harrowing moments in the sequence. We modeled the Srpyte in Maya, textured it with Mari, lit and rendered it in V-ray.
What was the real size of the sets?
The sets we worked with for our sequence were really only the Spryte itself, so in that case they were all real world scale.
Can you explain to us in details the ice breaks?
Ice breaking was something we always planned to animate by hand, with that being the driving force of our effects work. We had just finished out physic tool for Houdini that uses the Bullet solver and it was giving us very fast detailed results on other projects so we moved forward with a full physical simulation of how the ice would break away in real life.
The real challenge with the ice breaking away is that it was ice with a foot of snow on top of it. We had to try and sell the idea of a huge amount of soft snow under the Spryte’s treads and have it simulate in a direct-able and convincing way.
We had large chunks that were the driving simulation. Once we had the physics feeling just right, we broke up all the edges of them and did another simulation pass of the broken edges. Once these simulations were done, we added a pass of falling particles that collided with the two simulations. We then seeded this particle animation with millions of additional particle simulations to fill in the density needed for the amount of snow to fall with the ice.
How did you animate the ice breaks and the fall of the vehicle?
The Spryte was also simulated with our bullet solver and was actually used as a very heavy weight to begin the breaking of the ice. Once we had the initial simulation feeling right, we replaced the proxy Spryte object used in the simulation with the rigged Spryte and key framed it from there.
How did you create this huge environment both outside and inside?
Both environments are actually very tricky to make looking believable. On the top of the ice, the only details that could really give a sense of detail were very small things, such as, the wavelet patterns of packed snow that wind produces. How the light plays off the snow and sparkles as the eye moves across it. We spent a great deal of time texturing and lighting it. The treads were what helped us the most giving the feeling of scale in such a barren environment.
The ice crevasse itself was a huge challenge. Primarily because for a large duration of the sequence we could only use one light source, the sky. It was also very important to achieve that subsurface scattering effect that ice has. While we were tasked to mimic real world lighting conditions, we also had to exaggerate reality to produce shots that were frightening as well as beautiful, just like an actual ice crevasse. We ended up using Houdini to light the ice, snow, and chunks of ice with point clouds for subsurface properties and custom shaders for refraction and reflections. V-ray was used to light the Spryte and on occasion digi-doubles.
Can you tell us more about the digi-doubles?
The digi-doubles were scanned on set and modeled and textured based off those scans. Rigged and animated in Maya, then lit and rendered with V-ray. Considering the environment was so dark when digi-doubles were needed they ended up being a straight forward process, although one that added the violence of the situation they were going through.
How did you create the ice and the snow?
The ice chunks that fall though the crevasse were a mix of simulated rigid body dynamics in Houdini’s DOPs and our own bullet solver. We had them splash snow and trail snow whenever they made contact with a wall of the crevasse or the Spryte.
Did you develop specific tools for those?
We created an OTL to help distribution of all the chunks and direct their animation. We could then decide how fast, how brittle, or wet the chunks were, as well as when they would hit a wall and explode. Other tools we had were, the as mentioned bullet solver we developed, as well as our multi-particle simulator that we used to produce 100+ million particles per scene.
What was the biggest challenge on this project and how did you achieve it?
I believe the lighting inside the crevasse was the most difficult. Often with simulations of practical events the heavy lifting is done with the physics behind the solvers, talent of your artists, and the directability of your tools. The look of the crevasse was such a subjective thing to each viewer that it was difficult to find the desired look.
Was there a shot or a sequence that prevented you from sleep?
The entire sequence was a consistent challenge. Each shot had it’s own unique needs, as well they were all very meaty CG shots. The end result is something that I believe is convincing and unique glimpse into what it could be like falling into a crevasse in a glacier.
What do you keep from this experience?
The importance of craftsmanship, and the story of what you are trying to portray visually.
How long have you worked on this film?
Full production for our work was scheduled at 8 months.
How many shots have you done?
38 shots for the opening sequence.
What was the size of your team?
Throughout the production it would fluctuate with the other projects Mr. X is involved with but at it’s peak a team of 20 were working on this sequence.
What is your next project?
We usually have quite a few of projects on the go at one time. Currently we are working on RESIDENT EVIL: RETRIBUTION, MAMA, COSMOPOLIS and SILENT HILL: REVELATION 3D.
What are the four movies that gave you the passion for cinema?
For me the visually complex movies were always my weakness, as well as a huge inspiration for pushing me into an career of effects for film.
AKIRA – directed by Katsuhiro Otomo
THE CITY OF LOST CHILDREN – directed by Marc Caro and Jean-Pierre Jeunet
BLADE RUNNER – directed by Ridley Scott
GHOST IN THE SHELL – directed by Mamoru Oshii
Rob Duncan has worked for nearly 15 years at Framestore. He has participated in projects like LOST IN SPACE, THE BEACH or STALINGRAD. As a VFX supervisor, he worked on films such as BLADE II, UNDERWORLD, AUSTRALIA or WHERE THE WILD THINGS ARE.
What is your background?
I did a graphic design degree at college, but fell into digital effects when it was still in its infancy in the UK. I started off working on a variety of television shows, commercials and music videos, and when the technology became available I moved into feature films.
How did Framestore get involved on this show?
We have a good relationship with Working Title and they couldn’t think of anyone better to hand the work to! This was never going to be a mega-budget production and, without trying to sound like a furniture salesman, they trusted us to deliver quality work at an acceptable price.
How was the collaboration with director Oliver Parker?
It was great – he was always very available and approachable, and took on board my suggestions where appropriate. I would extend that to the producers and also to Rowan Atkinson, who was involved throughout the process. My producer Richard Ollosson and I could have a very open and honest conversation with them about what would be possible within the budget constraints, and we would all move ahead on that basis with an agreed plan of action.
What was his approach towards visual effects?
I’m sure he would be the first to admit that VFX is not really his area of expertise, so he was happy to leave many of the creative decisions to me.
Because this was first and foremost a comedy film, it was important that the VFX supported the story, and didn’t overwhelm or distract from the comedy moments. When I spoke to him after we had finished, he pointed out that he could have easily gone down the cheesy route and not really care too much about the VFX, but decided that having good quality invisible effects would be a better choice, since it would help to reinforce the thriller aspects of the story, leaving the comedy to come from the performances. No-one wanted the laughs to come in the wrong places.
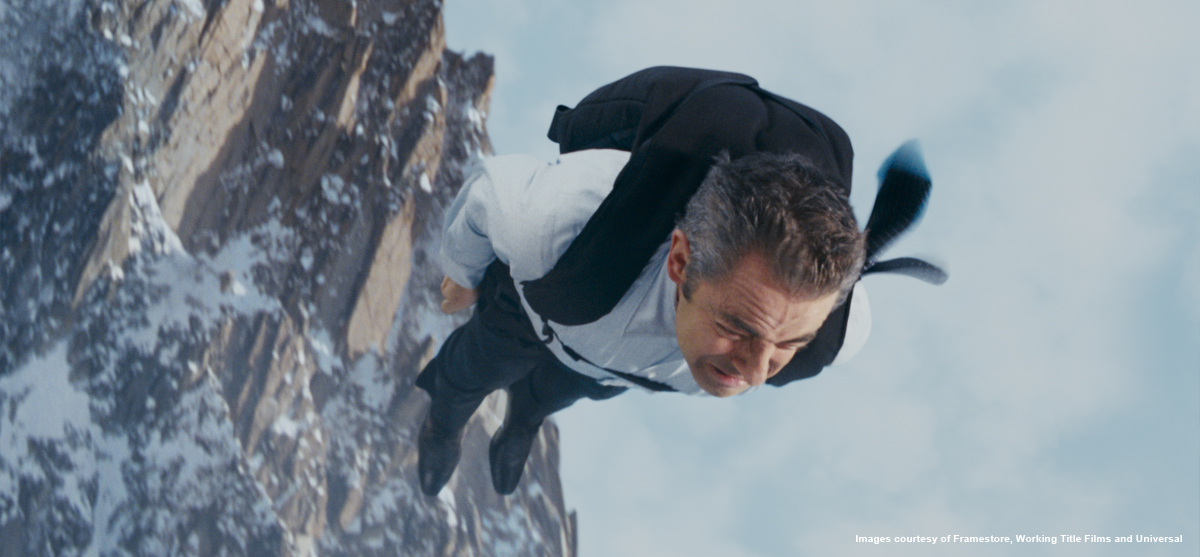
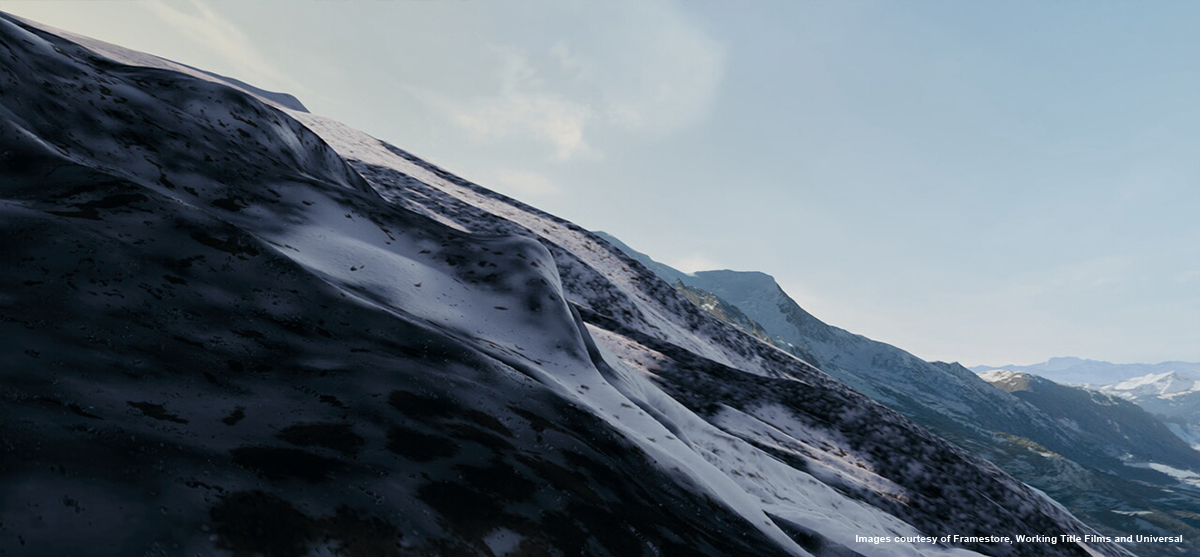
Can you tell us more about the Tibet environment? How did you create it?
I was sent solo to Argentina to obtain material that could be used for digi-matte paintings for the “Himalayas” scene. This was done with a local film crew while the main unit continued in the UK.
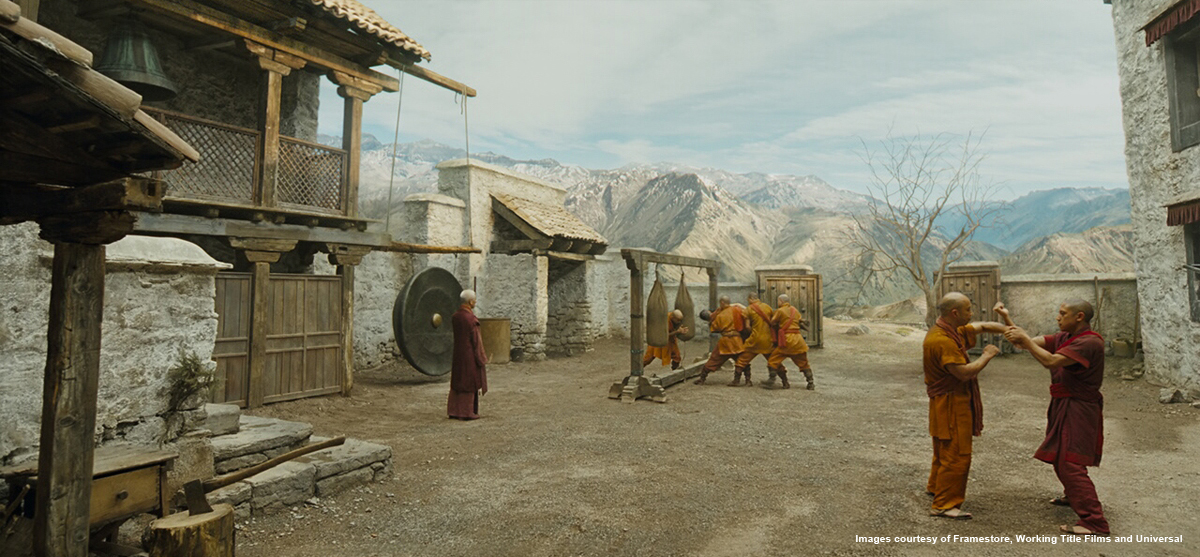
Over the course of one day’s shooting, we got some fantastic helicopter footage of the Andes for the establishing shot of the monastery, and when we landed we trekked off into the foothills to get some more controllable tiled plates that we would need for the ground level monastery panoramas. In post, we also had to adapt the original footage to make a winter scene, to sell the idea of the changing seasons.
The monastery courtyard you see in the film is a full-size set built at Ealing Studios which we had to top up only slightly, otherwise our task was to create the view beyond the walls.
There was another scene set in the Himalayas which we had almost finished the VFX for, but it got cut for editorial reasons.
What references and indications did you receive from the director?
Because the Ealing-for-Tibet scenes had been shot relatively early in the schedule, there was time to get a local Argentinian scout to offer up some options and send them to us. We were then able to go through and narrow them down to 2 or 3 possible locations before I set off for South America. The production then left it up to me to get the right stuff – we didn’t need anything too specific to fit the brief, as long as it could pass for the Himalayas and felt remote from civilisation, then everyone would happy.
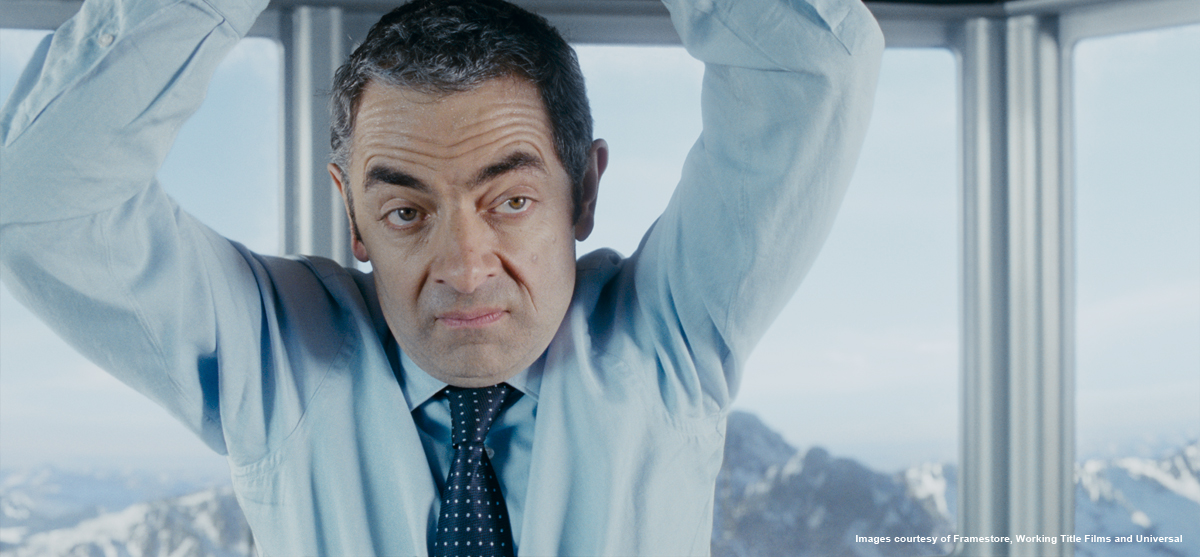
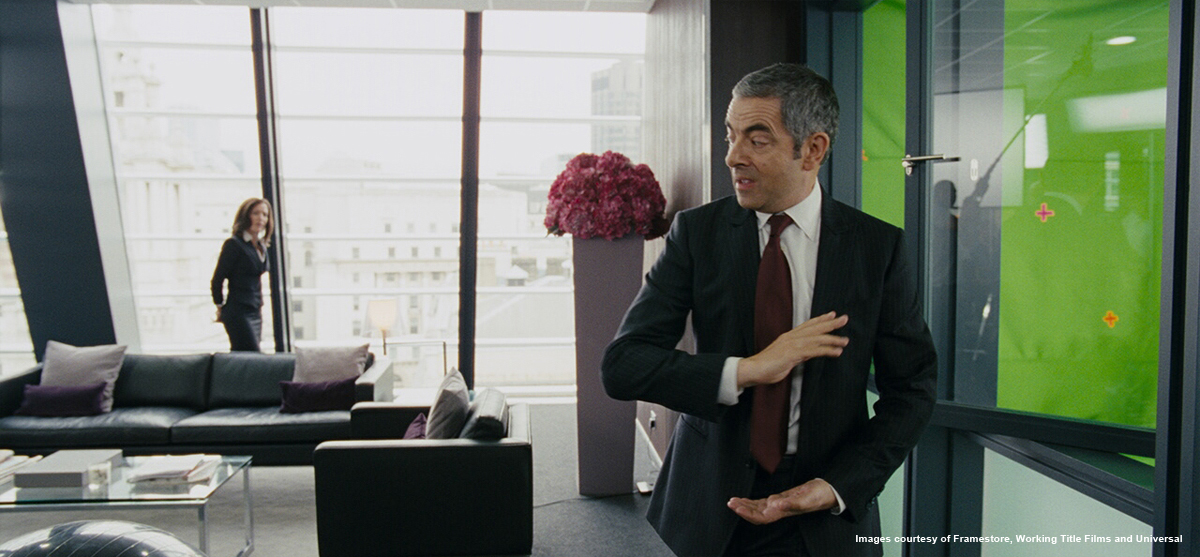
About the London sequences, how did you create the different panoramas we can see outside the office of MI-7 boss?
The boss’s office was a real location in the City of London, meaning that some of the window views are real. Like a lot of VFX work in this film, we were merely extending, extrapolating or replicating what could be shot for real rather than creating from scratch – I prefer this approach wherever possible since the basis of the scene is real and therefore it is much harder to stray off course when adding in the digital work.
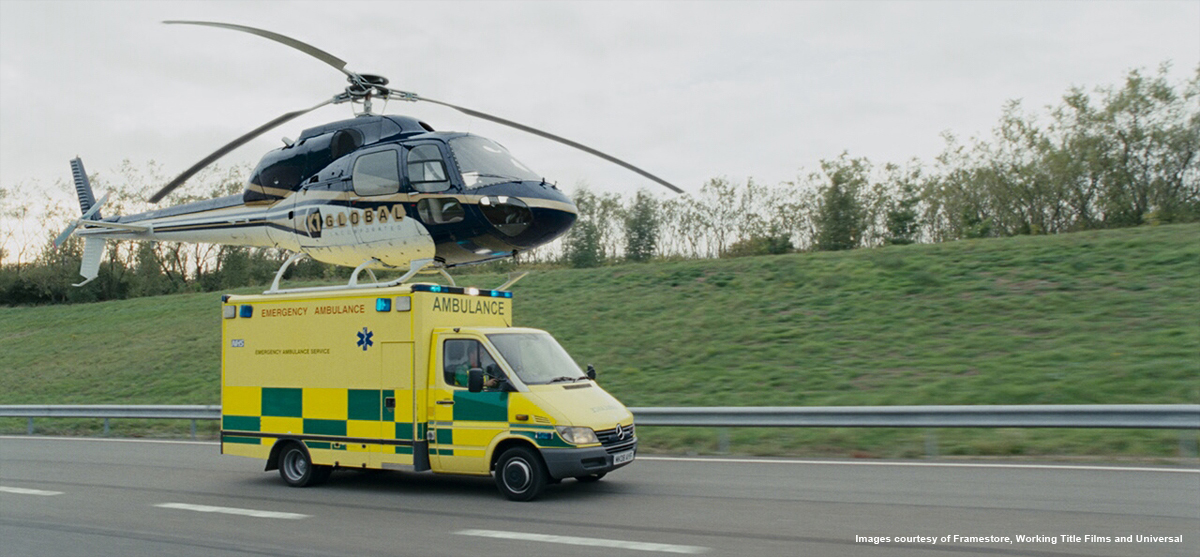
In this case, where we needed to invent the exterior view, it was created from tiled plates filmed from a different vantage point on the same building, from a window cleaner’s cradle suspended at the same height as the main unit footage. Unfortunately we were unable to shoot the plates on the same day, which meant that our lead compositor Bruce Nelson had to completely relight the material to make it match (sorry Bruce!).
The plates were then split up into different layers according to depth so we could create some parallax when the camera was translating inside the office. We built some very basic geometry of the interior so that we could be sure the various camera views had some consistency.
The reason we had to provide an exterior view at all was because we needed a false wall and window out of which the unsuspecting cat could be pushed, meaning it only had 1 metre to fall rather than 30 metres – it certainly cut down on the re-set time and the number of cats used.
What did you do on the roof chase sequence in Hong Kong?
Ultimately, very little. In pre-production this was potentially one of our most difficult sequences, since the buildings chosen to stage the action were due to be under refurbishment while we were shooting, meaning that they were going to be covered in bamboo scaffolding – although this would have been very photogenic, it would have rendered redundant the key action beats written in to the script.
At this time we were preparing to digitally reconstruct all the buildings in a two-block radius in order to remove the scaffolding. On the recce trip, I took thousands of digital stills of the buildings’ facades and other details, so we could use them as textures. However, agreement was reached with the local authorities to remove the bamboo where it would otherwise be in shot, so we were able to film the sequence unencumbered – I cite this as an example of solving a problem in pre-production rather than leaving it until post, when it would have been considerably more expensive to fix and, perhaps just as importantly, wouldn’t have contributed to the storytelling in any meaningful way.
Luckily, the bamboo which remained on the blindside of the building became a story point because it was used for the henchman’s final escape.
Can you tell us more about the helicopter sequence? Which is the balance between real stunts and CG?
When I originally read the script, it seemed to suggest that an extensive amount of CG helicopter shots would be needed to achieve the required action. However the production were nervous about committing to such a large VFX sequence (understandably since it would have eaten up the whole digital budget, and then some) and therefore found a largely practical solution by shooting most of the action on a test track closed to the public. This allowed the pilot to fly very low to the ground and close to cars driven by trained stunt people.
Although this reduced the real-to-CG balance considerably, it didn’t eliminate it entirely, so we still had to create a digital replica. Our CG supervisor John-Peter Li and our lead compositor Adrian Metzelaar did a brilliant job of matching it, using a bespoke side-by-side setup that I had shot in between main unit takes. This enabled us to make it completely indistinguishable from the real helicopter long before we knew which shots would be required for the film, and acted as a proof of concept should there be any scepticism about the believability of the digital vehicle. The shots in the film were approved by the client on version 1. Elsewhere, I was sent up in another helicopter to grab aerial plates for some of the action which takes place inside the cockpit – the actors were filmed safely on the ground against greenscreen first, so that we knew which angles and lens sizes to shoot when airborne.
How did you create the take off of the helicopter and the cutting of the trees?
The takeoff was performed by the real helicopter (this time on a private golf course which had its own helipad, so it was perfectly safe to do so). We had the digital helicopter on standby for this shot, but it was ultimately not required.
Apart from the fact that it would have been too dangerous to attempt, the stunt would have required a huge re-set time if we had tried to chop down the trees in situ. Instead, we shot a plate of the trees standing up to achieve the composition, and then they were laid flat on the ground for the pilot to determine the correct flightpath as he passed safely overhead, causing no destruction.
Some weeks later, the trees were shot upright (one at a time) against bluescreen on the Pinewood backlot, with the ‘slicing’ created by placing explosive charges on the trunks. There was some discussion in the planning stages about using an industrial tree-logging machine, but the slicing would not have been instantaneous and the device itself would have interfered with a lot of the flying debris. In order to avoid obvious repetition, we blew up 10 trees, all at different perspectives to match the original plate layout. They were shot individually so that we could get perfect synchronisation with the helicopter’s path. Even this wasn’t chaotic enough, so we shot some additional debris which would help to fill up the frame with fine leafy material.
About the final sequence, can you tell us the creation of the building on the top of the mountain and his cable car?
This started as an Art Department concept drawing, which we then adapted/developed to make it fit on to the chosen location of l’Aiguille du Midi near Chamonix, France.
In the story, le Bastion is meant to be a Swiss government fortress, inaccessible except by the single cable car which has a key role at the end of the film.
The Production Designer Jim Clay was very keen for the building to have a strong minimalist look, so of course it was impossible to find anything which fit this brief on top of a mountain. Because l’Aiguille du Midi actually has an observatory on the summit (the highest in Europe) serviced by a cable car system, it proved to be a excellent aid in terms of composing the shots – we were mostly able to cover up the real buildings with our digital creation and then erase what little was left.
The full-size cable car (which was used to stage the fight sequence) could not be used in the big establishing shots, because of the camera moves involved, so we built a digital replica with a combination of lidar scans and photographic textures. Whenever we saw the cable car in a wide shot, we stripped out the actors from the real prop and placed them in the digital version.
Can you explain to us in detail how you create the huge environment?
The environment was always going to be a combination of real locations and invented ones, in order to facilitate the journey mapped out in the script. For instance, the summit existed so we didn’t need to create that (apart from the aforementioned le Bastion building), and when Johnny falls out of the cable car this was all shot on the slopes in Megeve, France and Surrey, England.
The major part of the digital build would be confined to the cable car journey, but that brought with it its own challenges since the total distance was quite substantial. During the sequence the camera would be looking in all directions, so we had an environment which potentially covered hundreds of square kilometers.
We knew it would be infeasible to build the whole environment, so we decided to take a modular approach whereby we built a smaller section of the mountain slope which could be bolted together in different configurations to prevent it looking like a repeat. This took care of the close- to mid-ground terrain and beyond that, where parallax was less of an issue, we were able to resort to layered-up digi-matte paintings.
Can you tell us how you get your references for this environment?
As explained before, the real l’Aiguille du Midi is a working observatory, open to the public. We discussed taking the main unit crew up there, but due to time and equipment constraints this was ruled out, so I went as a tourist along with my colleague Dominic Ridley. We spent two sessions (different times of day) capturing the environment as digital stills which could later be worked up into digi-matte paintings and also used as textures for the CG parts of the mountain.
Because we were at such a high vantage point we had spectacular and uninterrupted views of the French Alps which didn’t require much modification to work for the story.
This worked perfectly for tiled panoramas (because we were on solid ground it was completely controllable), but we still needed some moving aerial plates for the establishers of le Bastion, so it was back in the helicopter again.
I also used the opportunity to shoot travelling aerial reference for the cable car’s journey by flying up and down a generic slope on a nearby mountain range – I had mapped out in advance about 10 generic angles that I thought would be good for later reference. Although these passes would be unusable in the final film – it would have been impossible to matchmove them to work with the greenscreen fight footage – they proved invaluable for laying out the sequence and were used in the early temp screenings before any CG backgrounds were available.
How did you create the free fall shots?
In the usual fashion – stringing the actor up on wires, throwing him around, and blowing air at him to make it seem as if he is travelling very fast.
Although this would be a typical studio setup because of the rigging involved, I insisted that we shoot outside so that we got natural daylight, which is almost impossible to recreate on stage and which tends to blow the illusion straight away. Rowan was hanging from a crane arm, so rather than the rigging moving past the camera, the camera moved past the actor to get a sense of movement.
These greenscreen shots were intercut with a stuntman doing the skydive and parachute drop for real in the Alps, which was sometimes made to look higher and more consistent with our digital environment by replacing the live action backgrounds.
Can you tell us more about the big explosion of the cable car?
This shot was a real hybrid – there was the full-size cable car suspended on a crane so that we could get the villain’s performance from the right perspective; there was a third-scale practical miniature built by Mark Holt’s SFX crew rigged with explosives; and then there was the digital replica which was used up to and slightly beyond the explosion.
The miniature was blown up in the Paddock Tank area at Pinewood and was photographed at 125fps to achieve the right scale. Three miniatures had been built in case repeats were needed – we got the best action on take 2 and so used the third one for alternative angles.
Our lead compositor Mark Bakowski then added a CG missile and smoke trail (mixing in some real smoke), more explosion and debris elements from our general library, and then combined everything with a plate shot in the Alps, even making the branches react to the shockwave created by the blast.
What was the biggest challenge on this project and how did you achieve it?
The biggest challenge was definitely the cable car fight sequence, not only because of the scale of the environment that it took place in, but more specifically because of the sheer number of photorealistic CG trees needed to cover it. Our lead TD Dan Canfora took some off-the-shelf tree generating software and refined it, at the same time as developing a tool to quickly and easily populate a mountainside with low res instances for layout purposes, and then replacing them at render time with the full res versions. He had to ensure that we would be able to render thousands of trees, some very close to camera, and he came up with a number of tricks to accomplish this such as simplifying the geometry depending on distance to camera and/or splitting into layers, etc.
We were also aware that the edit was frequently changing, so we had to remain flexible in terms of background layout without foregoing a sense of continuity when the edit was finally locked – it meant that the majority of backgrounds were only rendered in the last 3 weeks of the schedule.
Was there a shot or a sequence that prevented you from sleep?
I slept like a baby – I would often wake up in the middle of the night, screaming. Actually, because we were in constant contact with the cutting room, we were able to anticipate problems before they took root and could come up with a plan to deal with them. I would like to think that as the VFX industry has matured somewhat over the years, it has become easier to deal with a changing and expanding workload during a (more-or-less) normal working day. Hopefully you won’t have to ask that question for much longer!
What do you keep from this experience?
That I really don’t like helicopters.
How long have you worked on this film?
About a year in total, if you include the pre-production period.
How many shots did you do?
We ended up with about 230 shots in the film, plus a few dozen omits. Baseblack, our friends over the road, also did about 60-70 shots.
What was the size of your team?
About 50 I think.
What is your next project?
I’m not at liberty to say.
What are the four movies that gave you the passion for cinema?
It would be unfair to try and narrow it down to only four, since there have been so many that have contributed in different ways. Having said that, STAR WARS hit me at just the right time in my youth and really opened my eyes to what was possible – most of us in the VFX industry owe a great deal to that film.
A big thanks for your time.
// WANT TO KNOW MORE?
– Framestore: Dedicated page about JOHNNY ENGLISH REBORN on Framestore website.
I had the pleasure to interview Alessandro Cioffi in 2010 for his work on NINJA ASSASSIN at Trixter. Since then he has worked on films like PERCY JACKSON, IRON MAN 2 or X-MEN FIRST CLASS.
How did Trixter got involved on this show?
Since the time of our collaboration with CAPTAIN AMERICA’s vfx Supervisor Christopher Townsend on NINJA ASSASSIN first, in the late 2008, and PERCY JACKSON afterward, we had the pleasure to strike up a nice friendship along the years and many times we’ve looked forward to working together again. Eventually, around the end of March 2011, beginning of April we received an informal telephone call from Chris, who was by that that time extremely busy finishing the visual effects on the show, in which he asked us if we felt up to embracing the challenge on a tricky sequence, the so called Flashback sequence, which presented some complexity for being somehow different from the rest of the show. And guess what? Two hours later we set up our first Cinesync session for an initial briefing.
How was the collaboration with director Joe Johnston and Production VFX supervisors Christopher Townsend and Stephane Ceretti?
It has been an excellent collaboration. Rewarding, effective and mostly easygoing, even in moment of hectic hard work. Though, throughout the entire production we mainly had contacts with Chris Townsend, from whom we received briefings and feedbacks and, as said, we had frequent Cinesync sessions with. We also received Editorial comments almost on a daily basis, as the Flashback sequence, i.e., is all based on a visually vehement concept made of frequent and multiple dissolves upon a variety of elements, creatively combined. And naturally we received director Joe Johnston’s comments as well every time one or more of our shots were screened for him, he always had good words of encouragement and recognition. Very supportive, i was glad to appreciate, and so the team did.
Funny wise, with Stephane I didn’t collaborate on CAPTAIN AMERICA directly, but as we started our work on it we were just wrapped on another international show, the X-MEN: FIRST CLASS, on which Stephane Cerretti was VFX Supervisor, therefore for over two months i had the opportunity to work with him anyway.
What sequences have you made on this show?
We worked on the above mentioned Flashback sequence, describing how Schmidt descends into madness and eventually becomes the Red Skull, and on the train sequence where Captain America tries to high-jack the train and where he fatally loses his friend ‘Bucky’ Barnes. Plus a handful of shots from other sequences. In total we worked on over 115 shots.
What references and indications did you received for the flashback sequence?
For the Flashback sequence we were provided with an editorial version of the sequence for timing reference and naturally plenty of scans. Many backgrounds were then recreated and enhanced by us in a creative way, as well as the picture compositions were rebalanced according to the story that every shot had to tell. As said, we were given the opportunity to be proactive in the look development of this sequence, and the process naturally involved many long talks and cinesync sessions with Chris, which we used with greater enthusiasm!
How did you create the shield?
As mentioned we came on board pretty late, so time was ragingly against us since the beginning. Production was fortunately very supportive so we were provided with a rough model and vast array of pictures of the shield at different stages of deterioration. From there it was fairly straightforward to re-texture it and shade it according to the sequence we were working on. For the animation, we tried to anticipate our client’s wishes and preferred to present two or three versions at a time, so that Joe and Chris could foresee eventual changes and possibly streamline the approval process. That was the same approach we had on the digital double of Bucky falling from the train. There a shot in particular, which is sort of pivotal in the storyline, a POV of the Captain America, where he sees his friend dieing in a crevasse. Joe wanted to extend the fall substantially so we switched from a live action element of the actor, shot on green screen, to a digital double of his. Here we tried to present more alternatives per session in order to speed up and facilitate their decisions.
What references or materials did you received from production for the blue bolt fx and how did you create them?
This has been one of the main challenge, as we had to seamlessly “plug” into other vendors’ work on the same sequences, in this case Double Negative which meant that we had to duplicate some of their effects along with creating our own, but in the same style. Naturally we were provided with plenty of references, qt movies and still images, which was of greater help. After one of two weeks of playing around on Houdini, and long sessions with Chris Townsend, discussing every detail of the effects, we were ready to present our first shots with the bolts in it.
Did you share some assets with the other vendors?
Never directly, everything was coordinated and organized by the Production.
Can you tell us more about your greenscreen composites?
On the train sequence we mostly worked on interior shots. For those shots involving externals, like green screens or the Bucky sequence, BG plates where provided, we then enhanced the scene by adding atmospherics, clouds and so on, taken from our vast library of live action elements: It’s my firm belief that using the “real thing”, like actual snow or true wispy clouds, shot on black, has to be the primary way to go, using cg simulated elements only when absolutely necessary.
How did you managed the stereo conversion?
To be precise, we only converted the flashback sequence, as involving a third party, for that specific sequence, would have been too complex. The original idea was to give it a sort of disturbing, atmosphere. Chris asked us to come up with a few ideas for grading the sequence, and adding lensing artifacts in artistic but almost retro way. After a couple of layouts, we’ve gone for the look of the “three strip Technicolor Process”. In this sequence, where the cut is very dynamic and uses a number of alternating cross dissolve transitions, Townsend’s idea was of playing with the depth during the stereo conversion process to create a disorienting feeling for the audience.
Was there a shot or a sequence that prevented you from sleep?
More than a shot or a sequence in particular, was the whole scheduled that felt kind of scary! Anyway we managed to finish over 115 shots in little less than 6 weeks with a team of 20 people between artists and producers. We tried to optimize our resources and our time by keeping the production very tidy and asking and receiving constant feedback. We tried to stay well organized. And cool, most of all!
What do you keep from this experience?
Great excitment and loads of adrenaline!
What is your next project?
We’re currently doing CG creatures for JOURNEY 2 – MYSTERIOUS ISLAND, we provide FX work for James McTeigue’s RAVEN and we’ve just finished DEATH OF A SUPERHERO, a german-irish co-production which is going to be screened at next Toronto Film Festival, in September. There are more exciting projects in the pipeline, but I can’t disclosed details so far.
After working several years at IMAX on projects such as BATMAN BEGINS, V FOR VENDETTA or 300, Eric Robinson joined the team of Mr. X in 2010. He will participate in such films as RESIDENT EVIL: AFTERLIFE and HANNA.
What is your background?
I come from an artist background in both animation and compositing. I joined Mr. X as a Production Manager 2 years ago after spending the previous 4 years learning everything about 3Dstereo at IMAX. I am now a Digital Effects Supervisor and resident stereographer at Mr.X and was Digital Effects Supervisor on THE THREE MUSKETEERS.
Mr. X is used to work with director Paul Anderson, how was this new collaboration?
The growing rapport with Paul has been terrific for us at Mr. X. Over the years we have grown to understand his vision and now he trusts us to take his ideas and run with them. With both Three Musketeers and Paul’s most recent project, Resident Evil: Retribution, we have been pulled in from the very onset of pre-production helping to establish the look and feel of his films from the initial concept design stage. Paul and the producers, Robert Kultzer of Constantin Film AG and Jeremy Bolt of Impact Pictures have been tremendously supportive through so many projects.
What was his approach about visual effects for this show?
VFX were paramount in telling this story. From the fantastical airships to 17th century Paris, this was a story that couldn’t be told without visual effects. On the other hand we needed to achieve a level of realism, so that the VFX complemented the story, rather than being the story.
Can you tell us more about the main title and this big camera movement?
At one point when reviewing a version of the opening title shot with Paul, he said that, “This is every boy’s dream come true.” The idea was to create a stylized treatment that would complement the narrative storytelling and set the tone for the film. Paul wanted to start with a 17th century parchment paper styled map that would implement a dynamic use of 3Dstereo. As we open the shot, the camera drops into the map bringing to life the stereo feel with text that first appears to sit on the surface until the camera move reveals that is actually hovering above. Topographical details of the map begin to emerge out of the parchment paper and as we fly through the scene the camera begins to reveal the battling soldiers, ships in the harbour and palaces scattered across the landscape. We see the Spanish army advancing towards France, then we pass over a burning village to a gauntlet of musket and cannon fire between the English and French armies until we end up at the golden effigies of King Louis and Queen Anne being confronted by Cardinal Richelieu and his guards. As the camera pulls back up, the screen is filled with 3D smoke and then the 3D Three Musketeers logo bursts through the haze.
Initially we began by blocking out the camera move so we would know where everyone should be placed. Utilizing the soldier assets that were created for the film we tweaked the levels of detail down and swapped out their uniforms to give that old school led painted toy soldier look. We also repurposed the assets of the ships, Louvre, Notre Dame and Tower of London. The countryside was modeled in 3D using displacement maps of actual European landscapes and bump maps were used to increase the realism of the parchment paper textures. 2D and 3D rendered FX elements of cannon blasts, explosions, smoke and fire were also created. Then all the elements were brought into Nuke utilizing its 3D capabilities. Setting up a shallow depth of field through Nuke gave the miniaturization effect that sold the toy soldier look that we were going for.
How did you recreate Venice?
We started by going to Venice and shooting aerial plates on RED. It’s such a beautiful city that almost plays as period today. Changing modern lights to lamps and torches goes a long way to making it look right. Projected matte paintings were used extensively here so that complex camera moves could be utilized and the parallax to work correctly.
What were your references for the recreation of Paris?
The production designer, Paul Austerberry had numerous period maps and books with etchings of 17th century Paris. We used this as a starting point for our layout.
How did you take your references for the different locations in Paris?
We sent a team to Paris for a photo reference shoot, concentrating on Notre Dame.
The movie features a lot of set extensions. Can you tell us more about their creation?
The three main set extensions we had to do were for the two airships and then the roof of Notre Dame. These were all treated as highly detailed assets. Our team was responsible for creating seamless set extensions and entirely digital environments. Specifically for the Notre Dame roof fight sequence, which was shot green screen on a small set piece, our team was responsible for creating a CG replica of Notre Dame and the surrounding 360 degrees vantage point of Paris below.
We started this process by taking a lot of photo surveys. We sent a team to Paris to build a photo library containing thousands of meticulous pictures of Notre Dame for texture and modeling purposes. We created a 17 million polygon model of the cathedral that adhered to every single spec, down to the centimeter. The level of texture detail that was used to achieve the perfect amount of weathering, lead oxidization levels in the roof and soot induced damage was immense.
To accommodate for the amount of RAM required for each asset our team developed a texture caching system that would allow us to choose very specific resolutions for each portion of an asset ensuring that we were not wasting RAM space unnecessarily. We also implemented a proxying workflow system, which allowed for an efficient use of memory by re-using assets in multiple shots without the need to re-translate for rendering.
Can you tell us more about the creation of the air ships?
There were three paths of design we had to work with for the airships. There were initial concepts to work from that the art department created, lead by Paul Austerberry. From these drawings a team of model builders began creating scale models of the two airships. With the aggressive schedule on the film, the airship set piece was built concurrently with the model builds. We did extensive photo surveys of both the scale model and the set pieces.
What was the biggest challenge with the air ships?
Sheer size! There are so many moving parts which are connected and need to interact with the various motions of the airships. The rigging needed to influence the balloon when the airship was turning or in high winds. We wanted to be able to get really close to the CG airships. To achieve this, a tremendous amount of detail went in to their texturing. The balloon on the Cardinal’s airship had over 60 4k textures. The final poly count was in the 50 million range. With the airships playing in about 100 shots, they needed to work from many viewing angles, which didn’t allow for any shortcuts or compromises with them.
Did you create some previs for this show?
We created all the previs for the show! We initially started with the ASxseq, the first reveal of Buckingham’s airship. This had both technical and artistic requirements as we needed to see how the airship scale played with regards to our “Louvre” (in fact, Herrenchiemsee). We start off from storyboards and then make shots that have a good feel to them. From there we need to make sure it’s shoot-able, refine lens or framing, so that the DP, Glen McPherson would have a guide of how to accomplish the shot. There was one shot in particular where D’Artagnan is arriving in Paris, it starts on D’Artagnan with rural France behind him. We then do a 180° pan as the camera rises to show Paris. This was shot on a small bridge in Bavaria. We created a virtual 50′ Technocrane, placed this on a mockup of the actual bridge so that we could work out an elegant move within the confines of a very small bridge.
Can you tell us more about the big storm in the air battle?
The storm was place for the Musketeers to hide from Rochfort and his stronger airship. It had to be scary enough for a helmsman to refuse to fly into it! Which resulted in his summary execution. We had to use this storm as both a dramatic storytelling device and a clue to the geography of the route the airships were taking. Our skies began as a hemispherical dome that could be rotated to properly align to the CG set. Inside of that dome we have midground and background clouds that were modeled and then converted to volumes to be rendered out of Houdini. In addition to those layers, we felt that to properly immerse the audience in the shot, hero foreground layers of mist were needed.
How did you create and manage the huge environment of Notre Dame and the two air ships?
We had to render the elements for these shots in multiple layers, with holdout mattes so the compositing artist could seamlessly blend the elements together. Notre Dame and the island it resides on was a huge endeavour. We really wanted a rich, detailed environment. By laying on more and more detail, like birds, laundry hanging from windows to apple carts, barrels, sacks of cloth we were able to get a fully formed world that helped sell the scale of 17th century Paris. Creating the stained glass for Notre Dame was a particular challenge. In the modern world, massive stained glass windows are protected by Plexiglas or metal grating as well as being illuminated from within by electric light. In our Notre Dame we had none of this! We approached this by using very subtle colour and amounts of light to transmit through the windows. Bump maps and reflections provide the feeling of relief in the window surface.
About the final sequence. What was the real size of the set for the fight on top of Notre Dame?
There were three main sets for the Notre Dame fight. This included two levels of roof height for the actors to work on. There was a lower level, about one meter high for the bulk of the sword fighting. In part this was for actor safety. Rochfort, played so villainously by Mads Mikkelsen, wears an eye patch, making the complex fight sequences and sword work even more dangerous. The second area had a 5 meter drop from peak to ground. There is action where D’Artagnan, played by Logan Lerman, falls from the peak to a lower roof-line. The third location was where the end of the sword fight takes place. This was basically a 2×2 meter patch of landing. We did a set extension here for a shot that looks up at Rochfort and D’Artagnan fighting.
How did you split the work between Toronto and Montreal?
The Montreal office is a branch of Mr. X that specializes in compositing work. They did the lion’s share of work that didn’t require large amounts of CG. The Toronto branch has an extensive render farm and was more suited to handling the massive amounts of data required for many of the all CG shots in the film.
Did you develop specific tools for this show?
Our cloth pipeline was completely overhauled for 3M. The sails for the airships had to perform realistically so that the audience would believe in their flight. The same pipeline was used for Milady’s hair and dress over multiple shots. We also developed our own GPU based fire tool called Torch to allow for real time fire simulations, a custom physics solver, Bullet to help with real time destruction simulations. Also, our VRAY pipeline was significantly expanded and the introduction of Mari to handle the sheer volume of textures required.
What was the biggest challenge on this project and how did you achieve it?
The Paris environment was killer! At the start of production various locations were scouted as possible stand-ins for Paris but nothing was found that really suited the needs of the film. It was established that the city of Paris had to be created as a full 3D environment to allow flexibility for the unpredictable camera movements. Due to the stereo nature of the film we were unable to use many projection cheats to create the city. Instead we projected Matte Paintings into a true 3D space rather than a traditional 2.5D space. All the paintings were baked down and brought into lighting where they were augmented with specular and dirt textures supplied by our texturing crew. In addition we had 40 extremely hero houses that were mixed into the landscape of the scenes. These assets had to share the same look and style of the deep background matte paintings.
Adding ground level details such as trees, puddles, and people milling around gave a sense of chaos and complexity, while flags, banners and smoke billowing chimney stacks that riddled the cityscape helped sell the authenticity of 17th century Paris.
Was there a shot or a sequence that prevented you from sleep?
The airships’ approach to Notre Dame was extremely involved. It was a massive collaborative undertaking with all departments working together to a unified goal. From water sims for The Seine, which included boats and boatmen, matte painted sky and countryside, CG buildings, thousands of people on the streets, birds in the air, there was no limit to how much we felt we needed to add to make this environment come to life.
How long have you worked on this film?
It was about 15 months of work on the film. Starting with script reads with Paul Anderson and the production team, through previs, shooting, editing and final DI. Mr. X. was involved in this project from start to finish!
How many shots have you done?
The final shot count of 274 doesn’t speak to the volume of work that was needed to final the show. There were many full CG shots, with huge environments.
What was the size of your team?
At peak production we were just over 100 staff on the show. This was split between, Assets, Animation, Lighting, Effects, Cloth and Matte Painting, TD’s, with various production support staff and technical support.
What is your next project?
Another Paul Anderson movie, RESIDENT EVIL: RETRIBUTION. It’s filming now in Toronto Canada. It opens September 14th 2012.
What are the four movies that gave you the passion for cinema?
CASABLANCA, SEVEN SAMURAI, STAR WARS 1977 and LAWRENCE OF ARABIA.
Pour offrir les meilleures expériences, nous utilisons des technologies telles que les cookies pour stocker et/ou accéder aux informations des appareils. Le fait de consentir à ces technologies nous permettra de traiter des données telles que le comportement de navigation ou les ID uniques sur ce site. Le fait de ne pas consentir ou de retirer son consentement peut avoir un effet négatif sur certaines caractéristiques et fonctions.
Fonctionnel
Always active
L’accès ou le stockage technique est strictement nécessaire dans la finalité d’intérêt légitime de permettre l’utilisation d’un service spécifique explicitement demandé par l’abonné ou l’utilisateur, ou dans le seul but d’effectuer la transmission d’une communication sur un réseau de communications électroniques.
Préférences
L’accès ou le stockage technique est nécessaire dans la finalité d’intérêt légitime de stocker des préférences qui ne sont pas demandées par l’abonné ou l’internaute.
Statistiques
Le stockage ou l’accès technique qui est utilisé exclusivement à des fins statistiques.Le stockage ou l’accès technique qui est utilisé exclusivement dans des finalités statistiques anonymes. En l’absence d’une assignation à comparaître, d’une conformité volontaire de la part de votre fournisseur d’accès à internet ou d’enregistrements supplémentaires provenant d’une tierce partie, les informations stockées ou extraites à cette seule fin ne peuvent généralement pas être utilisées pour vous identifier.
Marketing
L’accès ou le stockage technique est nécessaire pour créer des profils d’internautes afin d’envoyer des publicités, ou pour suivre l’utilisateur sur un site web ou sur plusieurs sites web ayant des finalités marketing similaires.