
Huw Evans began his career in 2006 at Double Negative. He has worked on numerous projects such as THE DARK KNIGHT, http://www.artofvfx.com/?s=inception, MAN OF STEEL and THE HUNGER GAMES: CATCHING FIRE.
What is your background?
Well, having a huge interest in film and animation, I knew I wanted in! So I chose a university course at Bournemouth University called Computer Visualisation and Animation where I studied for 3 years and got hooked on the power of computers in creating art. After this I applied for a job at Double Negative in matchmove and thankfully got accepted. I’ve been working there ever since and have worked my way up from matchmove, through lighting, working as a generalist (which has been hugely beneficial to me as I get to have a go at everything), then into sequence supervision, CG supervision, and now VFX supervision. The job is so varied and each show has its own set of challenges so it keeps the work exciting for me still.
How did you get involved on this show?
I was approached by John Moffat (the client side VFX supe) who I’ve worked with a few times before while he was at Double Negative who told me about the show. It sounded right up my alley – space and an alien creature – how could I say no?! I said yes.
How was the collaboration with director Daniel Espinosa?
Daniel was an absolute pleasure to deal with. He has such a passion for what he does and it really shows when you speak with him. It was really nice having such a down to earth director who was open and willing to have discussions with the team and who would listen to our ideas. It felt like a true collaborative effort which you don’t always get in this job.
What was his approach and expectations about the visual effects?
I think it would be fair to say that Daniel was probably a little apprehensive as this would be his first time working with visual effects so he was new to the process and the stages of vfx production. Thankfully he really embraced it and wanted us to explain how it worked and what he was looking at for each stage. He understood the need to see greyscale playblasts for speed, rather than waiting for final renders, which again isn’t something that always happens. He would also talk directly to our animation team when describing how Calvin moves in each shot and would often be up and out of his seat in our dailies room, acting as a menacing creature which provided great reference and the animators really appreciated the direct feedback.
How did you organize the work at Double Negative?
The work was split in a couple of ways. The main build of the ISS was handled by our fantastic team in India, and supported by our build lead Tom Edwards back in London. Then we had three large sequence groups, roughly including:
– The Golovkina space walk and most other exterior ISS shots
– Calvin while onboard the ISS in various stages of growth
– The end sequence with the escape pods, ISS destruction and Calvin’s final evolution
There was a fairly even spread of shots between each sequence group and for the odd one off shots, we just peppered those amongst each sequence group to spread the love so we always stayed as balanced as possible for the crew.

Can you explain in detail about the creation of the ISS station?
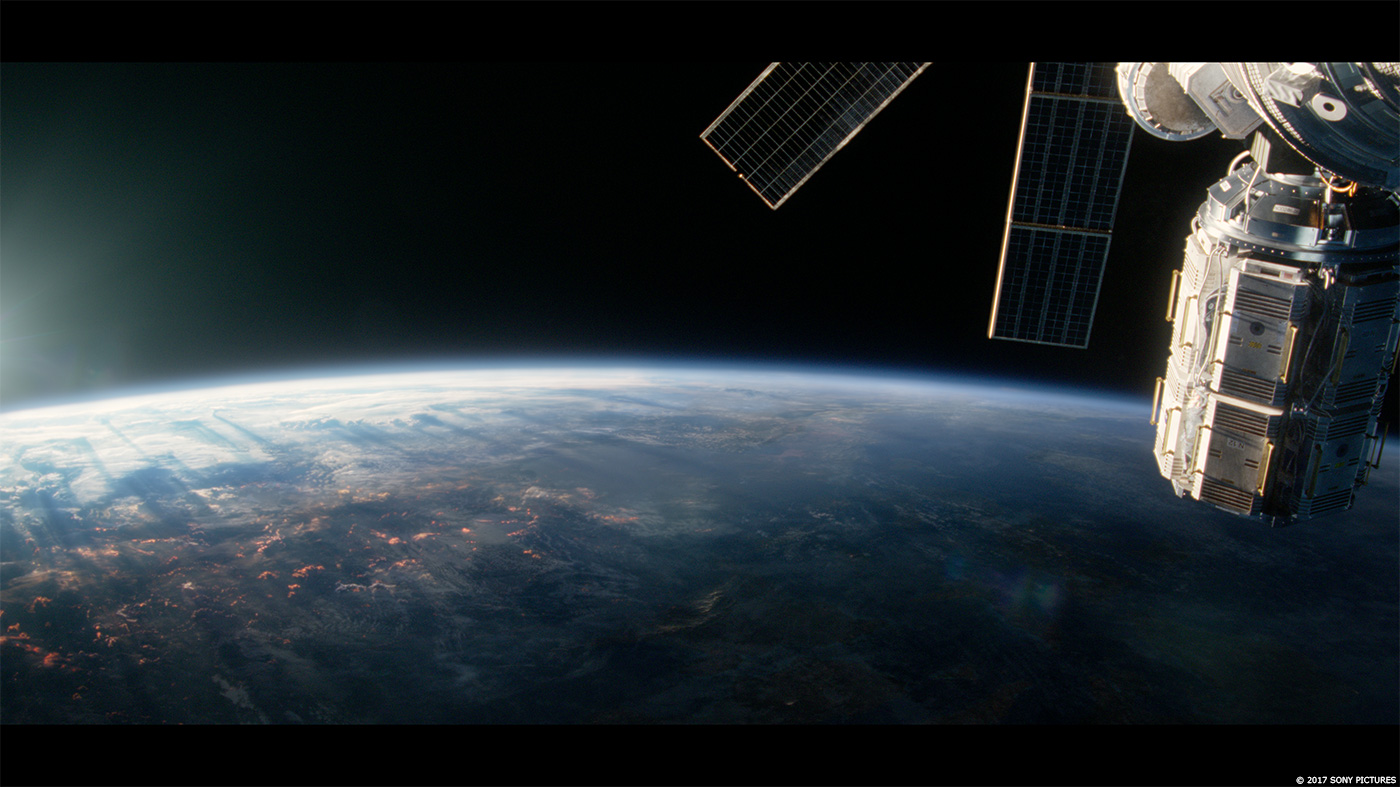
The ISS model/texture/lookdev was handled by our talented team of artists out in India who did a fantastic job building such a large asset to such a high level of detail in the time we had. It was an ever evolving model as from the offset we didn’t have the time or resources to go flat out and model every single detail on every single unit, instead we started with a base model from the production art department. This was then split up into separate modules which could be treated as individual assets. The idea was that we’d work each one up to a similar level of detail and start pushing through some shots to see where the cameras were looking and where we needed to focus the details. Unfortunately, for some of the fully CG shots, a number of different camera iterations were done and a number of new shots created to fill holes in the edit. This meant that the build team were constantly on the lookout for new cameras and had to work up more and more of the ISS, to the point where we probably had coverage for the whole thing in the end anyway! One of the tricky things we had to deal with was how clean the actual ISS is in real life. Looking at reference photography, it all looked quite CG in all honesty – the normal trick to break this up would be to add layers of dirt to the object but we wanted to try our best to stay true to real life so erred away from dirt where we could. We went crazy with things like bolts, rivets, handles, cloth – basically anything that helped to add more texture onto otherwise pretty flat panels. We finally had to succumb and run a little dirt through which did actually help sell that last 2% of making something feel real. Modelling was done in Maya, texturing in Mari and lookdev in Clarisse.
Which references did you received to use to create the station?
We started with a base model from production’s Art Department and some sketches of the segments. We then worked on some concept boards taking the base module and adding on additional ‘space chutney’ which was taken from real world photography. Things like cables, fabric sections, little control boxes, basically all manner of small things that help us add more details. We referred a lot to real world photography to make sure we were as accurate as possible. One thing Daniel was very keen to show was the different textures of the ISS, so the clean crisp whites next to the shiny silver metals, next to the gold foiling and the white fabrics. He wanted to feel that each module was built by different countries and different teams so they each look different, as in the real ISS.
Can you tell us more about the Earth creation?
The Earth setup was something we’ve been working on at Dneg for a little while now over a few projects. Each time it gets upgraded and more features added. Essentially it is a 2D setup controlled entirely in Nuke but using a 3D sphere, correctly scaled to real world size. We have a base layer RGB texture on the Earth to give us broad coverage over the whole thing. Then we have a city lights pass, again covering the entire world. We also have a base cloud layer pass, which is on its own, slightly larger scaled sphere to allow us to give motion to the clouds and cast shadows down onto the earth below. We can set the rotation to spin accurately compared to the real thing and block out all of our shots to make sure we have something that is technically correct, with regards to which continents we are seeing, then allow for artistic tweaks afterwards. Once the layouts are approved, we add in all the extra details and effects like the general hazing, the corona effect around the edge of the earth, the terminator line where the suns shadow can be animated across the surface of the earth and a whole host of other comp magic, lens flares, lens dirt etc. If we needed any particular areas worked up in more detail, to see higher resolution on the city lights, or to see volumetric shadows being cast from the clouds, then we’d bring in the matte painting team and just work up very specific areas, so we could stay smart with the way we were working and keep the setup as quick and as manageable as possible for the artists.
How did you manage the lighting in space?
The lighting in space was actually fairly simple for the most part. We took cues from the set lighting where we were extending practical set sections so we knew we had to match that to make the shot work. Then for the full CG shots, we would generally have a strong sun keylight, a few fills to pick out specific details or sections and that was pretty much it. It was quite nice being able to keep the basic setup fairly simple as it gave the artists a templated starting point they could import, then giving them more time to work on the main beauty lighting aspects of the shot and what would really make them sing.
Many destructions affects the station later in the movie. How did you handle this aspect?
Our fantastic FX supe Jordan Walsh was leading the team who helped us smash up the ISS. Again due to time constraints and available budget, we had to be very mindful of how we destroyed the ISS and try to keep things smart. We worked up a number of options for the main destruction beats so we could get quick feedback from the director and try to get sign off on the main action of what needs to happen before we got stuck in on all the details. This really helped us as we could pass things to be cut into the edit and all understand what needed to happen. We then knew exactly which module needed to be destroyed and where about the damage needed to be on each of them so it really helped focus our build. For the destruction, we started with a broad scale wobble of each of the units done in anim, then this would drive some FX simulations to give us some warping, then we’d add finer detailed pieces vibrating to give a smaller scale sense of destruction and collapse, and finally for the big action beats, we’d do proper rigid body destruction and fine detail particulate to really sell the chaos. Separate FX caches of generic bits floating around were added and positioned afterwards to give a nice sense of scale for our wide shots and to make sure once the big destruction moments had finished, we till had some aftermath that the audience could see.
How did you created the digi-doubles for the exterior shots?
So our digital Golovkina was used mainly for the exterior shots. The actress was scanned in the photogrammetry booth so we could get a fairly clean 3D model of here to use as reference for our character build, and a whole host of texture references too. This was then brought back to Dneg where the modelling team in London could work their magic. Once the model was approved and matching the reference photography as best it could, textures were applied in Mari using the given reference and finally pushed through into ldev. The key to the digi-doubles was making sure we had the right references, a great scan and a host of very talented artists working for us.

Can you explain in detail about the beautiful long continuous shot?
This shot was actually done by ILM so I wouldn’t be the best person to answer this. However I do know that our 2D supervisor Mike Bell was heavily involved on this shot while we were shooting. Firstly it involved a lot of planning with the on-set previs team, who helped figure out where the joins would be and which bits of set build would be required and which gaps would need to be bridged. Then while shooting, Mike would have a workstation actually on the set and would be handed a quicktime of the take they just shot so he could do a quick mockup in nuke to make sure the join would work. The shot was essentially a lot of separate set pieces that were topped up with CG set extensions, then retimed/extended/blended together to make the final image – plus a sprinkle of CG props to help sell the zero G feeling.
Can you tell us more about how was created the zero-g effect?
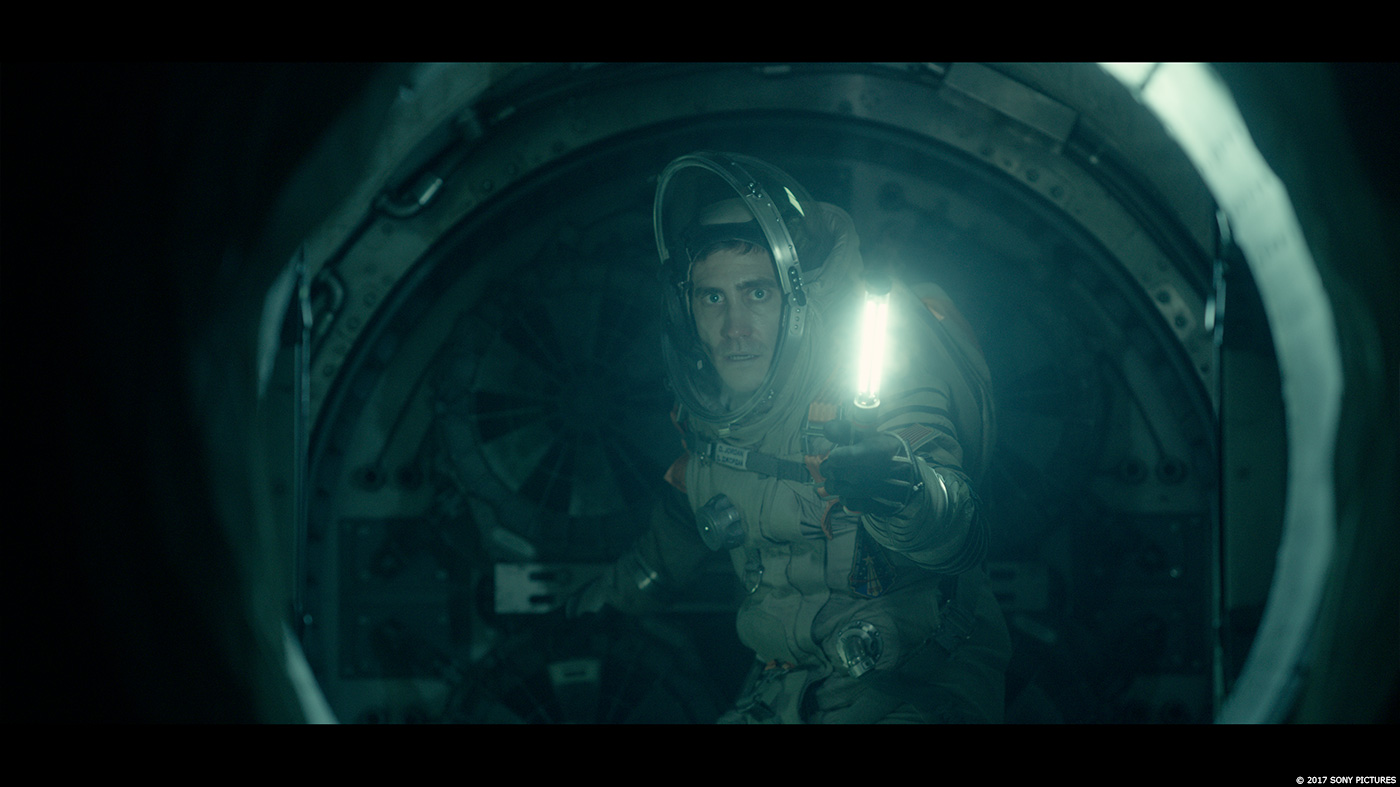
On set there was a lot of wire work done to help achieve this final look. A LOT of wires. A lot of wires that all had to be painted out, sometimes incredibly meticulously as they crossed over other actors faces during the take. So that would be the first step. Daniel was blown away by this very first step. He would be so used to seeing the wires there in his edit as they were cutting, that to see the wires removed, all of a sudden just felt so incredibly real, which was a really nice treat for him. There would also be large section of the set pieces removed to allow for these wire rigs to be hung in so we did a lot of digital set top ups to hide these gaps. In shots where the actors didn’t need to wear wires, they would just give their bodies a bit of float and sway to help keep the zero G feeling alive. We were just incredibly thankful everyone had short hair (or at least tied back) as that would have opened up a whole world of pain otherwise!

Let’s talk about Calvin. How did you work with the art department about it?
So Dneg was brought on in the early stages of production to help out with designing the hero creature of the movie. Our incredible creature supervisor Aharon Bourland worked with concept artists and incredibly talented digital sculptors to come up with the creature. It was a hugely fluid and evolving process as Daniel had some specific ideas about what he wanted and the studio also had ideas about what they wanted which didn’t always match up. Aharon essentially had to find this sweet spot in the middle to make both parties happy which she did an amazing job with.
Can you explain in detail about its creation?
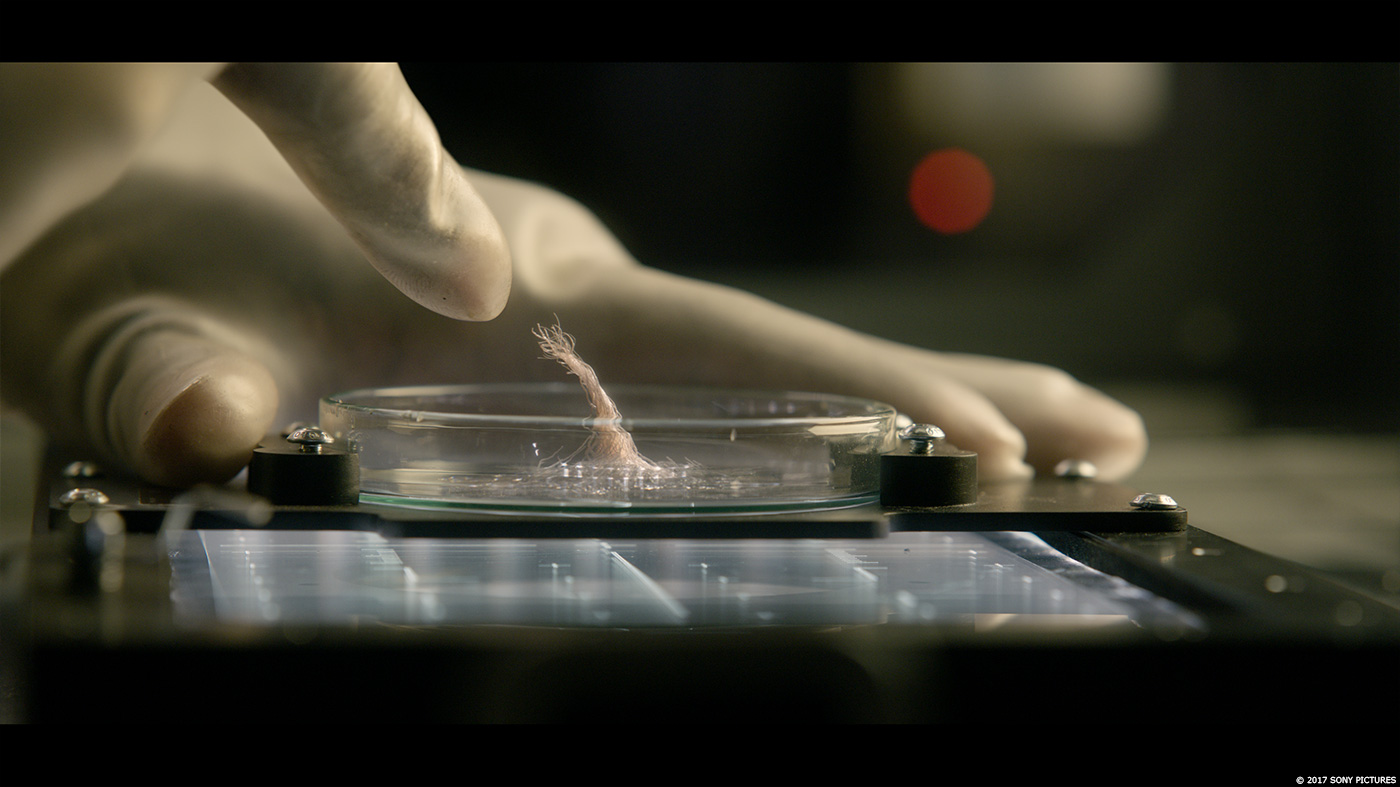
Sure. Calvin was split into 7 key stages, which was essentially 7 different creature designs.
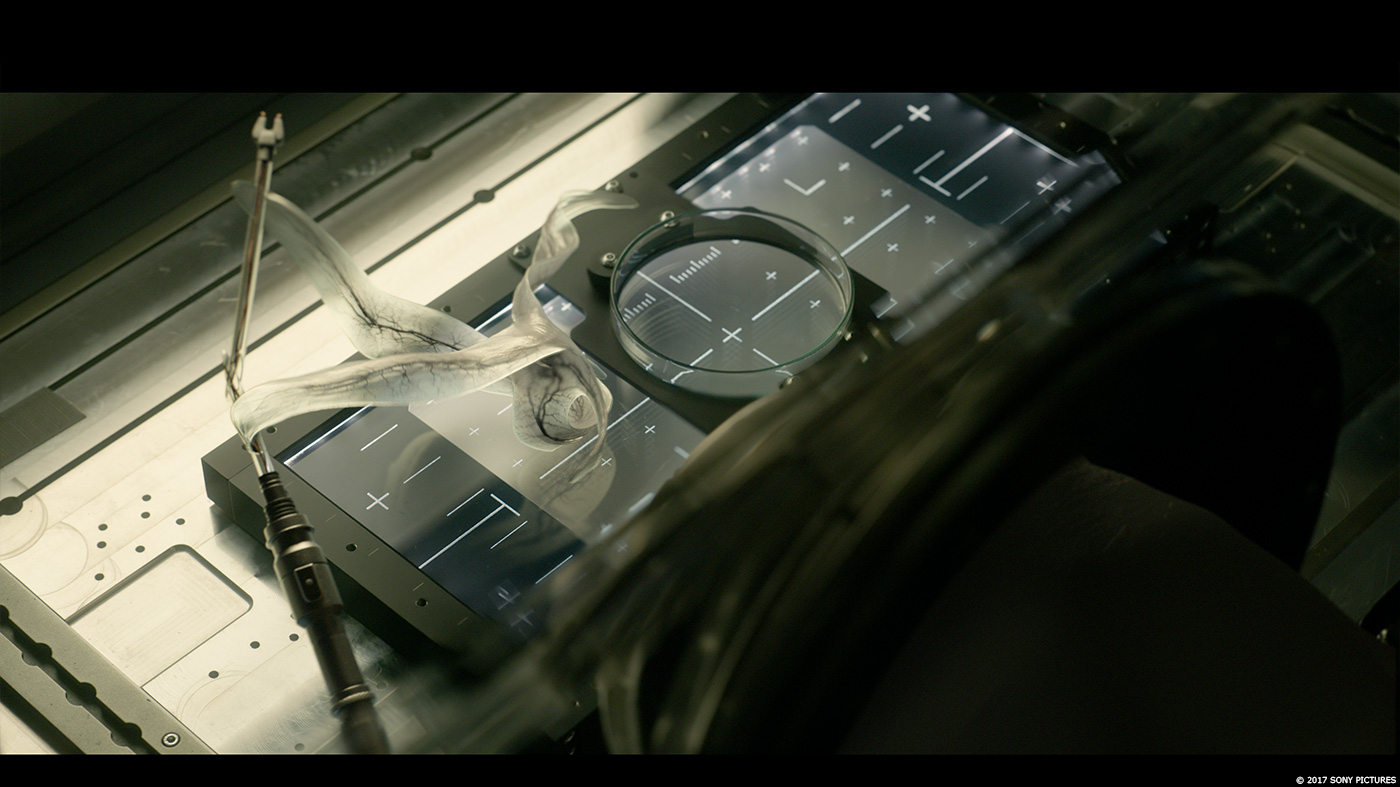
Petri dish Calvin
Finger-following tadpole Calvin
Finger-hugging baby Calvin
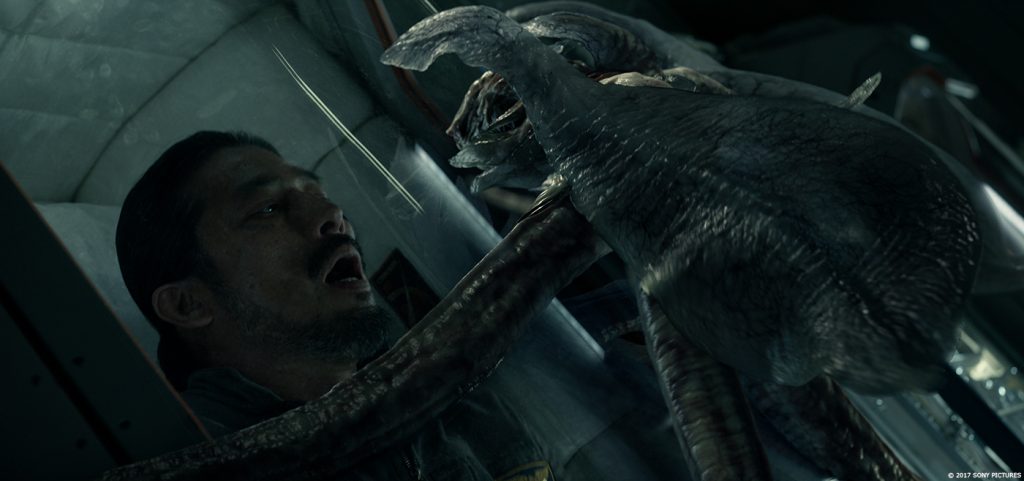
Hand-crushing flower Calvin
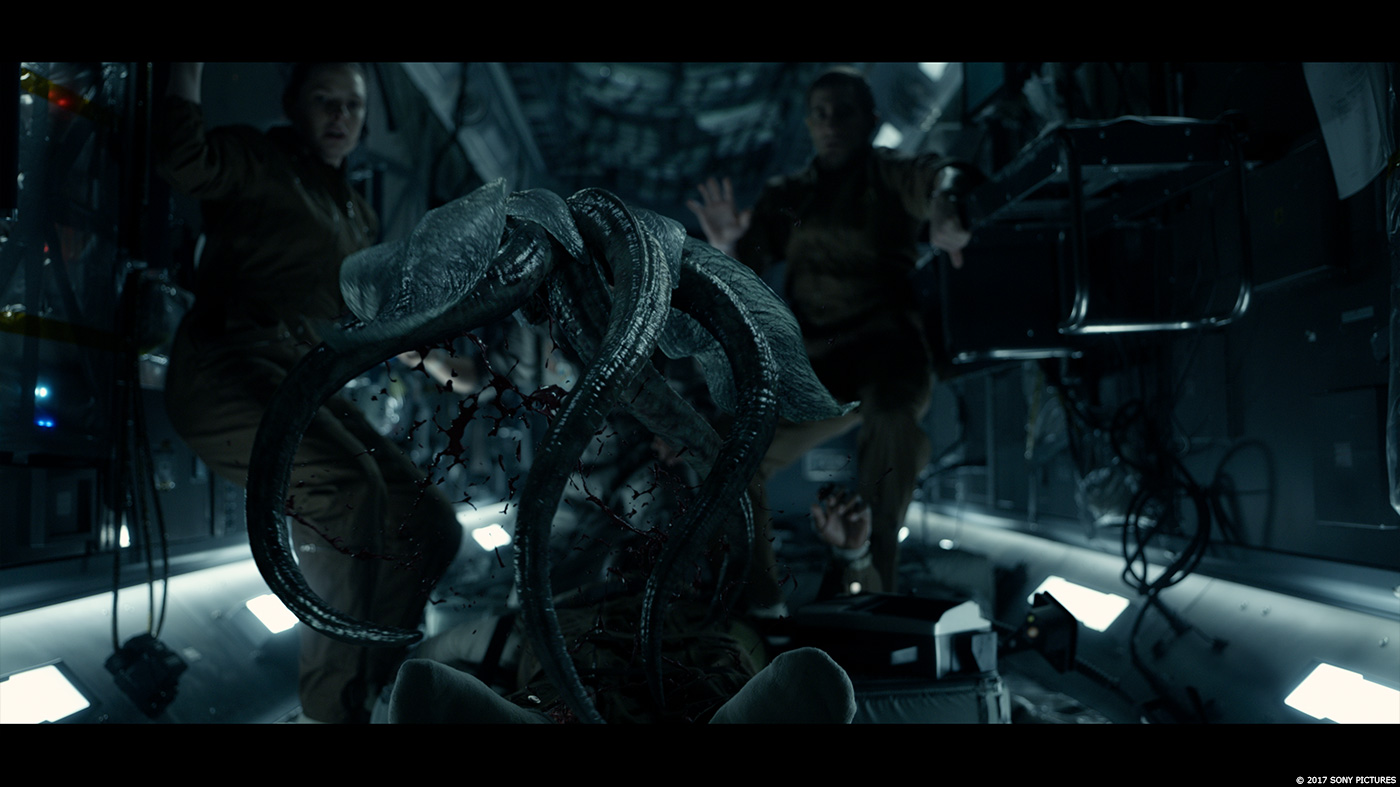
Mouth-erupting larger Calvin
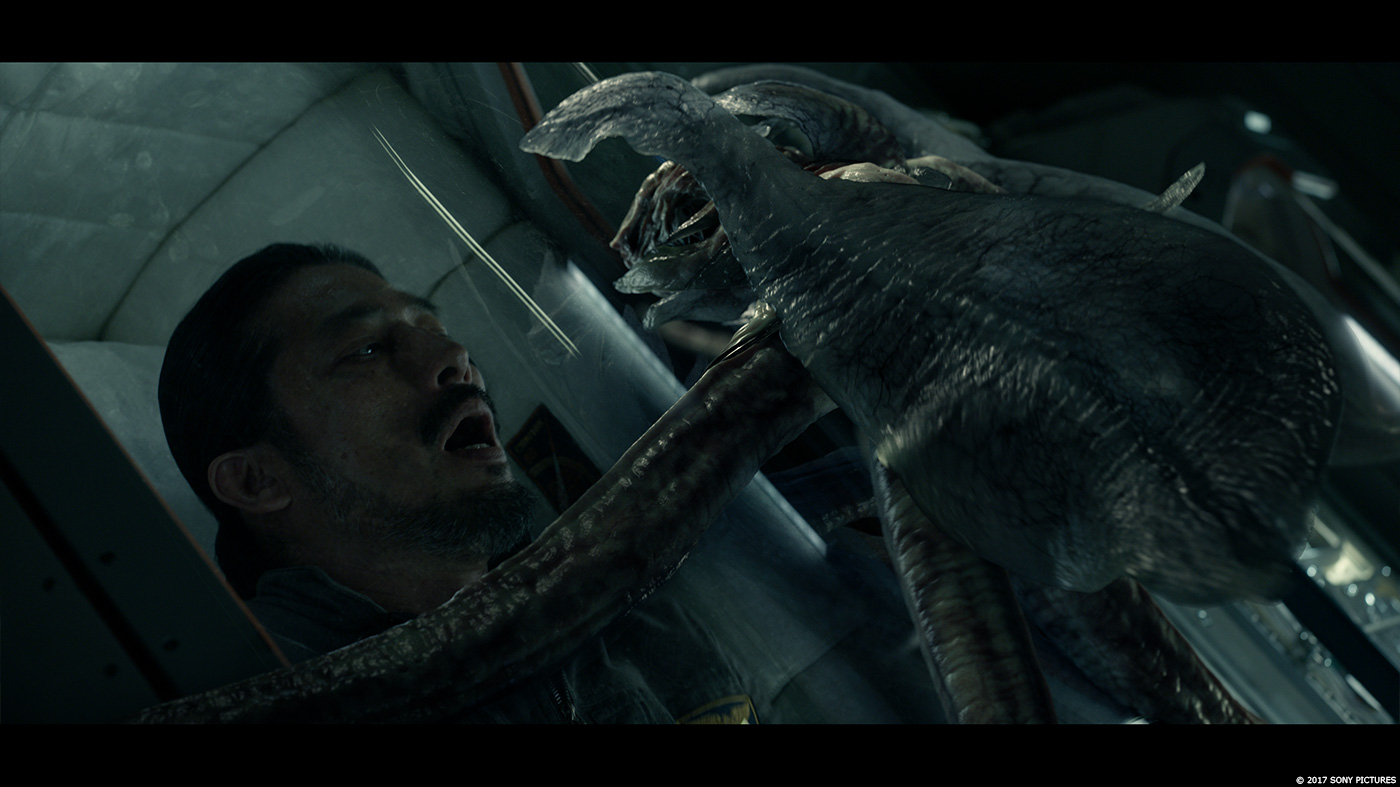
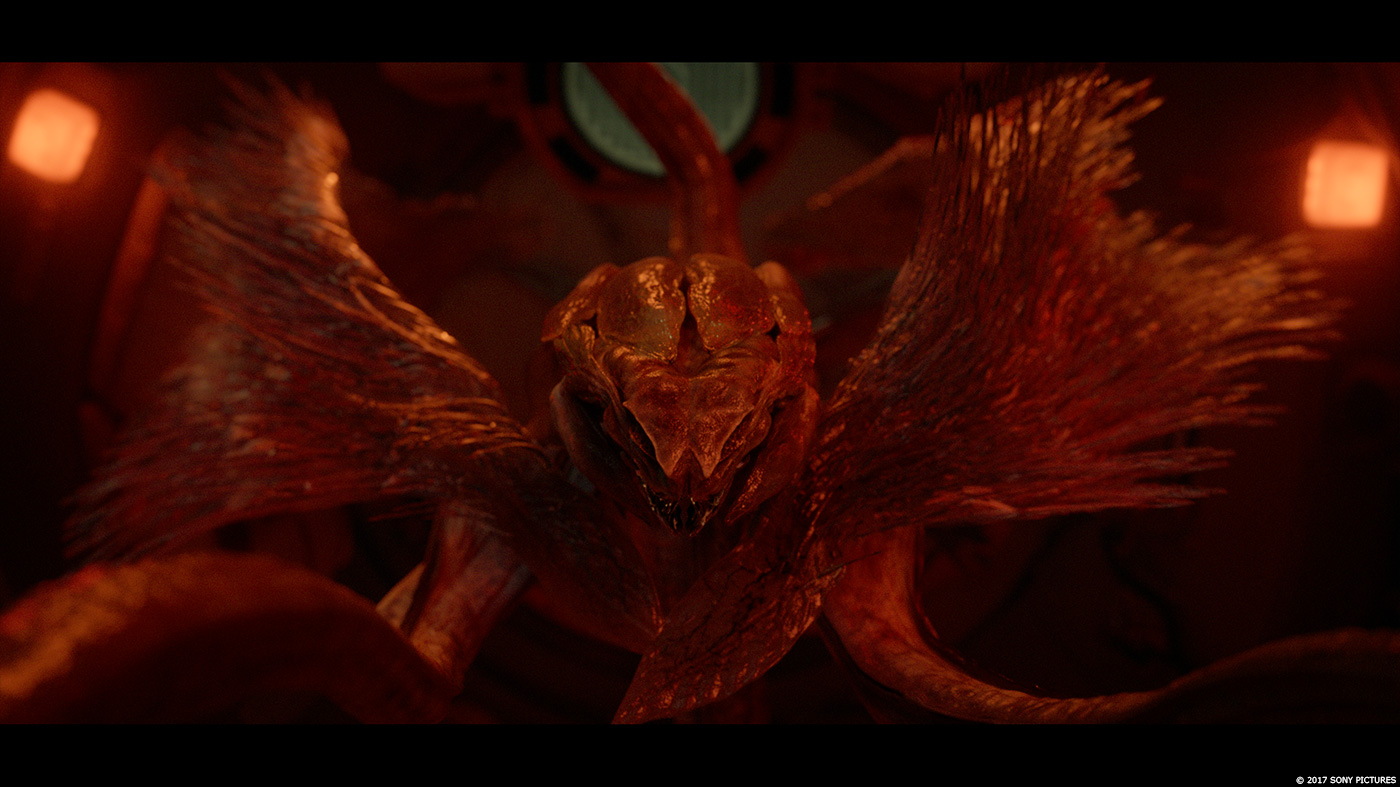
Adult Calvin
Final evolution stage Calvin
Some stages were a lot quicker to work up than others. The earlier stages were a little more agreed on and matched the concept work fairly closely in the end. The trickier stages were the last few, particularly the adult Calvin. It started with some early cloth tests and early concept drawings when Calvin was a lot more ethereal and amorphous. This then started to evolve into something more solid and animal based as there was a worry it wouldn’t appear scary enough for this stage of the movie. Aharon our creature supervisor then took the design back to clay and sculpted some ideas by hand to try to move the design forwards. This would then be built on in zBrush to start sculpting in muscle detail and adapting bits that were working and losing bits that weren’t. She had worked up a whole biology for this creature and tried to base it all on real world references as much as possible so each part of its design had a function. We wanted to avoid what is sometimes referred to as ‘monster soup’ where there is too much going on and nothing gels together or has a reason for its existence. By paring back some of the shapes and ideas to give a cleaner, more menacing silhouette, we ended on a design that felt exciting and new yet familiar enough that hopefully people bought it as something real that could have evolved in this way.

His morphology is really unique especially in his early stages. How does that affects the rigging and the animation?
As mentioned above, by splitting Calvin into these separate stages of evolution, we essentially had a few creatures that had separate rigs and separate animation needs which really helped in not creating one super evolving super complicated rig that merged between them. That would have been a nightmare! That said, our fantastic rigger Mark Ardington did have his work cut out with Calvin. The earlier stages we a little more straightforward, just requiring fairly simple anim controls to give broad movements that then drive FX simluations as Calvin is forming. Then for the later stages, being a multi limbed creature required a smart and fast setup to keep our animators happy, so there was a lot of back and forwards between rigging and anim as this rig was adapted and improved throughout the show.
Did you received specific indications from the director for Calvin’s animation?
Absolutely! Daniel was very active in describing Calvin’s movements and would often act out scenes in the dailies room complete with sound effects which was hugely helpful for the animation team. He would often talk about how Calvin isn’t just a killing machine. It’s a creature trying to communicate who understandably gets pi**ed when provoked and hurt. It was nice to play with this slightly timid and exploratory character that then flips and loses it when pushed. Our animation supervisor Neil Glaseby had a great sense of the character and did a great job in getting this feeling onto screen through the amazing work the animation team did.
Can you tell us more about the lighting challenges due to his translucency aspect?
Oh boy can I ever! The lighting did prove to be a challenge indeed. The colours and tonality of the environment would shift Calvin’s colour around quite significantly, particularly in the earlier more transparent stages of evolution. There was a lot of balancing required to try to keep a consistent look to the creature. With the sets each having a fairly different palette we had to make sure Calvin remained recognisable and not like a bunch of different creatures, so a lot of subtle lighting tweaks and some comp help got us through this! Along with a lot of patience from our lighting artists of course!
How did you manage his presence and interactions on-set?
Being a digital creation, Calvin obviously had very little presence on set. The actors had their eyelines and had an idea of how Calvin would move and how fast or slow the creature travelled, and the director Daniel is very expressive so I’m sure he channeled Calvin pretty effectively to the actors. They also had a couple of latex models built but in the early stages of the design process and these were mainly there for lighting reference.
Calvin is growing and evolving during the movie. How did you manage it?
We treated each stage of Calvin as a different creature effectively so had fairly clear distinctions about which iteration of evolution appeared at which point so it wasn’t too big a deal in that sense.
Which sequence was the most complicated to created and why?
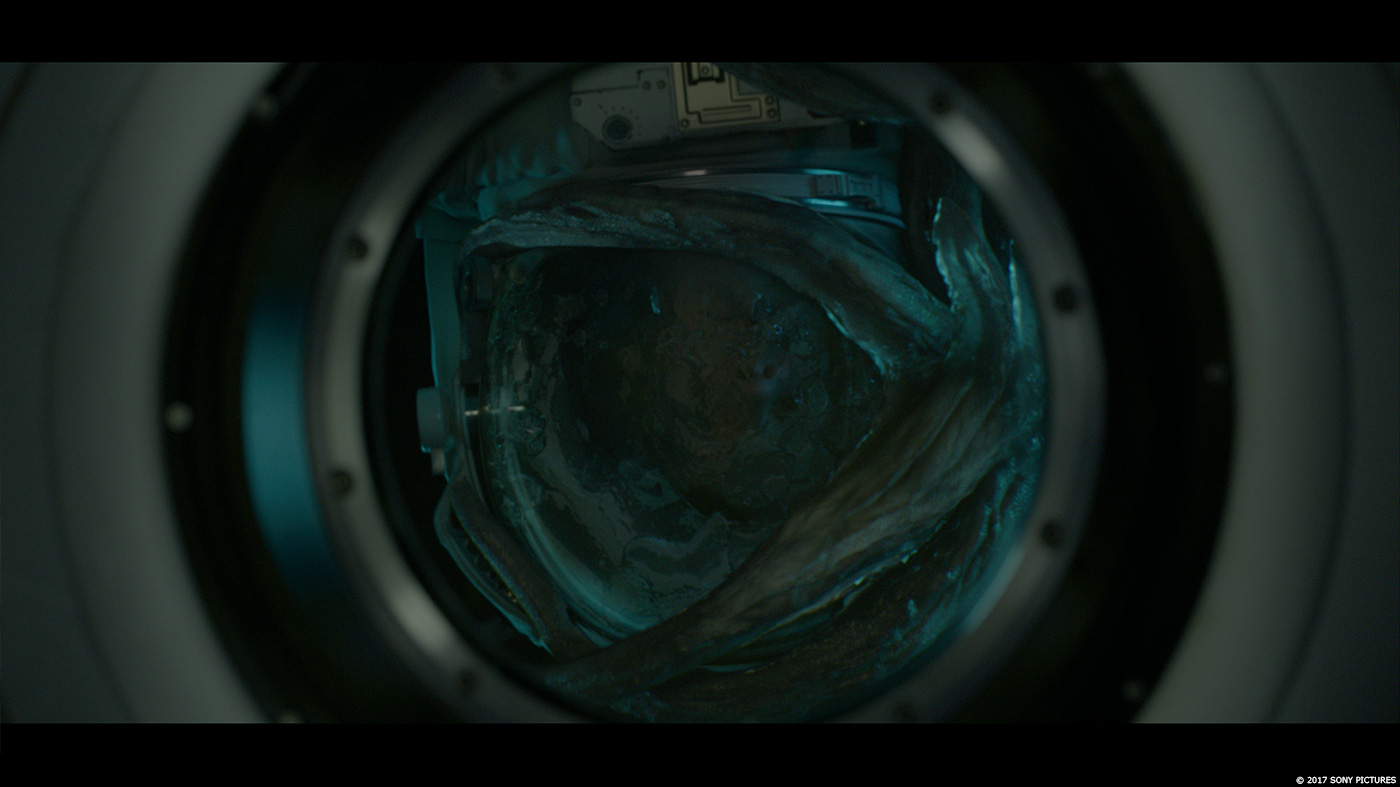
I think each sequence group had its own set of complications to be honest. The Golovkina space walk had the liquid coolant sloshing around inside her helmet which was a big challenge. The interior ISS shots with the majority of Calvin work were tricky due to the transparent nature of the creature and the complications in getting consistent lighting, and the end sequence had all the large scale destruction and the final stages of Calvin evolution, so yes I’d say each sequence equally had complications! We wanted to make sure we were fair to each sequence group so spread the pain!
Was there a shot or a sequence that prevented you from sleep?
Oh when I did actually get to go home and sleep, I slept very well indeed through sheer exhaustion! I think that Pluto’s (the rat’s) death scene was probably a concern for a little while due to it being such a long and such a complicated shot. Luckily Aharon took this on and absolutely smashed it! There was also an absolutely herculean effort by the comp team, particularly Julien Ducenne who was the 2D sequence supe for that section of work. This was one of the shots that went right down to the wire and I’m just so thankful for the dedication of our crew. We were very lucky!
What was the main challenge on this show and how did you achieve it?
The main challenge was definitely the time scale (or lack of), mixed with the complexity of the work. We made it to the end by having an amazing dedicated and talented crew, a LOT of late nights, and an incredible production team who worked tirelessly to make sure everyone had everything the needed to get the work done and were so on it, right through to the end. Thank you all!
What is your best memory on this show?
Getting to chat with the cast while doing the digi-double scanning. Such a pleasure to meet everyone and they were so nice and so easy to talk to. I love Ryan Reynolds. I just do. Big man crush.
How long have you worked on this show?
I came on board in June 2016.
What’s the VFX shots count?
Excluding omitted shots, we finalled 599 VFX shots in the end.
What was the size of your team?
Over the course of the show we had about 600 crew members (not including the various supporting departments).
What are the four movies that gave you the passion for cinema?
JURASSIC PARK was definitely one, as I’m sure it is a lot of peoples. I could watch that film any time and still love it as much as when I first saw it. It just never gets old. Still blows my mind. Also LABYRINTH had a big effect on me. It’s so incredibly creative and I remember the first time I watched that at home and just having that feeling of being transported to another world – it was so addictive! Also STAR WARS… obviously! Filled my childish mind with action and adventure. Finally, a collective multiple answer in Disney classics – I’m a huge huge Disney fan and find such joy in watching films like SNOW WHITE, CINDERELLA, BEAUTY AND THE BEAST, ALADDIN etc. It’s so lovely that I can share that joy with my children now – thankfully my wife is also a massive fan so there’s always time for Disney in our household!
A big thanks for your time.
// WANT TO KNOW MORE?
Double Negative: Dedicated page about LIFE on Double Negative website.
© Vincent Frei – The Art of VFX – 2017