
Guy Williams started in visual effects in 1993 and worked on films such as DROP ZONE MARS ATTACKS! or WING COMMANDER. In 1999, he joined Weta Digital and work on the LORD OF THE RINGS trilogy, I ROBOT or KING KONG. As a VFX supervisor, he took care of AVATAR, THE A-TEAM or X-MEN FIRST CLASS.
What is your background?
I started in visual effects in 1993 at Boss Film in LA. Since then I have worked primarily in the film industry at a variety of companies before landing at Weta Digital in 1999. I was lucky enough to be here before THE FELLOWSHIP OF THE RING, so I got to see Weta Digital grow from its original roots to the company it is now.
How was the collaboration with director Joss Whedon?
He is a joy to work with. I have been a fan of his since the FIREFLY series (I never watched BUFFY). I really enjoyed his ability to breathe individual personalities into his characters. Getting to meet him and work with him was a treat. His great sense of humor isn’t just reserved for his writing, it’s always there. He is a hoot to be around.

Can you tell us more about your collaboration with Production VFX Supervisor Janek Sirrs?
Getting a chance to work with Janek on this was brilliant. He has a great sense of epic scope and knows how to push something to a grand level without going too far and making it camp. He was very easy to work with and always eager to hear new ideas that might help make the scene even better. Tack on his dark sense of humor and you can imagine that between him and Joss, our client calls were always a riot.
What was your approach for this show?
We knew the post for this show was relatively short so we focused on planning and preparation. We tried to front load as much of the planning and setup as possible to give ourselves an easier time once we started working on shot production. Plans change though, so we also used bribes and extortion internally to assemble a talented team of artists. This part is key (not talking about the bribes). Talented, enthusiastic people do great work.
Can you tell us what Weta have done on the show?
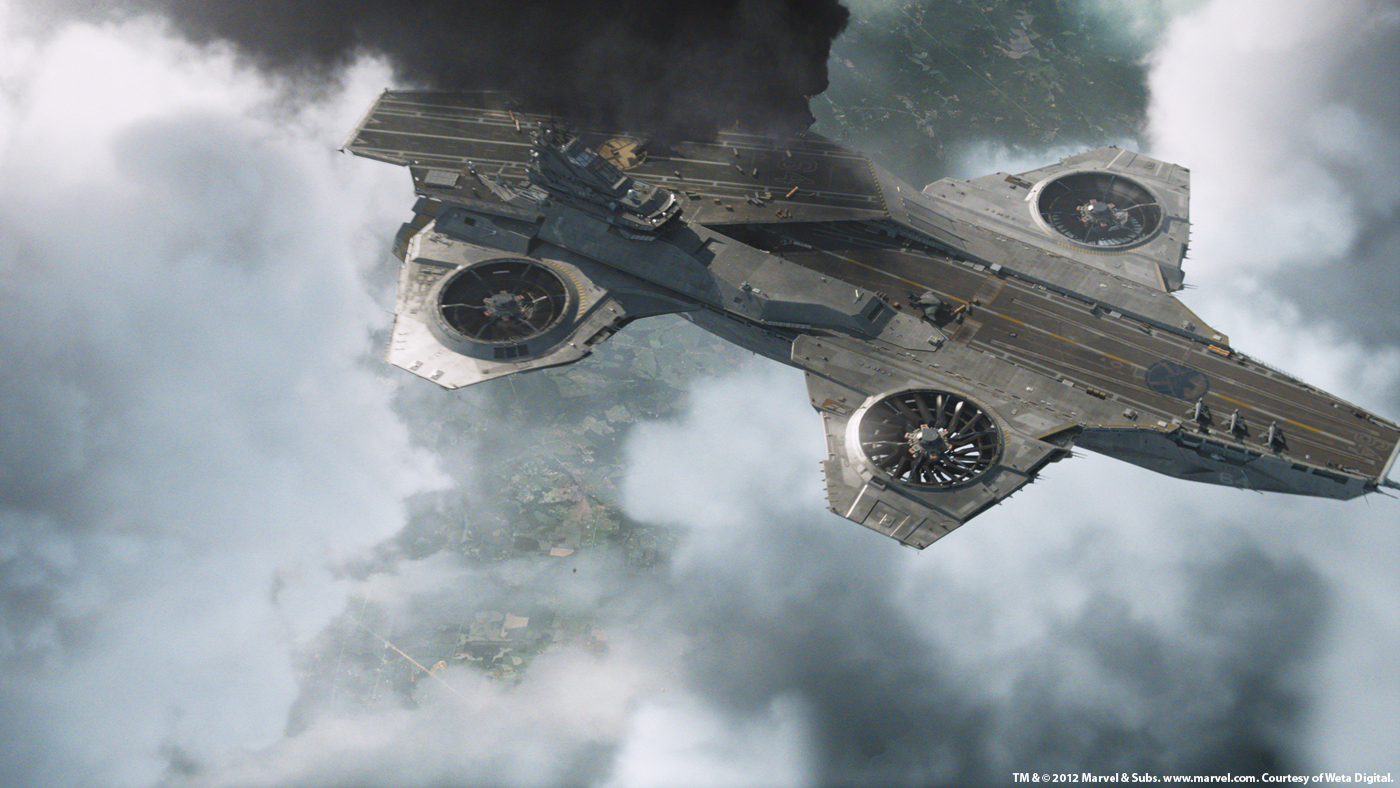
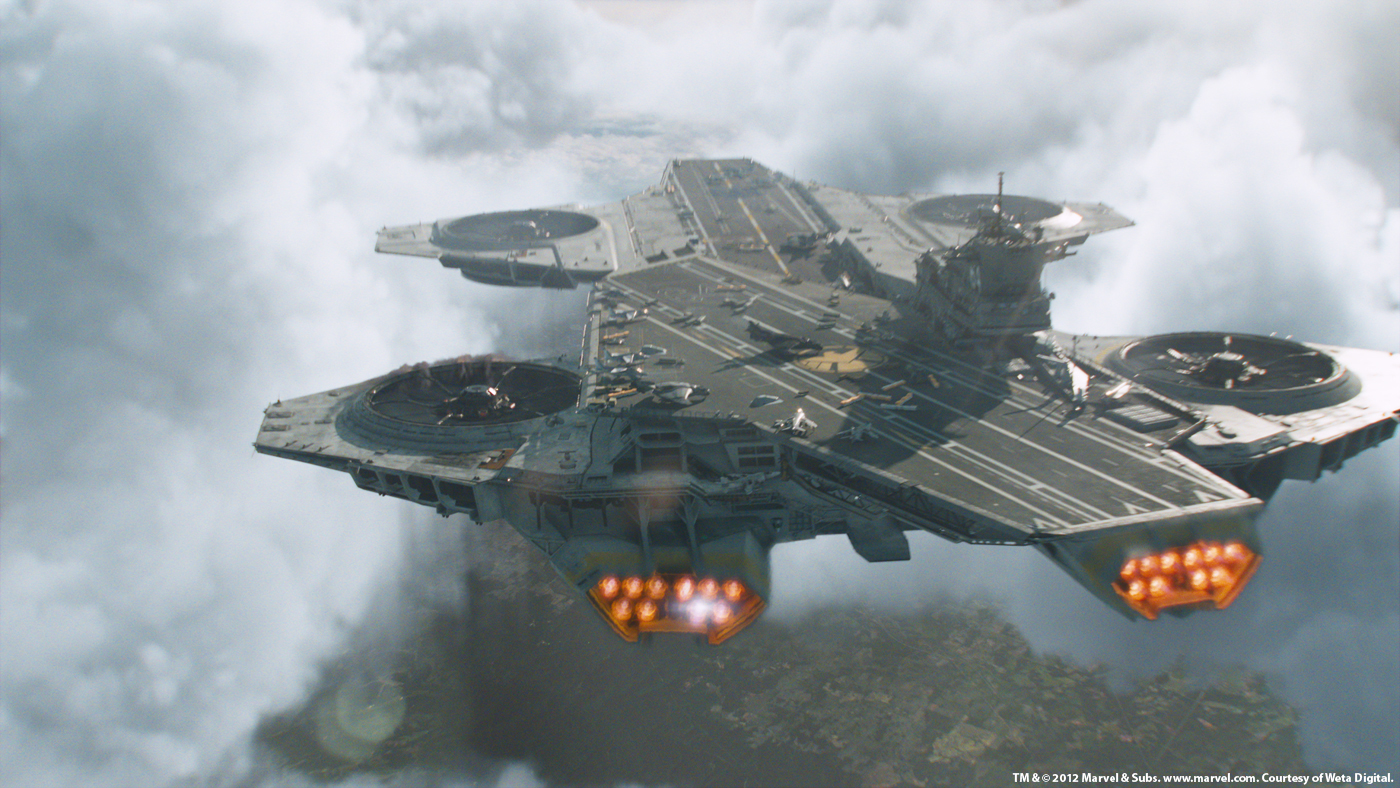
Weta worked on the part of the film starting where Loki exits the museum and fights Captain America to the point where Thor levels half of the forest by hitting Captain America’s shield. We also worked on the Helicarrier exteriors when Hawkeye flies up and shoots the arrow into Engine 3 through to Iron Man working on the damaged engine and getting it spinning again.
Can you tell us more about the Museum Square battle?
We did a variety of effects for the Museum Battle. They range from scepter shooting plasma effects to Loki illusions and finish with a digital Quinjet and Iron Man.
For much of the fight between Captain America and Loki, the onset team used stunt staves for safety. We tracked all of the stunt staves and replaced them with hero 3d staves. We also added all of the glows to the gem in the scepter. Cap’s shield was also digital for much of the fight.
Early on, as Loki is emerging from the museum, he transforms from his business suit to his Regal Armor. For these shots, we tracked Loki in 3D and added the armor back onto him digitally and used that for the transformation. We used the same setup for when he changes from his regal armor to his more sedate walk about armor at the end of the scene. For his other illusion effects, we used comp tricks and clean plates to make him seem partially ethereal.
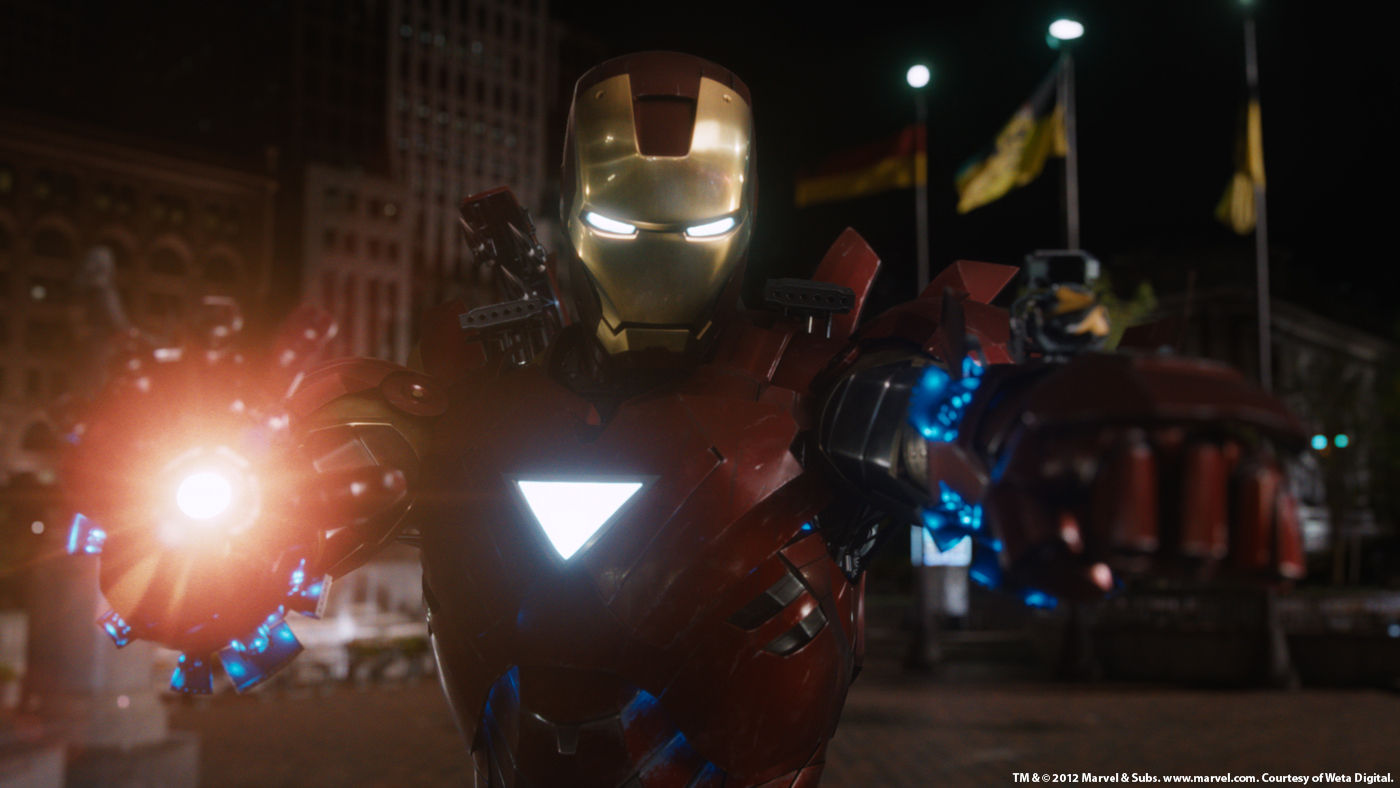
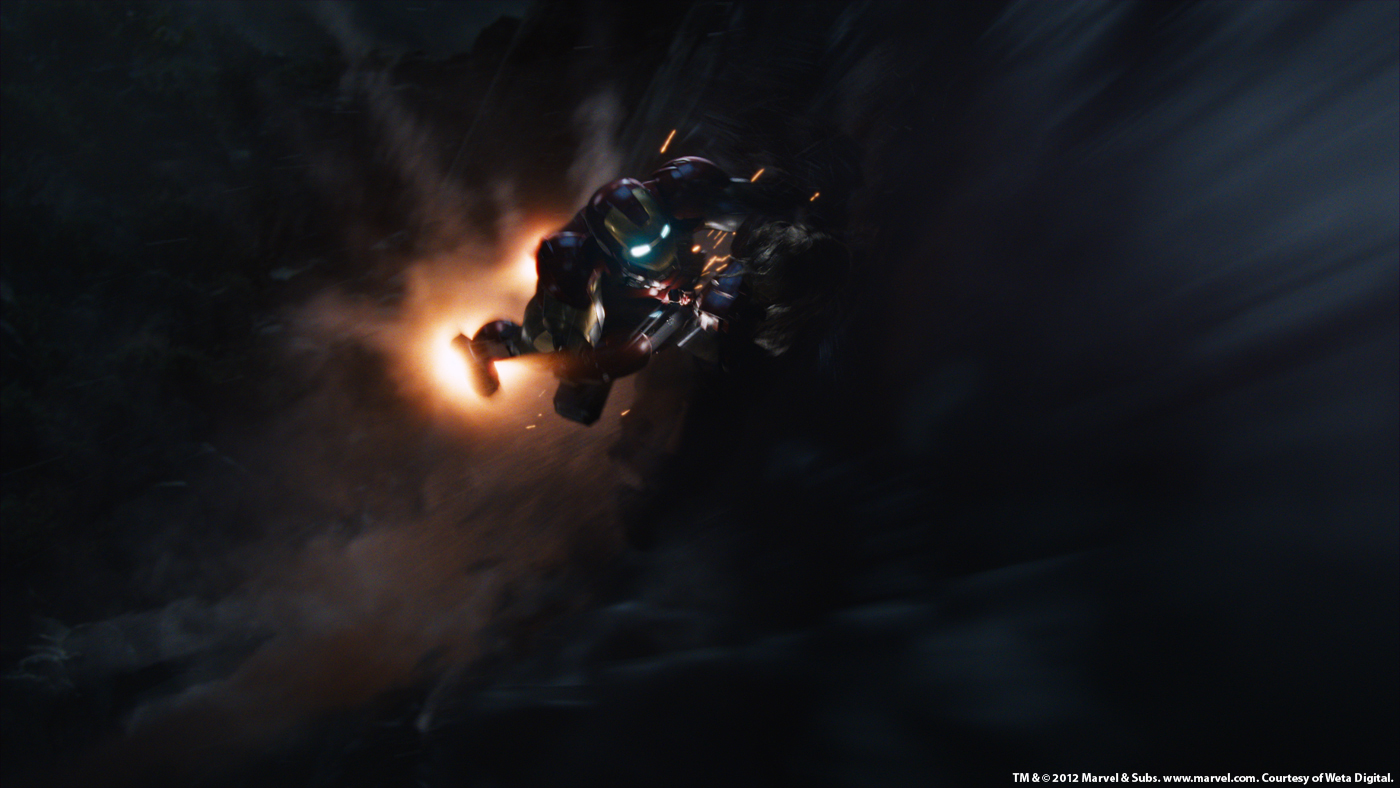
Towards the end of the fight, Cap is getting dealt a losing hand. It’s at this point that Iron Man arrives to put the balance back in favor of the good guys. He flies in and delivers a flying RT shot that throws Loki back 20 feet before landing in a very classic Iron Man pose. He then opens up all of the weapons on his suit to challenge Loki to continue. Iron Man was fully digital in all of these shots. We used the excellent suit made by the Legacy guys for lighting reference and went from there. We had to design some new weapons for Iron Man so that he could be imposing enough. For the landing shot, we did fluid dust for the impact with the ground and a rigid sim for the bricks shattering under his weight.
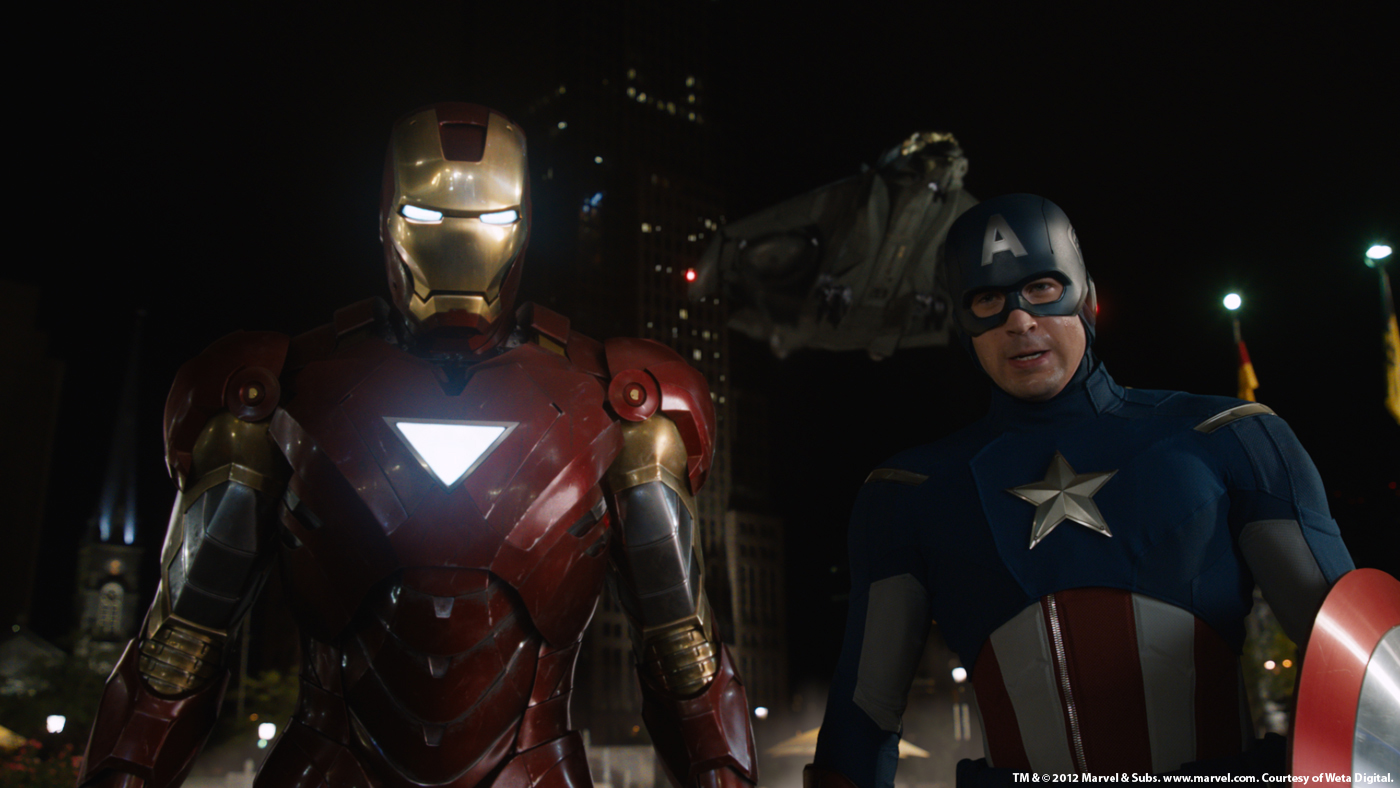
How did you create the digi-doubles for Iron Man, Thor and Captain America?
These models came to us from ILM. We fit our Genman asset to these models allowing us to leverage all of the generic man development done to date. This gave us a complex skin and muscle solve. We also used our hair tools to add grooms (these don’t transfer between companies due to their proprietary nature). Lastly, we modified some of the cloth elements to better work with our sim software.
The textures are migrated to the new models using a raytrace from one texture space to the other. New textures are painted to add detail where needed.
How was the collaboration with Jeff White and ILM teams?
We have had the pleasure of working with ILM in the past so the process of passing assets back and forth was somewhat defined. It is always made easier when the team on the other side of the line is as skilled and helpful as Jeff’s team was. I’ve got nothing but positive things to say about this part of the show (laughs).
Can you tell us more about the creation of Iron Man?
Weta Digital worked on the Iron Man Mk6 suit for the movie. This is the same suit that was in the end of IRON MAN 2. We received the model and textures from ILM and migrated them into our system as discussed earlier. We then set about figuring out the shading and lighting. For shading, we wrote a shader that simulates metal flakes suspended in colored enamel. To top the look off, we added a clear coat finish to the surface to get that car-like shine. The clear coat constantly fought the red under coat causing the red to want to go purple (blue lights or sky reflected into the clear top coat). This took some careful balancing but in the end the asset was stable and could easily be lit into shots.
For our lighting pipeline, we used our Spherical Harmonics lighting system with HDR image based lights acquired on set for each set up. We wrote a tool that allowed us to pull image areas out of the IBL and put them onto area lights so we could get the proper reflections in the proper places but get much nicer shadows and a sense of positional lighting. We also raytraced everything (shadows and reflections) to get the suit to really sit into the scene.
For rigging, we worked hard to build a rig that had enough freedom to allow the animators to move the character as they needed to but due to the complexity of the interlocking plates we ended up needing to augment this with a post bake step on some of the shots to clean up panel intersections or silhouette issues. For his eye and chest lights, we rendered an extra pass for every shot of volumetric light beams to give to comp. In some of the smokier shots, it is easier to see this pass dressed in giving a sense of his eyes lighting the smoky air around him.
Can you tell us more about the huge storm around the Quinjet?
The large storm around the Quinjet as Thor arrives to take Loki away was done using our in-house cloud system. The tool is written into Maya and Renderman as a plug-in. The artist is able to see the volumetric clouds as he builds them in Maya. Then the plug-in can take that data and render it in Renderman using its own shaders for the volume rendering.
To make the lightning, we used a tool that makes lightning bolts that fork from a predefined point. The lightning tool outputs extra info (temperature, position, etc) so extra visual effects can be added in the comp. The lightning can also be used to light the clouds. As the lightning passes into the cloud, its light fluoresces the cloud from the inside out. A second much thinner set of clouds was also created closer to the Quinjet so that as the jet moves through space, there is strong sense of high-speed travel.
What was the real size of the forest?
The forest was a location about a half an hour outside of Albuquerque. We shot in a small ravine on top of a rise. Some of the shots in the mountain top fight between Iron Man and Thor were completely digital. For these, we used reference photos taken during the shoot to build complex digimattes to replace the forest. These digimattes were extensive enough to allow us to translate the camera in a shot. If a tree was too close to camera in a digimatte shot, we replaced it with a full 3D tree. This same approach was used for the wides of the forest when Iron Man and Thor fly up and fight on the cliff face (though the face of the cliff was full 3D).
During the fight many elements especially trees are destroyed. Can you tell us more about that?
The amount of FX work in the forest fight was staggering at times. Often, the camera move or the action of the character would necessitate a full simulation instead of a plate-based effect. The FX Department used Maya’s particles for creating some of the dirt impacts or bark hits. These particles would get instanced at render time with geo for added complexity. Some of the larger or more hero interactions needed a rigid solver. For these we used our own implementation of the Bullet rigid body solver in Maya. For the large tree sims, we used our own solver to deal with the shattering and fracturing of the trees. The branch dynamics were solved using our own hierarchical curve simulation tool in Maya. These curves were replaced with the high rez trees at render time. Fluid sims were used for the dust from the tree falling and also for the resulting cloud of dust as the trees hit the ground.
In creating effects like these, it is important to build up many layers of different materials/effects. It is this layered complexity that makes these effects look real and natural.
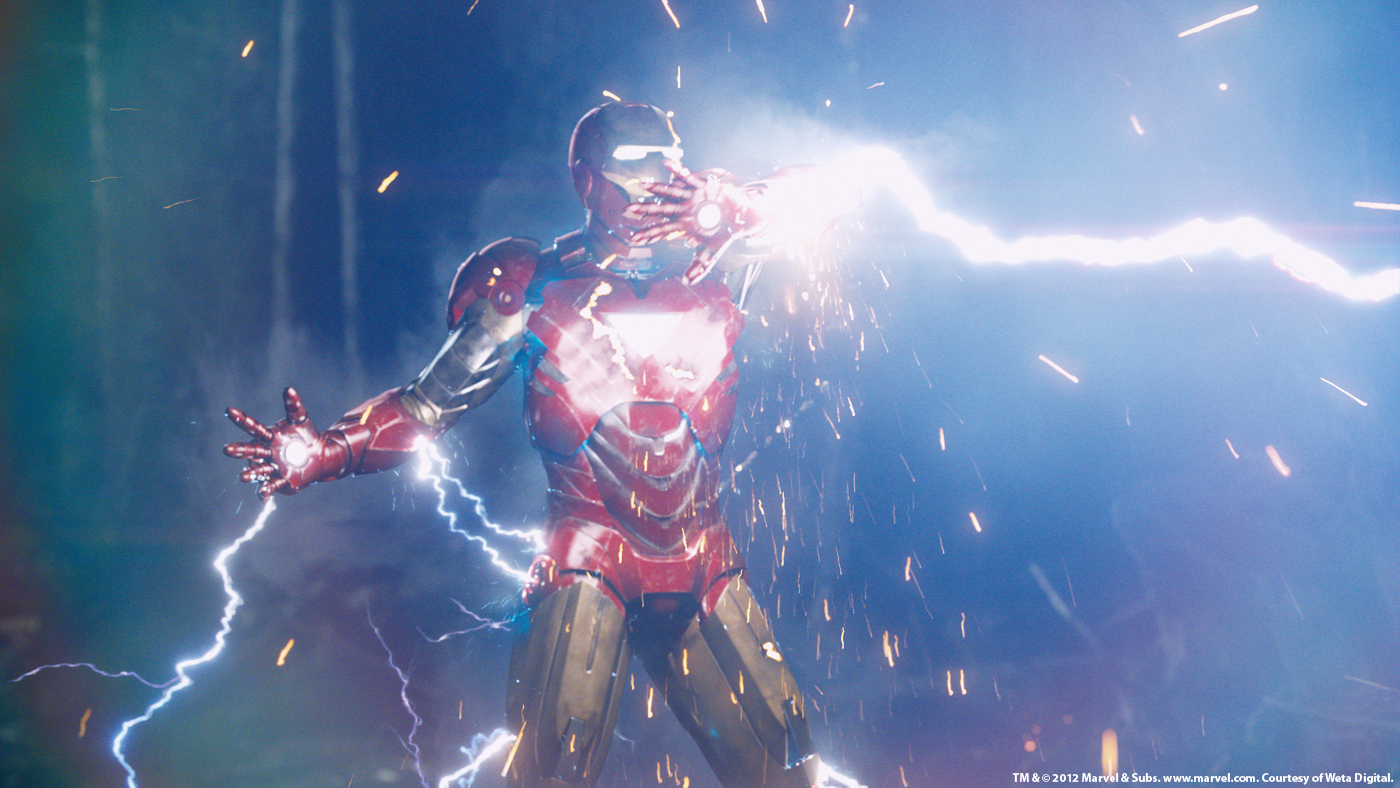
How did you create the various FX such as the lightning?
For the lightning, we used a tool we had from a previous show as listed above. For the mountaintop battle, we took it a step further and gave it the ability to not only start from a point but to also go to a specific point in space. We then created a series of points on Iron Man that covered the area that Iron Man would end up being damaged on. By choreographing which points the bolt would go to, we were able to get the bolt to travel from Thor’s hammer to Iron Man and hit where we wanted it to. We then ran the process a few more times to get the extra arcs from Iron Man to the ground and also from the Bolt itself to the ground. We then could take the points that the bolt was hitting on and use that to drive a particle system for sparks and a fluid system for a jet of gas being launched off the contact point. The bolt was used as an indirect light so that it could light the volumetrics that were coming off of Iron Man.
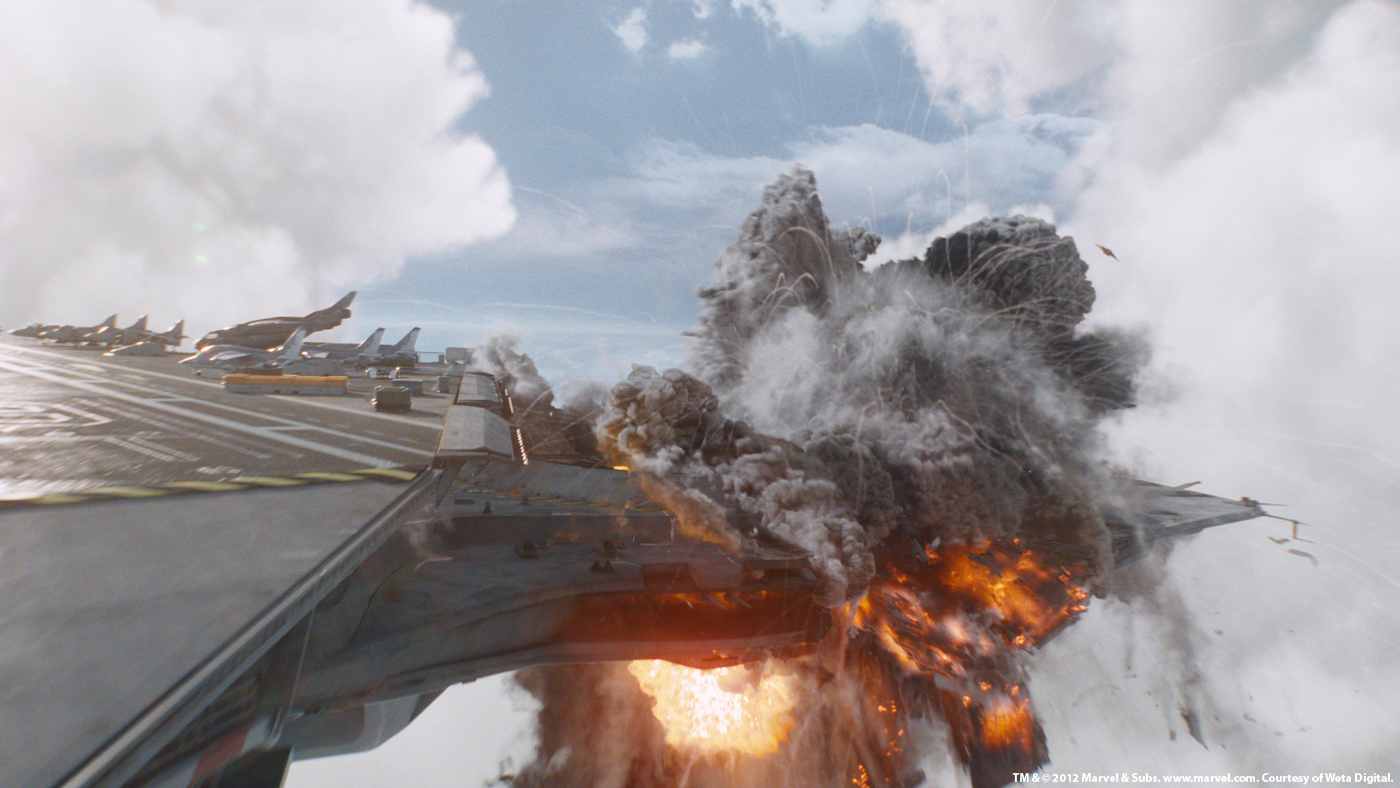
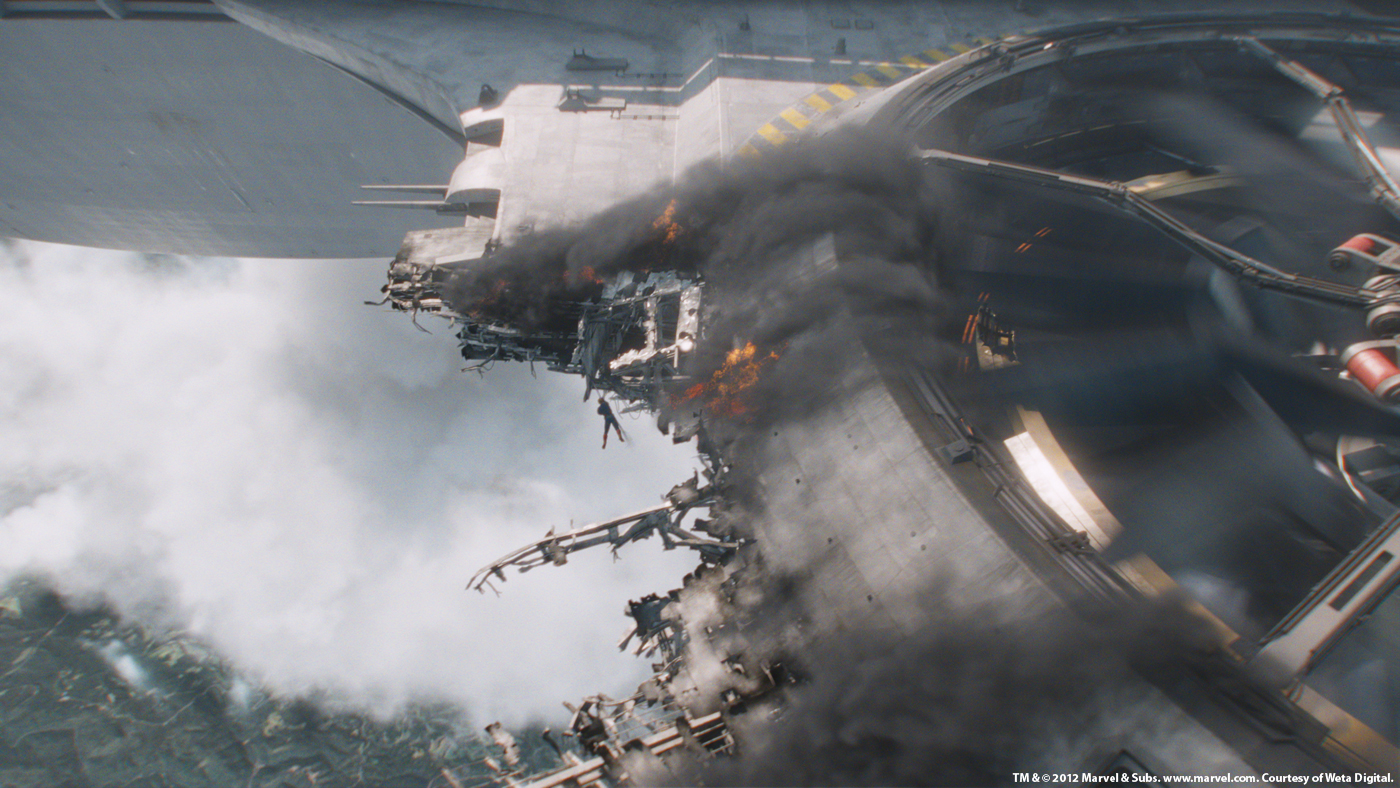
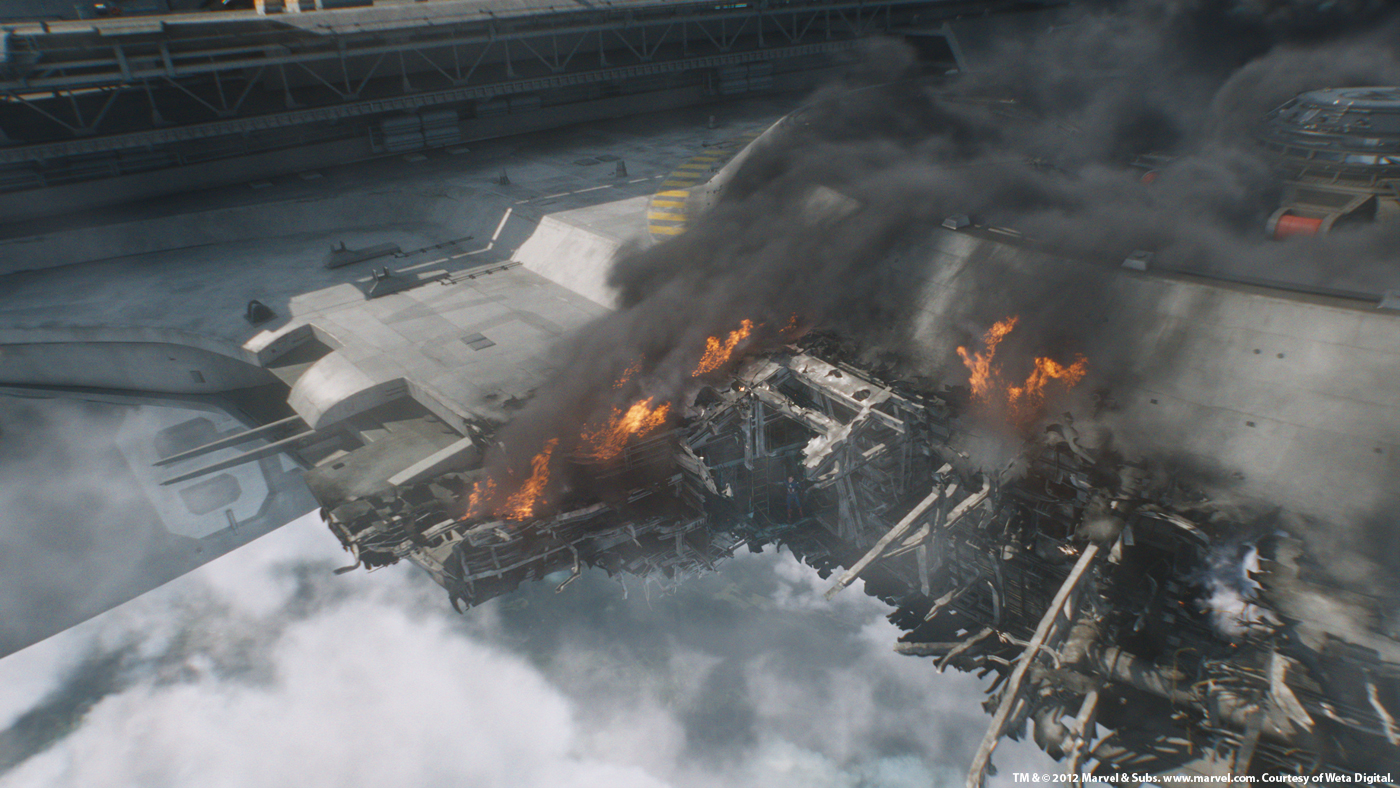
There are many explosions and destructions on the Helicarrier attack. How did you create these?
We were lucky to have a very talented effects team to work on the large explosions and subsequent fire and smoke on the Helicarrier. The large explosion sims were done using Maya fluids and rendered in Renderman using our inhouse volume shaders. A rigid body sim was done for the flying debris from the explosion and then these pieces were used to drive another smoke sim for the trailing smoke and fire on the flying pieces. We modeled a large section of the engine blown away and used the explosion to hide the transition between the two models. We also added in some very large sections that fell away and simulated smoke and fire on those pieces as well.
Can you tell us more about the clouds and environment creation around the Helicarrier?
We used the same cloud system we used for the night time storm. One thing to note is that we used anisotropic scattering of light into the clouds. Anisotropic scattering is when light wants to travel in the direction it entered the clouds and not scatter to the sides as fast. This gives clouds a silver lining when seen from behind or, more importantly for us, gives them more detail when front lit.
We also extended our cloud tools for this show with some scripts that allowed us to add detail fast to large clouds so that we could create a sky full of good-looking clouds fast.
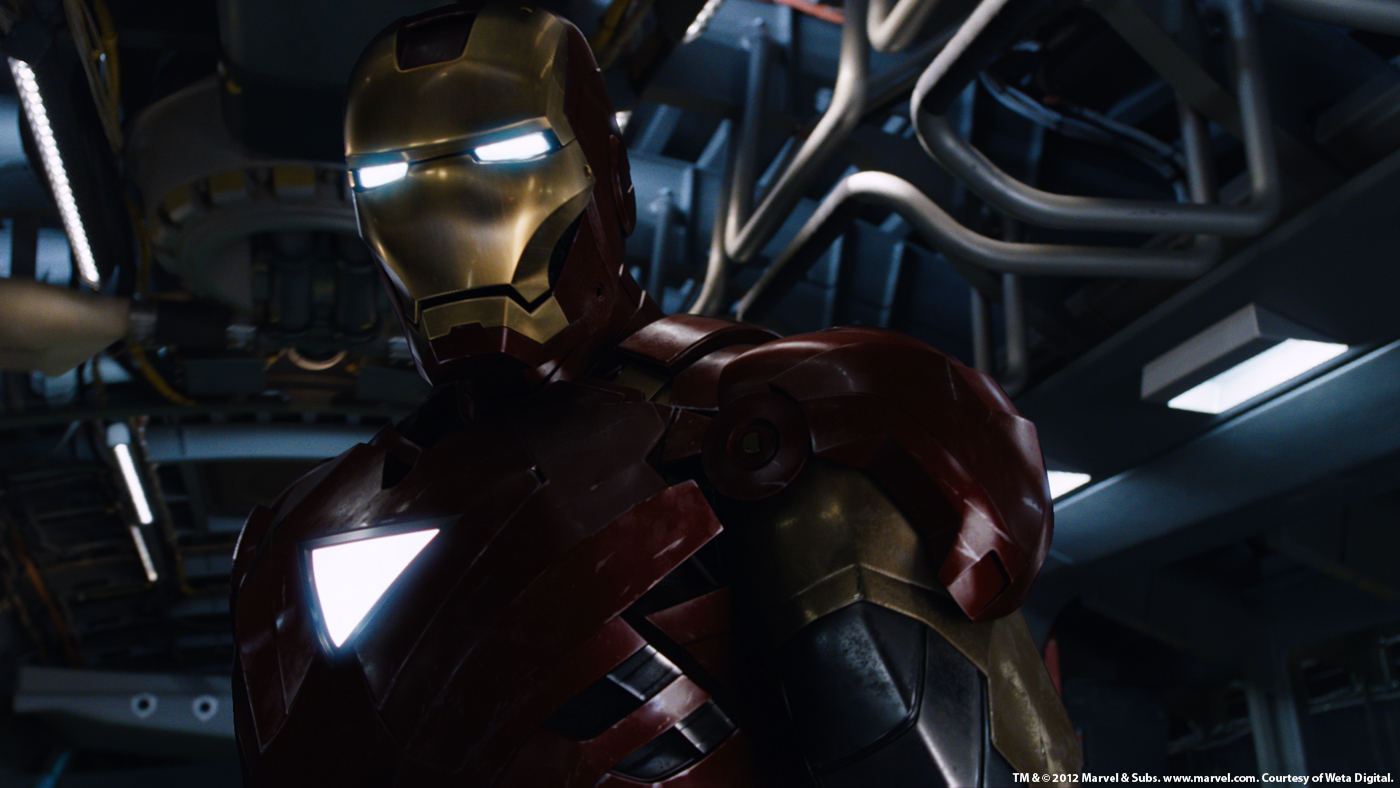
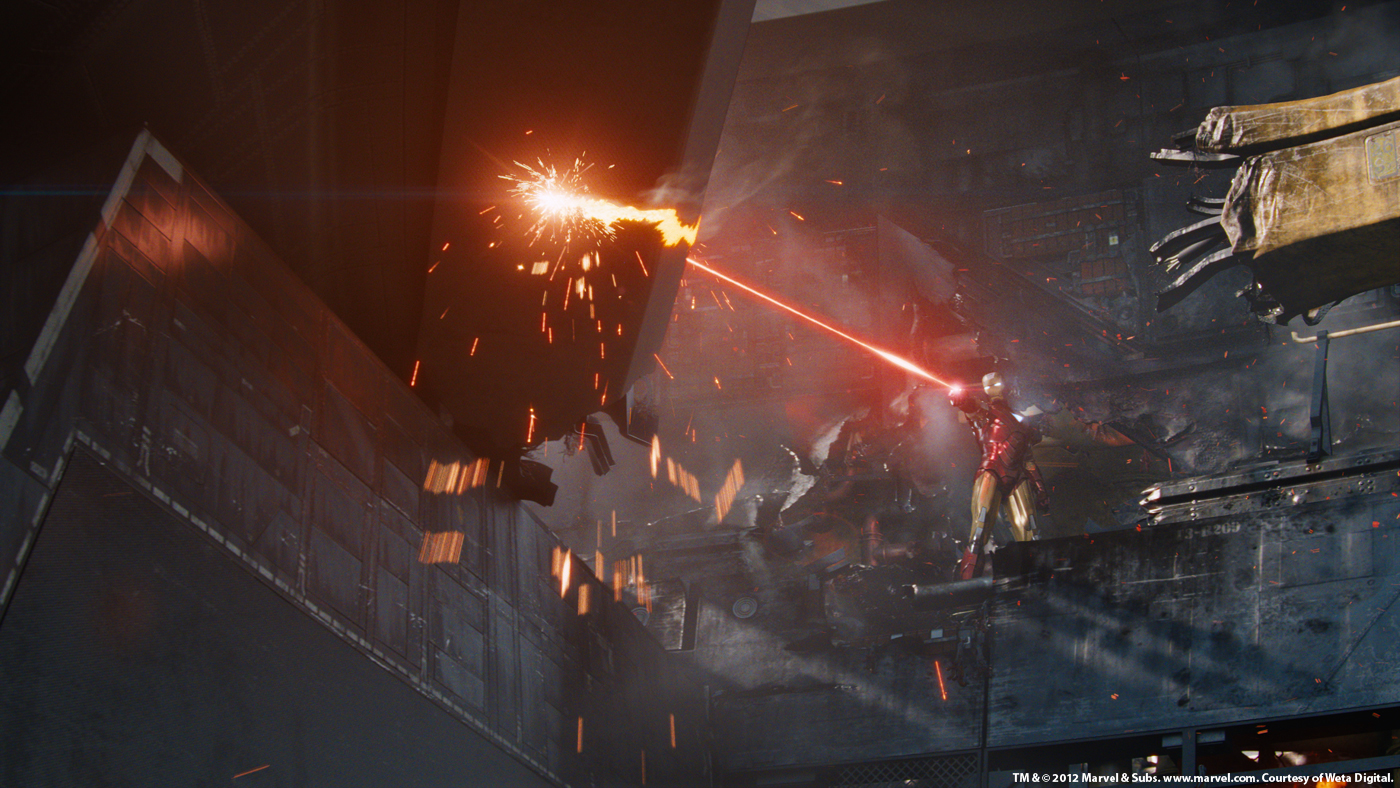
At a moment, Iron Man is trying to save the Helicarrier engine. How did you manage those full CG shots?
We started the scene of Iron Man entering the inside of Engine 3 to fix the damage to the blade system by launching straight into the animation of the scene basing it on the previz that had been done. We also started a build for the engine as it would require more detail then was needed for the wide shots.
For the build, we referenced images of warships and large turbines to get an idea of the things we wanted in the engine. We added in the banks of electromagnets that are mentioned in the dialogue so that we could have more visual detail on the walls of the engine. We used the explosion damage to reveal large banks of these copper magnets. The blades were designed to look like a large wall more then a propeller, this was key to getting the sense of scale.
Once the assets were in place and the animation was ready, we started on getting the lighting to work for us. We tried to keep the light always working in our favor but with camera moves of 270degrees or more, this became tricky. We used the overhead blades and the smoke to create areas of shadow to hide the fact that the sun should be front lighting the shots at certain times. For all of the shots inside of the engine, we also added smoke and embers swirling around to heighten the sense of destruction.
Have you adapted your pipeline for this show?
I would say we extended our pipeline more then we adapted it. We wrote some new tools to enhance the capabilities of existing tools and allow us to do new things (build clouds faster, have lightning be more controlled or even make an IBL a more positional light). We also pushed all of the tools to the bounds of what the machines could handle. The fluid sims were some of the largest we have done. Also, the destruction in the forest had to be split into layers as it was getting so large, it was reaching the limits of what could be rendered.
What was the biggest challenge on this project and how did you achieve it?
The biggest challenge was the destruction of the Helicarrier Engine 3. This was a very large set of shots for the effects team and it came to us a bit later in the schedule so we had less time to complete it. I feel our guys pulled another miracle out of the hat and not only finished it but did so with élan.

Was there a shot or a sequence that prevented you from sleep?
Not really. There was some work that was tight in the schedule but the production was very clear in what they wanted so we were able to keep focused and get the work done to a good quality level.
What do you keep from this experience?
Many things. I have many fond memories of our calls with the client. This was a very enjoyable show to be on (lots of humor and a very creative environment). I also have to say that I am the target audience for this film, so in that regard it was a blast getting to work on it. I got to unleash the inner geek and let him roam the fields free.
How long have you worked on this film?
From the moment that we started planning the shoot to when we delivered the last shot for the film, just under a year.
How many shots have you done?
We worked on a little under 400 shots.
What was the size of your team?
We had no problem finding people to work on this show (the source material and the director were great draws). By the end, 500 people had worked on the show.
What is your next project?
Sadly, I can’t say yet (top secret, would have to kill you).
Can you tell us the four movies that have given to you the passion for cinema?
Great Question…
1) JURASSIC PARK – this is the film that did it for me. This was the first time I had gone to the movies and seen the impossible. At that moment, I wanted to do this.
2) STAR WARS Trilogy (the first one).
3) TERMINATOR 2 – another one that was full of things that shouldn’t be possible.
4) DRAGONSLAYER.
A big thanks for your time.
// WANT TO KNOW MORE?
– Weta Digital: Official website of Weta Digital.
© Vincent Frei – The Art of VFX – 2012


Such a great interview, as usual The Art of VFX! 😉
super interview! comme d’hab! merci encore.
which vfx company that make avenger movie?