Nicolas Hernandez co-founded Milk VFX in 2013. Before that he worked at Framestore and The Mill. He has worked on numerous projects such as SNOW WHITE AND THE HUNTSMAN, DREDD, 47 RONIN and many TV series such as DOCTOR WHO.
What is your background?
I’m VFX Supervisor & Head of 3D at Milk. I’m also one of the founder-owners of Milk. We’re a London-based, boutique visual effects facility launched in June 2013. During our first year in business Milk has created a range of innovative and complex sequences for high end TV and feature films including DOCTOR WHO (BBC), 24: LIVE ANOTHER DAY (Fox), SHERLOCK (Hartswood Films) and David Attenborough’s NATURAL HISTORY MUSEUM ALIVE 3D (Sky/Atlantic) and Brett Ratner’s HERCULES (Paramount/MGM), LES MISERABLES (Universal) and 47 RONIN (Universal). Milk won a BAFTA Television Craft Award 2014 for its work on the BBC’s DOCTOR WHO 50TH ANNIVERSARY SPECIAL: DAY OF THE DOCTOR.
Prior to the launch of Milk, I was Joint Head of 3D, VFX Supervisor, Technical Director and CG Supervisor at The Mill Film and TV for eight years where my responsibilities included overseeing the 3D workflow pipeline. As VFX Supervisor, my film work at The Mill included credits on feature SNOW WHITE AND THE HUNTSMAN for Universal. As CG Supervisor, my film credits include DREDD 3D, THE CHRONICLES OF NARNIA: THE VOYAGE OF THE DAWN TREADER, 28 WEEKS LATER and DAMNED UNITED for Oscar winning director Tom Hooper, working on the digital crowd.
How did you get involved on this show?
We were briefed by Double Negative to create a series of effects, creatures, weapons and environments for HERCULES from Brett Ratner/ MGM/Paramount, working directly for Double Negative.
How did you work with Production VFX Supervisor John Bruno?
We worked directly with Double Negative’s VFX Supervisor Paul Riddle.
What are the sequences done by Milk VFX?
Milk created a series of effects, creatures, weapons and environments for HERCULES including:
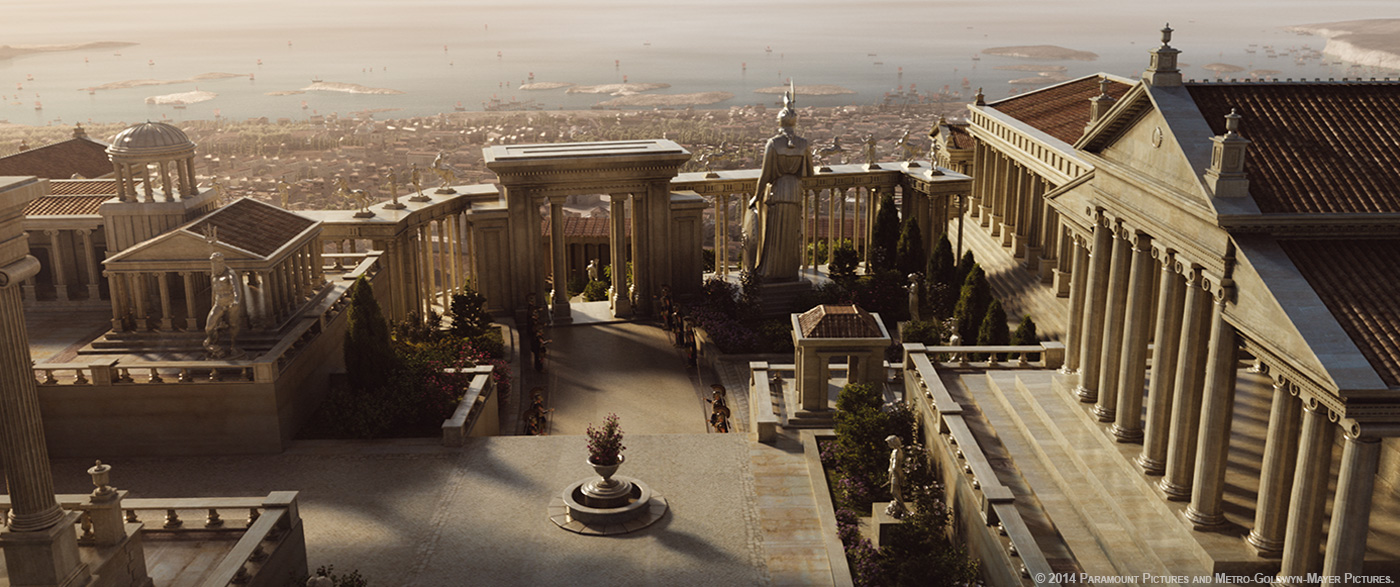
ATHENS:
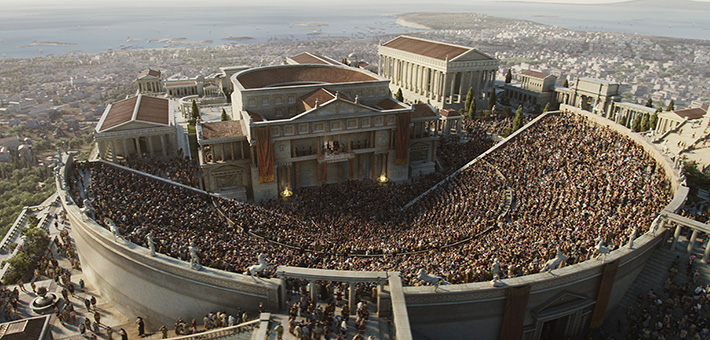
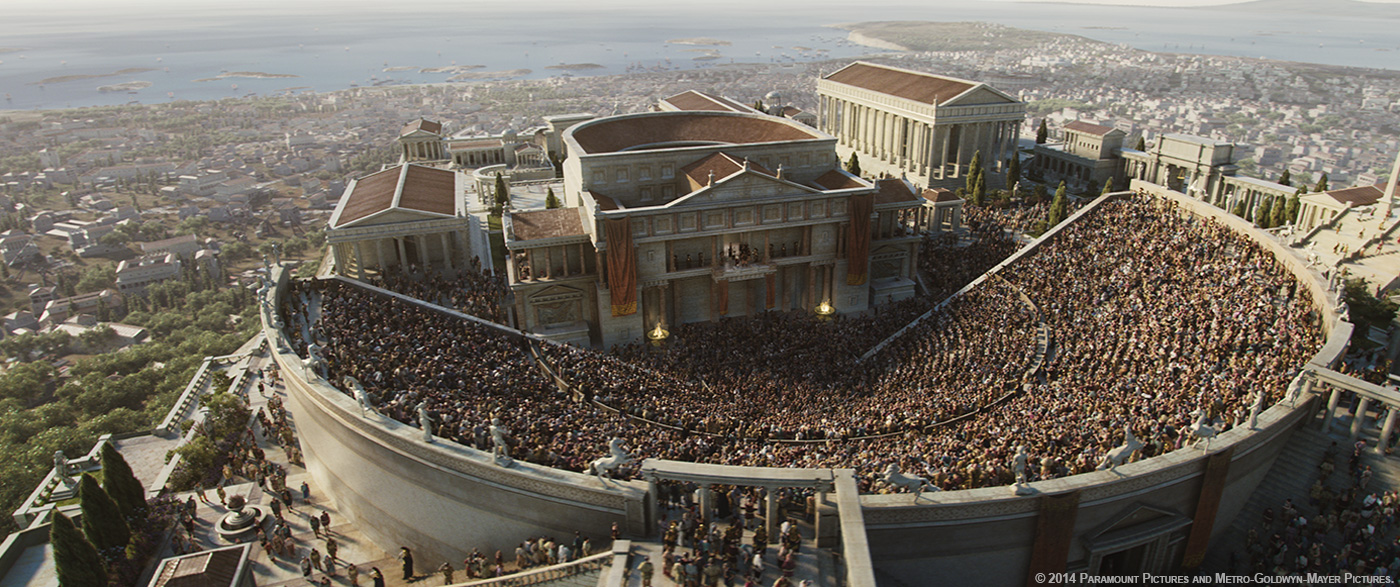
Milk created a full CG environment of Ancient Athens and the Acropolis. This proved to be one of the most complex and challenging parts of our work on Hercules.
We started by creating the terrain using Google map’s aerial view plus ancient maps as reference. We also had to create and build the terrain and tweak it on a per shot basis. We imported all the cameras for our shots into a master view so we could create one master asset for Athens that would cover all the shots.
In parallel we created an asset library of buildings (with hero buildings for close-ups, including temples, houses and courtyards); props (cranes, carts, canopy, scaffolding) and vegetation (trees, flowers). These assets were ingested into a library and cached individually into an Arnold source scene. Then these assets were grouped and positioned strategically on the terrain as if it were a giant Lego set. We also tried to minimize the amount of work to do for texturing by using procedural and tile textures for each element/material. Arnold was indispensable to render all this geometry. We had 9,859 trees for instance and every leaf was modeled.
One of the key shots was a full CG, wide flyover shot that required a populated amphitheatre and background crowd. We used Golaem crowd software inside Maya to tackle this challenge. We created 3 main agents – a soldier a male and a female followed by different props and clothing. Golaem was then used to randomize all of these elements in order to make the people in the crowd look different and thus realistic. We had a total of 15,000 people in the scene? Their actions included walking around, standing and clapping. The combination of Golaem rendering with Arnold was again essential to achieve the shot.
Other DMP work:
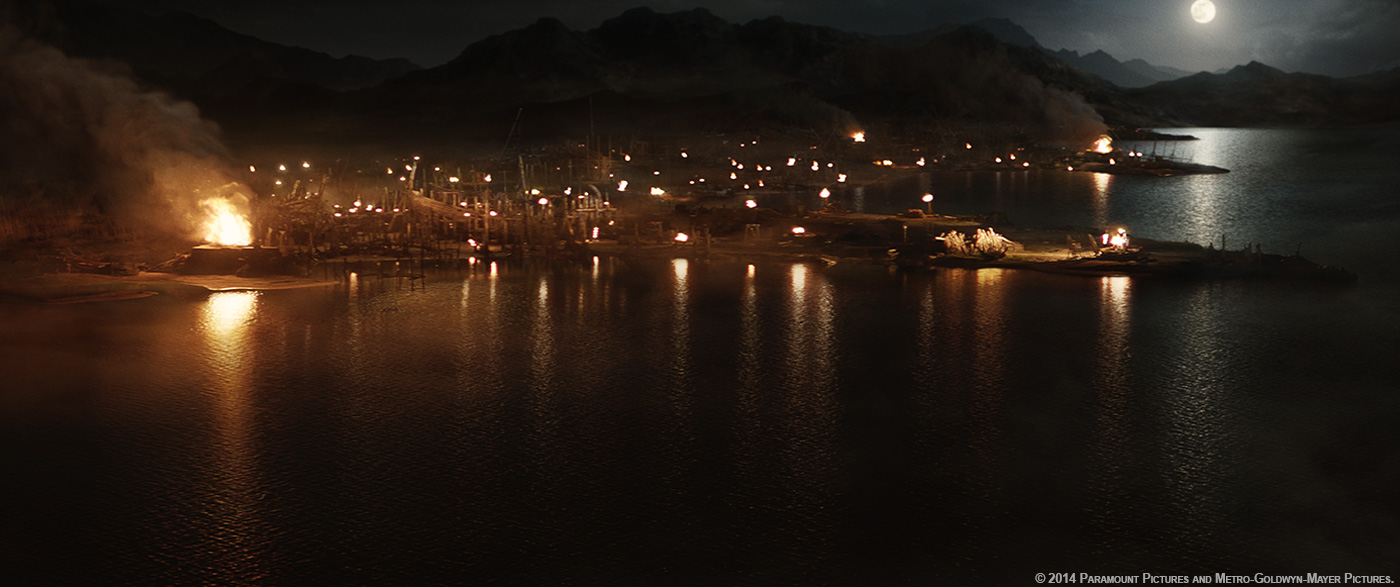
We also worked on 2.5D digital matte paintings in the Athens environment and throughout the film. We created the DMP elements in Photoshop and Maya, which were then assembled in 3D space in Nuke. We also added a lot of FX CG water, CG fire, CG mist/fog and CG rain. Houdini was used for these elemental effects. In a few hero shots – including a shot overlooking the Ancient Greek Shipping Yard in the early part of the film – the mist was rendered with deep camera map information in order to give extra control over shadows and lighting in comp. Fire assets were created to populate wide shots, whilst bespoke sims with more specific details were used when interaction with characters or matching the live action was required.
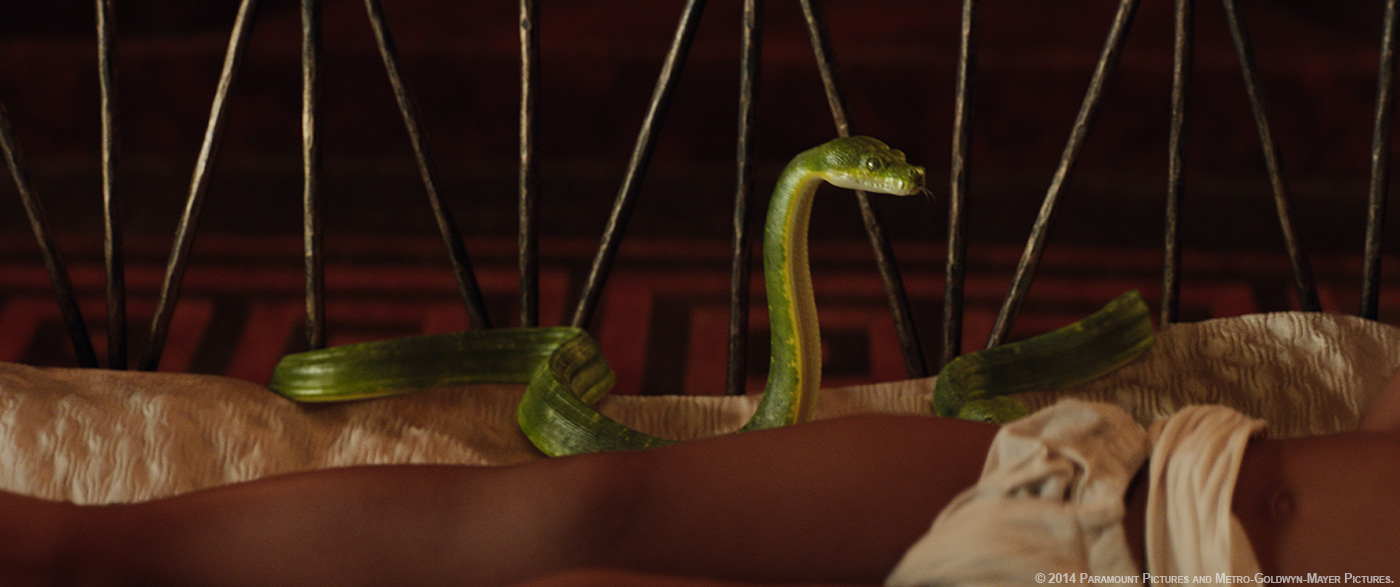
CG Snakes:
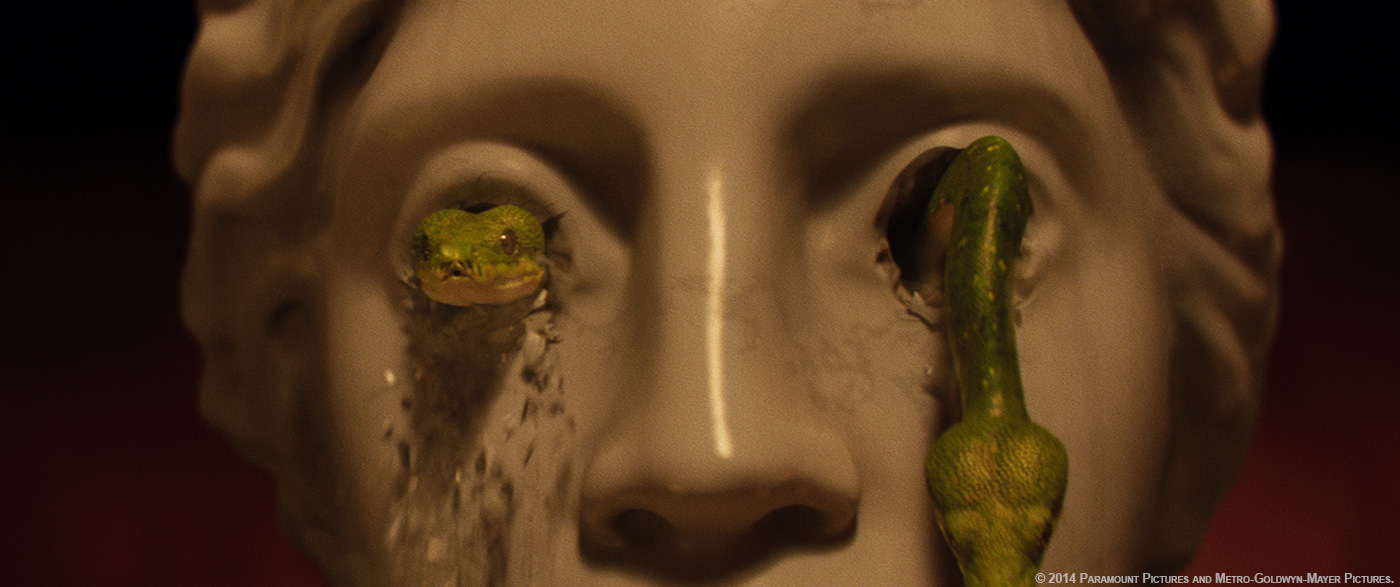
Milk worked on the scene involving two full CG snakes over 8 shots. The brief was specific: To match the snakes with the Director’s choice of the Emerald Tree Boa. We spent some R&D time writing tools that would allow us to tackle the technical challenges involved in realizing snakes and the way they move.
Milk has created CG snakes before and from our experience our best results come when scales are fully modeled. We looked at filmed reference of similar snakes to get an idea of what we should be seeing. The musculature and the articulation of snakes’ scales are very visible in certain conditions. Using Houdini and low-resolution animation we were able to extract information about which areas of the snake were going to be stretched or compressed as the snake moves. We also created collision geometry from either the lidar scans or the tracking scenes, which we then sampled the snake against for contact data. We used these two data sets to apply effects such as flaring of the scales during stretching and contact with the ground, drag along the snakes’ underside and a muscular expansion with ‘peaking’ of the snake’s body when the snakes are turning. We needed very tight control on these effects and how they were blended in and out, so a lot of time was spent tweaking how the deformations were set up. Houdini afforded us a lot of control over this and most of the deformations had controls for their intensity with length, time, height and radial length, as well as with how they combined with the other deformation/s. This gave us a very controllable and very stable result, which was ideal for making shot specific modifications.
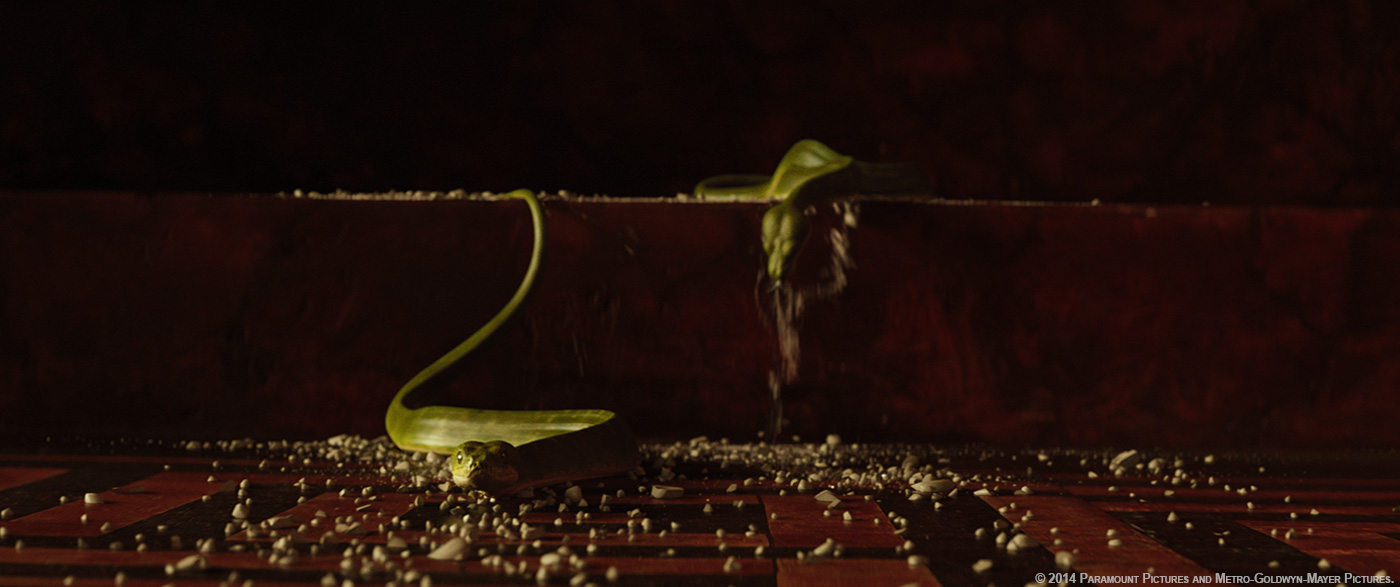
Our brief also included a full CG statue with a marble look – to replace the one used on set. We also designed a ‘breaking’ effect where the snakes magically dig and push themselves out from the statue’s eye sockets. A flexible and procedural approach was created in Houdini to accommodate an evolving brief and maintain repeatability between revisions. The setup was modular so that each module would feed into the successive one and was broken down into a fracturing stage; a main rigid body sim stage; secondary rbd sims; dusty smoke sims and particles and debris sims. Choreographed fractures and chunks were created using a combination of Booleans and voronoi patterns. This was accomplished by creating digital assets wherever possible in order to maintain a tidy workflow and history between revisions. The stability of the rbd sim was a key factor due to the confined space in which the objects had to be simulated, so the traditional rbd solver was preferred over the faster bullet due to the better volume collision handling. The smaller particle debris was partly driven by the advected smoke simulations. All solid caches were finally exported in the Arnold .ass format for rendering through the lighting pipeline back in Maya. The dusty smoke sims were rendered in Houdini using Mantra PBR.

Finally, we had quite a bit of work to augment the snake interaction in the live action (Rigid body debris on floor, bed sheet cloth replacement using ncloth in Maya). It was a fun sequence, and challenging as the snake asset color and model was continuously evolving right up until final delivery.
Can you tell us more about the CG crow?
Milk created a full CG crow that flaps its wings while perched on a severed head and then picks out an eyeball with its beak. To achieve a ‘photo real’ crow we upgraded our feather pipeline and decided to avoid polygons with transparency mapping for the feathers. As a consequence our crow feathers are only made up of curves. We also used curves on the beak and legs by adding coarse fur. We also used a full muscle system rig in Maya to make the crow skin move realistically. We used our proprietary wing rig module to create realistic wing movement? A lot of time went into the animation and the wing feather flex was hand animated. The grooming of the feathers and fur was done with Yeti in Maya. Our crow had 8406 feathers in total.
The crow’s eye was hand animated to give it a nice snappy elastic quality. This adds a lot of character to the crow and did not require us to engineer a lot of additional movement, as is sometimes the case. We used Houdini’s vdb tools to create an accurate representation of the severed head, with a slight modification to include a cavity inside the eye socket. Using Houdini’s FLIP fluids, we injected a small reservoir of viscous fluid into the socket that the eyes optic nerve would bathe in for a short number of pre-roll frames. As previously mentioned the animation drove much of the effects in terms of timing and energy. Most of the refinement period for this shot was adjusting the amount of gore to have oozing from the eye cavity; the viscosity of the fluid and perhaps most importantly, encouraging the optic nerve to display a realistic amount of fluid as it was liberated from the eye socket.
Hercules and his friends used many weapons. How did you created these CG weapons?
We were briefed to enhance and/or extend a number of key weapons over 2 sequences. One of the deadly weapons was a fully digitally created whip made of human bones.
We created a full replica of the prop used on set, modeled from photos in Maya and textured using Mari. We had to create 3 variations of the length of the bone whip in order to achieve the required choreography for different shots. The regular whip had 85 vertebrae; the extended version 112 vertebrae and the super long version had 333.
The animation was quite challenging because it had to be dictated by the motion of the actor’s hand position and his actions. We also had to play with motion blur in order to have readability of the whip in the fast shots. We also developed a setup allowing us to create digital gore automatically. The setup was done in Houdini and whatever geometry fed into the pipeline created procedurally indented wounds, blood on both objects and squirts of blood with fluids. A lot of digital ‘gore’ was created for each whip impact.
How did you collaborate with the team of Double Negative?
Having offices very nearby helped. Reviews would take place at Milk and at DNEG and the process was pretty seamless.
Was there a shot or a sequence that prevented you from sleep?
Towards the end of the project, a few big previously omitted shots came back into production, with some tight deadlines.
What do you keep from this experience?
It was great to work so closely with DNEG on the project. It was also great to refine the way we create full CG environments and also to put Golaem crowd software into production.
How long have you worked on this film?
11 months in total. 8 months for assets plus R&D with 8 overlapping months for turnover.
How many shots have you done?
88.
What was the size of your team?
35 artists.
What is your next project?
Milk is currently working on TV projects including the new eighth series of DOCTOR WHO (BBC) and new drama JONATHAN STRANGE & MR NORRELL – a seven part mini-series (7 x 60’) due to debut on BBC One in the UK in 2015. On the feature film side, Milk is working on Universal’s upcoming DRACULA UNTOLD and Scott Free’s GET SANTA and recently completed work on Alex Garland/DNA Film’s EX-MACHINA, which is set for release in 2015.
What are the four movies that give you the passion for cinema?
STARSHIP TROOPER
GHOSTBUSTERS
THE SHINING
THE EXORCIST
A big thanks for your time.
// WANT TO KNOW MORE?
– Milk VFX: Dedicated page about HERCULES on Milks VFX website.
© Vincent Frei – The Art of VFX – 2014


